Table of Contents
Advertisement
Quick Links
Advertisement
Table of Contents

Related Manuals for KB Racking BARN RACK 2.0


Summary of Contents for KB Racking BARN RACK 2.0
- Page 1 INSTALLATION MANUAL KB Racking ® Inc. 1 Atlantic Ave., Suite 210, Toronto ON M6K 3E7 117 E. Colorado Blvd., Pasadena, CA 91105 Varsovia 36, Col. Juárez, Interior 731, Cuidad de México, 06600 Phone: 1-888-661-3204 Fax: 647-933-5375 info@kbracking.com www.kbracking.com...
- Page 2 CERTIFICATION ANSI/UL 2703 BarnRack 2.0 is certified in compliance with ANSI/UL 2703 Standards for Mounting Systems, Mounting Devices, Clamping/Retention Devices, and Ground Lugs for Use with Flat Plate Photovoltaic Modules and Panels. This racking system may be used to ground and/or mount any PV module complying with UL 1703 only when the specific module has been evaluated for grounding and/or mounting in compliance with the included instructions.
- Page 3 Seulement les professionnels qualifié devrait installer les panneaux solaires, les fils CC, et les dispositifs de sécurité contre la foudre. Les composants de KB Racking peuvent ont déplacé au cours du transport. Prendre des ® précautions supplémentaires lorsque vous déplacez et déballage les composants.
- Page 4 Provide an appropriate method of direct-to-earth grounding in accordance with the latest edition of the Canadian Electrical Code Part 1, CSA 22.1 Safety Standard for Electrical Installations or the National Building Code, including NEC 250: Grounding and Bonding, and NEC 690: Solar Photovoltaic Systems. ...
-
Page 5: Table Of Contents
TABLE OF CONTENTS SYSTEM OVERVIEW ........................................6 COMPONENTS ........................................... 6 TOOLS REQUIRED ........................................7 TORQUE VALUES ........................................7 SYSTEM LIMITATIONS ....................................... 8 INSTALLATION CONFIGURATIONS ..................................9 SHARED-RAIL CONFIGURATION..................................9 FULLY-RAILED CONFIGURATION ..................................10 PRE-INSTALLATION ......................................... 11 LAYOUT DIAGRAM ........................................ 11 SPACING DIAGRAM ...................................... -
Page 6: System Overview
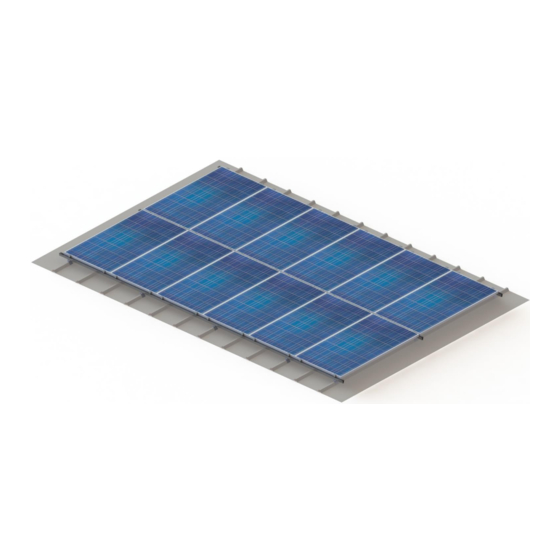
SYSTEM OVERVIEW Figure 2 – System Overview COMPONENTS KB10 Series Rail KB10 Series Splice KB Konnect Mid Clamp L-Foot † Barn Attachment † KB Konnect End Clamp † Project-specific component may appear different KB Konnect End Clamp Variations (Integrated End Clamp, KB Konnect Mid Clamp with End Block) are shown Rev.1, Sep 2019 Page 6 of 38... -
Page 7: Tools Required
TOOLS REQUIRED □ 3/16” Allen Bit Tip OR 5mm Hex Drive □ Torque Wrench □ 3/16” Hex Drive □ Cordless Drill □ 13mm Hex Socket □ Spirit Level □ Tape Measure □ Portable Band/Reciprocating Saw □ Safety Gloves □ Safety Glasses □... -
Page 8: System Limitations
SYSTEM LIMITATIONS Limitations that govern the installation of the BarnRack 2.0 system are listed below: For Shared Rail installations, the centre of each KB Konnect Clamp must be placed at minimum 4” from the module edge. Any given rail must contain a minimum of two Rail spans (i.e. three anchor connections to the roof). -
Page 9: Installation Configurations
INSTALLATION CONFIGURATIONS The versatility of BarnRack 2.0 allows it to be installed in both Shared-Rail and Fully-Railed configurations depending on your project requirements. NOTE: The selected configuration must adhere to the mounting instructions provided by your module manufacturer. SHARED-RAIL CONFIGURATION Shared-Rail configurations feature three Rails per two rows of modules. -
Page 10: Fully-Railed Configuration
FULLY-RAILED CONFIGURATION Fully-Railed configurations feature two Rails per row of modules. Figure 6 – Fully-Railed Portrait Configuration Figure 7 – Fully-Railed Landscape Configuration Rev.1, Sep 2019 Page 10 of 38... -
Page 11: Pre-Installation
PRE-INSTALLATION This section reviews the supporting documents that are included with your BarnRack 2.0 system. Study each document prior to installation. LAYOUT DIAGRAM Figure 8 – Sample Layout Diagram Layout Diagrams contain plans for all arrays in your project. Note the following items on your project-specific Layout Diagram: □... -
Page 12: Spacing Diagram
SPACING DIAGRAM Figure 9 – Sample Spacing Diagram Your Spacing Diagram will indicate the following dimensions: □ BARN ATTACHMENT SPACING N/S (Distance between attachments, along corrugation) □ BARN ATTACHMENT SPACING E/W (Distance between attachments, across corrugations) □ INTER BARN ATTACHMENT SPACING N/S (Distance between attachments between module rows;... - Page 13 INSTALLATION Rev.1, Sep 2019 Page 13 of 38...
-
Page 14: Key Installation Tips
KEY INSTALLATION TIPS INSTALLATION ORIGIN Each array in your layout diagram will have a point of origin. The installation of every array MUST begin at the origin. INSTALLATION DIRECTION It is recommended that installations start at the bottom of the roof, working up. Figure 10 –... - Page 15 L-FOOT ORIENTATION L-Feet must sit as perpendicular as possible to the roof surface. This is controlled by properly installing the roof attachment. An improperly installed L-Foot will prevent proper installation of BarnRack 2.0. Always rotate and orient the L-Feet as shown in the figure below. This is recommended to keep the installation consistent throughout the array.
-
Page 16: Roof Attachments
ROOF ATTACHMENTS Install Barn Attachments onto roof corrugations. Use your Spacing Diagram to obtain spacing dimensions. Consistent spacing is important; use a spacing stick or jig to aid installation. Refer to Appendix for detailed Barn Attachment installation instructions. Figure 14 – Barn Attachment Installation Figure 15 –... -
Page 17: Rail Attachment
RAIL ATTACHMENT Refer to your Layout Diagram to determine the arrangement of Rails for each array. Multiple rail lengths may be required. See Page 29 for instructions on cutting Rails. Figure 18 – Sample Layout Diagram Install Rails onto L-Feet by aligning the T-Bolt slot on the Rail with the L-Foot slot. -
Page 18: Splicing Rails
SPLICING RAILS The BarnRack 2.0 system uses a Splice to connect two Rails end-to-end. SPLICE REQUIREMENTS Adjacent Rails being spliced must be at the same height off the roof. Use a jig to maintain consistent Rail height throughout the array. ... -
Page 19: Thermal Breaks
THERMAL BREAKS Aluminum components experience thermal expansion/contraction due to temperature cycles. To prevent damage from thermal expansion, thermal breaks must be included, as specified below. Failure to comply with this instruction can result in damage to the BarnRack 2.0. A thermal break of at least 1.75” must be included for every 80 feet of spliced Rail in BarnRack 2.0 arrays. -
Page 20: Microinverter Installation
M8 Serrated Flange Nuts NOTE: Some microinverters require the use of a star washer or other components to complete grounding requirements. Please follow instructions set by your microinverter manufacturer. KB Racking ® can provide star washers if requested. NOTE: The maximum microinverter weight that can be mounted with the KB Microinverter Kit is 5kg. - Page 21 Install the microinverter onto the Accessory Bracket using M6 Serrated Flange Bolts and Nuts. Torque to 9.5Nm (7.0 ft-lb). Figure 27 – Securing Microinverter to Accessory Bracket Rev.1, Sep 2019 Page 21 of 38...
-
Page 22: Alternate Installation Methods
ALTERNATE INSTALLATION METHODS Alternate microinverter installation methods are shown below: Fully-Railed Configuration Only Module Mounting ( Microinverters are mounted to the module frame using slots on the underside of the module. Figure 28 – Microinverter Mounted to Module (Fully-Railed Configuration Only) Alternate Rail Mounting: Microinverters can be mounted to the top of the Rail using M8 bolts and nuts. -
Page 23: Installing Modules
INSTALLING MODULES SHARED-RAIL CONFIGURATION Module installation begins at the array origin (Page 11), or corner location. It is a continuous installation process that sees adjacent modules being installed up, then across. This may also require some adjustment to Rail positioning. A correctly installed system will have modules evenly seated on Rails, and KB Konnect Clamps in full-contact, flush, and correctly spaced on modules. - Page 24 Secure the first module onto each Rail with KB Konnect (KBK) Clamps. Use your Spacing Diagram to locate the Clamp locations relative to the module edge. Click-in and secure End Clamps at array edges first. The centre of each KB Konnect Clamp must be placed at least 4”...
- Page 25 Completely secure the first module. Use a 3/16” Allen Bit/5mm Hex Drive, tighten all Clamps with a standard drill or torque wrench. Torque to 8.3Nm (6.1ft-lb). NOTE: To prevent damage to module and KBK Clamp, do not exceed recommended torque setting above. Figure 34 –KB Konnect Clamp + End Block Installed Do not use hammer drills, impact drivers, or long Allen keys.
-
Page 26: Fully-Railed Configuration
FULLY-RAILED CONFIGURATION Module installation begins at the array origin (Page 11), or corner location. It is a continuous installation process that sees adjacent modules being installed across, then up. This may also require some adjustment to Rail positioning. A correctly installed system will have modules evenly seated on Rails, and KB Konnect Clamps in full-contact, flush, and correctly spaced on modules. - Page 27 Place the next module in the row, as shown in Figure 38. If no module is directly adjacent in the row, completely install the first module with four (4) KBK End Clamps. Click-in secure Clamps between modules. The adjacent module must be in place before completely installing the KBK Mid Clamp.
-
Page 28: Wire Management
WIRE MANAGEMENT As modules are being installed, tuck wires into the wire management slot of the KB10 Series Rails. Figure 41 – Wires Routed through Channel As an added measure, MC4 connectors must be securely zip tied to the Rails. Figure 42 –... -
Page 29: Cutting Rails
CUTTING RAILS This section will serve as a guide to cutting Rails on BarnRack 2.0. Shared-Rail Installations: Measure 6.5” or greater from the End Clamp/Integrated End Clamp (as shown in Figure 44), and mark this distance. Fully-Railed Installations: Measure 4” or greater from the End Clamp Block/Integrated End Clamp (as shown in Figure 45), and mark this distance. -
Page 30: Grounding & Bonding
At all times, the array must be interconnected to the grounding lug (as well as during maintenance). GROUNDING LUGS Only ETL Certified Grounding Lugs may be used to ground KB Racking ® systems. Examples of ETL Certified Grounding Lugs are: ... -
Page 31: Shared-Rail Configuration
SHARED-RAIL CONFIGURATION Shared-Rail Installations require one grounding point per array. Figure 46 – Shared-Rail Grounding Scheme Fasten grounding lug to the Rail. Torque as per manufacturer requirement. Figure 47 is for reference. Figure 47 – Grounding Lug Placement Insert #6 AWG – RW75 uninsulated copper ground wire into grounding lug. -
Page 32: Fully-Railed Configuration
FULLY-RAILED CONFIGURATION Fully-Railed Installations require one grounding point per row of modules. Figure 49 – Fully-Railed Grounding Scheme Fasten grounding lug to one Rail per row of modules. Torque manufacturer requirement. Figure 50 is for reference. Figure 50 – Grounding Lug Placement Insert #6 AWG –... -
Page 33: Label Attachment
LABEL ATTACHMENT Certification labels (Figure 52) must be visibly displayed on every array. Mark the appropriate quarter and year of assembly using a 1-hole punch. For a system being installed in April 2021, punch Q2 2021. For each array, a certification label must be pasted to at least one Rail carrying a grounding lug. - Page 34 POST-INSTALLATION Rev.1, Sep 2019 Page 34 of 38...
-
Page 35: Completing Installation
COMPLETING INSTALLATION For each array, ensure the following items are checked off: BARN ATTACHMENTS Are Barn Attachments torqued as per manufacturer instructions? L-FEET Are L-Feet perpendicular to roof surface? Are L-Feet correctly torqued? RAILS Are Rails securely fastened to L-Feet? Are T-Bolts correctly torqued? Is a thermal break included, as specified in the manual? Are thermal breaks free of modules? -
Page 36: Product Maintenance
PRODUCT MAINTENANCE To maximize life span and ensure peak performance, KB Racking recommends routine ® maintenance checks. The following checks should be completed every 6 months to maintain the system’s integrity. Remove debris from rooftop that can damage modules or stop solar absorption. -
Page 37: Technical Specs
TECHNICAL SPECS BARNRACK 2.0 – TECHNICAL SPECS Distribution Load 1.5 – 3 lbs/ft Inclinations Flush Wind Speed Up to 190mph Material 6000 series aluminum Module Type All standard size framed PV modules Wire Management Built into KB10 Rail Orientation Landscape, Portrait Rail Length 10’, 20’... - Page 38 APPENDIX Rev.1, Sep 2019 Page 38 of 38...
Need help?
Do you have a question about the BARN RACK 2.0 and is the answer not in the manual?
Questions and answers