Table of Contents
Advertisement
Quick Links
- 1 Installing the At&T Vpn Gateway U115
- 2 Step 1: Establish Physical Connectivity to the Internet
- 3 Option B. Cellular Connection
- 4 Option A. Wired Ethernet Connection
- 5 Step 2: Establish Local Network Connectivity
- 6 Access the U115 Web Interface
- 7 Configuring the U115
- 8 Administrator Access
- Download this manual
Advertisement
Table of Contents

Related Manuals for AT&T U115


Summary of Contents for AT&T U115
- Page 1 AT&T U115 Install Guide Version D6.0.1...
- Page 2 © 2018 AT&T Intellectual Property. All rights reserved. AT&T, the AT&T logo and all other AT&T marks contained herein are trademarks of AT&T Intellectual Property and/or AT&T affiliated companies. All other marks contained herein are the property of their respective owners. CALIFORNIA PROPOSITION 65 WARNING WARNING: Cancer and Reproductive Harm –...
- Page 3 במוצר " • • • המוצר • המוצר • במוצר • המוצר • • • המוצר • • • • Class A היבואן איי טי אנד טי גלובל נטוורק סרויסס אינטרנשיונל 05107 רחוב הנגב 4, קריית שדה התעופה, לוד naveeD : "...
-
Page 4: Table Of Contents
Table of Contents Installing the AT&T VPN Gateway U115 ..............................5 Step 1: Establish Physical Connectivity to the Internet ..........................5 Option a. Wired Ethernet Connection ..............................6 Option b. Cellular Connection ................................6 Step 2: Establish Local Network Connectivity ............................7 Configuring the U115 .................................... -
Page 5: Installing The At&T Vpn Gateway U115
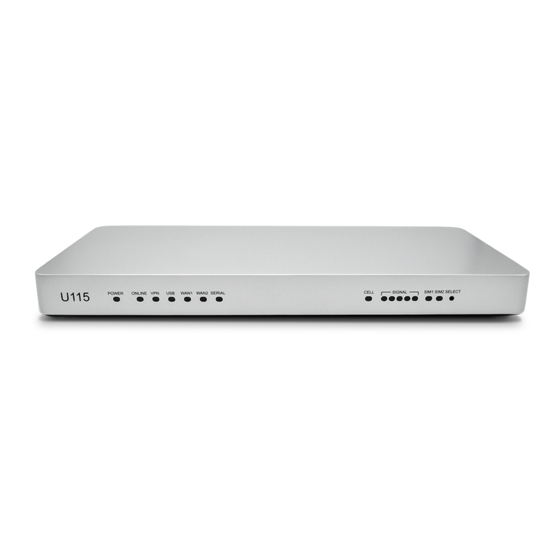
This should occur within the first 2-3 minutes after initial power on. Wait for a steady GREEN ONLINE light on the front panel to indicate the U115 is ready for use. -
Page 6: Option A. Wired Ethernet Connection
If the device will connect via an approved cellular USB modem, then insert the modem into one of the two USB ports on the back of the U115. The U115 needs basic setup of the cellular modem via the web interface before it can connect to the Internet to retrieve its configuration. See “... -
Page 7: Step 2: Establish Local Network Connectivity
Step 2: Establish Local Network Connectivity In most cases, your devices will attach directly to the U115 via one of the 8 LAN ports with an Ethernet cable. The Local LAN ports are auto-sensing, so either a straight-through or a crossover cable can be used interchangeably. -
Page 8: Configuring The U115
Access the U115 Web Interface The U115 web interface can be accessed from a computer attached to a LAN port. The web interface can be used to access various administration functions and can allow the VPN connection to be controlled. -
Page 9: Primary Ipv4 Wan Interface Setup
Primary IPv4 WAN Interface Setup To configure the primary interface for something other than DHCP (or to change DHCP settings), follow these steps: 1. Access the web interface as described on page 8. 2. Click on the Control Panel navigation icon. 3. - Page 10 An “Always-On Internet Connection” means that the connection will normally always be available, and the U115 will try to re-establish connectivity if the connection is lost. The other type is for where an Internet connection is only established when required. This is commonly used where having a connection up always may be expensive and there are periods of time when the connection is not required.
-
Page 11: Configuring Dhcp
Configuring DHCP Figure 4 To configure DHCP, follow these steps after reaching 1. Select the radio button next to “DHCP” on Figure 4 and click OK to proceed to the DHCP set up window. Figure 5 2. Select the DHCP options required by your ISP on . -
Page 12: Configuring A Static Ip Address
Configuring a Static IP Address Figure 4 To configure a static IP address, follow these steps after reaching 1. Select the radio button next to “Static” on Figure 4 and click OK to proceed to the Static IP set up window. Figure 6 2. -
Page 13: Configuring Pppoe
Configuring PPPoE Figure 4 To configure PPPoE Account information, follow these steps after reaching 1. Select the radio button next to “PPPoE” on Figure 4 on and click OK to proceed to the to the PPPoE set up window. Figure 7 2. -
Page 14: Configuring An Always-On Cellular Connection
To configure an Always-On Cellular connection, follow these steps after reaching 1. Ensure your supported Cellular modem is inserted into one of the two USB ports on the back of the U115 or if an internal modem is installed, that a SIM has been inserted. - Page 15 Figure 8: Cellular Always On Settings- Modem Properties Figure 9: Cellular Always On Settings - Login Information...
-
Page 16: Configuring A User Controllable Dial As Primary Configuration
To configure a Cellular User Controllable Dial as Primary connection, follow these steps after reaching 1. Ensure your supported Cellular USB modem is inserted into one of the two USB ports on the back of the U115 or if an internal modem is installed that a SIM has been inserted. - Page 17 Figure 10: Cellular Dial as Primary Settings - Modem Properties Figure 11: Cellular Dial as Primary Settings - Login Information...
-
Page 18: Cellular Service Verification
Figure 12: Cellular Signal Strength Display The unit should be installed in a location that gives optimal signal strength. Note: After the final location has been determined by the best signal strength the U115 needs to be rebooted in order to re-establish the cellular connection. -
Page 19: Administrator Access
Administrator Access One or more users may be designated as administrators by your IS Department. If your U115 was set up for administrator Figure 13 access, is displayed and you must select your access level. You must be a designated administrator to configure or control the U115. -
Page 20: Establishing Vpn Connectivity
VPN connection with your U115 follow these steps: 1. Open your web browser as described under “Access the U115 Web Interface” on page 8 and if necessary click the Home button to view the Login page. The form of the page will depend on the network and type of Figure 14 authentication configured. - Page 21 Figure 14: Example of Login Page for AT&T Managed Figure 15: Example of Connected Page...
-
Page 22: Lan Port Configuration
1. Following the automatic reboot open your web browser as described in “Access the U115 Web Interface” on page 8. It may be necessary to reboot or reconfigure your devices attached to the U115 in order to obtain/assign a valid IP address if the IP addressing was changed when the U115 retrieved its VLAN configuration. - Page 23 Figure 16: Navigation to Local LAN Settings Figure 17: Local LAN Settings – VLANS...
- Page 24 Figure 18: VLAN DHCP Configuration...
-
Page 25: Hub Mode
The Local LAN Settings page will result in the basic port information display as shown in . In this case, Local LAN equipment can be plugged into any available port on the back of the U115. If you see this page and you think that VLANs SHOULD have been configured, please contact your IS department.