
Related Manuals for oGrow Walk-in OGAL-466


Summary of Contents for oGrow Walk-in OGAL-466
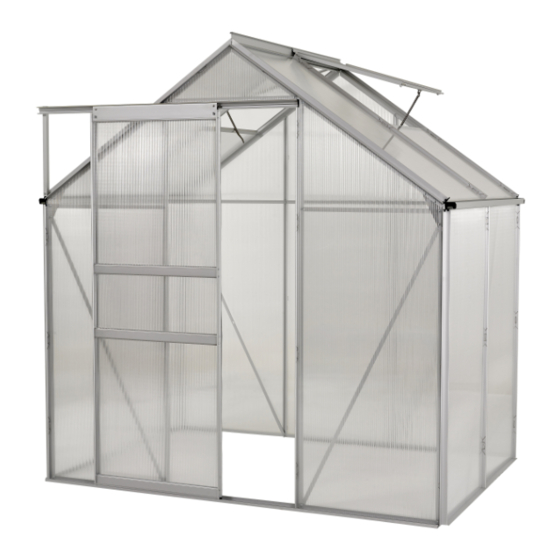
- Page 1 MODEL# OGAL-466 OGrow Walk-in 6' x 4' LAWN AND GARDEN GREENHOUSE With Heavy Duty Aluminium Frame...
- Page 2 Let's Thank you for purchasing the OGROW™ greenhouse Follow the assembly and safety instructions in this manual. If you have any questions, please contact our Customer Service Department • Parts List......... • Side Walls........• Back Wall........• Front Wall........
-
Page 3: Parts List
PARTS LIST PART PART PART# PART NAME QTY. PART# PART NAME QTY. IMAGE IMAGE Corner Beam Front Floor Bar Front Right Roof Beam Vent Stopper Front Left Roof Beam Vertical Door Rail Support Rear Right Roof Beam Left Door Support Rear Left Roof Beam Rear Horizontal Support Right Doorway Support... - Page 4 PARTS LIST PART PART QTY. PART# PART NAME QTY. PART# PART NAME IMAGE IMAGE Side Floor Bar Vent Screw Top Roof Bar Panel Clip Gutter Bar Beam End Cap Long Door Support Bolt Gutter End Cap Door Frame Spacer Rail End Cap- Right Spanner Wrench Rail End Cap- Left Rubber Seal...
- Page 5 NOTICE: Read the entire IMPORTANT SAFETY INFORMATION section at the beginning of this document – including all text under subheadings – before set up or use of this product. PLEASE RETAIN THESE INSTRUCTIONS FOR FUTURE REFERENCE. KEEP THEM IN A SAFE PLACE WHERE YOU CAN REFER TO THEM AS NEEDED. The warnings, precautions, and instructions discussed in this manual cannot cover all possible conditions and situations that may occur.
- Page 6 If you have any doubt regarding the stability of the foundation you are to use, consult a professional. • It is always your responsibility to ensure that the greenhouse is properly anchored. Ogrow cannot be held responsible for personal injury, damage to the greenhouse, or other property damage that occurs as a result of improperly anchoring the greenhouse.
-
Page 7: Getting Ready
GETTING READY Construct a base first so that the greenhouse can be immediately mounted and secured when it is completed Find someone to assist you in the assembly. The work is light and should suit any able-bodied person, who can speed up and ease assembly by assisting you. Note that the construction takes time. -
Page 8: Part 1 - Side Walls
A S S E M B L I N G T H E G R E E N H O U S E PART 1 – SIDE WALLS Lay out all the parts needed for the side wall, following the layout shown below. The grooves in the support poles should be facing you. - Page 9 Follow the steps below to assemble the Side Walls. NOTE: Each step applies to both relevant wall supports. 43 52 43 52 S T E P S T E P S T E P Slide three bolts into the groove of Bolt the support poles to the Bolt the bottom of the diagonal the support poles part 10.
- Page 10 A S S E M B L I N G T H E G R E E N H O U S E PART 2 – BACK WALL Lay out all the parts needed for the back wall, following the layout shown below. Make sure that the roof beams are on the correct sides as the left and right di er;...
- Page 11 Follow the steps below to assemble the Back Wall. NOTE: Each step applies to both relevant corners/supports. 43 52 43 52 43 52 S T E P S T E P S T E P Attach the corner brackets to the Bolt the floor bar to the inside of Secure the support poles to the corner and roof beams.
-
Page 12: Part 3 - Front Wall
A S S E M B L I N G T H E G R E E N H O U S E PART 3 – FRONT WALL Lay out all the parts needed for the front wall, besides for parts 14 and 19. Follow the same layout as for the rear wall. - Page 13 Follow the steps below to assemble the Front Wall. NOTE: Each step applies to both relevant corners/supports. Note: 43 52 Steps 1 - 5 follow the same steps used for the back wall. S T E P S T E P Attach the corner brackets to the Bolt the floor bar to the inside of side and roof beams.
- Page 14 Follow the steps below to assemble the Door Frame. Turn the assembled wall over so that the outside is now facing you, to make attaching the door frame easier. S T E P S T E P Slide the door rail onto the bolt heads, Insert a bolt into the hole at the end starting on the left until it reaches the of the door rail, securing with a nut.
- Page 15 A S S E M B L I N G T H E G R E E N H O U S E PART 4 – FULL STRUCTURE AND ROOF This section completes the greenhouse frame by joining the 4 walls and completing the roof. At this stage it is best if two people work together.
- Page 16 Follow the steps below to assemble Full Structure and Roof. NOTE: Each step applies to all relevant corners/supports. 43 52 S T E P S T E P S T E P 43 52 Attach the gutter end and beam Lift the walls and bolt the side Attach the ends of the gutter bars end plastic caps to the ends of...
-
Page 17: Part 5 - The Door
A S S E M B L I N G T H E G R E E N H O U S E PART 5 – THE DOOR Lay out all the parts needed for constructing the door, following the layout shown. The open sides of parts 24, 26 and 27 should be facing down. - Page 18 Follow the steps below to assemble the Door. S T E P S T E P S T E P Screw through the door side Attach the bottom door bar as in Bolt the door slider to the outside supports into the top door bar, on step 1.
-
Page 19: Part 6 - The Vents
A S S E M B L I N G T H E G R E E N H O U S E PART 6 – THE VENTS Lay out all the parts needed for constructing the vents, following the layout shown. The greenhouse has two window vents, but instructions are for a singular vent as the procedure for installation is the same. - Page 20 Follow the steps below to assemble the Vents. S T E P S T E P S T E P Slide the vent top bar into the vent Insert bolts into the bottom of the Attach the vent bottom bar to the side bars, just over the outermost two vent side bars, securing loosely.
- Page 21 A S S E M B L I N G T H E G R E E N H O U S E PART 1 – INSERTING THE PANELS One at a time, place Remove the protective film Secure each panel with each transparent panel from each side of the panel panel clips, placing a clip...
- Page 22 INSERTING THE PANELS 1) Start by inserting the roof panels, putting the panels in place on both sides of the roof before moving forward to the next row of roof panels. Slide the panels into Slide the panels below Make sure the bottom of the lowest groove of the window vents into all the roof panels are...
Need help?
Do you have a question about the Walk-in OGAL-466 and is the answer not in the manual?
Questions and answers