
Related Manuals for oGrow OGAL-866A


Summary of Contents for oGrow OGAL-866A
- Page 1 OGAL-866A GREENHOUSE ASSEMBLY INS TRU CTION S 1.888.965.3331...
- Page 2 TO PREVENT INJURY, READ AND UNDERSTAND THE GREENHOUSE ASSEMBLY INSTRUCTIONS BEFORE USE. Notes: 1. It takes about 2-3 hours to assemble the greenhouse by 2-3 persons. 2. The UV-protected side of the sheet is covered with opal white film and must face towards the sun.
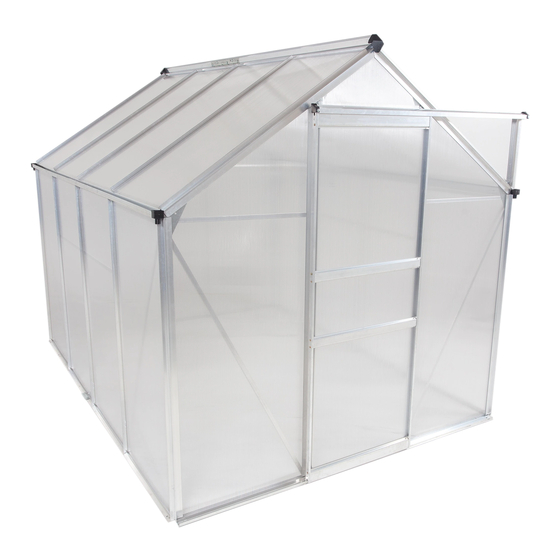
- Page 3 99 inches x 79 inches x 75 inches www.kshbrands.com support@kshbrands.com 1.888.965.3331...
- Page 4 Notes. 1. Remove approximately 5mm of film from all sheet edges before installing. Remove all film immediately after the construction completed. 2. The UV-protected side of the sheet is covered with opal white film and must face towards the sun. POLYCARBONATE PANEL Opal white film PC sheet...
- Page 5 www.kshbrands.com support@kshbrands.com 1.888.965.3331...
- Page 6 | OGAL-866A ASSEMBLY INSTRUCTIONS 1.1 Connect F-C02 & F-C02a by C-64, 1.2 Lay parts F-03b & F-C02 to a fix the bolts and nuts. right-angle, make sure the grooves of F-03b & F-C02 are on the outside. Parts used in this section.
- Page 7 OGAL-866A ASSEMBLY INSTRUCTIONS | 2.1.2 Insert F-05 into the bolts. 2.1.1 Insert the bolts (F-C14) into the holes. Parts used in this section. Image Quantity Item # 2.1.3 and 2.1.4 Put on the nuts and tighten. www.kshbrands.com support@kshbrands.com 1.888.965.3331...
- Page 8 3 . 1 . 2 C o n n e c t F - 0 5 , F - 1 9 b , F - 1 8 b y t h e u p p e r b o l t . O n c e t h e n o t c h o n F - 1 9 b i s a l i g n e d w i t h t h e t o p o f F - 0 5 , y o u c a n s c r e w t h e n u t t i g h t o n t h e b o l t .
- Page 9 4 . 1 C o n n e c t F - 2 9 a n d F - 1 7 t o F - 0 5 w i t h b o l t s a n d n u t s , ma i n t a i n i n g 3 / 4 o f a n i n c h d i s t a n c e f r o m t h e t o p o f F - 0 5 t o t h e b o l t .
- Page 10 | OGAL-866A ASSEMBLY INSTRUCTIONS 5.2 Connect F-30 and F-04 with bolts and nuts. NOTICE: Don't tighten nuts yet. 5.1 Connect F-30 and F-05 to the lower notch of F-19b with bolts and nuts. NOTICE: The notch of F-19b MUST be aligned with the top of F-05.
- Page 11 OGAL-866A ASSEMBLY INSTRUCTIONS | 6.1 and 6.2 Connect F-41 with F-23 by bolts and nuts. Make sure the shelf part is facing upward Parts used in this section. Image Quantity Item # www.kshbrands.com support@kshbrands.com 1.888.965.3331...
- Page 12 | OGAL-866A ASSEMBLY INSTRUCTIONS 7.2 Insert one bolt into F-08/09, connect 7.1 Insert F-08, F-09, F-10, and F-11 into F-18 and F-08/09 with the bolt & nut and the bolts at each location. tighten. Parts used in this section. Image...
- Page 13 OGAL-866A ASSEMBLY INSTRUCTIONS | 8.1 Slide one bolt into F-23, and attach 8.2 Insert F-23 into the bolt to connect to F-41 at its center, tightening the nut. base part and tighten the nuts. Parts used in this section. Image...
- Page 14 | OGAL-866A ASSEMBLY INSTRUCTIONS Slide the panels into each NOTICE: designated area. Parts used in this section. Image Quantity Item # www.kshbrands.com support@kshbrands.com 1.888.965.3331...
- Page 15 OGAL-866A ASSEMBLY INSTRUCTIONS | 10.2 Slide the bolts into the grooves of 10.1 Insert the bolts and nuts into each F-23. hole of F-C06, don't tighten the nuts yet. Slide the bolts into the grooves of F-05. Parts used in this section.
- Page 16 | OGAL-866A ASSEMBLY INSTRUCTIONS 11.2 Slide two bolts each into F-08, F-09, F-10, and F-11. 11.1 Insert bolt and nut into the hole of F-B06. Don't tighten the nuts yet. Parts used in this section. Image Quantity Item # 11.3 Insert two bolts and nuts into the holes on the top edge of F-19b as shown.
- Page 17 OGAL-866A ASSEMBLY INSTRUCTIONS | 12.1 Insert F-06/07 through the bolts in F-19b and F-C06a/C06. Tighten the nuts. Parts used in this section. Image Quantity Item # 12.2 & 12.3 Slide two bolts into the grooves of F-06 and F-07. Then insert those bolts into the corresponding holes in F-19 and tighten.
- Page 18 | OGAL-866A ASSEMBLY INSTRUCTIONS Parts used in this section. Image Quantity Item # 13.2 Insert one bolt each into F-06 and F-07, to secure to F-C07 and F-CO7a, respectively. 13.1 Connect F-C07 & F-C07a with F-43 by bolts and nuts.
- Page 19 OGAL-866A ASSEMBLY INSTRUCTIONS | Parts used in this section. Image Quantity Item # 14.1 Insert F-40 into the angle joining F-06 and F-07. Connect F-12 and F-19 by bolt & nut. www.kshbrands.com support@kshbrands.com 1.888.965.3331...
- Page 20 | OGAL-866A ASSEMBLY INSTRUCTIONS NOTICE: Insert one bolt into the two pieces of F-24, as shown on the diagram. 15.1 Insert F-24 to the bolt in F-C06 and F-C06a and tighten the nut. Parts used in this section. 15.2 Slide a bolt into each of the six units...
- Page 21 OGAL-866A ASSEMBLY INSTRUCTIONS | NOTICE: Insert the panels into each designated section. Parts used in this section. Image Quantity Item # www.kshbrands.com support@kshbrands.com 1.888.965.3331...
- Page 22 | OGAL-866A ASSEMBLY INSTRUCTIONS 17.2 Insert F-28 with notch through the bolt in F-24 and tighten the nut. Parts used in this section. 17.1 Slide F-C05 and F-C05a into F-C06 & Image Quantity Item # F-C06a, then connect F-C05, F-C05a, F-C06 &...
- Page 23 1 8 . 1 S l i d e t h r e e b o l t s i n t o t h e g r o o v e s o f F - 1 3 , t h e n i n s e r t t h o s e s a me b o l t s t h r o u g h t h e h o l e s i n F - 1 2 , a n d t i g h t e n t h e n u t s .
- Page 24 | OGAL-866A ASSEMBLY INSTRUCTIONS 19.1 Slide two units F-26 over the sides of the F-37 window panel. 19.2 Slide F-27 over the bottom of the F-37 window panel. Slide F-25 over the top edge of the window panel. Secure with F-C14 nuts and bolts at all four corners.
- Page 25 OGAL-866A ASSEMBLY INSTRUCTIONS | 20.1 Slide the window into F-C07, as shown above. You should be able to pivot it up and down. www.kshbrands.com support@kshbrands.com 1.888.965.3331...
- Page 26 p a n e l p a n e l s...
- Page 27 OGAL-866A ASSEMBLY INSTRUCTIONS | 22.1 and 22.2 Slide the assembled door, ensuring the pulley wheels align to the the middle notch o F-13 on top and F-03b on the bottom. Parts used in this section. Image Quantity Item # 22.3 Secure door frame with nuts and bolts at bottom corners.
- Page 28 | OGAL-866A ASSEMBLY INSTRUCTIONS 23.1 and 23.2 Insert four G-P1 units into the to pcorners of front and back walls of the greenhouse by sliding the rectangular section into each F-C05a panel. Parts used in this section. Image Quantity Item # www.kshbrands.com...
- Page 29 OGAL-866A ASSEMBLY INSTRUCTIONS | 24.1 Slide the two G-P2 connectors into where F-C07 and F-C07a each joins F-06 and F07. Parts used in this section. Image Quantity Item # 24.2 and 24.3 Cap off F-13 with G-P3L at the left end and G-P3R at the right end.
- Page 30 | OGAL-866A ASSEMBLY INSTRUCTIONS NOTICE: When the window is closed, the handle of F-20 could be rotated to the right and fixed in place. www.kshbrands.com support@kshbrands.com 1.888.965.3331...
- Page 31 OGAL-866A ASSEMBLY INSTRUCTIONS | Advice It is not necessary but we would advise: For additional strength, you can also use some glue or tapes between the polycarbonate panel and the aluminium frame to enhance the stability. Note: Silicone sealant and glue gun are not included in our tool kit. You can buy them locally.
Need help?
Do you have a question about the OGAL-866A and is the answer not in the manual?
Questions and answers