
Related Manuals for oGrow OGAL-46


Summary of Contents for oGrow OGAL-46
- Page 2 Step 1: This procedure will assist you with assembling the OGrow Walk-In 4 ft. by 6 ft. Lawn and Garden Greenhouse with Heavy Duty Aluminum Frame. Step 2: To complete this procedure, you will need a Hammer, a Phillips Screwdriver, a Drill, fifteen-sixty fourths inch Drill Bit, and Gloves.
- Page 3 Step 4: Insert (2) Bolts (K - A 3 1) into the holes at each corner. Secure with (2) Nuts (K - A 3 1). Do not fully tighten the Nuts. Step 5: Slide (K - 0 5) into position. Repeat for both corners. Tighten the Nuts.
- Page 4 Step 7: Insert (2) (K - A 0 3) onto the Bolts on the Base. Tight- en all the Nuts. Step 8: Insert (1) Bolt into each (K - 0 5) and (K - A 0 3) Frame. Attach (K - A 1 5) to the Bolts using (4) Nuts. Make sure all the Nuts are tightened.
- Page 5 Step 10: Remove the Opal White Film from (3) (K - A 2 4) Panels. Step 11: Slide (3) (K - A 2 4) Panels into the grooves of each Beam. Step 12: Insert (4) Bolts and (4) Nuts into each hole of (K - A 0...
- Page 6 Step 13: Slide the Bolts on (K - A 0 6) into the grooves of the Beams, then fully tighten all of the Nuts. Step 14: Insert (4) Bolts and (4) Nuts into (K - 0 3 B) and (K - 0 4) in the indicated areas.
- Page 7 Step 16: Insert (K - 1 9) and (K - 1 0) onto the Bolts in (K - 0 3 B). Fully tighten the Nuts. Note: Support these Beams until they have additional supports. Step 17: Insert (3) Bolts each into (K - 1 9), (K - 2 0), (K - 1 0), and (K - 0 9).
- Page 8 Step 19: Remove the Opal White Film from (K - A 2 1), (K - A 2 0), and (K - A 2 2) Panels. Step 20: Insert (K - A 2 2), (K - A 2 0), and (K - A 2 1) Panels into the grooves of the Beams.
- Page 9 Step 22: Insert the Bolts into the holes in (K - A 0 6) and secure them with (2) Nuts. Step 23: Insert (2) Bolts each into (K - 0 6) and (K - 0 7). Step 24: Align (2) Bolts on (K - 0 5) and (2) Bolts on (K - 0 6) to the holes in (K - 2 1).
- Page 10 Step 25: Insert (2) Bolts each into (K - 0 6) and (K - 0 7). Step 26: Align (2) Bolts on (K - 1 0) and (2) Bolts on (K - 0 6) to the holes in (K - 2 1). Attach (K - 2 1) using (4) Nuts.
- Page 11 Step 28: Align (2) Bolts on (K - 1 9) and (2) Bolts on (K - 0 6) to the holes in (K - 2 3). Attach (K - 2 3) using (4) Nuts. Align (2) Bolts on (K - 2 0) and (2) Bolts on (K - 0 7) to the holes in (K - 2 3).
- Page 12 Step 31: Remove the Opal White Film from (K - A 2 3) Panel. Step 32: Slide (K - A 2 3) Panel into the grooves of the angle be- tween (K - 1 9) and (K - 0 6). Attach the wedged end of (K - 1 2) to (K - 1 0) using (1) Bolt and (1) Nut.
- Page 13 Step 34: Attach (K - 1 8) to (K - 0 5), (K - 0 9), and (K - 2 0) using (3) previously attached Bolts and (3) Nuts. Step 35: Position the Greenhouse Assembly in desired location against a Wall. Mark the locations of the holes in the side of the Assembly which will be in contact with the Wall.
- Page 14 Step 37: Drill 10 holes corresponding with the marks on the wall using a fifteen-sixty fourths inch Drill Bit. Note: If you do not have a fifteen-sixty fourths inch Drill Bit, you may use a three-sixteenths inch Drill Bit instead. Step 38: Insert (10) Wall Anchors (K - A 1 9) into the holes.
- Page 15 Step 40: Insert (3) Bolts each into (K - A 0 4). Step 41: Attach (K - A 0 4) onto the Greenhouse. Insert the Bolts on each end of (K - A 0 4) with the middle holes in (K - A 0 6) and (K - A 0 7). Secure with (4) Nuts. Step 42: Remove the Opal White Film from (2) (K - A 2 5) Panels and Opal White Film from (K - A 2 7) Panel.
- Page 16 Step 43: Slide (2) (K - A 2 5) and (1) (K - A 2 7) Panels into the grooves of the Roof Frame Assembly. Step 44: Slide (K - A 0 5) into (K - A 0 6) to hold the Roof Pan- els in place.
- Page 17 Step 46: Attach (G - P 3 L) to (K - 1 3) using (1) Nut and (1) Bolt. Step 47: Insert (3) Bolts into (K - 1 3). Step 48: Attach the Bolts on (K - 1 3) to (K - 0 8) and (K - 1 2) using (3) Nuts.
- Page 18 Step 49: Place (K - A 1 1) between both (K - A 0 4) Beams, sliding the notches over the (2) Bolts. Attach (K - A 1 2) to those Bolts and the (2) Bolts on (K - 0 6) and (K - 0 7).
- Page 19 Step 52: Secure the front corners of the Frame with (4) Bolts and (4) Nuts. Step 53: Remove the Opal White Film from (K - A 2 6) Panel. Step 54: Slide (K - A 2 6) Panel over the lip of (K - A 1 0) and into the grooves of the Window Frame Assembly.
- Page 20 Step 55: Attach (K – A 1 3) to (K – A 1 0) using (2) Screws (K - A 3 2). Step 56: Slide the Window Assembly into the groove of (K – A 0 7). Make sure the Window Assembly pivots up and down correctly.
- Page 21 Step 58: Attach (2) (K – 1 5) Beams to (1) (F – 1 6 B). Secure with (4) Screws (K - A 3 1 A). Step 59: Slide (1) (K - A 2 9) Panel into the middle slot. Step 60: Attach (1) (F –...
- Page 22 Step 61: Slide (2) (K - A 2 8) Panels into the ends of the Door. Step 62: Cap the top and bottom of the Door with (2) (F – 1 4 Step 63: Secure the (F – 1 4 B) Beams using (4) Screws (K - A 3 1 A).
- Page 23 Step 64: Insert (1) (F – 2 2 B) into the bottom of (F – 1 6 B). Secure (F - 2 2 B) with (1) Screw (K - A 3 2). Repeat on the other side. Step 65: Insert (1) (F – 2 2 B) into the top of (F – 1 6 B). Secure (F - 2 2 B) with (1) Screw (K - A 3 2).
- Page 24 Step 67: Secure the Door with (2) Bolts and (2) Nuts attached to (K - 0 3 B). Step 68: Attach (G - P 3 R) to (K - 1 3) using (1) Nut and (1) Bolt. Step 69: Insert the rectangular ends of (2) (G - P 1) into the ends of (K - A 0 5).
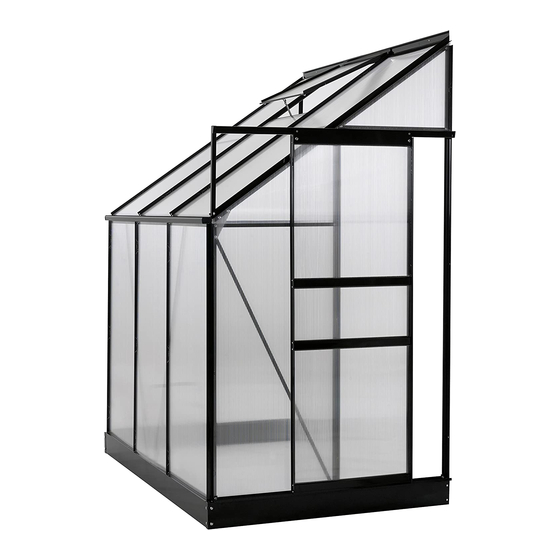
- Page 25 Only use Silicone Sealant suitable for Aluminum. Step 71: Congratulations, this completes the assembly of the OGrow Walk-In 4 ft. by 6 ft. Lawn and Garden Green- house with Heavy Duty Aluminum Frame.
Need help?
Do you have a question about the OGAL-46 and is the answer not in the manual?
Questions and answers