Table of Contents
Advertisement
Available languages
Available languages
Quick Links
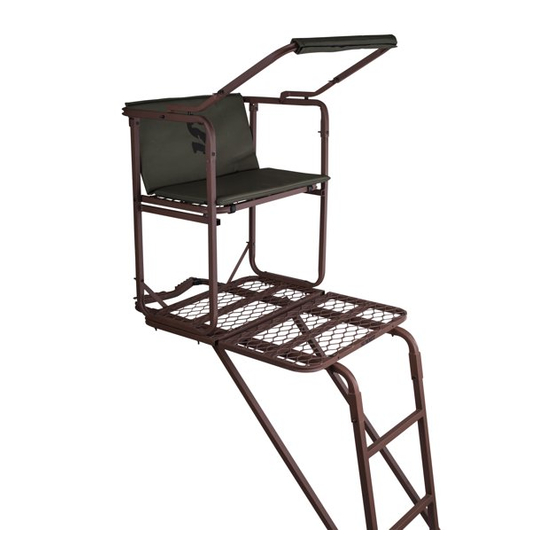
Solo Pro
Ladder Treestand
© 2012 Summit Treestands, LLC
715 Summit Dr. Decatur, AL 35601
(256) 353-0634
info@summitstands.com
www.summitstands.com
WARNING
!
You must fully read, understand and follow these warnings
and instructions (written and video)! Failure to follow these
instructions may cause serious injury or death!!
•
WHEN HUNTING FROM A TREESTAND FALLS CAUSING INJURY OR DEATH CAN OCCUR ANY TIME AFTER LEAVING THE GROUND! FOR
THOSE REASONS ALWAYS USE A FALL ARREST SYSTEM (FAS) COMPRISING A FULL BODY HARNESS AT ALL TIMES AFTER LEAVING THE
GROUND. YOU MUST STAY CONNECTED AT ALL TIMES AFTER LEAVING THE GROUND WHILE USING ANY ELEVATED HUNTING PLATFORM.
SINGLE SAFETY BELTS AND CHEST HARNESSES ARE NO LONGER ALLOWED AND SHOULD NEVER BE USED. IF YOU ARE NOT USING A FULL
BODY HARNESS THAT IS PROTECTING YOU FROM A FALL, DO NOT LEAVE THE GROUND!
•
READ AND UNDERSTAND ALL OF THE MANUFACTURER'S WARNINGS AND INSTRUCTIONS AND USE ALL SAFETY DEVICES PROVIDED.
CONTACT SUMMIT TREESTANDS FOR ANY QUESTIONS. FAILURE TO DO SO COULD RESULT IN INJURY OR DEATH!
•
A SIGNAL DEVICE SUCH A MOBILE PHONE, RADIO, WHISTLE, SIGNAL FLARE OR PERSONAL LOCATOR DEVICE (PLD) MUST BE ON YOUR
PERSON AND READILY AVAILABLE AT ALL TIMES! ALWAYS INFORM SOMEONE OF YOUR HUNTING LOCATION, WHERE THE TREESTAND
WILL BE LOCATED AND THE EXPECTED DURATION OF THE HUNT!
•
DO NOT USE ANY TREESTAND UNLESS YOU ARE IN GOOD PHYSICAL SHAPE AND HAVE NO PHYSICAL LIMITATIONS OR MEDICAL
CONDITIONS WHICH MAY PREVENT YOU FROM SAFELY USING THIS PRODUCT. ALWAYS CONSULT A PHYSICIAN IF YOU HAVE ANY
QUESTIONS ABOUT YOUR PHYSICAL ABILITY TO USE THIS PRODUCT.
•
NEVER USE A TREESTAND WHILE TAKING DRUGS, ALCOHOL OR CERTAIN PRESCRIPTION DRUGS! ALWAYS CONSULT A PHYSICIAN IF YOU
HAVE ANY QUESTION ABOUT TAKING SPECIFIC MEDICATIONS AND USING THIS PRODUCT!
•
NEVER USE A TREESTAND DURING INCLEMENT WEATHER SUCH AS RAIN, LIGHTNING, WINDSTORMS OR ICY CONDITIONS! END YOUR
HUNT AND RETURN TO THE GROUND IF ANY OF THESE INCLEMENT CONDITIONS ARISE.
•
NEVER USE A TREESTAND WHEN FEELING ILL, NAUSEOUS, DROWSY OR DIZZY!
•
BE WELL RESTED AND NEVER HURRY. HURRYING CAUSES ACCIDENTS!
•
CHECK EVERY LADDER SECTION CONNECTION EVERY TIME YOU USE THE STAND. IF ANY LADDER SECTIONS ARE SEPARATING - DO NOT
USE THE STAND!
•
NEVER USE A TREESTAND ON A DEAD, LEANING, DISEASED, LOOSE BARKED TREE, ON A UTILITY POLE OR ON TREES THAT HAVE ANY
OBSTRUCTIONS THAT MAY LIMIT TREESTAND USE! NEVER RELY ON A TREE BRANCH FOR SUPPORT!
•
CHECK THE GROUND UNDER THE LADDER STAND TO MAKE SURE IT IS FIRM AND LEVEL. SLOPING GROUND OR AN UNEVEN SURFACE
(ONE LADDER SECTION ON A ROCK FOR EXAMPLE) CAN CAUSE YOUR STAND TO TILT OR SHIFT AS YOU CLIMB.
•
ALWAYS MAINTAIN THREE POINTS OF CONTACT WHEN YOU CLIMB THE LADDER SECTION OF THIS STAND!
•
NEVER JUMP OR BOUNCE ON A TREESTAND TO SECURE IT TO THE TREE!
•
PULL UP A BOW, BACKPACK, FIREARM OR OTHER EQUIPMENT ONLY AFTER BEING SECURE IN THE TREESTAND. FIREARMS MUST BE
PULLED UP UNLOADED, CHAMBER OPEN AND MUZZLE DOWN!
•
NEVER MODIFY YOUR STAND IN ANY WAY BY MAKING REPAIRS, REPLACING PARTS, OR ALTERING ADDING OR ATTACHING ANYTHING
TO IT EXCEPT IF EXPLICITLY AUTHORIZED IN WRITING BY THE MANUFACTURER!
•
PRACTICE INSTALLING, ADJUSTING AND USING YOUR TREESTAND AT GROUND LEVEL PRIOR TO USING IT AT ELEVATED POSITIONS!
•
INSTRUCTIONS (WRITTEN AND VIDEO) SHOULD BE KEPT IN A SAFE PLACE AND REVIEWED AT LEAST ANNUALLY. IT IS THE RESPONSIBILITY
OF THE TREESTAND OWNER TO FURNISH THE COMPLETE INSTRUCTIONS TO ANY PERSON WHO BORROWS OR PURCHASES THE
TREESTAND! THIS SUMMIT TREESTAND IS DESIGNED TO BE USED AS A COMPLETE SYSTEM - NEVER LOAN OR SELL ONLY A PORTION OF
THIS TREESTAND SYSTEM.
•
BEFORE EACH USE OF YOUR SUMMIT TREESTAND, ALWAYS INSPECT THE TREESTAND AND HARNESS FOR ANY DAMAGE, CRACKS, TEARS,
CABLE WEAR OR ABRASION THAT MAY HAVE OCCURRED IN TRANSPORTING / STORING YOUR TREESTAND. DO NOT USE IF ANY DAMAGE
IS FOUND! CONTACT CUSTOMER SERVICE FOR THE APPROPRIATE REPAIR / REPLACEMENT PROCEDURE!
•
DO NOT LEAVE YOUR TREESTAND OUTDOORS WHEN IT IS NOT BEING USED! ANY STAND TUBING THAT IS ALLOWED TO FILL WITH
RAINWATER AND FREEZE WILL RUPTURE OR BURST - DO NOT USE YOUR TREESTAND IF THIS OCCURS!
You MUST also view the enclosed DVD BEFORE using your new treestand!!
WEIGHT LIMIT
SINGLE USER
300 LBS. X 1 TOTAL*
DO NOT EXCEED THIS LIMIT!
(* Includes all gear)
Stand minimum and maximum tree size: 8-20" diameter
PN 82065
Solo Pro 82065, 11/2012
Advertisement
Table of Contents

Related Manuals for Summit Solo Pro


Summary of Contents for Summit Solo Pro
- Page 1 OF THE TREESTAND OWNER TO FURNISH THE COMPLETE INSTRUCTIONS TO ANY PERSON WHO BORROWS OR PURCHASES THE TREESTAND! THIS SUMMIT TREESTAND IS DESIGNED TO BE USED AS A COMPLETE SYSTEM - NEVER LOAN OR SELL ONLY A PORTION OF THIS TREESTAND SYSTEM.
-
Page 2: Parts List
PLATFORM SHORT STRAP NOTICE FOR RATCHET 82065.760 SHORT LADDER STABILIZER STRAP Summit recommends the use of the SOP Climbing WITH CAM BUCKLE System Accessory with all ladder and hang-on 82065.765 LONG LADDER STABILIZER STRAP treestands. For more information please visit our WITH LOOP END website www.summitstands.com or by calling 256-... - Page 3 ASSEMBLY PLATFORM PLATFORM BRACE 1. Position two Platform Braces and (PN 82065.200) the Yoke as shown in figure 1. Note that the teeth on the Yoke should face down as shown. 2. Line up the bolt holes and secure using one 1 3/4”...
- Page 4 ARMREST 2 1/2” BOLTS, LOCK NUTS - 1. Position the Left Seat Support over the WRENCH TIGHTEN STEP 5 finished platform assembly as shown in figure 7. 2. Secure using two 2 1/2” bolts and lock LEFT SEAT nuts as shown in figure 8. Leave these bolts SUPPORT hand tight for now.
- Page 5 SEAT / BRACE 1. Position the Seat Base between the Seat Supports as shown in figure 14. 2. Line up the holes and secure using SEAT 2 1/2” bolts with lock nuts. Do not BASE overtighten as this connection is designed (PN 82065.600) to pivot.
- Page 6 GUNREST (continued) 3. Insert two of the Rubber Bumpers into the pre-drilled holes on each Armrest (see figure 20). Insert by pushing while RUBBER twisting slightly. BUMPERS 4. Each Gunrest Arm has a tab with a pre-drilled hole. Line up these holes with the holes in the Armrests. Insert one 1/4”...
- Page 7 2 3/4” BOLT, LOCK NUT - WRENCH TIGHTEN LADDER COLUMN 1. Position the Bottom Ladder Section and Middle Ladder Section as shown in WELDED figure 27. The welded U bracket faces U BRACKET BOTTOM the tree when fully assembled. LADDER The Bottom Ladder Section has no SECTION welded couplers.
- Page 8 STABILIZER BAR 1 3/4” BOLTS, LOCK NUTS - 1. Position the Female Section of the Stabilizer bar as WRENCH TIGHTEN shown in figure 31. The Stabilizer bar will attach to the welded U Bracket. Slide the bar into the bracket and line up the hole.
-
Page 9: Setup And Use
SETUP AND USE PLATFORM RATCHET STRAP 1. Attach the Ratchet with Loop End to the yoke tube at location A as shown in figure 35. Put the sewn loop around the tube (figure 36) and then push the ratchet through the loop (figure 37) to create a cinch knot as shown in figure 38. - Page 10 SETUP WARNING It is required that at least three people initially set up the ladder stand. Always use two helpers! WARNING Check the ground under the ladder stand to make sure it is firm and level. WARNING Never use this ladder stand on dead, leaning, diseased or loose barked trees.
- Page 11 1. Climb up and before stepping onto the platform IMMEDIATELY attach your safety strap around the tree above your seating position. ALWAYS refer to your harness instructions included with this stand for proper use of your Summit Safety harness and Safety Strap 2.
-
Page 12: Maintenance And Care
It is expressly understood that Summit’s liability for its products, whether due to breach of warranty, negligence, strict liability, or otherwise, is limited to the repair of the product, as stated above, and Summit will not be liable for any other injury, loss, damage, or expense, whether direct or consequential, including but not limited to loss of use, income, profit, or damage to material, arising in connection with the sale, installation, use of, inability to use, or the repair or replacement of Summit’s products. -
Page 13: Limite De Poids
FOIS PAR ANNÉE. LA RESPONSABILITÉ DE FOURNIR LES INSTRUCTIONS COMPLÈTES À TOUTE PERSONNE QUI EMPRUNTE OU ACHÈTE LE MIRADOR INCOMBE AU PROPRIÉTAIRE! LE MIRADOR SUMMIT EST FAIT POUR ÊTRE UTILISÉ COMME UN SYSTÈME COMPLET - NE PRÊTEZ OU NE VENDEZ JAMAIS UNE PARTIE DE CE MIRADOR •... - Page 14 INDEX AVERTISSEMENTS GÉNÉRAUX ET PRÉCAUTIONS, LIMITES DE POIDS DU MIRADOR PAGE 13 SECTION 1 - INDEX P 14 SECTION 2 - LISTES DES PIÈCES P 14 SECTION 3 - OUTILS REQUIS P 14 SECTION 4 - ASSEMBLAGE P 15 - 20 SECTION 5 - INSTALLATION ET UTILISATION P 21 - 23 SECTION 6 - ENTRETIEN ET SOINS...
- Page 15 ASSEMBLAGE PLATEFORME APPUI PLATE- 1. Placez deux appui plateformes gauche et la FORME fourche tel qu’illustré à la figure 1. Notez que (PN 82065.200) la partie dentelée de la fourche est orientée vers le bas tel qu’illustré. 2. Alignez les trous de boulons et sécurisez en utilisant un boulon 1 3/4 po.
- Page 16 ACCOUDOIR 2 1/2” BOULONS, 1. Placez le support gauche pour siège sur ÉCROU DE BLOCAG- la plateforme assemblée tel qu’illustré à la ES - SERRER À CLÉ figure 7. ÉTAPE 5 2. Sécurisez en utilisant deux boulons 2 1/2 SUPPORT po.
- Page 17 SIÈGE / APPUI 1. Placez le siège entre les supports du siège tel qu’illustré à la figure 14. 2. Alignez les trous et sécurisez en utilisant deux boulons 2 1/2 po. et des écrous de blocage. Ne serrez SIÈGE pas trop fort parce que ce point d’attache doit pivoter (PN 82065.600) (voir figure 15).
- Page 18 APPUI-ARME (SUITE) 3. Insérez deux des coussinets de caoutchouc dans les trous COUSSINETS pré-usinés pour chaque accoudoir (voir figure 20). Insérez en DE CAOU- poussant tout en tournant légèrement. TCHOUC POUR 4. Chaque bras d’appui-arme possède une plaque avec un trou pré-usiné.
- Page 19 2 3/4” BOULONS, ÉCROU DE BLOCAGES - SERRER À CLÉ ÉCHELLE 1. 1. Placez la section inférieure de SUPPORT EN l’échelle et la section du milieu de ‘’U’’ SOUDÉ l’échelle tel qu’illustré à la figure 27. Le SECTION IN- support en ‘’U’’ soudé fait face à l’arbre lorsqu’assemblé.
- Page 20 BARRE STABILISATRICE 1 3/4” BOULONS, ÉCROU DE 1. Placez la section femelle de la barre stabilisatrice BLOCAGES - SERRER À CLÉ tel qu’illustré à la figure 31. La barre stabilisatrice s’attachera au support en ‘’U’’ soudé. Glissez la barre dans le support et alignez le trou. 2.
- Page 21 SETUP AND USE COURROIE POUR PLATEFORME À ROCHET 1. Attachez le rochet avec le bout en boucle au tube de la fourche à l’emplacement A tel qu’illustré à la figure 35. Placez la boucle cousue autour du tube (figure 36) et puis poussez le rochet dans la boucle (figure 37) pour créer un noeud coulant tel qu’illustré...
- Page 22 INSTALLATION AVERTISSEMENT Il est recommandé qu’au moins trois personnes mettent initialement le mirador à échelle en place. Veuillez toujours utiliser deux assistants AVERTISSEMENT Vérifiez le sol sous le mirador à échelle pour vous assurer qu’il soit ferme et de niveau. AVERTISSEMENT N’utilisez jamais ce mirador à...
- Page 23 Veuillez TOUJOURS vous referez aux instructions du harnais inclus avec ce mirador pour l’utilisation correcte du harnais de sécurité et de la courroie de sécurité Summit. 2. La longueur de la courroie d’encrage du harnais doit être minimalisée en tout temps. Elle devrait être ajustée de sorte qu’elle soit plus haute que votre tête et n’ait pas de jeu lorsque vous êtes assis et vous devriez avoir un minimum de mou possible...
-
Page 24: Entretien Et Soin
(B) Limitation de responsabilité Il est expressément entendu que la responsabilité de Summit pour ses produits, que ce soit dû à une violation de la garantie, de la négligence, de la responsabilité sans faute ou autrement, est limitée à la réparation du produit, tel que mentionné ci-haut, et Summit ne sera pas responsable pour toute blessure, perte, dommage ou frais encourus, que ce soit une cause directe ou indirecte, notamment de la perte d’usage, de salaire ou dommage matériel...
Need help?
Do you have a question about the Solo Pro and is the answer not in the manual?
Questions and answers