Advertisement
Quick Links
Advertisement

Related Manuals for Gunter & Hauer EOV 7509 BS


Summary of Contents for Gunter & Hauer EOV 7509 BS
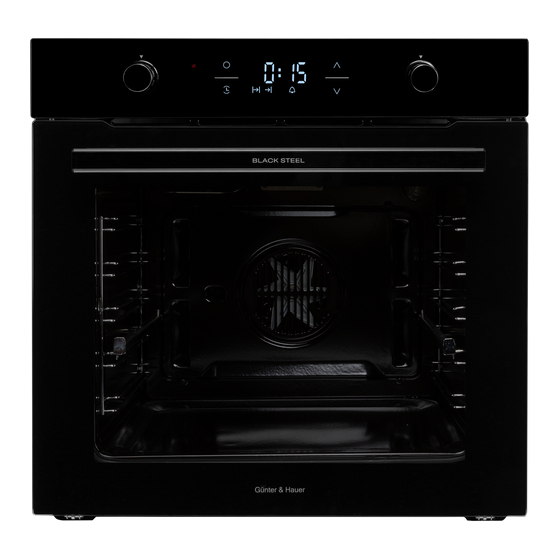
- Page 1 Gunter & Hauer Instruction Manual Built-in oven EOV 7509 BS / EOV 7509 BSX...
-
Page 3: Table Of Contents
Content General warnings………………………………..4 Connection of the feeding cable to the mains….4 Initial use of the oven…………………………..7 To ensure the safe use of the appliance…………19 Installation………………………………………..21 Technical specification…………………………...24 Environmental protection……………………….25... -
Page 4: General Warnings
GENERAL WARNINGS Please read this handbook carefully before installation and use, to ensure that you will find the correct indications for the best installation, usage and maintenance of the product. This appliance is designed for non-professional home usage for • adults. - Page 5 power cable directly connected to the electric box, it is necessary to insert a suitable omnipolar switch or a creepage protection device. Before connecting to the mains, make sure that: The electrical counter, the safety valve, the feeding line and the •...
- Page 6 4. Do not use harsh abrasive cleaners or sharp metal scrapers to clean the oven door glass since they can scratch the surface, which may result in shattering of the glass 5. A steam cleaner is not to be used. 6.
-
Page 7: Initial Use Of The Oven
Initial use of the oven This multi-function oven combines the advantages of traditional convection ovens with those of the more modern fan assisted models in a single appliance. It is an extremely versatile appliance that allows you to choose easily and safely between 9 different cooking modes. - Page 8 The time required to defrost the food will depend on the room temperature, the quantity and type of food. “Top” oven Pre-set temperature”: between 50℃ and 250℃. The top heating element comes on. This mode can be used to brown food at the end of cooking. Conventional mode Pre-set temperature: between 50℃...
- Page 9 This fan assisted mode is particularly recommended for dishes requiring a gratin finish or for those requiring considerably prolonged cooking times, such as for example: lasagna, pasta bakes, roast chicken and potatoes, etc… Moreover, the excellent heat distribution makes it possible to use lower temperatures when cooking roast.
- Page 10 Fan assisted half Grill and full grill Pre-set temperature: between 50℃ and 200℃. The top central heating element and fan comes on. This combination of features increases the effectiveness of the unidirectional thermal radiation of the heating elements through forced circulation of the air throughout the oven.
- Page 11 After the cooking time is already set, press key to switch the icon set the end of cooking time by pressing keys . The end time equals current time plus working time; If working time is default 2 hrs, the working end time equals current time plus two hours) Set the alarm time Press the key to switch on the icon...
- Page 12 basis. If necessary, clean it and avoid using abrasive products or objects to do so. Should it become damaged, please contact your nearest after-sales service center. We recommend you avoid using the oven until it has been repaired. 5 Never line the oven bottom with aluminium foil, as the consequent accumulation of heat could compromise the cooking and even damage the enamel.
- Page 13 Replacing the oven lamp 1 Warning: Ensure that the appliance is switched off before replacing the lamp to avoid the possibility of electric shock 2 Remove the glass cover of the lamp-holder; 3 Remove the lamp and replace with a lamp resistant to high temperature (300C) with the following characteristics: --Voltage:220-240V --Wattage 25W...
- Page 14 directions are only a guideline which may be varied according to your own personal experience. Preheating If the oven must be preheated (this is generally the case when cooking leavened foods), the “fan assisted” mode can be used to reach the desired temperature as quickly as possible in order to save on energy.
- Page 15 the bottom rack (1st from the bottom), placing the dripping pan provided to collect any sauce and/or grease and prevent the same from dripping onto the oven bottom. When using this mode, we recommend you set the thermostat to the highest setting.
- Page 16 cooking time. Cooked well on the inside but sticky on the outside Use less liquid, lower the temperature, and increase the cooking time. The pastry sticks to the pan. Grease the pan well and sprinkle it with a dusting of flour or use greaseproof paper.
- Page 17 In general, the larger the roast, the lower the temperature setting. Place the meat on the center of the grid and place the dripping pan beneath it to catch the fat. Make sure that the grid is inserted so that it is in the center of the oven. If you would like to increase the amount of heat from below, use the low rack heights.
- Page 18 Top oven Browning food perfect cooking Pizza Pizza 15-20 function Roast veal or 25-30 beef 2 or 3 60-70 Chicken Circular Tarts 20-30 element Fruitcakes 2 or 3 40-45 with Plum cake 40-50 Sponge cake 25-30 Stuffed pancakes (on2 2 and 4 30-35 racks) 2 and 4...
-
Page 19: To Ensure The Safe Use Of The Appliance
NB: Cooking times are approximate and may vary according to personal taste. When cooking using the grill or fan assisted grill, the dripping pan must always be placed on the 1st oven rack from the bottom. To ensure the safe use of the appliance To maintain the efficiency and safety of this appliance, we recommend that you do the following: 1 Only call the Service Centers authorized by the manufacturer. - Page 20 appropriate measures must be taken to prevent children and disabled from coming into contact with them: -controls and the appliance in general; -Packaging (bags, polystyrene, nails, etc.); -the appliance itself, immediately after use of the oven or gill due to the heat generated;...
-
Page 21: Installation
parts. You must do as following: -only use the appliance to cook food and nothing else; -check the soundness of the appliance after it has been unpacked. -disconnect the appliance from the electrical mains if it is not functioning properly and before cleaning or performing maintenance. -when left unused, unplug the appliance from the electricity mains;... - Page 22 N.B.: Installation in compliance with the consumption declaration In order to ensure adequate ventilation, the back panel of the cabinet unit must be removed. Installing the oven so that it rests on two strips of wood is preferable. If the oven rests on a continuous, flat surface, there must be an aperture of at least 45x560mm.
- Page 23 The panels of the adjacent cabinets must be made of heat resistant material. In particular, cabinets with a veneer exterior must be assembled with glues which can withstand temperature of up to 100℃ In compliance with current safety standards, contact with the electrical parts of the oven must not be possible once it has been installed.
-
Page 24: Technical Specification
Contact your local government for information regarding the collection systems available. If electrical appliances are disposed of in landfills or dumps, hazardous substances can leak into the groundwater and get into the food chain, damaging your health and well-being. Technical specifications. <CE >... -
Page 25: Environmental Protection
Environmental protection This product is marked with the symbol on the selective sorting of waste electrical and electronic equipment. This means that this product must not be disposed of with household waste but must be supported by a system of selective collection in accordance with Directive 2002/96/EC. - Page 26 Mühlenstrasse 8a, Berlin,14167, Germany www.gunter-hauer.eu e-mail: info@gunter-hauer.de...
Need help?
Do you have a question about the EOV 7509 BS and is the answer not in the manual?
Questions and answers