Electrolux EOB9956XAX User Manual
Hide thumbs
Also See for EOB9956XAX:
- User manual (68 pages) ,
- User manual (65 pages) ,
- Installation instruction (4 pages)
Table of Contents
Advertisement
Quick Links
Advertisement
Table of Contents

Related Manuals for Electrolux EOB9956XAX


Summary of Contents for Electrolux EOB9956XAX
- Page 1 EOB9956XAX Steam oven User Manual...
-
Page 2: Table Of Contents
14. ENERGY EFFICIENCY.................. 65 WE’RE THINKING OF YOU Thank you for purchasing an Electrolux appliance. You’ve chosen a product that brings with it decades of professional experience and innovation. Ingenious and stylish, it has been designed with you in mind. So whenever you use it, you can be safe in the knowledge that you’ll get great results every time. - Page 3 ENGLISH damages that are the result of incorrect installation or usage. Always keep the instructions in a safe and accessible location for future reference. 1.1 Juveniles and vulnerable people safety The juveniles aged under 8 years shall not use this •...
-
Page 4: Safety Instructions
WARNING: Ensure that the appliance is switched off • before replacing the lamp to avoid the possibility of electric shock. Do not use the appliance before installing it in the • built-in structure. Do not use a steam cleaner to clean the appliance. - Page 5 ENGLISH be replaced, this must be carried out • Do not apply pressure on the open by our Authorised Service Centre. door. • Do not let mains cables touch or • Do not use the appliance as a work come near the appliance door or the surface or as a storage surface.
- Page 6 2.4 Steam Cooking • If you use an oven spray, follow the safety instruction on it's packaging. WARNING! • Do not clean the catalytic enamel (if Risk of burns and damage to applicable) with any kind of detergent.
-
Page 7: Product Description
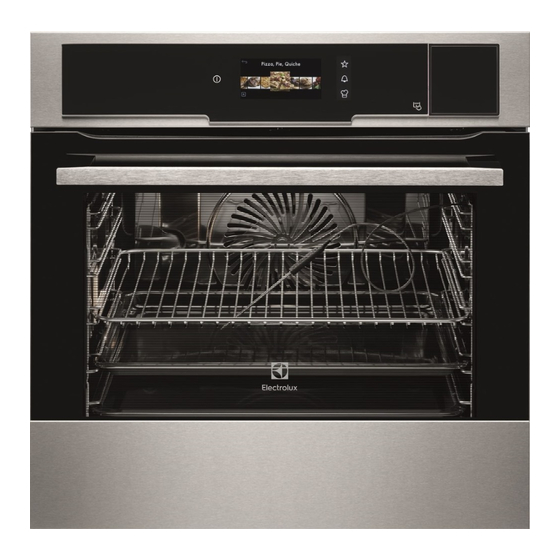
ENGLISH 3. PRODUCT DESCRIPTION 3.1 General overview Control panel Electronic programmer Water drawer Socket for the core temperature sensor Heating element Lamp Descaling pipe outlet Shelf support, removable Shelf positions 3.2 Accessories To bake and roast or as a pan to collect fat. -
Page 8: Control Panel
One unperforated and one perforated Steam set food container. The steam set drains the condensing water away from the food during steam cooking. Use it to prepare vegetables, fish, chicken breast. The set is not suitable for food that needs to soak in the water e.g. -
Page 9: Before First Use
ENGLISH 4.2 Display A. Return to menu B. Current set heating function C. Current set temperature Menu 11:09 D. Clock E. Start 150° start Other indicators of the display: Symbol Function Change of the text size More options Core temperature sensor Heat + Hold Lock 5. -
Page 10: Quick Guide
Water hardness Calcium deposit Calcium deposit Water clas‐ (mmol/l) (mg/l) sification Class 0 - 7 0 - 1.3 0 - 50 Soft 7 - 14 1.3 - 2.5 50 - 100 Moderately hard 14 - 21 2.5 - 3.8... -
Page 11: Daily Use
ENGLISH Assisted Cooking Cookbook Menu 11:09 VarioGuide SousVide Cook‐ 150° book SousVide Vario‐ Guide 33min 20min start Last and most Last used When you press and hold an option in used the menu, a short description of the Most used option appears. - Page 12 7.2 Operating the menu 4. To turn on the function just tap it on the display. 5. To return to the previous menu 1. To turn on the oven press: 2. Press: Menu. press: or Menu. 3. Scroll through the menu to find the 6.
- Page 13 ENGLISH 7.5 Setting a heating function To go back to the previous menu press: Menu. 1. Scroll through the functions to find You can see a description of the heating the one you want and press it. function or create a default function on a 2.
- Page 14 Heating func‐ Application Heating func‐ Application tion tion To bake on up to To bake bread. three shelf positions at the same time and True Fan Cook‐ Bread Baking to dry food. Set the temperature To prepare very ten‐...
- Page 15 ENGLISH The lamp may turn off Procedure for rinsing automatically at a and cleaning the steam temperature below 60 °C generation circuit after during some oven functions. Rinsing frequent use of the steam functions. 7.7 Submenu for: Specials Procedure for cleaning the steam generation Heating func‐...
- Page 16 2. Fill the water drawer with cold water to the maximum level (around 950 ml). Use the scale on the water drawer. The water supply is sufficient for approximately 50 minutes. 3. Put the water drawer to its initial position.
- Page 17 ENGLISH oven can be limited. If this occurs, dry At the end of a steam the cavity when the oven is cool. cooking cycle, the oven cooling fan runs at a higher speed to evacuate in a better way the excess of steam.
- Page 18 7.13 Submenu for: Timers A. Return to menu B. Current set duration time 4 32 C. Reset duration time D. End time 3 31 E. Start time 2h 30min Duration 1 29 Start 09:03 11:33 0 28 Menu item...
- Page 19 ENGLISH Menu item Description Lamp On / Off Switch the oven lamp on or off. Child Lock On / Off Once activated it locks the screen and all but‐ tons. They remain locked both in ON and OFF positions. To unlock touch the display and fol‐ low instructions.
- Page 20 2. Tap the display. 3. Follow the instructions on the display. • The function: Child Lock is on when a heating 7.19 Screen Lock function operates and after the oven is turned Menu / Options / Screen Lock off. Follow the...
- Page 21 ENGLISH 7.22 Submenu for: Basic Settings Menu item Description Last used It shows the last used The set settings stay fixed each time you 5 functions. activate the appliance. Most used It shows the most used 5 functions. Menu item Description Fast heat-up On / Off Fast heat-up is activated and is always switch‐...
-
Page 22: Assisted Cooking
Menu item Description Service Software Version Shows the software version and Shows the software version of the oven. configuration. Reset all settings Resets all settings to factory default. Licence Shows the licence in English language. 8. ASSISTED COOKING 8.2 Activating the function WARNING! Refer to Safety chapters. - Page 23 ENGLISH Food category Dish Fish and Seafood Cod fish Salmon fillet Fish fillet Fish (Trout), poached Fish in salt Stuffed calamari Poultry Chicken legs Stuffed chicken Stuffed chicken breast Roast duck with orange Coq au vin Meat Beef casserole Ossobuco Marinated beef Stuffed veal breast Meatloaf...
- Page 24 8.4 Submenu for: SousVide the dish name and input the correct value. Cookbook • Meat programmes with Automatic Menu / Assisted Cooking / SousVide Core Temperature - this function automatically calculates the roasting Cookbook or touch: time. When the programme ends an You can find the recipes on our website.
- Page 25 ENGLISH Dish Dish Wings, fresh Chipolatas Wings, frozen Spare ribs Legs, fresh Knuckle, pre- cooked Legs, frozen Chicken Ham joint Breast, poached Loin Half Loin Whole Pork Smoked pork loin Duck Smoked loin, poached Goose Neck Turkey Shoulder Food Category: Meat Roast Dish Cooked ham...
- Page 26 Food Category: Oven Dishes Dish Dish Almond cake Lasagne Muffins Lasagne / Cannelloni, frozen Pastry Pasta bake Pastry strips Potato gratin Cream puffs Vegetables au gratin Puff pastry Sweet dishes Eclairs Food Category: Pizza and Quiche Macaroons Dish Short pastry bis‐...
- Page 27 ENGLISH Dish Dish Baguette, pre- Fennel baked Baguette Artichokes Baguette, frozen Beetroot Bread crown Black salsify White bread Cabbage turnip, strips Yeast plait White haricot beans Brown bread Savoy cabbage Bread Rye bread Food Category: Custards and Terrines Wholegrain bread Dish Unleavened bread Egg custard...
-
Page 28: Using The Accessories
Dish Food category Dish Rice Beef • Medium Tagliatelle, fresh • Well done Polenta Lamb Meat • Medium Automatic Core Temperature • Well done function Wild boar Automatic Weight function Rabbit, boneless 8.6 Submenu for: SousVide Asparagus, green VarioGuide... - Page 29 ENGLISH There are two temperatures to be set: • the oven temperature (minimum 120 °C), • the food core temperature. CAUTION! Use only the core temperature sensor supplied and the original replacement parts. Directions for the best results: • Ingredients should be at room temperature.
- Page 30 WARNING! place during baking. Use a solid There is a risk of burns as ingredient to achieve that. Use the the core temperature sensor rim of the baking dish to support the becomes hot. Be careful...
- Page 31 ENGLISH Wire shelf: Put the wire shelf on the telescopic runners so that the feet point downwards. The high rim around the wire shelf is a special device to prevent the cookware from slipping. Wire shelf and baking tray / deep pan together: Push the baking tray / deep pan between the guide bars of the shelf support and...
-
Page 32: Additional Functions
10. ADDITIONAL FUNCTIONS 10.1 Automatic Switch-off Temperature (°C) Switch-off time For safety reasons the oven turns off automatically after some time if a heating function operates and you do not change 200 - 230 the oven temperature. The Automatic switch-off does not work with the functions: core temperature Temperature (°C) Switch-off time... - Page 33 ENGLISH SousVide Cooking Recommendations Use high quality and fresh raw food. Always clean the food before cooking. BEEF Be careful when using raw eggs. Low temperatures are suitable only for the types of food that can be eaten raw. Beef / Veal fillet (°C) (min) Do not cook the food for a long time when you are using the temperature...
- Page 34 11.6 SousVide Cooking: Fish and seafood VEGETABLES Dry the fish fillets with a paper towel before you put them in a vacuum bag. Add a cup of water in the vacuum bag Set the temperature to 90 °C. when you cook the mussels.
- Page 35 ENGLISH When you cook on more than one level make sure that there is a distance between the shelves to let the steam VEGETABLES circulate. Start cooking with a cold oven unless the preheating is recommended in the below Set the temperature to 95 °C. table.
- Page 36 Example: The total time of this cook‐ ing session is 40 min. First, put in VEGETABLES Boiled potatoes, quartered, after 20 min add Salmon fillets and Broccoli, florets after 30 min. (min) 20 - 30 Snow peas / Kaiser pep‐...
- Page 37 ENGLISH SIDE DISHES / ACCOMPANI‐ FISH MENTS (min) (°C) (min) 20 - 25 Semolina pudding, milk / Thin fish fillet 75 - 80 15 - semolina ratio 3.5:1 20 - 30 Lentils, red, water / lentils Prawns, fresh 75 - 85 20 - ratio 1:1 25 - 30 Spaetzle...
- Page 38 11.11 Combining function: Turbo Grilling + Full Steam MEAT You can combine these functions to cook meat, vegetables and side dishes at one time. 1. Set the function: Turbo Grilling to (°C) (min) roast meat. Tafelspitz 110 - 2. Add the prepared vegetables and side dishes.
- Page 39 ENGLISH 11.12 Humidity High Use the second shelf position. Use the second shelf position. (°C) (min) (°C) (min) Stewed / 140 - 150 100 - Braised meat Thin fish fillet 15 - 25 Baked eggs 90 - 110 15 - 30 11.14 Humidity Low Small fish, up 20 - 30...
- Page 40 Mix 0.25 kg of yogurt with 1 l of milk. Fill it in yogurt jars. If you use raw milk, boil it first and let it cool down to 40 °C. (°C) (min) Duck, 1.5 - 2 kg 70 - 90...
- Page 41 ENGLISH Baking results Possible cause Remedy The cake is too dry. The oven temperature is Next time set higher oven tem‐ too low. perature. The baking time is too Next time set shorter baking long. time. The cake bakes un‐ The oven temperature is Set lower oven temperature and evenly.
- Page 42 CAKES / PASTRIES / BREADS ON BAKING TRAYS Preheat the empty oven unless specified otherwise. (°C) (min) Plaited bread / Conventional 170 - 190 30 - 40 Bread crown, pre‐ Cooking heating is not needed Christstollen Conventional 160 - 180...
- Page 43 ENGLISH BISCUITS Use the third shelf position. (°C) (min) Short pastry / Sponge True Fan Cooking 150 - 160 15 - 25 cake mixture Meringues True Fan Cooking 80 - 100 120 - 150 Macaroons True Fan Cooking 100 - 120 30 - 50 Yeast dough biscuits True Fan Cooking...
- Page 44 CAKES / PASTRIES / BISCUITS BREADS ON BAKING TRAYS (°C) (min) (°C) (min) Rolls 20 - Cream puffs / Eclairs, 160 - 25 - preheat the empty oven 11.22 Tips on Roasting Dry streusel cake 150 - 30 - Use heat-resistant ovenware.
- Page 45 ENGLISH BEEF (°C) (min) Roast beef or fillet, 1 cm thick Turbo Grilling 180 - 190 6 - 8 medium, preheat the empty oven Roast beef or fillet, 1 cm thick Turbo Grilling 170 - 180 8 - 10 well done, preheat the empty oven PORK Use the function: Turbo Grilling.
- Page 46 LAMB Use the function: Turbo Grilling. (kg) (°C) (min) Lamb leg / Roast 1 - 1.5 150 - 170 100 - 120 lamb Lamb saddle 1 - 1.5 160 - 180 40 - 60 GAME (kg) (°C) (min) Saddle / Hare...
- Page 47 ENGLISH POULTRY Use the function: Turbo Grilling. (kg) (°C) (min) Turkey 4 - 6 140 - 160 150 - 240 FISH (kg) (°C) (min) Whole fish 1 - 1.5 Turbo Grilling 180 - 200 30 - 50 11.24 Bread Baking Preheating is not recommended.
- Page 48 11.25 Crispy baking with Pizza Setting PIZZA Use the first shelf position. (°C) (min) Tarts 180 - 200 40 - 55 Spinach flan 160 - 180 45 - 60 Quiche lorraine / Swiss flan 170 - 190 45 - 55...
- Page 49 ENGLISH GRILL (°C) (min) (min) 1st side 2nd side Roast beef 210 - 230 30 - 40 30 - 40 Beef fillet 20 - 30 20 - 30 Pork loin 210 - 230 30 - 40 30 - 40 Veal loin 210 - 230 30 - 40 30 - 40...
- Page 50 4. Select the function: Slow Cooking. 5. After 10 minutes, the oven You can set the temperature automatically lowers the temperature between 80 °C and 150 °C for the to 80 °C. first 10 minutes. The default is 90 °C.
- Page 51 ENGLISH Put no more than six one-litre preserve jars on the baking tray. Fill the jars equally and close with a VEGETABLES clamp. The jars cannot touch each other. Put approximately 1/2 litre of water into (min) (min) the baking tray to give sufficient moisture Cooking Continue in the oven.
- Page 52 FRUIT FRUIT Set the temperature to 60 - 70 Set the temperature to 60 - 70 °C. °C. Plums 8 - 10 Apple slices 6 - 8 Apricots 8 - 10 Pears 6 - 9 11.31 Food Sensor BEEF Food core temperature (°C)
- Page 53 ENGLISH MUTTON / LAMB Food core temperature (°C) Less Medium More Mutton leg Mutton saddle Roast lamb / Lamb leg GAME Food core temperature (°C) Less Medium More Hare saddle / Venison saddle Hare leg / Hare, whole / Venison POULTRY Food core temperature (°C) Less...
- Page 54 CASSEROLES - SAVOU‐ Food core temperature (°C) Less Medium More Cannelloni / Lasagne / Pasta bake CASSEROLES - SWEET Food core temperature (°C) Less Medium More White bread casserole with / without fruit / Rice porridge cas‐ serole with / without fruit / Sweet noodle casserole 11.32 Moist Fan Baking -...
- Page 55 ENGLISH (°C) (min) Moussaka 170 - 190 70 - 95 Lasagne 180 - 200 75 - 90 Cannelloni 180 - 200 70 - 85 Bread pudding 190 - 200 55 - 70 Rice pudding 170 - 190 45 - 60 Apple cake, made of sponge cake mix‐...
- Page 56 BAKING ON ONE LEVEL. Biscuits Use the third shelf position. (°C) (min) Short bread / Pastry True Fan Cooking 25 - 40 strips Short bread / Pastry Conventional Cook‐ 20 - 30 strips, preheat the empty ing / Top / Bottom...
- Page 57 ENGLISH GRILL Preheat the empty oven for 5 minutes. Grill with the maximum temperature setting. (min) Toast Grilling 1 - 3 Beef steak, turn halfway Grilling 24 - 30 through FAST GRILLING Preheat the empty oven for 3 minutes. Grill with the maximum temperature setting. Use the fourth shelf position.
-
Page 58: Care And Cleaning
Set the temperature to °C. Container (min) (Gastro‐ norm) Broccoli, pre‐ 1 x 2/3perfo‐ Put the baking heat the rated tray on the empty oven first shelf po‐ sition. Broccoli, pre‐ 1 x 2/3perfo‐ max. Put the baking heat the... - Page 59 2. Choose the steam cleaning function You can buy our products at in the menu: Cleaning. www.electrolux.com/shop and at the best Steam Cleaning - the duration of the retailer shops. function is around 30 minutes. a) Turn on the function.
- Page 60 You can get maximum effects of the cleaning function if you manually clean the oven immediately after the function ends. 12.5 Cleaning Reminder When reminder is displayed cleaning is necessary. Use the function Steam Cleaning Plus. You can enable / disable the function: Cleaning Reminder in the menu: Basic Settings.
- Page 61 ENGLISH Make sure there is no remaining 2. Fill the water drawer with fresh water. cleaning solution inside the water 3. Activate the function. drawer. Remove the baking tray after the end of 8. Insert the water drawer. the procedure. 9.
-
Page 62: Troubleshooting
The top lamp 1. Turn the lamp glass cover to remove 9. Clean the glass panel with water and soap. Dry the glass panel carefully. When the cleaning is completed, do the above steps in the opposite sequence. 2. Remove the metal ring and clean the Install the smaller panel first, then the glass cover. - Page 63 ENGLISH Problem Possible cause Remedy The oven does not heat The necessary settings are Make sure that the settings not set. are correct. The oven does not heat The Child Lock is on. Refer to "Using the Child Lock". The oven does not heat The fuse is blown.
- Page 64 Problem Possible cause Remedy There is no water inside You did not fill the water Check if the a descaling the grill- / roasting pan af‐ drawer to the maximum agent / water is present in ter the descaling proce‐...
-
Page 65: Energy Efficiency
ENGLISH We recommend that you write the data here: Model (MOD.) ......... Product number (PNC) ......... Serial number (S.N.) ......... 14. ENERGY EFFICIENCY 14.1 Energy saving cooking time is longer than 30 minutes, the heating elements automatically The appliance contains deactivate earlier in some oven features which help you functions. - Page 66 www.electrolux.com...
- Page 67 ENGLISH...
- Page 68 www.electrolux.com/shop...
Need help?
Do you have a question about the EOB9956XAX and is the answer not in the manual?
Questions and answers