Table of Contents
Advertisement
Advertisement
Table of Contents

Subscribe to Our Youtube Channel
Related Manuals for REVV Generator 100 P


Summary of Contents for REVV Generator 100 P
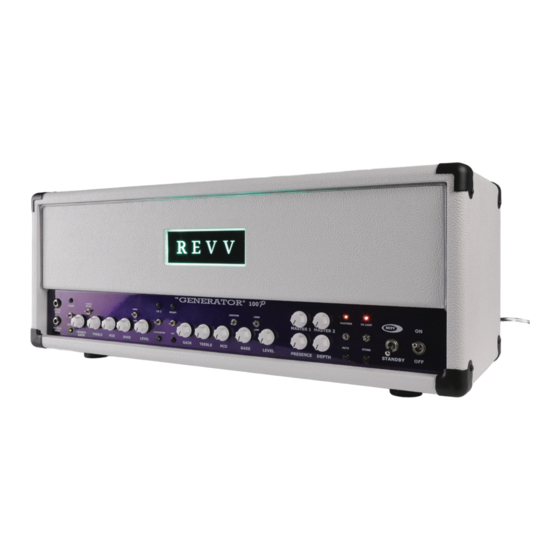
- Page 1 Owner’s Manual Generator 100(P) Revv Owner’s Manual - 1...
- Page 2 INTRO Congratulations and welcome to the Revv family! Thank you for trusting Revv Amplification with such an important part of your musical endeavors. Enjoy tone, durability, and ease of use designed to inspire. Please note that this manual applies to both our Generator 100 & Gen- erator 100P amplifiers.
-
Page 3: Table Of Contents
— — MIDI channel setting — 31-32 — MIDI program change — 32-33 — MIDI controllable functions — — Revv Generator 100w continuous controller — 34-35 commands (CC) — foot switch — — hook up — — control mode —... -
Page 4: Safety Instructions & Warnings
Do not use 2 pole prevent loss of hearing or hearing extension or power cords to supply damage. power to this amplifier. • Keep away from children. Revv Owner’s Manual - 4... - Page 5 & power up Only keep your Revv in a dry place that keeps 6” of space between the rear and any other objects. Tubes produce heat, and anything flammable should be kept away. First, make sure that the power and standby switches are in the off (down) positions.
-
Page 6: Front Panel Layout
The passive input jack is to be used with guitars that have passive pick- ups & require high impedance for proper signal transfer. This jack is designed to get the strongest signal from a passive pickup to the first tube stage. Revv Owner’s Manual - 6... -
Page 7: Channel One (Clean)
10 watts for a more broken up sound with the Output Power Switch. Channel output power is independent so you can use this to control both tone & volume separately from the gain channel. Revv Owner’s Manual - 7... -
Page 8: Channel One (Crunch)
& go from there. Crunch Gain is an independent knob used only for this mode & will go from “just barely more than clean” to quite a bit of distortion. Revv Owner’s Manual - 8... -
Page 9: Channel Two
& can result in everything from broken up rock tones to metal rhythm tones & lead tones. These aggression levels can be cycled through both by repeatedly pressing the designated momentary toggle switch & by repeatedly pressing the Channel #2 footswitch. Revv Owner’s Manual - 9... - Page 10 All else being equal this will result in a more broken up oldschool sound, compared against letting the preamp take care of much of the gain in the higher headroom 100w mode. Revv Owner’s Manual - 10...
-
Page 11: Master Volume Controls
Master volume #2 control is in use when the red “masters” LED is on. The controls can be toggled via the front panel “masters” toggle switch, the footswitch button #4 (or programmed bank) or a MIDI device. Revv Owner’s Manual - 11... -
Page 12: Presence & Depth
Note: Lowering the bass control on the three channels & increasing the depth control is also another means of experimenting with the Genera- tor’s voicing. Revv Owner’s Manual - 12... -
Page 13: Function Controls
The Red LED is illuminated when master #2 is in use & not illuminated when master #1 is in use. B - Mute Switch Mute totally silences the amp & is useful in many situations as an alterna- tive to the standby switch. Revv Owner’s Manual - 13... - Page 14 The FX Loop LED will flash & immediately turn the loop on. Now whenever you turn the amplifier on, the FX loop will also be on & ready to be put in & out of the signal path as you wish. Revv Owner’s Manual - 14...
-
Page 15: Standby & Power Switch
First turn on the power switch & wait one minute to allow the tubes to warm up. Turn on the standby switch to the Revv position once you are ready to play. Note: NEVER power up the amplifier without the proper speaker load connected! Revv Owner’s Manual - 15... -
Page 16: Rear Panel Layout
Always replace them with the same type & rating only! Always unplug the amplifier from the mains before replacing the fuses. Fuse requirements are marked on the rear panel of the amplifi- Revv Owner’s Manual - 16... -
Page 17: Bias Test Points
For example, if the speaker cabinet is 8 ohms, set the amplifier to 4 ohms, & if the speaker cabinet is 16 ohms, set the amplifier to 8 ohms. Revv Owner’s Manual - 17... -
Page 18: Impedance & Speaker Jacks
Most rigs will not utilize more than 2 cabinets so we won’t go beyond 2 cabinets here. Revv Owner’s Manual - 18... - Page 19 Note: Depending on the power tubes used, this amplifier can supply 180 watts+ of power to the speakers at high volumes, so it is important to be sure your cabinet can handle that kind of power, especially when running KT88/6550 type tubes. Revv Owner’s Manual - 19...
-
Page 20: Fx Loop Connections
MIDI Connections The MIDI IN connection is for external equipment connections when your rig necessitates control of your Revv with third party gear. The MIDI through jack allows for connection of additional MIDI devices in your signal chain in addition to your Revv. - Page 21 Revv speaker cabinets each have an illuminated up logo which is pow- ered from the cab lighting jack on Revv amplifiers. This is a 4 pin DIN jack that should be connected to the 4 pin DIN jack of a Revv speaker cabinet only.
-
Page 22: Serial Effects Loop
This means you can either turn it on using the front control, or set the amplifier to always turn on the effect loop at startup, as above. Revv Owner’s Manual - 22... -
Page 23: Send Level Control
In order to put the effects loop into the signal path, it needs to be turned on first (See 4.1). The effects loop, once turned on, can be put in & taken out of the guitar signal path in a few ways: Revv Owner’s Manual - 23... -
Page 24: Fx Loop Hookup
Adjust each channel’s level control to your liking & set your send level control & master volume as above. Note: If you hear no sound - your effects loop level control knob is proba- bly set at zero! Revv Owner’s Manual - 24... -
Page 25: Tubes & Bias
Note: The tubes listed above are guaranteed to bias correctly & sound good in the amplifier, but if you are an experienced technician other tubes can be experimented with as well. 6550, KT77, KT66, 5881 can be equipped, with care. Revv Owner’s Manual - 25... -
Page 26: Power Tube Sockets & Tube Type
The power tubes can be biased without taking the chassis out of the wood head shell. You will need a voltmeter or digital multimeter set to the lowest DC voltage range. (Make sure you refer to the meter’s user manual). Revv Owner’s Manual - 26... - Page 27 & return to step 3. If everything checks out, move on to the next steps of setting the bias. If it is still blowing fuses, a tube is at fault. Try a different pair. Revv Owner’s Manual - 27...
-
Page 28: Set The Bias
Running the tubes on the higher end of the range will shorten the tubes expected life. Type KT88 EL34 6L6GC Safe Range 90mV - 115mV 60mV - 85mV 80mV - 100mV Recommended set point 105mV 75mV 90mV Revv Owner’s Manual - 28... -
Page 29: Midi
MIDI Versatile & optional MIDI control helps Revv amps seamlessly integrate into any rig. The amplifier will store up to 128 programs for program change commands as well as accept Continuous Controller (CC) commands to control functions directly. The amplifier also features OMNI mode to allow control options on 16 channels, &... -
Page 30: Omni Mode
5) You can do this with just our footswitch, or not at all, if you choose. External equipment just becomes more beneficial when integrating your Revv with additional pieces of a rig such as effects units. OMNI Mode OMNI mode off will allow the amplifier to be controlled via a designated channel (1-16), &... -
Page 31: Midi Channel Setting
As you press the switch you will notice the other Channel LEDs turn on as you increase the MIDI channel number. Once you reach the channel you desire, press the STORE switch to save it to memory. Revv Owner’s Manual - 31... -
Page 32: Midi Program Change
4) Once the command is received, the amplifier will save the current amp configuration to that program number. The Store LED will flash 3 times & turn off verifying that the command has been received & saved. Revv Owner’s Manual - 32... -
Page 33: Midi Controllable Functions
CC command will switch any one of the functions listed above, independent from any of the others. The CC command functions are great for things like instant access buttons on foot pedals etc. Revv Owner’s Manual - 33... -
Page 34: Revv Generator 100W Continuous Controller
Revv Generator 100w Continuous Controller Commands (CC) In order to use CC commands, the Generator Functions have all been given a designated number & on or off setting. When using & selecting a function the number associated with the function must be used & then the setting of the function (on or off) must also be sent. - Page 35 ( 0-63 is OFF & 64-127 is ON). (Consult the Peripheral’s instruction manual) Effects Loop: 26 – (0x1A) Masters: 27 – (0x1B) Fat: 28 – (0x1C) Bright: 29 – (0x1D) Mute: 30 – (0x1E) Revv Owner’s Manual - 35...
-
Page 36: Foot Switch
The footswitch is connected to the rear of the amplifier with a shielded Ethernet cable & very rigid connectors. The amplifier & footswitch will work with any Ethernet cable should you be in a pinch, but the Revv cable is always recommended for best performance. -
Page 37: Control Mode
LED will flash. Note: Bright & Fat functions cannot be changed via the footswitch as they are considered to be an extension of the EQ. They can be saved to a bank when in Preset mode however. Revv Owner’s Manual - 37... -
Page 38: Preset Mode
Note: When a preset is set on the foot switch, it will not be lost if power is removed from the amp. The Revv footswitch has memory & will retain the settings. Each button is identical in Preset mode & will be considered banks. -
Page 39: Memory Reset
2 seconds in any mode. Once the amp is muted the LED will flash until mute is turned off. Mute can be turned off by pressing button four again & quickly releasing it. Revv Owner’s Manual - 39... -
Page 40: Amp Memory Reset (Factory Default)
CC control of all functions — OMNI functionality — 3 band EQ per channel + voicing switches — REVV tube arrangement: 5 - 12AX7, 1 - 12AT7, 4 - 6L6GC — Presence & depth control — Two master volume controls —... -
Page 41: Warranty
Amplification Inc. will not be covered by this warranty. This warranty shall not apply to repair or replacements necessitated by any cause beyond the control of Revv Amplification Inc. including, but not limited to, any mal- function, defects, or failure caused by or resulting from unauthorized ser-... - Page 42 Box 29 Ile De Chenes, MB Canada, R0A 0T0 info@revvamplification.com http://www.revvamplification.com Copyright Revv Amplification Inc. 2018...
Need help?
Do you have a question about the Generator 100 P and is the answer not in the manual?
Questions and answers