Table of Contents
Advertisement
Quick Links
Model 300F & 300SSF
Water Distillation System
Instruction Manual
Thank you for purchasing an H2oLabs Water Distillation System.
You'll soon be making the PUREST water you can drink.
PLEASE READ THIS INSTRUCTION MANUAL
for a quick, easy and enjoyable water making experience.
DO NOT DISCARD SHIPPING BOX OR STYROFOAM until all
parts are located. (Glass Carafe is shipped inside the main unit.)
© 2017 H2oLabs, Ltd.
11-04-17
Advertisement
Table of Contents

Summary of Contents for H2oLabs 300F
- Page 1 Model 300F & 300SSF Water Distillation System Instruction Manual Thank you for purchasing an H2oLabs Water Distillation System. You’ll soon be making the PUREST water you can drink. PLEASE READ THIS INSTRUCTION MANUAL for a quick, easy and enjoyable water making experience.
-
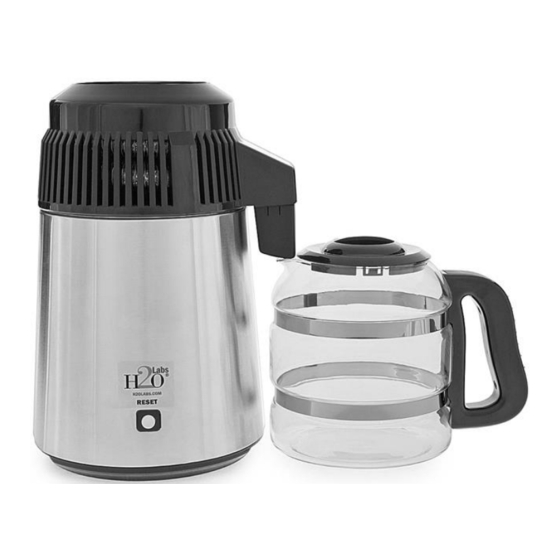
Page 2: Package Includes
Not Shown Above: Glass Collection/Serving Carafe and related parts, (Shipped inside unit.) Nozzle with Glass Insert Activated Carbon Pods (6 pack) Main Power Cord PACKAGE INCLUDES: Water Distillation Unit, (Head and Body Assemblies. See above.) Glass Carafe, (Inside unit. See Carafe Instructions before removing) Nozzle with Glass Insert, (Shipped inside Glass Carafe) Main Power Cord (Inside Styrofoam packaging) Activated Carbon Pods (6 pack) (Inside Styrofoam packaging) -
Page 3: Electrical Precautions
SAFETY INSTRUCTIONS - Read Before Operating SCALDING DANGER! ▲Do not allow children or disabled people to operate the unit or come in close proximity of it or the power cord. ▲Never remove the top of the distiller when it is on or for at least 30 minutes after it has turned off. - Page 4 Quick Start Instructions: Making your own pure distilled water is easy as 1, 2, 3! Don’t let this detailed Instruction Manual discourage you. We try to explain everything possible so there is no guess work about the best way to set up and operate your distiller. But it is actually very easy to use.
- Page 5 CARAFE ASSEMBLY INSTRUCTIONS Only tool required: Phillips, (Cross-Head) Screwdriver, (not included) Note: Please use caution when handling the glass Carafe. 1. Remove the top of the water distiller, (Head Assembly), and remove the package inside. Carefully pull out the glass Carafe. 2.
- Page 6 4. Place a towel or soft cloth on the work surface to protect the glass Carafe. There are two indentations on the Carafe body. Wrap one strap around the Carafe, placing it in the indentation. Position the strap so that the cap nut is facing towards the Carafe. Snap the other end with screw slot over the cap nut.
- Page 7 9. Tighten both screws while making sure the Handle is vertically aligned with the black reference line. Do not use excessive force. 10. Place the Carafe right side up. Viewed from inside, check to see that the Handle is aligned to the black reference line. When done correctly, the Handle will also be aligned with the spout on the opposite end.
- Page 8 13. Place the lid on the Carafe with the opening facing the Carafe spout. The Carafe is now ready to use. Always handle the glass Carafe carefully and set it GENTLY on hard surfaces as it is breakable. Since the Carafe weighs approx. 9 lbs.
- Page 9 3. Wash the Boiling Chamber using a couple drops of dish soap and a little warm water. Swab the interior of the Boiling Chamber with a regular soft sponge and then rinse and dry well. Never use abrasive detergent cleaners, metal brushes or metal scouring pads. And to protect the electrical components, never submerge the Main Body or Head Assembly in water.
- Page 10 INCORRECT CORRECT 4. When a new Activated Carbon Pod is to be used for the first time, dip it in a cup of distilled water several times to remove the dust. The activated carbon, (charcoal made from coconut shells), is harmless. To install the Activated Carbon Pod, simply drop it into the Nozzle.
- Page 11 8. Press the Reset Button to begin the cycle. The unit will automatically shut off after the process has completed. Enjoy your PURE WATER! PURE WATER, (like all good things), takes time. You’ve heard of Instant Coffee and Instant Tea. It might do if you are in a hurry, but it just won’t be as good as if it were freshly brewed.
-
Page 12: Break-In Period
Unlike water filters that begin deteriorating with the very first use, and continue to get worse as additional water is filtered, pure water made with H2oLabs systems just gets BETTER and BETTER with each cycle. To expedite the break-in process, it is recommended to clean the boiling tank after each use with a Scotch-Brite™... -
Page 13: Maintenance
(or Scotch-Brite™, etc.), and rinse out. Difficult residue may require periodic use of a safe water scale cleaner such as that supplied with the unit or available at H2oLabs.co.uk. 6. Fill the unit after cleaning in order to prepare for the next cycle. - Page 14 The Activated Carbon Pod helps to reduce any noticeable taste or residual gases. Replace the Activated Carbon Pod every 30 to 60 days, or whenever there is any noticeable taste or odor. To replace the Pod, press the middle tabs on each side of the nozzle and TILT it out of the slots.
-
Page 15: Troubleshooting
TROUBLE SHOOTING (Visit www.H2oLabs.co.uk for additional Trouble Shooting Guidance.) Fan does not come on or unit is not making any water: -Fan power cord not plugged firmly into the bottom socket of the unit. -
Page 16: Specifications
Power Source: AC 230V 50/60Hz; Consumption: 580W (Total) The H2oLabs Countertop Water Distillation System will provide your household with THE PUREST WATER POSSIBLE and it’s made fresh every day to taste great. To order Activated Carbon Pods, Cleaning Crystals, Parts and Accessories, or for information on High Capacity Automatic Units and other helpful products or information ...
Need help?
Do you have a question about the 300F and is the answer not in the manual?
Questions and answers