Table of Contents
Advertisement
Advertisement
Table of Contents

Subscribe to Our Youtube Channel
Summary of Contents for Ozito LTR-300
-
Page 2: Specifications
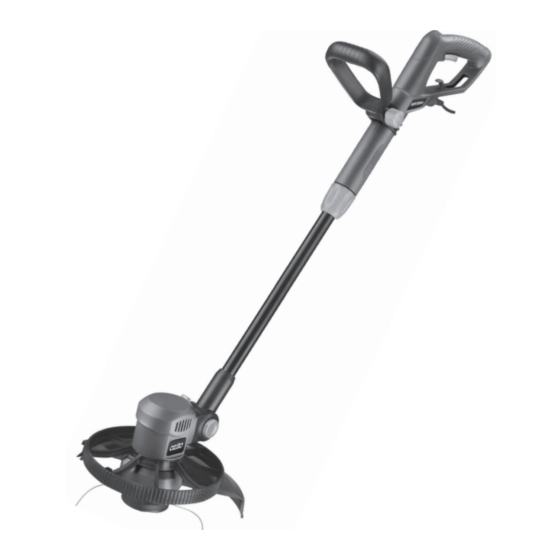
SPECIFICATIONS - MODEL NO. LTR-300 Motor: 500W Input: 230-240V ~ 50Hz No load speed: 11,000/min Cutting diameter: 300mm Line diameter: 1.5mm x 4.5m Feed type: Semi-Automatic Weight (tool only): 2.7kg KNOW YOUR PRODUCT 1. Main Handle 7. Safety Guard 2. On/Off Switch 8. -
Page 3: Table Of Contents
TABLE OF CONTENTS SPECIFICATIONS ……………………………………….. Page 2 INTRODUCTION………………………………………… Page 4 ELECTRICAL SAFETY…………….……………………… Page 4 GENERAL SAFETY WARNINGS………………………… Page 5 LINE TRIMMER SAFETY WARNINGS …………………. Page 7 ASSEMBLY……………………………………………….. Page 9 OPERATION……………………………………………… Page 10 MAINTENANCE…………….…………………………… Page 12 SPARE PARTS …………….……………………………... Page 14 DESCRIPTION OF SYMBOLS …………………………. -
Page 4: Introduction
The electric motor has been designed for 230V and 240V only. Always check that the power supply corresponds to the voltage on the rating plate. Note: The supply of 230V and 240V on Ozito tools are interchangeable for Australia and New Zealand. -
Page 5: General Safety Warnings
GENERAL POWER TOOL SAFETY WARNINGS WARNING! Read all safety warnings and all instructions. Failure to follow the warnings and instructions may result in electric shock, fire and/or serious injury. Save all warnings and instructions for future reference. The term “power tool" in all of the warnings refers to your mains-operated (corded) power tool or battery-operated (cordless) power tool. - Page 6 GENERAL POWER TOOL SAFETY WARNINGS d) Remove any adjusting key or wrench before turning the power tool on. A wrench or a key left attached to a rotating part of the power tool may result in personal injury. e) Do not overreach. Keep proper footing and balance at all times. This enables better control of the power tool in unexpected situations.
-
Page 7: Line Trimmer Safety Warnings
LINE TRIMMER SAFETY WARNINGS Hold power tool by insulated gripping surfaces, when performing an operation where the cutting accessory may contact hidden wiring or its own cord. Cutting accessory contacting a "live" wire may make exposed metal parts of the power tool "live“... - Page 8 LINE TRIMMER SAFETY WARNINGS (cont.) • Disconnect the line trimmer from the mains before carrying out maintenance or cleaning work. • Inspect and maintain the line trimmer regularly. Have the line trimmer repaired only by an authorized repairer. • Take care against injury from the blade(s) fitted for trimming the cutting line length.
-
Page 9: Assembly
ASSEMBLY WARNING! Before assembly, make sure that the line trimmer is switched off and unplugged . Fitting the edging wheel 1. Align both halves of the edging wheel (8) onto the line trimmer housing as shown (Fig. 1). Align Align Fig. -
Page 10: Operation
OPERATION Preparing the line trimmer for use WARNING! The line trimmer runs for a few seconds after it has been switched off. Let the motor come to a complete standstill before setting the tool down. Telescopic shaft adjustment (Fig. 6) 1. - Page 11 OPERATION (cont.) Edging mode (Fig. 11) WARNING! Before making this change, make sure that line trimmer is switched off and unplugged. In order to use the line trimmer as an edger, adjust as follows: 1. Push the rotating head button (10) on the motor housing, then rotate the housing to the edging position.
-
Page 12: Maintenance
WARNING! Before making this change, make sure that line trimmer is switched OFF and unplugged. Fig. 12a Fig. 12b Replacement spool & line can be purchased from your local Bunnings store. The Ozito ACCLT-05 spool & line is compatible with the LTR-300 line trimmer. - Page 13 MAINTENANCE (cont.) 1. Turn your line trimmer upside down. 2. Depress both tabs (e) on both sides of the spool housing and remove the spool cover (a) from the spool housing (c). 3. Remove the empty spool (f) from the spool housing (c). 4.
-
Page 14: Spare Parts
Never let any liquid get inside the tool; never immerse any part of the tool into a liquid. Note: Ozito Industries will not be responsible for any damage or injuries caused by the repair of the tool by an unauthorised person or by mishandling of the tool. -
Page 15: Pack Contents
2 x Screws ST4.2x15 (for fitting guard) 1 x Instruction Manual 1 x Spool & Line (fitted) 1 x Edging Wheel OZITO INDUSTRIES PTY LTD AUSTRALIA (Head Office) 1 - 23 Letcon Drive, Bangholme, Victoria, Australia 3175 Telephone: 1800 069 486 Facsimile: +61 3 9238 5588 Website: www.ozito.com.au... -
Page 16: Warranty
PURCHASED FROM: ________________________________________________ DATE PURCHASED: ________________________________________________ 2 YEAR REPLACEMENT WARRANTY Your Ozito tool is guaranteed for a period of 24 months from the ORIGINAL date of purchase under the following conditions: Professional, industrial or high frequency use will VOID this warranty.


Need help?
Do you have a question about the LTR-300 and is the answer not in the manual?
Questions and answers