Advertisement
Quick Links
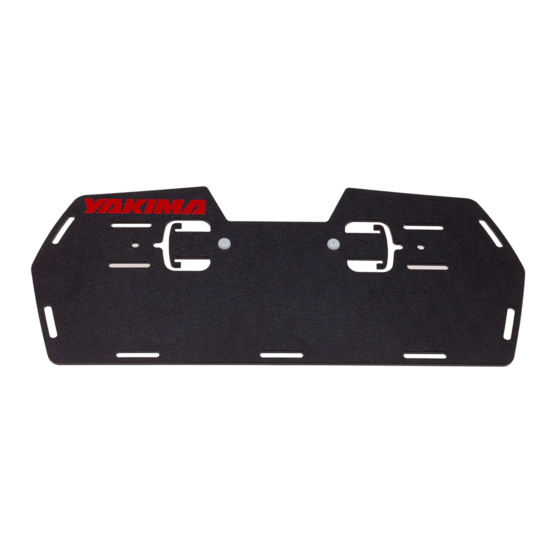
PlateMate Installation
FIRST TIME INSTALLATION
• Please read instructions carefully before installation.
• Check the contents of kit. Contact your YAKIMA
dealer if any parts appear missing or damaged.
• Place these instructions in the vehicle's glove box
after installation is complete.
KIT CONTENTS
1
ITEM COMPONENT QTY
1.
Back Plate
2.
Knurled Nuts
3.
Screws
4.
Velcro Straps
1
INSERT VELCRO STRAPS
Take x2 Velcro Straps and
thread through the front of
PlateMate as shown.
Pull Velcro Straps completely
through as shown.
6100003124-Rev2
®
3
2
4
x1
x2
x2
x3
NOTE:
Strap configuration
shown is for Yakima
HoldUp.
PlateMate can
also be attached
to other carriers
using the other slot
combinations.
2
POSITION NUMBER PLATE
Position your number plate onto the
PlateMate. Using the x2 Screws,
line up the Screws through slots
in your number plate with the
appropriate holes in PlateMate.
3
SECURE NUMBER PLATE
Turn PlateMate over carefully
ensuring that the screws don't
fall out. Spin the Knurled
Nuts onto screw threads.
Finger tighten nuts until number
plate is secure on PlateMate.
6100003124-Rev2
Advertisement

Related Manuals for Yakima PlateMate


Summary of Contents for Yakima PlateMate
- Page 1 • Please read instructions carefully before installation. appropriate holes in PlateMate. • Check the contents of kit. Contact your YAKIMA dealer if any parts appear missing or damaged. • Place these instructions in the vehicle’s glove box after installation is complete.
- Page 2 2x Velcro Straps as shown below. The remaining Velcro Strap can be threaded through one of the lower slots in PlateMate to prevent swinging if you opt to attach PlateMate to the rearmost bicycle on the carrier.
Need help?
Do you have a question about the PlateMate and is the answer not in the manual?
Questions and answers