Table of Contents
Advertisement
Quick Links
Advertisement
Table of Contents

Summary of Contents for ICON XDJ
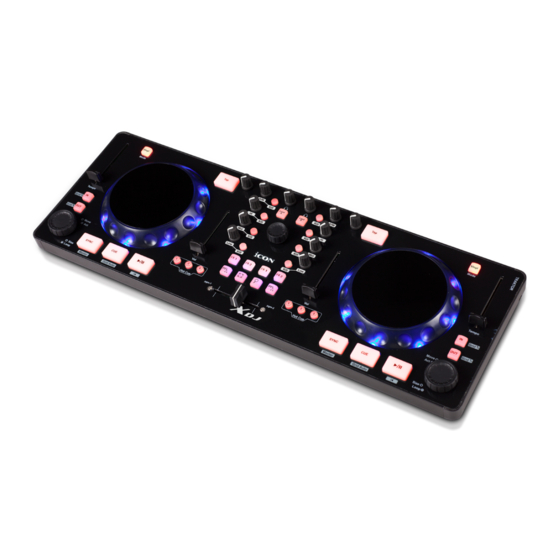
- Page 1 USB MIDI DJ Controller with OptiSen optical scratch wheels...
- Page 2 Important Safety Instructions 1. Read this manual thoroughly before using this unit. 2. Keep this manual for future reference. 3. Take notice of and comply with all warnings included in the user's manual or indicated on the appliance. 4. Follow all instructions included in this manual. 5.
-
Page 3: Table Of Contents
Contents Introductions .....................4 What's in the package? ................4 Register your ICON ProAudio product to your personal account ...5 Features ....................6 Front Panel Layout ...................7 Side Panel Layout ..................10 Getting Started ..................11 Connecting your XDJ controller .............. 11 For Deckadance (with Template) ............12 For Traktor (with Template) ..............13... -
Page 4: Introductions
In these pages, you'll find a detailed description of the features of the XDJ digital audio interface, as well as a guided tour through its front and rear panels, step-by- step instructions for their setup and use, and full specifications. -
Page 5: Register Your Icon Proaudio Product To Your Personal Account
Register your ICON ProAudio product to your personal account 1. Check serial number of your device Please go to http:// iconproaudio.com/registration or scan the QR code below. Input your device’s serial number and the other information on the screen. Click “Submit”. -
Page 6: Features
● All controls including faders, knobs & buttons are assignable on some DJ software (except Mode & Shift buttons) ● Bundled with Deckadance 2 LE ICON edition ● Perfectly match with MacBook Pro ● Compatible with Windows XP, Vista, Windows 7, Windows 8 (32-bit/64-bit), and Mac OS X (Intel) ●... -
Page 7: Front Panel Layout
Front Panel Layout Note: The following descriptions on different controls are based on Deckadance 2 software. Different DJ software may need user’s self setup or software compatibility support, and controls may work differently in other software. 1. Touch-sensitive scratch wheel with high resolution pulse sensor The scratch wheel is constructed with high resolution pulse sensor with touch- sensitive and non-sensitive elements. - Page 8 Adjust the crossfader curve Activate the “Shift” button and press down the “Song Selection” encoder (i.e. the centre encoder), and the two buttons “A” & “B” should stay light. Then slide the crossfader to your preferred cross point. This would be your “A” cross point and “B”...
- Page 9 10. Control buttons Please refer to the following table for the button functions. Button Function Loop (when you end looping playback resumes from end of loop) IN + Shift Gross Beat Slot 1 Leap (when you end looping playback resumes from where it would have been without looping) OUT + Shift Gross Beat Slot 2...
-
Page 10: Side Panel Layout
Side Panel Layout 1. USB port (B-Type) Functions as a MIDI port to your notebook (or computer) and compatible software. Also provides power to your XDJ. -
Page 11: Getting Started
To avoid all hassles to set the midi mapping for your DJ software. We have created preset templates on some DJ software. By importing this template to your DJ software, your XDJ is ready to use immediately. Also, we will update and create more templates for different DJ software. Please check our official website for updates. -
Page 12: For Deckadance (With Template)
For Deckadance (with Template) Behringer_cmd_micro.c iCON_XDJ.c iCON_XDJ(ModifiedByJMC).c numark_mixtrack_pro_ii.c Vestax_spin.c... -
Page 13: For Traktor (With Template)
For Traktor (with Template) xdj_V1.01.tsi... -
Page 14: Firmware Upgrade
Firmware upgrade Step 1: Connect the ICON product using a USB connection. Press the “MIDI Device” button at the top to select your connected ICON product as the “MIDI In and Out” device at the pull-down menu. Note: If your connected ICON product model name does not appear on the pull-down menu, select “USB Audio”... -
Page 15: Specifications
Specifications Connector: To computer ......... USB connector (mini B type) Power supply ..........USB bus power Current consumption ........100mA or less Weight ............2119g Dimensions ............. 524(L) X 180(W) X 40(H) ............. 20.63"(L) x 7.09"(W) x 1.57"(H) - Page 16 Pack the unit in its original packaging including end card and box. This is very important. If you have lost the packaging, please make sure you have packed the unit properly. ICON is not responsible for any damage that occurs due to non-factory packing.
Need help?
Do you have a question about the XDJ and is the answer not in the manual?
Questions and answers