Table of Contents
Advertisement
Quick Links
MotionProtect Outdoor User Manual
MotionProtect Outdoor is a wireless outdoor motion detector for the Ajax security
system. The detector communicates with the hub via protected
protocol at a distance up to 1,700 meters in the line of sight. MotionProtect
Outdoor features protection against blocking the detector view (anti-masking
system) and triggering by pets (pet immunity). The motion detection distance is
adjustable: from 3 up to 15 meters.
MotionProtect Outdoor can operate both on pre-installed batteries or use an
external power supply. Depending on the detector settings, the batteries' life is up
to 5 years.
MotionProtect Outdoor does not support connection via the
integration modules.
Updated April 13, 2021
Jeweller
radio
ocBridge Plus
and
uartBridge
Advertisement
Table of Contents

Related Manuals for AJAX Systems MotionProtect Outdoor


Summary of Contents for AJAX Systems MotionProtect Outdoor
- Page 1 MotionProtect Outdoor User Manual Updated April 13, 2021 MotionProtect Outdoor is a wireless outdoor motion detector for the Ajax security system. The detector communicates with the hub via protected Jeweller radio protocol at a distance up to 1,700 meters in the line of sight. MotionProtect Outdoor features protection against blocking the detector view (anti-masking system) and triggering by pets (pet immunity).
-
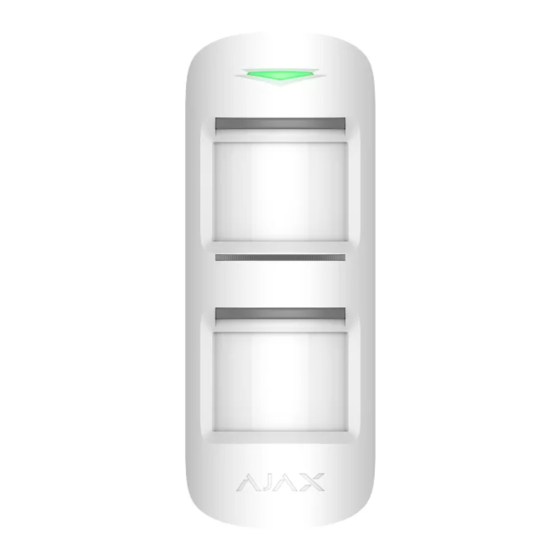
Page 2: Functional Elements
SMS, and calls (if activated). The Ajax security system can be connected to a central monitoring station of a security company. Buy outdoor motion detector MotionProtect Outdoor Functional Elements 1. Main light indicator 2. Upper light indicator and masking sensor 3. -
Page 3: Operating Principle
PIR sensors. If both sensors detect identical motion, MotionProtect Outdoor instantly transmits an alarm signal to the hub and blinks with a green LED. MotionProtect Outdoor ignores animals, birds, insects, as well as swaying plants and trees. By a motion alarm, the security system also can activate sirens and notify a security company if connected. - Page 4 If one or more types of masking are detected, the detector generates a masking alarm and lights up a green LED for 1 second. MotionProtect Outdoor detects masking regardless of the security state: armed or disarmed. Response time to masking...
- Page 5 lenses Pasting or painting any of the lenses Pasting the detector front side Applying aerosol or painting the detector front side with paint Connecting Before starting connection: 1. Following the hub user guide, install the Ajax app . Create the account, add the hub, and create at least one room.
- Page 6 3. Select Add — the countdown will begin. 4. Switch on the device by pressing the on/off button for 3 seconds. For the detection and interfacing to occur, the detector should be located within the coverage area of the wireless network of the hub (at a single protected object). Request for connection to the hub is transmitted for a short time at the time of switching on the device.
- Page 7 MotionProtect Outdoor, and then follow the standard addition procedure. If the connection to the hub failed, repeat the connection attempt after 30 seconds. The device connected to the hub will appear in the list of devices of the hub in the app.
- Page 8 Displays the status of using the ReX range Routed Through ReX extender Displays the status of using the external power External Power supply Sensitivity level of the motion detector: low, Sensitivity normal, high Anti-masking Has the anti-masking option been enabled When turned on, the motion detector always Always Active detects movement...
- Page 9 First �eld Detector name, can be edited Selecting the virtual room to which the device is Room assigned Delay when entering, sec Selecting delay time when entering Delay when leaving, sec Delay period after the security system is armed When enabled, the detector will experience a Delays in night mode delay in the night mode When turned on, the detector will switch to armed...
- Page 10 is enabled) Switches the detector to the signal fade test Attenuation test mode (available in detectors with �rmware version 3.50 and later) Allows the user to disconnect the device without removing it from the system. Two options are available: Deactivate entirely — the device will not execute system commands or participate in automation scenarios, and the system will ignore device alarms and other noti�cations...
-
Page 11: Functionality Testing
Pressing the power button (detector is switched Lights up red while the button is held down Switching on Lights up green while the device is switching on Switching off Initially lights up red, then blinks three times Turned-on detector indication Event Indication Note... - Page 12 Choosing an installation place Before installing the detector, conduct the Jeweller signal strength test. Install MotionProtect Outdoor at the height of 0.8 – 1.3 m, ensuring the upper lens axis to be parallel to the ground, and the supposed intrusion path is perpendicular to the lens axis.
- Page 13 Do not install the detector: Without Hood for MotionProtect Outdoor in a place without a covering. Opposite the trees whose leaves can be in the detection zone of the upper and lower PIR sensors of the detector.
- Page 14 Why motion detectors react to animals and how to avoid it Install detector at a height 0.8 to 1.3 meters so that its upper lens looks parallel to the ground. If the site is uneven, the installation height is considered from the highest point of the territory controlled by the detector.
- Page 15 2. Select the motion detection distance (3 to 15 m) using the adjustment scroll bar.
- Page 16 5. If all tests have been appropriately passed, �x the SmartBracket to the surface with screws permanently, put MotionProtect Outdoor on the attachment panel, and wait until the end of calibration. Fix the detector on the attachment panel...
- Page 17 MotionProtect Outdoor can use external power supply 5-28 V DC, 200 mA. If the external power supply is connected, there is no need to remove the pre-installed batteries. Batteries provide the detector with the backup power source. To connect the external power supply: 1.
- Page 18 3. Terminal strips on the detector board 4. The clamp on the back of the detector body 5. Switch on the power supply. The value of the External Power Supply �eld in the detector settings will change to Connected. Use grounded power supply source only! 6.
-
Page 19: Hood Installation
Buy Hood for MotionProtect Outdoor Hood for MotionProtect Outdoor can be mounted even on a detector that is already installed. You don’t need to detach the device from the surface for installing the hood. To install Hood for MotionProtect Outdoor: 1. - Page 20 Adjustable, 3–15 m when the detector is Motion detection distance installed at 1 m height Protection against masking Yes, height up to 80 cm when the detector is installed at 1 m height Pet ignoring function Why motion detectors react to animals and how to avoid it >...
-
Page 21: Warranty
4. Installation kit 5. Quick Start Guide Warranty Warranty for the “AJAX SYSTEMS MANUFACTURING” LIMITED LIABILITY COMPANY products is valid for 2 years after the purchase and does not apply to the pre-installed battery. If the device does not work correctly, you should �rst contact the support service—...
Need help?
Do you have a question about the MotionProtect Outdoor and is the answer not in the manual?
Questions and answers