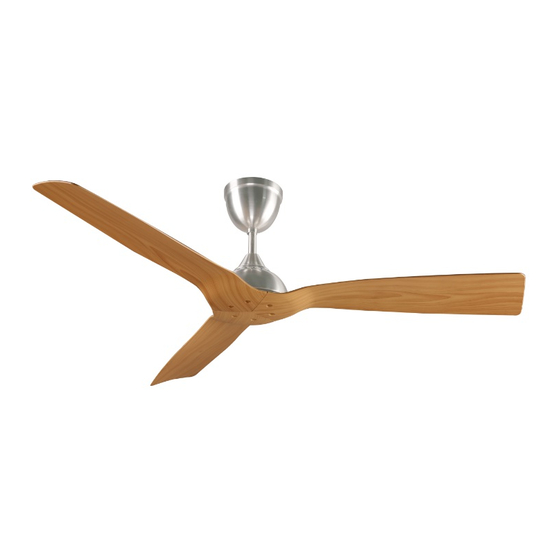
Summary of Contents for Fiamma Rubine RCF-PRESTO52-3B Series
- Page 1 用户手册...
- Page 2 KUANTITI NG KUSA 零件 数量 螺丝包 数量 x 1 set HANGING BALANCING KIT/ 平衡包 SET PENGIMBANGAN/ 吊杆 RECEIVER / 叶片螺丝 SKRU BILAH/ KUNCI ALLEN/内六角扳手 接头罩 风扇电机 风扇叶片 REMOTE / 遥控器 RF / /遥控器墙座 PEMEGANG ALAT KAWALAN JAUH POWER TURBO Sleep VOLTAGE VOLTAN 风扇寸数...
- Page 3 INSTRUCTION SEBELUM MENGENDALIKAN SILA BACA BUKU PANDUAN INI DENGAN TELITI DEMI KESELAMATAN 1) Do not bend the blade holders during installation, blades balancing or fa n cleaning. Dilarang membengkokkan bilah kipas semasa pemasangan, pengimbangan ataupun pembersihan kipas siling. must be disconnected before installation, d ismantling, maintenance or cleaning.
- Page 4 1) Please do not install the ceiling fan at high humidity areas. Elakkan kipas dipasang di kawasan yang berminyak atau lembap. 请不要 2) Distance between fan blades and ground must be at least 2.5 meter and above. Jarak antara bilah kipas dengan lantai mestilah lebih daripada 2.5 meter. 面...
- Page 5 STEP 1 (See Diagram 1) LANGKAH 1 (Rujuk Gambar 1) 骤 1(图 1) 1) Before installation, remove the rubber wheel from both side of the hanging tube. Sebelum pemasangan, keluarkan roda getah, plug plastik dan semua skru / bolt dari kedua-dua belah rod besi. 在...
- Page 6 骤3 /Langkah 3(Rujuk gambar 3) 3) Step 3 (Refer diagram 3) Place the rubber wheel onto the ceiling U-hook and Masukkan roda getah pada cangkuk-U dan pasang semula bolt, pin-R, nat, sesendal pegas dan sesendal spring seperti rajah dibawah. AMARAN: Pin-R mestilah dipasang untuk mengelakkan nat menjadi longgar. 。...
- Page 7 /Langkah 5(Rujuk gambar 5) 5) Step 5 (Refer diagram 5) / 骤5 Tie the safety cable across the U-hook as shown. Ikatkan dawai keselamatan menembusi cangkuk-U seperti rajah dibawah. Diagram 5 Gambar 5 图例 5 6) Step 6 (Refer diagram ) /Langkah 6(Rujuk gambar 6) / 骤6 Firmly screw the safety cable with flat washer onto the hanging tube bracket.
- Page 8 / Langkah 7 (Rujuk gambar 7) 7) Step 7 (Refer diagram 7) 骤7 Join the receiver with motor wire by connector. Then join the receiver to the power supply and place the receiver into the top canopy. Hubungkaitkan alat penerima dan wayar motor dengan penyambung wayar. Kemudian cantumkan wayar alat penerima dengan bekalan kuasa dan masukkan alat penerima dalam sengkuap atas.
- Page 9 8) Step 8 (Refer diagram 8) / Langkah 8 (Rujuk gambar 8) 骤8 Slide the top canopy up then tighten the screw to secure the position. Tolakkan sengkuap atas sehingga mencecah dinding, seterusnya ketatkan skru untuk mengekalkan posisi. Diagram 8 Top canopy Gambar 8 Sengkuap atas...
-
Page 10: Remote Control
/ Alat Kawalan Remote control / 手柄操作 正面 / Depan Function of Remote / Fungsi alat kawalan 手柄功 / Untuk memadamkan kipas POWER 关 ① ③ TURBO 1--5 o switch fan speed 1 to speed 5. Pilihan kelajuan kipas ② Pilihan kelajuan maxima ④... - Page 11 Back Belakang Battery cover Penutup bateri 2 X 1.5V bateri (AAA) 1.5V 电池 2 颗 电池盖 This fan is operated using remote control. Kipas ini berfungsi dengan alat kawalan. which it is supplied. If the fan does not respond with the remote , attempt to pair the fan with following steps below.
- Page 12 Remove the battery from the remote control when left unused for extended periods. Nota 2: Keluarkan bateri dari alat kawalan, sekiranya kipas tidak diguna untuk jangka masa yang panjang. needs To change the direction of rotation ( function ), the fan Nota 3: Untuk menukar arah putaran, kipas akan mengambil masa sehingga ia berhenti sepenuhnya.
- Page 13 blade. Pastikan kipas dipasang pada jarak bilah kipas dengan lantai melebihi 2.5m dan jarak bilah kipas dari dinding melebihi 米。...


Need help?
Do you have a question about the Rubine RCF-PRESTO52-3B Series and is the answer not in the manual?
Questions and answers