
Related Manuals for Huion KAMVAS 22 Plus


Summary of Contents for Huion KAMVAS 22 Plus
- Page 1 KAMVAS 22 Plus GS2202 User Manual Benutzerhandbuch Manuel d' utilisateur ユーザーマニュアル Manuale d' uso Manual de Usuario...
-
Page 2: Table Of Contents
GS2202 Contents 1 / Precautions ...........................3 2 / Product Overview ........................4 2.1 Display Introduction ..........................4 2.2 Product and Accessories ........................4 2.3 Setting Up Display ............................8 2.4 Install Driver ..............................8 3 / Pen Basic Operation ........................9 3.1 Hold the Pen ..............................9 3.2 Position the Cursor ............................9 3.3 Click ................................ -
Page 3: Precautions
GS2202 / Precautions 【 Please read this manual carefully before using, and keep it well for future reference. 】 --Before cleaning the display, please unplug the USB cable and wipe with a soft damp cloth, do not use any kind of detergents. --Please don't place the display near water sources such as bathtub, washbasin, sinks, washing machine, damp basement, swimming pool, etc. -
Page 4: Product Overview
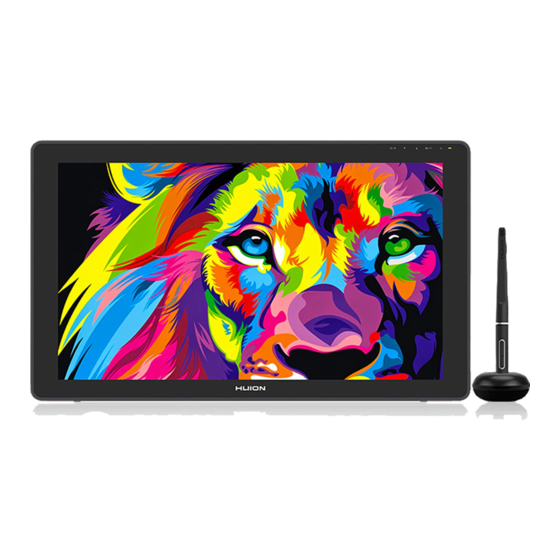
/ Product Overview 2.1 Display Introduction ® ® Thanks for choosing HUION KAMVAS 22 Plus creative display. This is a new generation of desktop-level professional drawing display, which can greatly improve your work efficiency of painting and creation, and full of fun. You can freely paint and write, depicting different lines and colors, just as the pen writes on the paper, which brings you a real shock experience. - Page 5 GS2202 2.2.1 Accessories Battery-free pen Replacement Nibs Pen Holder Cleaning Cloth (inside the pen holder) 3-in-1 Cable Power Adapter Power Cable USB-C Cable Warranty Card Quick Start Guide Pen Nib Clip (inside the pen holder) 2.2.2 Adjustable Stand We designed this ergonomic adjustable stand specially for your KAMVAS display, you can adjust the angle of the display according to your usage habit, and make you feel more comfortable when painting and creating.
-
Page 6: Setting Up Display
GS2202 2.3 Setting Up Display [1] Take out the pen display and stand from the package, then assemble the stand to the back of the display with attached screwdriver according to the following instruction. Adjust the stand angle by dragging this switch [2] Connect the pen display to your computer with 3-in-1 Cable or USB-C to USB-C Cable. - Page 7 GS2202 2) Connect the display to your computer with USB-C to USB-C cable; Connect the power adapter to the power cable.
-
Page 8: Install Driver
Windows 7 or later, macOS 10.12 or later. 2.4.2 Install Driver Please download the driver from our website: www.huion.com/download After finishing installation, you can find the driver icon " " in the system tray area, which means the driver was installed successfully; when you connect the display to computer, the icon will change to color "... -
Page 9: Pen Basic Operation
GS2202 / Pen Basic Operation 3.1 Hold the pen Hold the pen as you hold a normal pen or pencil. Adjust your grip so that you can toggle the side switch easily with your thumb or forefinger. Be careful not to accidentally press the switch while drawing or positioning with the pen. -
Page 10: Click
GS2202 3.3 Click Use the pen tip to tap once on the screen to register a click. Tap to highlight or select an item on the screen and double-click to open it. 3.4 Move Select the object, then slide the pen tip across the screen to move it. 3.5 Use the side buttons The buttons on the pen can be set to two different customizable functions. -
Page 11: Pen Nib Replacement
GS2202 3.6 Pen Nib Replacement The nib will be worn off after using for a long time, then you need to replace a new nib. [1] Anticlockwise rotate the pen holder to open the cover, take a new nib out. [2] Insert the pen nib into the pen nib clip and tilt the pen to pull out the old nib. -
Page 12: Function Setting
GS2202 / Function Setting 5.1 Working Area Setting 5.1.1 Using Multiple Monitors Select the Working Area tab to define the relationship between pen movement on the display and cursor movement on the monitor screen. By default the entire active area of display maps to the entire monitor. If more than one monitor is in use and you are in extended mode, you need to choose the related monitor on the driver interface which you are going to map to. - Page 13 GS2202 ① ② ③ 5.1.3 Rotate Working Area By changing the direction of the display to adapt to the left and right hand operation. You can rotate the display by 0°, 90°, 180° or 270°.
-
Page 14: Display Setting
GS2202 5.2 Display Setting Click the " " in the upper right corner of the driver to set the Display, including General settings, Hotkeys and Updates. 5.2.1 General settings Add App: Shortcut key function can be set by adding different programs. When opening different programs, the driver will automatically recognize that the shortcut function is the corresponding function set. - Page 15 GS2202 5.2.2 Hotkeys settings Set the shortcut key to quickly open the driver interface. The default value is Ctrl+Alt+H, which can be set according to usage habits. 5.2.3 Updates You can view the driver version number, click "Check for Update", view the latest driver version, and update according to the system prompt.
-
Page 16: Pen Buttons Function Setting
GS2202 5.3 Pen Buttons Function Setting Select the function to be achieved on the pop-up dialog box, then click "Apply" or "OK" to take effect. 5.4 Enable the Windows Ink Feature Microsoft Windows provides extensive support for pen input. Pen features are supported in such as Microsoft Office, Windows Journal, Adobe Photoshop CC, SketchBook 6 and so... -
Page 17: Pressure Sensitivity Setting
GS2202 5.5 Pressure Sensitivity Setting The pressure sensitivity will be changed by dragging the slider up and down, the smaller the value, the more pressure sensitive. Drag upward (left): the pressure change is more obvious, small pressure produces a great pressure. -
Page 18: Pen Pressure Testing
GS2202 5.6 Pen Pressure Testing You can gradually apply pressure to the stylus on the screen to test the pressure level. Click " " button to clear all the ink. 5.7 Pen Nib Activity Setting The pen nibs can be set to be Active/Inactive as needed.Click the drop-down option to select, and click OK again to save the Settings. -
Page 19: Data Export And Import
GS2202 5.8 Data Export and Import The driver supports exporting and importing your custom configuration data of the product, which is convenient for you to use different software and avoid the trouble of repeated settings. -
Page 20: Specifications
GS2202 / Specifications Model GS2202 Panel Size 21.5 inches Resolution 1920 x 1080 (16:9) LCD Type Active Area 476.64 x 268.11mm Contrast Ratio 1200:1 Screen Brightness 220cd/m2 Response Time 14ms 89°/89° (H) /89°/89° (V) (Typ.) (CR > 10) View Angle Gamut 140% sRGB Display Color... -
Page 21: Trouble Shooting
GS2202 / Trouble Shooting 7.1 Possible Breakdowns Related to DISPLAY Abnormal Phenomena Possible Solutions 1. Make sure power is on. Power indicator does not flash 2. Check the socket and power cable. 1. Make sure power is on. 2. Correctly connect the cables. 3. - Page 22 GS2202 Abnormal Phenomena Possible Solutions 1. It is because you are under extended mode right now. It is a normal situation. 2. If you are not familiar with extended mode, we recommend you to use in Duplicate/Mirror mode. Windows OS: Press keyboard Displays wallpaper &...
- Page 23 There is no pressure in the software when installing the driver. Please uninstall all drivers and graphics software but the close the drawing software, then reinstall the Huion driver. It's better cursor moves to restart your computer after finishing the installation.
-
Page 24: After-Service Contact
GS2202 After-service Contact SHENZHEN HUION ANIMATION TECHNOLOGY CO., LTD. Bldg 28, Quarter 4, HuaiDeCuiGang Industrial Park, Fuyong Street, Bao'an District, Shenzhen, 518106, China +86-755-32998548 www.huion.com www.facebook.com/huion service@huion.com huion-skype https://twitter.com/HuionTab... - Page 25 GS2202 Inhalt 1 / Vorsichtsmaßnahmen ......................27 2 / Produktübersicht........................28 2.1 Einführung in das Display ........................29 2.2 Produkt und Zubehör..........................29 2.3 Einstellen des Displays .......................... 30 2.4 Treiber installation ........................... 31 3 / Grundlegende Verwendung des Stifts ................32 3.1 Den Stift halten ............................32 3.2 ZeigerpositionierungPosition the cursor ..................
-
Page 26: Vorsichtsmaßnahmen
GS2202 / Vorsichtsmaßnahmen 【 Bitte lesen Sie diese Anleitung vor der ersten Verwendung, und bewahren Sie es zur späteren Verwendung auf. 】 --Entfernen Sie das USB-Kabel, bevor Sie das Display mit einem weichen, feuchten Tuch reinigen. Verwenden Sie keine Reinigungsmittel. --Vermeiden Sie es, das Gerät in der Nähe von Wasserquellen wie Badewannen, Waschbecken, Spülbecken, Waschmaschinen, feuchten Kellern, Schwimmbecken usw. -
Page 27: Produktübersicht
/ ProduktübersichtProduct Overview 2.1 Einführung in das Display ® ® Wir danken Ihnen, dass Sie sich für das kreative HUION KAMVAS 22 Plus Display entschieden haben. Es ist Teil einer neuen Generation professioneller Zeichnen-Display mit Desktop-Qualität, welche ihre Arbeitseffizienz und künstlerische Kreativität deutlich erhöhen kann und dazu auch einfach Spaß... - Page 28 GS2202 2.2.1 Zubehör Stiftspitzen Digitaler Stift Stifthalter Reinigungstuch (Innerhalb des Stifthalters) 3-in-1-Kabel Netzadapter Netzkabel USB-C Kabel Schnellanleitung Spitzenclip Garantiekarte (Innerhalb des Stifthalters) 2.2.2 Display ständer Dieser Ständer wurde speziell für das KAMVAS-Display entwickelt. Sie können den Winkel des Displays frei nach ihren Nutzungsgewohnheiten justieren um komfortabel Zeichnen und ihre Kreativität ausleben zu können.
-
Page 29: Einstellen Des Displays
GS2202 2.3 Einstellen des Displays [1] Nehmen Sie den Stift-Display und den Ständer aus der Verpackung, und befestigen Sie den Ständer mit dem beigefügten Schraubendreher nach der folgenden Anleitung auf der. Stellen Sie den Standwinkel ein, indem Sie diesen Schalter ziehen [2] Schließen Sie den Stift- Monitor mit einem 3-in-1-Kabel oder einem USB 3.1 GEN1- Kabel(muss separat erworben werden) an Ihren Computer an. - Page 30 GS2202 2) Verbinden Sie das Display mit einem USB 3.1 GEN1 Kabel mit dem Computer; Schließen Sie den Adapter an das Kabel an.
-
Page 31: Treiberinstallation
Windows 7 oder neuer, Mac OS 10.12 oder neuer. 2.4.2 Installieren der Treiber Laden Sie bitte die Treiber von unserer Webseite herunter: www.huion.com/de/download Nach der Installation finden sie das Treiber-Icon " " im grauen Systembereich. Das bedeutet, dass der Treiber erfolgreich installiert wurde. Wenn Sie das Display an den Computer anschließen, verändert sich die Farbe des icons "... -
Page 32: Grundlegende Verwendung Des Stifts
GS2202 / Grundlegende Verwendung des 3.1 Den Stift halten Halten Sie den Stift wie jeden anderen gewöhnlichen Stift. Halten Sie den Stift so, dass Sie den Schalter an der Seite mit Ihrem Daumen oder Zeigefinger erreichen können. Achten Sie darauf, dass Sie nicht unabsichtlich beim Zeichnen oder Ansetzen den Schalter betätigen. -
Page 33: Klicken
GS2202 3.3 Klicken Verwenden Sie die Spitze des Stifts um den Bildschirm anzutippen um einen Klick zu registrieren. Tippen Sie ein Mal um etwas anzuwählen oder Text zu markieren und zwei Mal um etwas zu öffnen. 3.4 Bewegung Wählen Sie ein Objekt aus und ziehen Sie die Stiftspitze über den Bildschirm um es zu bewegen. -
Page 34: Ersetzen Von Stiftspiten
GS2202 3.6 Ersetzen von Stiftspiten Die Stiftspitze nutzt sich über längere Zeit ab. Sie muss gelegentlich ersetzt werden. [1] Rotieren Sie den Stifthalter gegen den Uhrzeigersinn um ihn zu öffnen. Nehmen Sie eine neue Stiftspitze heraus. [2] Führen Sie die alte Stiftspitze in die Öffnung auf der Unterseite des Stifthalters ein und neigen Sie den Stift um die alte Spitze zu entfernen. -
Page 35: Funktionseinstellungen
GS2202 / Funktionseinstellungen 4.1 Einstellungen zum Arbeitsbereich 4.1.1 Verwendung von mehreren Monitoren Öffnen Sie den Arbeitsbereich-Tab, um die Beziehung zwischen den Bewegungen des Stifts auf dem Display und den Zeigerbewegungen auf dem Monitor zu definieren. Als Standardeinstellung deckt die aktive Region des Display den gesamten Monitor ab. Falls Sie mehr als einen Monitor verwenden, und das Bild auf einen weiteren Monitor erweitern, müssen Sie in der Treiberoberfläche den Bildschirm auswählen, auf dem Sie Ihre Zeigerbewegungen registrieren möchten. - Page 36 GS2202 ① ② ③ 4.1.3 Rotation des Arbeitsbereichs Die Ausrichtung des Display kann geändert werden, um es links- oder rechtshändig zu verwenden. Sie können das Display in den Schritten 0°, 90°, 180° oder 270° rotieren.
-
Page 37: Einstellungen Für Die Funktionen Der Stifttasten
GS2202 4.2 Einstellungen für die Funktionen der Stifttasten Wählen Sie die gewünschte Funktion in der pop-up Dialogbox und klicken Sie auf "Anwenden" oder "OK" um sie zu übernehmen. Nützlich 4.3 Windows Ink aktivieren Microsoft Windows bietet erweiterte Unterstützung für Stift-Input. Ihr Stift wird in Programmen wie Microsoft Office, Windows Journal, Adobe Photoshop CC, Sketch Book 6 und so weiter unterstützt. -
Page 38: Einstellungen Zur Drucksensitivität
GS2202 4.4 Einstellungen zur Drucksensitivität Die Drucksensitivität kann mit der Leiste geändert werden. Je kleiner der Wert, desto sensitiver der Stift. Nützlich Nach oben ziehen (links): Druck wird offensichtlicher, geringer Druck wird zu großem Druck Nach unten ziehen (rechts): Druck wird abgeschwächt, auch großer Druck verursacht nur geringen Druck. -
Page 39: Stiftdrucktest
GS2202 4.5 Stiftdrucktest Sie können nach und nach den Druck Ihres Stifts auf den Bildschirm erhöhen um das Druckniveau zu testen. Klicken Sie auf die " " Schaltfläche um die Tinte zu entfernen. Nützlich 4.6 Exportieren und Importieren Der Treiber unterstützt das Exportieren und Importieren Ihrer benutzerdefinierten Konfigurationsdaten des Produkts, was für Sie bequem ist, um verschiedene Software zu verwenden und die Probleme wiederholter Einstellungen zu vermeiden. -
Page 40: Spezifikationen
GS2202 / Spezifikationen Modell GS2202 Panelgröße 21.5 Zoll Auflösung 1920 x 1080 (16:9) LCD-Typ Aktive Fläche 476.64 x 268.11mm Kontrastverhälts 1200:1 Bildschirm Helligkeit 220 cd/m2 Reaktionszeit 14ms Blickwinkel 89°/89° (H) /89°/89° (V) (Typ.) (CR >10) Farbtiefe 140% sRGB Displayfarben 16.7M (8bit) Touch Type Passive Electromagnetic Resonance Auflösung... -
Page 41: Problemlösungen
GS2202 / Problemlösungen 6.1 Mögliche Probleme mit dem DISPLAY Abnormale Phänomene Mögliche Lösungen 1. Stellen Sie sicher, dass das Gerät angeschaltet ist. Stromleuchte blinkt nicht 2. Überprüfen Sie den Anschluss und das Stromkabel 1. Stellen Sie sicher, dass das Gerät angeschaltet ist. 2. - Page 42 GS2202 Abnormale Phänomene Mögliche Lösungen 1. Ihr Bildschirm befindet sich im Erweiterungsmodus. Das ist normal. 2. Wenn Sie sich nicht mit dem Erweiterungsmodus auskennen, empfehlen wir Ihnen, den Verdoppelungs-/Spiegelmodus zu Hintergrundbild und verwenden. Windows: Drücken Sie die Tastenkombination Taskbar werden nur auf "Windows + P"...
- Page 43 GS2202 6.2 Mögliche Probleme mit FUNKTIONEN Abnormale Phänomene Mögliche Lösungen Sie haben möglicherweise andere Displaytreiber installiert oder Es gibt keinen Druck in während der Treiberinstallation ein Grafikprogramm geöffnet. der Grafiksoftware, Deinstallieren Sie die Treiber, schließen Sie ihr Grafikprogramm aber der Mauszeiger und installieren Sie die Treiber erneut.
-
Page 44: After-Service-Kontakt
GS2202 After-Service-Kontakt SHENZHEN HUION ANIMATION TECHNOLOGY CO., LTD. +86-755-32998548 www.huion.com www.facebook.com/huion service@huion.com huion-skype https://twitter.com/HuionTab... - Page 45 GS2202 Sommaire 1 / Précautions ..........................47 2 / Présentation du produit ......................48 2.1 Votre appareil ............................48 2.2 Produit et accessoires ..........................49 2.3 Configuration de l'Écran ........................50 2.4 Installation des pilotes ........................... 51 3 / Utilisation du stylet ........................52 3.1 Tenue du stylet ............................
-
Page 46: Précautions
GS2202 / Précautions 【 display Veuillez lire ce manuel attentivement avant d'utiliser l' . Conservez-le pour le consulter plus tard si besoin. 】 --Avant de nettoyer la tablette, débranchez le câble USB et utilisez un chiffon doux, ne jamais utiliser de détergents. --Veuillez ne pas placer la tablette près de sources d'eau telles que baignoire, lavabo, éviers, lave- linge, sous-sol humide, piscine, etc. -
Page 47: Présentation Du Produit
/ Présentation du produit 2.1 Votre appareil ® ® Merci d' avoir choisi la tablette HUION KAMVAS 22 Plus Il s'agit d'une nouvelle génération d'écran graphique professionnelle conçue pour les ordinateurs afin d'améliorer votre efficacité lors de travaux de dessins, cela de manière ludique. Vous pourrez écrire et dessiner en utilisant les différents styles et couleurs de la même manière que si vous... - Page 48 GS2202 2.2.1 Accessoires Stylet Pointes de rechange Porte stylet Chiffon de Nettoyage Câble USB-C Câble 3-in-1 Adaptateur Câble Alimentation Électrique Guide Carte de Garantie Remplace pointe 2.2.2 Support réglable Nous avons conçu ce support réglable spécialement pour la KAMVAS. Vous pouvez régler l'angle en fonction de vos habitudes et besoin d'utilisation pour améliorer votre confort quand vous dessinez.
-
Page 49: Configuration De L'écran
GS2202 2.3 Configuration de l'Écran [1] Retirez l'écran et le support de l'emballage, puis fixez le support à l'arrière de l'écran avec le tournevis fourni selon les instructions suivantes. Ajustez l'angle de position en faisant glisser la commande [2] Connecter la tablette graphique à votre ordinateur avec Câble 3-in-1 ou Câble USB 3.1 GEN1. - Page 50 GS2202 2) Connectez la Tablette Graphique à votre ordinateur avec câble USB 3.1 GEN1; Connectez l'adaptateur d'alimentation au câble d'alimentation.
-
Page 51: Installation Des Pilotes
Windows 7 ou supérieur, macOS 10.12 ou supérieur. 2.4.2 Installation des pilotes Merci de télécharger les pilotes depuis notre site web : www.huion.com/fr/download Une fois l'installation terminée, vous retrouverez l'icône " " dans la barre d'état du système, cela indique que les pilotes ont été correctement installés. Lorsque vous connectez l' tablette, l'icône change de couleur "... -
Page 52: Utilisation Du Stylet
GS2202 / Utilisation du stylet 3.1 Tenue du stylet Tenez le stylet comme vous tiendrez un stylo normal. Ajustez la tenue afin de pouvoir facilement accéder avec votre pouce aux boutons latéraux. Faites attention de ne pas être gêné par ces boutons et de les actionner accidentellement lors de l'utilisation. A noter : Lorsque vous n'utilisez pas le stylet, rangez le dans son étui ou sur votre bureau. -
Page 53: Clic
GS2202 3.3 Clic Utilisez le stylet en appuyant sur l'écran pour réaliser un clic. Cliquez pour effectuer une sélection à l'écran, double cliquez pour l'ouvrir. 3.4 Mouvement Sélectionner un objet et glissez-le à l'écran en bougeant le stylet. 3.5 Utilisation des boutons latéraux Les boutons latéraux du stylet peuvent être réglés avec 2 fonctions personnalisables. -
Page 54: Remplacement De La Point Du Stylet
GS2202 3.6 Remplacement de la point du stylet Après de nombreuses utilisations la pointe s'usera et il sera nécessaire de la remplacer. [1] Tournez dans le sens inverse des aiguilles d'une montre le couvercle du porte style pour l'ouvrir et prenez une nouvelle pointe. [2] Insérez la pointe du stylo dans le trou du bas du support, et inclinez le stylo pour retirer l'ancienne pointe. -
Page 55: Réglages Des Fonctions
GS2202 / Réglages des fonctions 4.1 Réglage de l'espace de travail 4.1.1 Utilisation de plusieurs écrans Sélectionner l'onglet Zone de travail pour établir le lien entre le mouvement du stylet et l'affichage du mouvement du curseur à l'écran. Par défaut toute la zone active d'affichage correspond à tout l'écran. Si vous utilisez plusieurs écrans et que vous êtes en mode étendu vous devez choisir le moniteur associé... - Page 56 GS2202 ① ② ③ 4.1.3 Rotation de la zone de travail En tournant la tablette il est possible d'adapter la rotation de l'affichage. Vous pouvez faire une rotation de 0°, 90°, 180° ou 270°rotieren.
-
Page 57: Réglage Du Bouton Du Stylet
GS2202 4.2 Réglage du bouton du stylet Sélectionnez la fonction que vous souhaitez attribuer et valider par "Appliquer" ou par "OK". Active 4.3 Activer la fonction Windows Ink Microsoft Windows permet une prise en charge de la saisie au stylet. Les fonctions de stylet sont supportées dans les logiciels tels que Microsoft Office, Windows Journal, Adobe Photoshop CC, SketchBook 6 etc... -
Page 58: Réglage De La Sensibilité De La Pression
GS2202 4.4 Réglage de la sensibilité de la pression La sensibilité de la pression du stylet peut être changée en ajustant via le curseur sa valeur. Plus la valeur est petite, plus la pression sera sensible. Active Faire glisser vers le haut (gauche): le changement de pression est plus prononcé : une petite pression produit une grande pression. -
Page 59: Test De La Pression Du Stylet
GS2202 4.5 Test de la pression du stylet Vous pourrez progressivement augmenter la pression sur le stylet pour tester son niveau de sensibilité. Cliquez sur " " pour tout effacer. Active 4.6 Export et import des données Les pilotes permettent l'export et l'import de vos paramétrages de l' tablette. Cela permet de conserver ces réglages et les rétablir facilement. -
Page 60: Caractéristiques
GS2202 / Caractéristiques Modèle GS2202 Taille d'écran 21.5 pouces Résolution 1920 x 1080 (16:9) Type d'écran Zone tactile 476.64 x 268.11mm Ratio du contraste 1200:1 Écran Luminosité 220 cd/m2 Temps de réponse 14ms 89°/89° (H) /89°/89° (V) (Typ.) (CR > Angle de vision Gamme de couleur 140% sRGB... -
Page 61: Dépannages
GS2202 / Dépannages 6.1 Pannes possibles de l'appareil Cause Solution possible 1. Assurez-vous que l'appareil est allumé. Voyant d'alimentation ne clignote pas 2. Vérifiez le câble et le chargeur 1. Assurez-vous que l'appareil est allumé. 2. Vérifiez les branchements des câbles. 3. - Page 62 GS2202 Cause Solution possible 1. Vous êtes en mode étendu et c'est normal. 2. Si vous n'êtes pas familier avec le mode étendu nous vous conseillons d'utiliser le mode miroir. Windows : Touche Windows + P puis choisir "Dupliquer" Mac OS: Affichage uniquement du fond d'écran et de la barre Préférences système, affichage, arrangement, choisir...
- Page 63 GS2202 6.2 Pannes logicielles possibles Cause Solution possible Vous avez peut être installé les mauvais pilotes ou ouvert un logiciel Le curseur se déplace de dessin pendant l'installation. mais la pression n'est Veuillez désinstaller tous les pilotes, fermer les logiciels de dessin pas détectée puis réinstaller le pilote.
-
Page 64: Contacts Après Vente
GS2202 Contacts après vente SHENZHEN HUION ANIMATION TECHNOLOGY CO., LTD. +86-755-32998548 www.huion.com www.facebook.com/huion service@huion.com huion-skype https://twitter.com/HuionTab... - Page 65 GS2202 目次 1 / 安全上のご注意 ...........................67 2 / 前書き ............................68 2.1 製品の特徴 ..............................69 2.2 各部のなまえとはたらき ........................69 2.3 ディスプレイの設定 ..........................70 2.4 ドライバーをインストールする ......................71 3 / ペンの基本操作 ...........................72 3.1 ペンの持ち方 ............................. 72 3.2 カーソルの移動 ............................72 3.3 クリック ..............................73 3.4 アイテムの移動...
-
Page 66: 安全上のご注意
GS2202 / 安全上のご注意 【 このたびはお買い上げいただき , 誠にありがとうございました。ご使用前に本書をよくお読みの うえ , 正しくお使いください。読み終わったらいつでも見られるところに大切に保管してください】 ・本製品は精密電子機器です。修理に必要な資格を有しない人が分解・改造・修理を 行うこと は禁止されています。誤って製品を傷つけたり損傷した場合 , 発火 , 火災 , 発熱 , 破裂 , 感電 , けが の原因となります。点検・調整・修理はお買い上げの販売店にご依頼ください。 ・ディスプレイを掃除する前に , USB ケーブルを外し , 柔らかい布で拭いてください。洗剤は使 用しないでください。 ・本製品は防水ではありません。水に濡らしたり , 接続端子やすき間から内部に異物や液体を入 れないでください。ショートによる故障だけでなく , 火災や感電の原因となります。 ・浴槽 , 洗面台 , 流し台 , 洗濯機の近く , 湿気の多い地下室やプールなど , 水の近くに置かないで ください。火災... -
Page 67: 前書き
GS2202 / 前書き 2.1 製品の特徴 この度は HUION 22 Plus クリエーティブディスプレイーをお買い上げいただき ® ® KAMVAS 誠にありがとうございます。本機は描画性能とを兼ね備えた新世代のプロフェッショナル ペンディスプレイイです。まるで紙に描いているかのような自然な描き心地で , 思いのま まに作業できることを目指しました。 製品を正しくお使いいただくために , 本書をよくお読みいただき使用上の注意に従って正 しくお使いください。本書では Windows での使用について記載しています。特に指定が ない限り , 本書の内容は Windows および MacOS の両方に適用されます。 2.2 各部のなまえとはたらき... - Page 68 GS2202 2.2.1 付属品を確認する スタイラスペン 交換用ペン先 ペンホルダー クリーニングクロス ( ペンホルダー内蔵 ) 3-in-1 ケーブル 電源アダプター USB-C ケーブル 電源ケーブル クイックスタ 保証書 ペン先クリップ ートガイド ( ペンホルダー内蔵 ) 2.2.2 ディスプレースタンド KAMVAS ペンディスプレイ専用設計のディスプレースタンドです。ユーザーの環境に合わ せ , 調節して使用することができます。 20°-80°...
-
Page 69: ディスプレイの設定
GS2202 2.3 ディスプレイの設定 [1] ペンディスプレイとスタンドをパッケージから取り出し , 付属のドライバーを使用し てスタンド をペンディスプレイの背面に固定します。 このスイッチを引っ張って スタンドの角度を調節します [2] 3in1 ケーブルまたは USB-C ケーブル(別途購入する必要があります)を使用して、 ペンタブレットと PC を接続します。 1) 3-in-1 ケーブルで接続する ; 電源アダプタを電源ケーブルに接続。... - Page 70 GS2202 2) USB 3.1 GEN1 ケーブルで接続する ; 電源アダプタを電源ケーブルに接続。...
-
Page 71: ドライバーをインストールする
エアを閉じてください。 2.4.3 ドライバーの設定 イ ン ス ト ー ル 完 了 後 , アイ コ ン を ダ ブ ル ク リ ッ ク し て ド ラ イ バ ー ソ フ ト[ Huion Display ]を起動し付属のケーブルでペンタブレットイを接続します。 ペンタブレットイを接続すると , ウインドウ左下のメッセージが「未接続」から「接続... -
Page 72: ペンの基本操作
GS2202 / ペンの基本操作 3.1 ペンの持ち方 鉛筆などと同じようにペンを持ちます。サイドスイッチを親指や人差し指で無理なく押せ るよう位置を調節してください。使用中に不用意にスイッチを押さないようご注意くださ い。 ご注意 : 使用しないときはペンをペンホルダーに置くか , ペンディスプレイイから離してください。 スクリーン上に置いたり近づけたままにしておくと , 他のポインターデバイスの誤作動の 原因になります。またスリープモードへの移行ができない場合があります。 3.2 カーソルの移動 スクリーンに触れないよう , ペン先を少し浮かせたままアクティブエリア上を移動させる と , カーソルはペンの動きに合わせて移動します。 ツールやアイテムを選ぶにはペン先で画面を1回タップするか , スクリーンを強めに押し て選択します。... -
Page 73: クリック
GS2202 3.3 クリック ペン先で画面を1回タップするとクリック操作を行います。アイテムをハイライトまたは 選択して , ダブルタップしてアイテムを開きます。 3.4 アイテムの移動 アイテムを選択したままペン先を移動させます。 3.5 サイドボタンを使用する サイドボタンには2つの異なる機能を割り当てることができます。 割り当てた機能を使うには , ペン先をスクリーンから 10mm 以内に保持した状態でサイ ドボタンを押します。ペン先がスクリーンに触れていない状態で使用します。... -
Page 74: 替え芯をセットする
GS2202 3.6 替え芯をセットする ペン先は長期間使用すると摩耗します。傷んできたら替え芯を新しいものに交換して ください。 [1] ペンホルダーを反時計回りに回転させてカバーを開き , 新しい替え芯を取り出しま す。 [2] 替え芯をホルダーの底の穴に挿し込み , ペンを傾けて古い芯を抜きます。 [3] 新しい替え芯にペンを挿し込み , 止まるまでゆっくりとしっかりと押し込みます。 交換用ペン先 ペン先クリップ... -
Page 75: 機能設定
GS2202 / 機能設定 4.1 作業領域の設定 4.1.1 マルチモニター設定 [ 作業領域 ] タブを選択し , ディスプレイイ上のペンの動きとモニター上のカーソルの動き を調整します。 デフォルトでは , ディスプレイイのアクティブエリア全体がモニター全体に割り当てられ ています。マルチモニター使用時で拡張モードの場合 , 連動するモニターを選択する必要 があります。 モニターが複製モードの場合 ( すべてのモニターに同じ映像を表示 ), ディスプレイイは各 モニターと連動し , カーソルを各モニターに表示します。 4.1.2 作業領域の設定 画面に対する作業領域を定義します。 [1] 全ての領域 : ディスプレイイのアクティブエリア全体を使用します。デフォルト設定で す。 [2] 画面比率 : 原則として 16:9 に設定します。 [3] カスタム領域... - Page 76 GS2202 ① ② ③ 4.1.3 作業領域の回転 ディスプレイイの方向を利き手や環境に合わせて変更します。 回転角度を 0° , 90°, 180° または 270° から選びます。...
-
Page 77: ペンのサイドボタン設定
GS2202 4.2 ペンのサイドボタン設定 ポップアップダイアログボックスから使用する機能を選択し [ 適用 ] または [ 確認 ] をク リックして有効にします。 有効 4.3 Windows Ink 機能を有効にする Microsoft Windows ではペン入力を広くサポートしています。 各機能は Microsoft Office, Windows Journal, Adobe Photoshop CC, Sketch Book 6 等に対応しています。 有効... -
Page 78: 筆圧感度を設定する
GS2202 4.4 筆圧感度を設定する スライダーを上下にドラッグして感度を調整します。値を小さくすると感度が高くなりま す。感度が高すぎる場合は値を大きくしてください。 有効 上方向にドラッグ(左) : 筆圧の変化が大きくなります。柔らかい線を描くのに向いてい ます。 下方向にドラッグ(右) : 筆圧の変化が小さくなります。シャープでな線を描くのに向い ています。 筆圧感度を初期設定に戻すには設定内の をタップします。 例 : 同じ圧力を掛けた場合でも , 筆圧感度が高めでは変化率が大きくなり(左図) , 筆圧感 度が低めだと変化率は小さくなっています ( 右図 ) 。 同じ圧力 *N 筆圧感度 1 同じ圧力 *N 筆圧感度 2... -
Page 79: 筆圧感度のテスト
GS2202 4.5 筆圧感度のテスト ペンに圧力を徐々に加えてレベルを確認します。 筆跡を消去するには「 」をクリッ クします。 有効 4.6 設定データのインポート / エクスポート 設定したデータのエクスポートとインポートができます。 これは , さまざまなソフトウェアを使用して , 繰り返し設定の問題を回避するのに便利で す。... -
Page 80: 製品の仕様
GS2201 / 製品の仕様 モデル GS2202 パネルサイズ 21.5 型 解像度 1920 x 1080 (16:9) LCD タイプ アクティブエリア 476.64 x 268.11mm コントラスト比 1200:1 スクリーン 輝度 220 cd/m2 応答速度 14ms 89° /89° (H) /89° /89° (V) (Typ.) 視野角 (CR > 10) 色域 140% sRGB 表示色... -
Page 81: トラブルシューティング
GS2201 / トラブルシューティング 6.1 ディスプレイや表示に関するトラブル 症 状 解 決 方 法 1. 電源が入っていることを確認してください。 電源インジケータランプが点 灯しない。 電源プラグが正しく接続されていることを確認してください。 1. 電源がオンになっていることを確認します。 2. ケーブルを正しく接続することを確認します。 3. ディスプレイをノートパソコン等に接続する場合は , ディスプ レイが正しいディスプレイモード ( 拡張モードまたは複製モード ) になっていることを確認してください。 何も表示されない。 4. インジケータランプが緑色に点灯しているかを確認します。緑 色でない場合は , 信号が入力されていません。コンピューターを 再起動するか , ケーブルを再接続してください。 5. ケーブルが破損または極端に曲がっていませんか?新しいケー ブルに交換してください。... - Page 82 GS2201 症 状 解 決 方 法 1. ディスプレイ設定が拡張モードになっています。正常な状態で す。 2. 拡張モードに慣れていない場合は , 複製 / ミラーモードで使用す ることをお勧めします。 Windows : 「 Windows + P 」 →「複製」 コンピューターの壁紙とタス を選択します。 クバーしか表示されない Mac OS: システム設定→ディスプレイ→配置→「ミラーディスプ レイ」を選択 3. 拡張モードで使用する場合。 ドライバーの作業領域設定でペン ディスプレイを選択してください。 通常は 「ディスプレイ 2 」 です。 ケーブルや端子が曲がったり折れたりしていないことを確認しま...
- Page 83 GS2201 6.2 機能に関するトラブル 症 状 解 決 方 法 他のディスプレイドライバーを削除しなかった , またはグラフィック ソフトウエアを実行したまま , 本機のドライバーをインストールした カーソルは動くのに筆圧感 可能性があります。 すべてのディスプレイドライバーを削除し , グラフィックソフトウエ 知が反映されない アを閉じてからもう一度ドライバーをインストールします。インス トール後はコンピューターを再起動してください。 1. 本機に付属していたペンであることを確認してください。 ペンが機能しない 2. ドライバーを正しいて順でインストールしたことを確認してくだ さい。 1. ドライバーでショートカットキーが有効になっていることを確認 してください。 キーを押しても反応がない 2. キーが正しく定義されていることを確認してください。 3. ロックスイッチが解除位置にあることを確認します。 コンピューターのスリープ ディスプレイを使用していないときは , ディスプレイの上にペンを置 モードが動作しない...
-
Page 84: お客さまご相談窓口
GS2202 お客さまご相談窓口 SHENZHEN HUION ANIMATION TECHNOLOGY CO., LTD. +86-755-32998548 www.huion.com www.facebook.com/huion service@huion.com huion-skype https://twitter.com/HuionTab... - Page 85 GS2202 Indice 1 / Precauzioni ..........................87 2 / Panoramica del prodotto ......................88 2.1 Introduzione del Display ........................88 2.2 Prodotto e Accessori ..........................89 2.3 Impostazione del Display ........................90 2.4 Installazione del Driver .......................... 91 3 / Funzionamento base della Penna ..................92 3.1 Come tenere la penna ...........................
-
Page 86: Precauzioni
GS2202 / Precauzioni 【 Leggere il manuale prima dell'uso, e conservarlo per future consultazioni. 】 -- Prima di pulire il display, scollegare il cavo USB e pulire con un panno morbido inumidito, senza utilizzare alcun tipo di detergente. --Si prega di non posizionare il display vicino a fonti d'acqua come vasca da bagno, lavandino, lavandini, lavatrice, cantina umida, piscina, ecc. -
Page 87: Panoramica Del Prodotto
/ Panoramica del Prodotto 2.1 Introduzione del Display ® ® Grazie per aver scelto il Display creativo HUION KAMVAS 22 Plus Questa è una nuova generazione di desktop Display per il disegno di livello professionale, che può migliorare notevolmente l'efficienza del lavoro di pittura e creazione in modo divertente. Puoi dipingere e scrivere liberamente, tracciando linee di colori diversi, proprio come la penna scrive sul foglio, per un'esperienza davvero sconvolgente. - Page 88 GS2202 2.2.1 Accessori Penna a stilo Pennini sostitutivi Porta penna Panno pulente (dentro il porta penna) A d a t t a t o r e d i Cavo di Cavo 3-in-1 Cavo USB-C Alimentazione Alimentazione Scheda Guida di Clip del pennino di garanzia Avvio rapido (dentro il porta penna)
-
Page 89: Impostazione Del Display
GS2202 2.3 Impostazione del Display [1] Estrarre la penna display e il piedistallo dalla confezione, quindi fissare il piedistallo al retro della penna display con il cacciavite fornito secondo le seguenti istruzioni. Regolare l'angolo del piedistallo trascinando il seguente interruttore [2] Collegare il display interattivo con la penna al computer con cavo 3-in-1 o cavo GEN1 USB 3.1 di tipo C. - Page 90 GS2202 2) Conecte la pantalla a su computadora mediante un cavo USB 3.1 GEN1 di tipo C; Conecte el adaptador de corriente con el cable de alimentación.
-
Page 91: Installazione Del Driver
Windows 7 o successivo,mac OS 10.12 o successivo. 2.4.2 Install Driver Si prega di scaricare il driver dal nostro sito Web: www.huion.com/it/download Al termine dell'installazione, è possibile trovare l'icona del driver " " nell'area grigia del sistema, il che significa che il driver è stato installato correttamente; quando si collega lo schermo al computer, l'icona diventa "... -
Page 92: Funzionamento Base Della Penna
GS2202 / Funzionamento base della Penna 3.1 Come tenere la penna Tenere la penna come si tiene una normale penna o matita. Regola la presa in modo da poter attivare facilmente l'interruttore laterale con il pollice o l'indice. Fare attenzione a non premere accidentalmente l'interruttore durante il disegno o il posizionamento con la penna. -
Page 93: Cliccare
GS2202 3.3 Cliccare Utilizzare la punta della penna e toccare una volta lo schermo per registrare un clic. Toccare per evidenziare o selezionare un elemento sullo schermo e fare doppio clic per aprirlo. 3.4 Spostare Selezionare l'oggetto, quindi fare scorrere la punta della penna sullo schermo per spostarlo. -
Page 94: Sostituzione Del Pennino
GS2202 3.6 Sostituzione del pennino Il pennino si consuma dopo un lungo utilizzo, quindi è necessario sostituire un nuovo pennino. [1] Ruotare in senso antiorario il portapenne per aprire il coperchio, estrarre un nuovo pennino. [2] Inserire il pennino nel foro nella parte inferiore del supporto e inclinare la penna per estrarre il pennino vecchio. -
Page 95: Impostazione Di Funzione
GS2202 / Impostazione di Funzione 4.1 Impostazione Area di Lavoro 4.1.1 Utilizzo di Monitor multipli Selezionare la scheda Area di lavoro per definire la relazione tra il movimento della penna sul Display e il movimento del cursore sullo schermo del monitor. Per impostazione predefinita, l'intera area attiva della visualizzazione viene mappata sull'intero monitor. - Page 96 GS2202 ① ② ③ 4.1.3 Ruotare l'Area di Lavoro Modificando la direzione del Display per adattarsi all'operazione a sinistra e a destra. È possibile ruotare il Display di 0° ,90° ,180° o 270°...
-
Page 97: Impostazione Funzioni Tasti Della Penna
GS2202 4.2 Impostazione funzioni tasti della penna Selezionare la funzione da eseguire nella finestra di dialogo a comparsa, quindi fare clic su "Conferma" o "OK" per renderla effettiva. Efficace 4.3 Enable Windows Ink Microsoft Windows offre un ampio supporto per l'input penna. Le funzionalità della penna sono supportate in Microsoft Office, Windows Journal, Adobe Photoshop CC, Sketch Book 6 e così... -
Page 98: Impostazione Sensibilità Di Pressione
GS2202 4.4 Impostazione Sensibilità di pressione La sensibilità alla pressione può essere modificata trascinando il cursore su e giù: più piccolo è il valore, più sensibile alla pressione. Efficace Trascinare verso l'alto (a sinistra): il cambiamento di pressione è più evidente, una piccola pressione produce una grande pressione. -
Page 99: Test Di Pressione Della Penna
GS2202 4.5 Test di pressione della penna è possibile applicare gradualmente la pressione allo stilo sullo schermo per testare il livello di pressione. Fare clic sul pulsante " " per cancellare tutto l'inchiostro. Efficace 4.6 Esportazione e importazione dei dati Il driver supporta la funzione di esportazione e importazione dei dati personalizzati di conf igurazione del prodotto, vantaggiosa per utilizzare software diversi evitando di dover ripet ere la configurazione delle impostazioni. -
Page 100: Specifiche
GS2202 / Specifiche Modello GS2202 Dimensioni 21.5 pollici pannello Risoluzione 1920 x 1080 (16:9) Tipo LCD Area attiva 476.64 x 268.11mm Proporzioni 1200:1 schermo Schermo Luminosità 220 cd/m2 Tempo di risposta 14ms Angolo di visuale 89°/89° (H) /89°/89° (V) (Typ.) (CR >10) Gamut 140% sRGB Colore Display... -
Page 101: Risoluzione Dei Problem
GS2202 / Risoluzione dei problem 6.1 Possibili guasti relative al Display Fenomeni anomali Possibili Soluzioni L'indicatore di 1. Accertarsi che sia acceso alimentazione non 2. Controllare la presa e il cavo di alimentazione lampeggia 1. Accertarsi che sia acceso. 2. Collegare correttamente il cavo. 3. - Page 102 GS2202 Fenomeni anomali Possibili Soluzioni 1. In modalità estesa, si tratta di una situazione normale. 2. Se non si ha familiarità con la modalità estesa, si consiglia di utilizzare la modalità Duplica / Specchio. Sistema operativo Windows: premi la combinazione di tastiera --- Windows + P --- Visualizza solo lo sfondo e la barra delle applicazioni del quindi scegli Duplica Mac OS: Preferenze di sistema --- Display ---...
- Page 103 GS2202 6.2 Possibili Guasti relativi alle funzioni Situaciones anormales Posibles Soluciones È possibile che siano stati installati altri driver dello schermo o che Non c'è pressione nel sia stato aperto il software di disegno durante l'installazione del software grafico ma il driver.
-
Page 104: Contatti Di Servizio Di Assistenza Clienti
GS2202 Contatti di Servizio di Assistenza SHENZHEN HUION ANIMATION TECHNOLOGY CO., LTD. +86-755-32998548 www.huion.com www.facebook.com/huion service@huion.com huion-skype https://twitter.com/HuionTab... - Page 105 GS2202 Contenido 1 / Precauciones ........................... 107 2 / Descripción del Producto ....................108 2.1 Intoducción sobre la Pantalla ......................108 2.2 Producto y accesorios ........................109 2.3 Ajuste de Pantalla ..........................110 2.4 Instalación de los Controladores ....................111 3 / Operaciones Básicas con el Lápiz ..................
-
Page 106: Precauciones
GS2202 / Precauciones 【 Lea atentamente este manual antes de usarlo y consérvelo para futuras consultas. 】 -- Antes de limpiar la pantalla, desenchufe el cable USB y límpielo con un paño suave y húmedo, no use ningún tipo de detergente. -- No coloque la pantalla cerca de fuentes de agua como bañera, lavabo, fregaderos, lavadora, sótano húmedo, piscina, etc. -
Page 107: Descripción Del Producto
/ Descripción del Producto 2.1 Intoducción sobre la Pantalla ® ® Gracias por elegir la Pantalla gráfica HUION KAMVAS 22 Plus Esta es una nueva generación de Pantallas de dibujo profesional al mismo nivel que las Pantallas de escritorio, y que puede mejorar enormemente la eficiencia de su trabajo de pintura y creación, así... - Page 108 GS2202 2.2.1 Accesorios Lápiz stylus Puntas de Recambio Soporte del Lápiz Paño de Limpieza (Dentro del soporte del lápiz) Cable USB-C Cable 3-in-1 Adaptador de Cable de Corriente Alimentación Guía de Tarjeta de Clip de Puntas del Lápiz Inicio Rápido Garantía (Dentro del soporte del lápiz) 2.2.2 Soporte para la pantalla...
-
Page 109: Ajuste De Pantalla
GS2202 2.3 Ajuste de Pantalla [1] Saque la pantalla y el soporte del paquete, fije el soporte a la parte trasera de la pantalla con el destornillador adjunto, siguiendo las instrucciones. Ajuste el ángulo de soporte arrastrando este interruptor [2] Conecte el monitor interactivo a su computadora con un cable 3 en 1 o un cable USB 3.1 GEN1(necesita compra por separado). - Page 110 GS2202 2) Conecte la pantalla a su computadora mediante un cable USB 3.1 GEN1; Conecte el adaptador de corriente con el cable de alimentación.
-
Page 111: Instalación De Los Controladores
Windows 7 o posterior,mac OS 10.12 o posterior. 2.4.2 Instalación del Controlador Descargue el controlador de nuestro sitio web: www.huion.com/es/download Después de finalizar la instalación, puede encontrar el ícono del controlador " " en el área gris del sistema, lo que significa que el controlador se instaló correctamente; cuando conecte la Displaya a la computadora, el ícono cambiará... -
Page 112: Operaciones Básicas Con El Lápiz
GS2202 / Operaciones Básicas con el Lápiz 3.1 Agarrar el lápiz Agarre el bolígrafo como sostendría un bolígrafo o lápiz normal. Ajuste su agarre para que pueda presionar fácilmente el interruptor lateral con el pulgar o el índice. Tenga cuidado de no presionar accidentalmente el interruptor mientras dibuja o coloca con el lápiz. -
Page 113: Click
GS2202 3.3 Click Use la punta del lápiz para tocar una vez en la Pantalla para registrar un clic. Toque para resaltar o seleccionar un elemento en la Pantalla y haga doble clic para abrirlo. 3.4 Movimiento Seleccione el objeto, luego deslice la punta del lápiz por la Pantalla para moverlo. 3.5 Uso de los botones Laterales Los botones en el lápiz se pueden configurar en dos funciones personalizables diferentes. -
Page 114: Cambiar La Punta Del Lápiz
GS2202 3.6 Cambiar la Punta del Lápiz La punta se desgastará después de usarla durante mucho tiempo, luego deberá reemplazarla con una nueva punta. [1] En sentido antihorario, gire el soporte del lápiz para abrir la tapa, saque una punta nueva. -
Page 115: Configuración De Funciones
GS2202 / Configuración de Funciones 4.1 Configuración del Área de Trabajo 4.1.1 Utilisation de plusieurs écrans Uso con varios monitores Seleccione la pestaña Área de trabajo para definir la relación entre el movimiento del lápiz en la Pantalla y el movimiento del cursor en la Pantalla del monitor. Por defecto, toda el área activa de visualización se asigna a todo el monitor. - Page 116 GS2202 ① ② ③ 4.1.3 Rotate Working Area Rotar el Área de Trabajo By changing the direction of the display to adapt to the left and right hand operation. You can rotate the display by 0° ,90° ,180° or 270° .
-
Page 117: Configuración De Los Botones Del Lápiz
GS2202 4.2 Configuración de los botones del lápiz Seleccione la función que se desea realizar en el cuadro de diálogo emergente, luego haga clic en "Aceptar" u "Aplicar" para que tenga efecto. Activo 4.3 Habilitar la función de Windows Ink Microsoft Windows proporciona un amplio soporte la señal de entrada del lápiz. -
Page 118: Ajuste De Sensibilidad De Presión
GS2202 4.4 Ajuste de sensibilidad de presión La sensibilidad de la presión cambiará arrastrando el control deslizante hacia arriba o hacia abajo, cuanto menor sea el valor, más sensible a la presión. Activo Arrastre hacia arriba (izquierda): el cambio de presión es más obvio, una pequeña presión produce una gran presión. -
Page 119: Prueba De Presión Del Lápiz
GS2202 4.5 Prueba de presión del lápiz Puede aplicar presión gradualmente al lápiz en la Pantalla para probar el nivel de presión. Haga clic en el botón " " para borrar toda la tinta. Activo 4.6 Exportación e importación de datos El controlador admite la exportación e importación de sus datos de configuración personalizados para el producto, lo que es conveniente para facilitar el uso de diferentes programas y evitar el tener configuraciones repetidas. -
Page 120: Especificaciones
GS2202 / Especificaciones Modelo GS2202 Tamaño del panel 21.5 pulgadas Resolución 1920 x 1080 (16:9) Tipo de LCD Área Activa 476.64 x 268.11mm Relación de 1200:1 contraste Pantalla Brillo 220cd/m2 Tiempo de 14ms Respuesta Angulo de Visión 89°/89° (H) /89°/89° (V) (Typ.) (CR > 10) Gama de colores 140% sRGB Color de la pantalla... -
Page 121: Solución De Problemas
GS2202 / Solución de problemas 6.1 Posibles averías relacionadas con la pantalla Situaciones anormales Posibles Soluciones 1.Asegúrese de que la fuente de alimentación esté encendida. El indicador de encendido no parpadea 2. Compruebe el enchufe y el cable de alimentación 1. - Page 122 GS2202 Situaciones anormales Posibles Soluciones 1. Es porque estás en modo extendido en este momento. Es una situación normal. 2. Si no está familiarizado con el modo extendido, le recomendamos que lo use en modo Duplicado / Espejo. Sistema Muestra solo el fondo operativo Windows: presione la combinación de teclado --- de pantalla y la barra de Windows + P --- luego elija Duplicar...
- Page 123 GS2202 6.2 Mögliche Probleme mit FUNKTIONEN Situaciones anormales Posibles Soluciones Es posible que haya instalado otros controladores de pantalla o que No hay presión en el haya abierto el software de edición gráfica al instalar el controlador. software de edición Desinstale todos los controladores y cierre el software de edición gráfica, pero el cursor gráfica, luego reinstale el controlador.
-
Page 124: Contacto Después Del Servicio
GS2202 Contacto después del servicio SHENZHEN HUION ANIMATION TECHNOLOGY CO., LTD. +86-755-32998548 www.huion.com www.facebook.com/huion service@huion.com huion-skype https://twitter.com/HuionTab...
Need help?
Do you have a question about the KAMVAS 22 Plus and is the answer not in the manual?
Questions and answers