Table of Contents
Advertisement
Contents
Product Overview .................................................. 2
Product Connection ................................................ 5
Driver and Setting ................................................. 7
....................................................... 7
..................................................... 19
Digital Pen Basic Operation ........................................ 29
Specifications ..................................................... 33
Troubleshooting Solutions ......................................... 35
................................................. 2
.............................................. 2
.............................................. 9
................................................. 11
.................................................. 24
Kamvas 13
1 / 38
Advertisement
Table of Contents

Related Manuals for Huion Kamvas 13


Summary of Contents for Huion Kamvas 13
-
Page 1: Table Of Contents
Kamvas 13 Contents Product Overview ..........2 Display Introduction ..........2 Product and Accessories ..........2 Product Connection ..........5 Driver and Setting ..........7 Install Driver ............7 Driver Interface Preview ..........9 Pen Display Setting ..........11 Driver Setting ............. -
Page 2: Product Overview
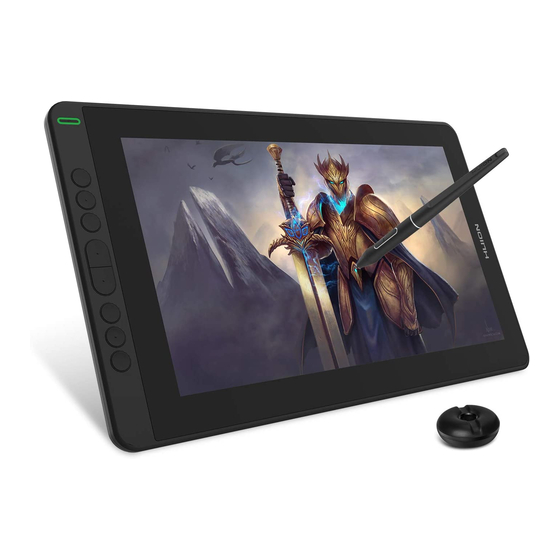
Product Overview Display Introduction Thanks for choosing HUION KAMVAS 13 creative pen display. This is a new generation of professional drawing display, which can greatly improve your work efficiency of painting and creation, and full of fun. You can freely painting and writing, depicting different lines and colors, just as the pen writes on the paper, which brings you a real shock experience. - Page 3 Kamvas 13 *Function Button: Press K4 & K5 around three seconds to open the OSD menu, meanwhile the indicator will flash green. The function of K2 K3 K6 K7 will become OSD function. K2 [AUTO]: Before entering menu, its function is "auto adjustment".
- Page 4 Kamvas 13 Accessories After unboxing your package, make sure that you have the following items: Pen Display*1 Battery-free Pen*1 Pen Holder*1 Replacement Nibs(Inside the Pen Holder)*8 3-in-1 Cable*1 USB Extension Cable*1 Quick Start Guide*1 Cleaning Cloth*1 Warranty Card*1 *3-in-1 Cable 1.
-
Page 5: Product Connection
Kamvas 13 *Adjustable Stand(Optional) We designed this ergonomic adjustable stand specially for your KAMVAS display, you can adjust the angle of the display according to your usage habit, and make you feel more comfortable when painting and creating. Product Connection... - Page 6 Kamvas 13 The display supports the connection of a computer and Android device, please refer to the following connection method. Watch the Video 3-in-1 Type-C Cable Connect the pen display to your computer with 3-in-1 Cable. Generally the device can be powered on when the black USB-A cable is connected to your computer.
-
Page 7: Driver And Setting
Kamvas 13 Kamvas 13 is the first pen display that supports connectivity with Android device via a USB-C to USB-C cable. *USB-C on device should at least support USB3.1 GEN1 data transfer protocol and DP 1.2. *Extra power supply is needed under connection with Android device. - Page 8 Kamvas 13 Please download the driver from our website: Driver-Kamvas 13 Note: 1. Before installing driver, please close all graphic software and antivirus program. 2. If you have installed other pen tablet driver, please uninstall it before you install this driver.
-
Page 9: Driver Interface Preview
Kamvas 13 Driver Interface Preview 9 / 38... - Page 10 Sensitivity Adjustment and Pressure Test. See Section 3. Store Huion Store, where you can get the latest information about the product such as its FAQ or sales promotion. Additionally, you can also purchase other products or accessories on Huion Store. 10 / 38...
-
Page 11: Pen Display Setting
Kamvas 13 4. Add Programs You can customize different functions on the current device for different programs. When select All programs, the setting of the device is valid for every program. By clicking Add a Program from the drop-down list, you can set the functions for a specific program and hence have unique settings for different programs. - Page 12 Kamvas 13 the function. 1. Keyboard Key Click on the input box above and enter a valid key combination to creat a shortcut. For example "Ctrl+A", "Ctrl+Z", and so on. 12 / 38...
- Page 13 Kamvas 13 2. Mouse Key Select the function of a Mouse or Wheel. Please see the picture below for detailed functions. Mouse: Left Button, Right Button, Middle Button. Wheel: Wheel Forward, Wheel Backward. Double-Left Click. 13 / 38...
- Page 14 Kamvas 13 3. Switch Select Switch Screen or Switch Brush. Note: Some software does not support the "Switch Brush" function. 4. Run Program Browse and select a program that you want to launch quickly. After the setting, you can launch that program with just a single press.
- Page 15 Kamvas 13 5. System Application The table below are the functions of Windows and Mac Systems that can be customized on the Keys. 6. Multimedia 15 / 38...
- Page 16 Kamvas 13 To realize the functions such as previous song, next song, play/pause, volume up, volume down. 7. None When select None, the keys will have no function. Working Area Select the Working Area tab to define the relationship between pen movement on the device and cursor movement on the monitor screen.
- Page 17 Kamvas 13 [2] Screen Ratio: As a general rule, be 16:9. [3] Customized Area: 1> Enter coordinate values. 2> Drag the corners of the foreground graphic to select the screen area. 2. Rotate Working Area By changing the direction of the device to adapt to the left and right hand operation. You can rotate the tablet by 0°, 90°, 180°...
- Page 18 Kamvas 13 3. Monitor Calibration Click "Cursor Calibration" to enter the calibration page and operate according to the prompts. 18 / 38...
- Page 19 Kamvas 13 Please use the digital pen to click on the center red dot of the cross in a common pen-holding posture. You can cancel Calibration and restore default. 19 / 38...
-
Page 20: Driver Setting
Kamvas 13 Driver Setting 1. Device You can view product information. *OSD Settings Scene Mode: You can choose the "Standard Mode", "Motion Mode", "Movie Mode" and "Gaming Mode". Brightness: You can djust the brightness of the screen. Contrast Ratio: You can adjust the contrast of the screen. - Page 21 Kamvas 13 2. Backup The Driver can import and export your custom settings, which helps to avoid repeated settings when launching a different program. 21 / 38...
- Page 22 Kamvas 13 3. General Setting [1] Language: Click the drop down menu to select a language. [2] Color: You can select the color of the Driver interface among Dark, Blue, and Light according to your preference. [3] Start Menu: Click to enable or disable AutoStart, New Message Alert, Automatic Updates.
- Page 23 Kamvas 13 4. About Users can check the Driver version number here. Click Check for Updates to view the latest Driver version and then follow the prompts to update the Driver if needed. 23 / 38...
-
Page 24: Digital Pen Setting
Kamvas 13 Digital Pen Setting 1. Press Key The function setting is the same as the Press Key setting of the tablet. Please refer to it. See Section 24 / 38... - Page 25 Kamvas 13 2. Pen Nib Activity The pen nibs can be set to be Valid/Invalid as needed. Click the drop-down option to select. In Valid mode, the digital pen can be used normally. In Invalid mode, the digital pen has cursor movement, but cannot complete the specified action.
- Page 26 Kamvas 13 3. Enable Windows ink Microsoft Windows provides extensive support for pen input. Pen features are supported in such as Microsoft Office, Windows Whiteboard, Adobe Photoshop CC, SketchBook 6 and so on. 26 / 38...
- Page 27 Kamvas 13 4. Pressure Sensitivity Adjustment The pressure sensitivity will be changed by dragging the slider up and down, the smaller the value, the more pressure sensitive. Click the Redo button at the top right of the Settings box to reset the pressure sensitivity to the default state.
- Page 28 Kamvas 13 5. Pressure Test You can gradually apply pressure to the stylus on the screen to test the pressure level. Click the Clear button to clear all the ink. 28 / 38...
-
Page 29: Digital Pen Basic Operation
Kamvas 13 Digital Pen Basic Operation Hold the Pen Hold the pen as you hold a normal pen or pencil. Adjust your grip so that you can toggle the side switch easily with your thumb or forefinger. Be careful not to accidentally press the switch while drawing or positioning with the pen. - Page 30 Kamvas 13 Position the cursor Move the pen slightly above the active area without touching the screen surface, the cursor will move to the new position accordingly. Press the pen tip on the screen to make a selection. Tap the screen once with the pen tip, or touch it to the screen with enough pressure to register a click.
- Page 31 Kamvas 13 Click Use the pen tip to tap once on the screen to register a click. Tap to highlight or select an item on the screen and double-click to open it. Move Select the object, then slide the pen tip across the screen to move it.
- Page 32 Kamvas 13 Use the side buttons The buttons on the pen can be set to two different customizable functions. You can use the buttons whenever the pen tip is within 10mm of the tablet active area. You do not have to touch the pen tip to the device in order to use the switch.
-
Page 33: Specifications
Kamvas 13 2. Insert the pen nib into the pen nib clip and tilt the pen to pull out the old nib. 3. Insert the new nib straight into the pen and push the nib slowly and firmly until it stops. - Page 34 Kamvas 13 Resolution: 1920 x 1080 LCD Type: AG Glass: Anti-glare matte film Full Lamination: Contrast Ratio: 1000:1 Brightness: 220cd/m2 Response Time: 25ms Viewing Angle: 89°/89°(H)/89°/89°(V) (Typ.)(CR?10) AGamut: 120% sRGB Display Color: 16.7M(8bit) Technical Specifications Digital Pen: PW517 Pen Technology:...
-
Page 35: Troubleshooting Solutions
Kamvas 13 Operating Conditions Input Voltage: DC 5V Output Voltage: 5V 2A Power Consumption: Standby Consumption: ?0.3W Working Temp. and Humidity: 0-40°C, 20-80% Storage Temp. and Humidity: -20°C~60°C, 10-90% OS Compatibility Windows 7 or later macOS 10.12 or later Android 6.0 or later Troubleshooting Solutions 1. - Page 36 Kamvas 13 mode: extend or duplicate mode. 4. Check whether the side indicator shows green, if not, it means no signal in. Please reboot your computer or reconnect the cable. 5. Is the signal wire broken or bent? If so, please replace the signal wire.
- Page 37 You may have installed other display drivers or opened the drawing software when installing the driver. Please uninstall all drivers and close the drawing software, then reinstall the Huion driver. It's better to restart your computer after finishing the installation.
- Page 38 Kamvas 13 When you are not using the display, please do not put the pen on the display surface, which will keep the computer awake. The side button of the pen doesn't work. When pressing the side button, please make sure that the nib didn't touch the tablet surface and the distance between the nib and surface is within 10mm.
Need help?
Do you have a question about the Kamvas 13 and is the answer not in the manual?
Questions and answers