CellarPro 1800QT Owner's Manual
Hide thumbs
Also See for 1800QT:
- Owner's manual (27 pages) ,
- Owner's manual (32 pages) ,
- Owner's manual (31 pages)
Advertisement
Quick Links
Advertisement

Subscribe to Our Youtube Channel
Related Manuals for CellarPro 1800QT


Summary of Contents for CellarPro 1800QT
- Page 2 Serial Number*: ____________________ *We recommend that you take a minute to fill-in your CellarPro serial number, which has 15 characters: seven-digits and eight letters and can be found on the printed label on the left side of your cooling unit).
-
Page 3: Table Of Contents
T a b l e o f C o n t e n t s Important Notes Overview III. Replacement Instructions IV. Operating Instructions Normal Operation VI. Troubleshooting VII. Limited Warranty VIII. Contact Information... -
Page 4: Important Notes
• Before plugging in and operating your CellarPro cooling unit, remove any materials that have been packed inside the exhaust cavity. • Wait 24 hours before plugging in and operating your CellarPro cooling unit. • Before installing the cooling unit, make sure it works by plugging it in and letting it run on a hard, flat surface. -
Page 5: Overview
(top-vent) or rear (rear-vent) of the cooling units. CellarPro cooling units are designed to turn on when the temperature inside the cellar exceeds the Minimum Set Point plus the Temperature Differential, and turn off when the temperature inside the cellar drops below the Minimum Set Point. - Page 6 Once cooled, the cold air is discharged from the bottom of the cooling unit. CellarPro cooling units should be mounted to the ceiling inside the cellar, or as close to the top of the cellar as possible. Optional mounting clips for attaching the front of the cooling unit to the ceiling are available for purchase from CellarPro.
- Page 7 85°F, the cooling unit should be able to maintain temperatures of 55°F inside the cellar. CellarPro cooling units do not have heating elements, so if temperatures inside the cellar drop below proper wine storage temperatures, the cooling unit cannot create heat inside the cellar.
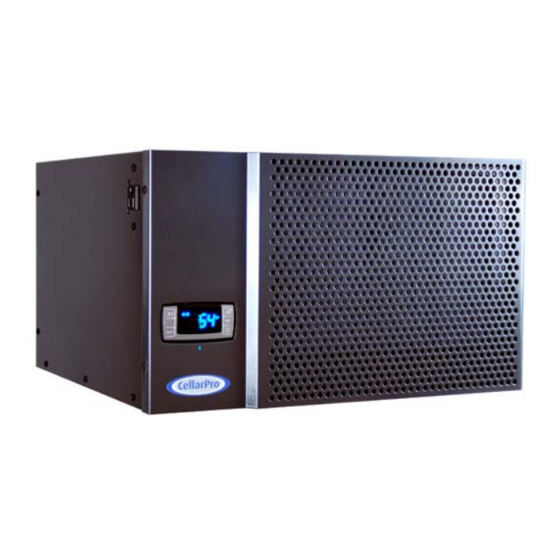
- Page 8 Model Dimensions (inches) Operating Cellar Capacity W x D x H Amps (cubic feet) 1800QT 18 x 16.5 x 10.5 1800XT 18 x 16.5 x 10.5...
-
Page 9: Replacement Instructions
R e p l a c e m e n t I n s t r u c t i o n s • Replacement Instructions – Top Vent Units TOOLS NEEDED: Phillips screwdriver 7/16" open end wrench or socket Needlenose pliers REQUIRED PARTS Replacement Cooling Unit... - Page 10 Do not let the cooling unit drop on unprotected bottle racks. TO INSTALL NEW COOLING UNIT 1. Wait 24 hours before plugging in and operating your CellarPro cooling unit. 2. Carefully remove the new cooling unit from the packaging. You may reuse this packaging for shipping or storing the old cooling unit 3.
- Page 11 8. Attach the mounting clips to the new cooling unit in the same position as located on the old cooling unit. We recommend removing the two screws that attach the left side of the front grill before attaching the mounting clips. 9.
- Page 12 • Replacement Instructions – Rear Vent Units TOOLS NEEDED: Phillips screwdriver 7/16" open end wrench or socket Needlenose pliers REQUIRED PARTS Replacement Cooling Unit Butyl Sealant Tape REMOVAL OF OLD COOLING UNIT: 1. Unplug the cooling unit from the wall. FROM THE REAR OF THE CELLAR 2.
- Page 13 Do not let the cooling unit drop on unprotected bottle racks. TO INSTALL NEW COOLING UNIT 1. Wait 24 hours before plugging in and operating your CellarPro cooling unit. 2. Carefully remove the new cooling unit from the packaging. You may reuse this packaging for shipping or storing the old cooling unit 3.
- Page 14 10. Follow the removal instructions described above in reverse. 11. After installing the cooling unit, It is not necessary to replace the grill 12. A complete and proper seal must be made between the cellar and the cooling unit to ensure that outside air does not enter the cellar. Use the butyl tape to seal the perimeter where the cooling unit touches the wine cabinet at the rear of the cellar by rolling the tape with your fingers into a thin (pencil diameter) "rope", then press the tape into the cracks where the cooling unit touches the cellar.
-
Page 15: Operating Instructions
O p e r a t i n g I n s t r u c t i o n s The settings on your CellarPro cooling unit have been preset and optimized by the factory, and it is not necessary to change these settings initially. - Page 16 Basic Operation Power On/Off Button Press “Power On/Off” to turn the unit on and off When the “Compressor On” indicator light is on (Row 1), the Compressor is running When the “Fan On” indicator light is on (Row 1), the Fan is running Digital Display The temperature displayed on the control indicates the real-...
- Page 17 Energy Saver Button To activate and deactivate the “Energy Saver” mode, press the “Energy Saver” button The “Energy Saver” indicator light (Row 3) will turn on when the cooling unit is in “Energy Saver” mode In the “Energy Saver” mode, the Minimum Set Point will increase 4°F Quick Chill Button To activate the “Quick Chill”...
- Page 18 Alarm Code What it means What to do P1, P2, P3 Probe Failure Call CellarPro The temperature inside Check seals; the cellar is too warm Check if door was left open; (above 70°F for more Lower the ambient temperatures...
- Page 19 Protection Mechanisms Protection To protect the components in the cooling unit as well as the Mechanisms wine inside the cellar, the cooling unit is programmed to shut down certain components under certain circumstances, as follows: Scenario What it means What happens The evaporator probe The evaporator fan will turn off P2 >...
- Page 20 Advanced Settings CellarPro cooling systems can be programmed with advanced settings to achieve more control over conditions inside the cellar. Conditions like humidity, the Temperature Differential, and alarm settings all can be modified for custom applications. To access the advanced settings, press the “Set” button and “Down” button together for three seconds.
-
Page 21: Normal Operation
“on” time. Most wine collectors store their wine in the range of 55 - 60°F. CellarPro cooling units are designed to maintain optimal temperatures for storage and aging of wine. CellarPro cooling units are not designed to maintain cellars at much colder serving temperatures. - Page 22 • Maintenance The condenser coils at the back of the cooling unit will collect dust, dirt and lint over time. It is critically important to clean the coils periodically. If the condenser coils become clogged, the cooling unit will not have proper airflow and its performance and longevity will be compromised.
-
Page 23: Troubleshooting
T r o u b l e s h o o t i n g • The Cooling Unit Runs Constantly The cooling unit is designed to turn on when the air temperature in the cellar rises ABOVE the Minimum Set Point + Temperature Differential, and turn off when the air temperature falls below the Minimum Set Point. -
Page 24: Limited Warranty
CellarPro. Purchaser is responsible for removing and reinstalling the cooling unit from the wine cellar, and for shipping the cooling unit to and from CellarPro or to and from a designated repair facility. -
Page 25: Contact Information
C o n t a c t I n f o r m a t i o n CellarPro Cooling Systems 531 Mercantile Drive Cotati, CA 94931 877.726.8496 Email us: info@cellarpro.com Website: www.cellarpro.com...
Need help?
Do you have a question about the 1800QT and is the answer not in the manual?
Questions and answers