Advertisement
Quick Links
What's In The Box
Please inspect the contents of your shipped package to ensure you have received everything that
is listed below.
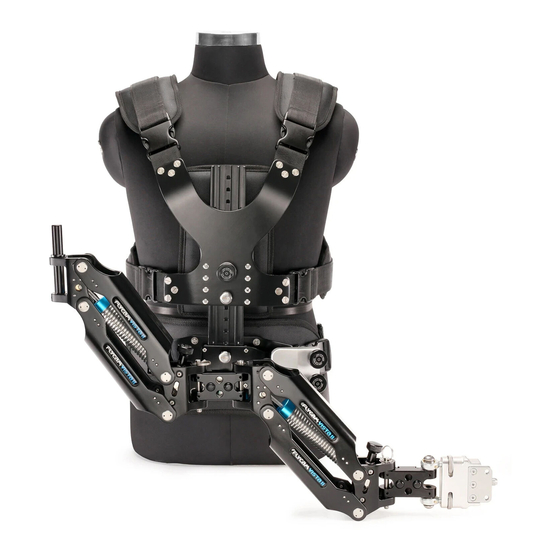
Vista-II Vest front (Part-1)
Hip Pad (Part-2)
No part of this document may be reproduced, stored in a retrieval system, or transmitted by any form or by any means,
electronic, mechanical, photo-copying, recording, or otherwise, except as may be expressly permitted by the applicable copyright
Vista-II Stabilizer Arm & Vest
A s s e m b l y M a n u a l
Vista-II Vest back (Part-1a)
Storage Bag (Part-5)
All rights reserved.
statutes or in writing by the Publisher.
(VSTA-II-AV)
Vista-II Arm (Part-3)
2x Bush (Part-4)
2x Heavy
Tension Springs
1
3/16mm,2.5mm,
1.5mm Allen Key
Advertisement

Related Manuals for Flycam Vista-II


Summary of Contents for Flycam Vista-II
- Page 1 Vista-II Stabilizer Arm & Vest (VSTA-II-AV) A s s e m b l y M a n u a l What’s In The Box Please inspect the contents of your shipped package to ensure you have received everything that is listed below.
-
Page 2: Safety Hints
Safety Hints ATTENTION: PLEASE READ THIS BEFORE USING TO PREVENT SERIOUS DAMAGE TO THE GEAR! BE WATCHFUL OF THE HANDS Cautiously operate to avoid pinching your hand/fingers inside the arm. ALWAYS ESTABLISH THE CORRECT BALANCE Adjust the weight balance before telescoping the length. NEVER LEAVE THE FIXTURES LOOSE All the knobs/screws must be locked tightly to avoid unbalancing of the whole camera setup. - Page 3 Vista-II Vest Setup 1. Attach both parts of Jacket by attaching the top shoulder buckles (Part-1a) with (Part-1). 2. Follow same step on other side. Then wear the jacket/vest. 3. After wearing the Vest, attach the waist buckles (Part-1a) with (Part-1) of both side.
- Page 4 Vista-ll Arm Setup NOTE: It can be operated efficiently either right or left handed. 12. Loosen the knobs of Socket Block on Vest (Part-1). 13.Then Insert male connecting socket of Arm (Part-3) into Socket Block of Vest (Part-1). 14. After tightening the both knobs of Socket Block on Vest (Part-1) to secure the section.
-
Page 5: Arm Adjustment
To Use As Single Arm Configuration 19. Pull the pin from middle jointer. 20. Remove one section of the Arm (Part-3). 21. Now, attach the single arm (Part-3) 22. Insert the pin from middle jointer to secure with it. 23. Finally, single arm (Part-3) properly attached as shown in the image. -
Page 6: Maintenance
Cleaning Do not use solvents or harsh cleaners of any kind on Vista-II Arm & Vest. If the unit becomes dirty, use only a cloth or sponge with water and a very mild detergent to gently rub the unit clean. Rinse well. - Page 7 Warranty: We offer one year warranty for our products from date of purchase. Within this period of time, we will repair it without charge for labor or parts. Warranty doesn’t cover transportation costs nor does it cover a product subjected to misuse or accidental damage. Warranty repairs are subjected to inspection and evaluation by us.