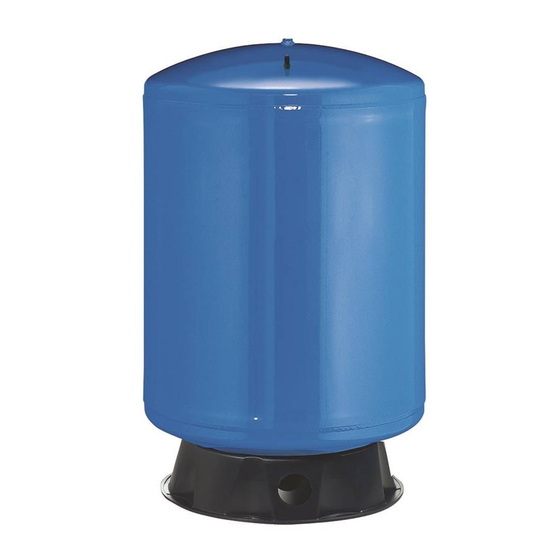
Table of Contents
Advertisement
Available languages
Available languages
Quick Links
OWNER'S MANUAL
PRO-Source
Plus
®
Steel Pressure Tanks
6709 1112
Installation/Operation/Parts
For further operating, installation,
or maintenance assistance:
Call 1-262-728-5551
293 WRIGHT STREET, DELAVAN, WI 53115 WWW.STA-RITE.COM
PH: 262-782-5551
PSP973 (11/15/12)
© 2012 Pentair, Inc. All Rights Reserved.
Advertisement
Table of Contents

Summary of Contents for Pentair STA-RITE PRO-Source Plus PSP19S-T02SA-25PSI
- Page 1 OWNER’S MANUAL PRO-Source Plus ® Steel Pressure Tanks 6709 1112 Installation/Operation/Parts For further operating, installation, or maintenance assistance: Call 1-262-728-5551 293 WRIGHT STREET, DELAVAN, WI 53115 WWW.STA-RITE.COM PH: 262-782-5551 PSP973 (11/15/12) © 2012 Pentair, Inc. All Rights Reserved.
- Page 2 Safety READ AND FOLLOW RULES FOR SAFE SAFETY INSTRUCTIONS! INSTALLATION AND OPERATION This is the safety alert symbol. When you see this symbol on your pump or in this manual, Read the Owner’s Manual and Rules for Safe look for one of the following signal words and be Operation and Installation Instructions carefully.
-
Page 3: General Information
General Information GENERAL INFORMATION NOTICE: Replace and tighten air valve cap if it is re moved for any reason. Failure to replace air cap All tanks are factory pre-charged with air. When may allow loss of air pressure and eventually lead installing tank, adjust pre-charge to 2 PSI below to tank waterlogging and water cell failure. -
Page 4: Installation
Installation TO CHECK TANK AIR CHARGE Connect system pipe to tank flange. Use plastic or steel pipe as required. To prevent leaks, use PTFE If drawdown (amount of water that comes out of pipe thread sealant tape on male threads of all tank per pump cycle) decreases significantly, check threaded connections to tank. - Page 5 Installation B. Reconnect power supply to pump and pump 6. Before water cell can be inserted into tank, it up pressure in system. must be tightly rolled up as follows: C. Disconnect power supply to pump again and A. Place water cell on clean surface with open- re-check switch setting.
-
Page 6: Air Valve Replacement
Installation 11. Clean sealing surface and groove of cover E. Recheck all nuts, using same pattern. Be sure flange; place on tank (see Figure 5). Be sure to all nuts are tight and that you have a good capture the base with the flange (the tabs on the seal. -
Page 7: Repair Parts
Repair Parts Models PSP19S-T02SA-25PSI PSP19T-T02SA-25PSI PSP35-T05SA-25PSI PSP50-T50SA-25PSI PSP85-T52SA-25PSI 3946 0401 REPAIR PARTS LIST – Pro-Source Plus Tanks PSP19S-T02 PSP19T-T02 PSP35-T05 Part SA-25PSI SA-25PSI SA-25PSI Description Used 19 Gal. 19 Gal. 35 Gal. Air Valve with Cap U212-266 U212-266 U212-266 Water cell - Vinyl U20-8 U20-15S U20-13L... - Page 8 THIS PAGE INTENTIONALLY LEFT BLANK...
- Page 9 THIS PAGE INTENTIONALLY LEFT BLANK...
- Page 10 أجزء اإلصال ح الطرز PSP19S-T02SA-25PSI PSP19T-T02SA-25PSI PSP35-T05SA-25PSI PSP50-T50SA-25PSI PSP85-T52SA-25PSI 3946 0401 Pro-Source Plus قائمة أجزاء اإلصالح – خزانات PSP19S-T02 PSP19T-T02 PSP35-T05 SA-25PSI SA-25PSI SA-25PSI الرق م وص ف الرق م المستخد م 91 جالون 91 جالون 53 جالون الجز ء الرئيس ي U212-266 U212-266 U212-266 صمام هواء مزود بغطا ء U20-13L U20-15S U20-8...
- Page 11 التركي ب 11 . نظ ّ ف سطح وحز منع التسرب من بقايا شفة الغطاء؛ ضعها على هـ- أعد التحقق من كل الصواميل، باستخدام النمط نفسه. تأكد من .إحكام ربط كافة الصواميل ومن منع التسرب جي د ً ا الخزان (راجع الشكل 5). تأكد من تثبيت القاعدة مع الشفة (تالئم .)األلسنة...
- Page 12 التركي ب ب - أعد توصيل مصدر الطاقة بالمضخة وش غ ّ ل المضخة لزيادة 6 . قبل التمكن من إدخال خلية الماء داخل الخزان، يجب لفها بإحكام :كما يلي .الضغط في النظام أ - ضع خلية الماء على سطح نظيف مع فتحها من جهة واحدة ج...
- Page 13 التركي ب لفحص شحن هواء الخزان قم بتوصيل ماسورة النظام بشفة الخزان. استخدم ماسورة بالستيك أو )PTFE( صلب حسب الحاجة. ولمنع التسرب، استخدم شريط تيفلون في حالة تناقص السحب (مقدار الماء الخارج من الخزان في كل دورة لمنع التسرب من السنون اللولبية الخارجية في جميع الوصالت الممدودة :ضخ) بشكل...
- Page 14 معلومات عامة معلومات عامة مالحظة: في حالة إزالة غطاء صمام الهواء ألي سبب كان فأعد وضعه وأحكم ربطه. وقد يتسبب عدم وضع غطاء الهواء مرة أخرى في فقد ،جميع الخزانات مشحونة بالهواء مسب ق ً ا من المصنع. وعند تركيب خزان .ضغط الهواء وبالتالي تشبع الخزان بالماء وتعطل خلية الماء اضبط...
- Page 15 السالم ة قواعد السالمة عند اقرأ تعليمات السالمة التركيب والتشغيل !والتزم بها اقرأ التعليمات الواردة في دليل المالك وقواعد السالمة عند التركيب هذا هو رمز تنبيه السالمة. عندما ترى هذا الرمز على والتشغيل بعناية. وقد يؤدي اإلخفاق في االلتزام بهذه القواعد والتعليمات المضخة...
- Page 16 دليل المالك PRO-Source Plus ® خزانات ضغط من الصلب 6709 1112 التركيب/التشغيل/األجزاء ،لمزيد من المساعدة بخصوص التشغيل، أو التركيب :أو الصيانة 1-262-728-5551 اتصل بالرقم 293 WRIGHT STREET, DELAVAN, WI 53115 WWW.STA-RITE.COM 262-782-5551 :هاتف PSP973 )11/15/12( . جميع الحقوق محفوظةPentair, Inc. حقوق الطبع والنرش © لعام 2102 محفوظة لرشكة...


Need help?
Do you have a question about the STA-RITE PRO-Source Plus PSP19S-T02SA-25PSI and is the answer not in the manual?
Questions and answers