
Related Manuals for Q CELLS Q.FLAT-G6


Summary of Contents for Q CELLS Q.FLAT-G6
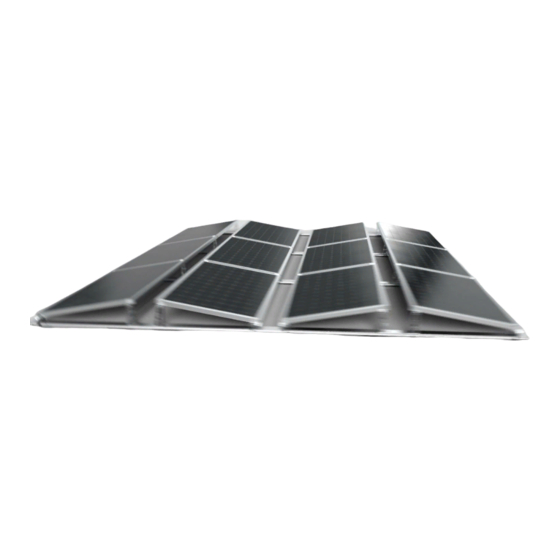
- Page 1 INSTALLATION AND OPERATION MANUAL Q.FLAT-G6 Flat roof system for east-west orientation...
-
Page 2: Table Of Contents
4.5.4 BALLAST TROUGH TYP V02 O MOUNT AND SCREW ON MODULE CLAMPS H OPTIONAL STEP 4.7.1 MOUNTING THE SIDE COVER O 4.7.2 CABLE DUCT COVER O FINAL INSPECTION INSTALLATION AND OPERATION MANUAL FOR FLAT ROOF SYSTEM Q.FLAT-G6 – Q CELLS... -
Page 3: General Safety Information
Î The Q.FLAT-G6 flat roof system is only permitted for use on flat roofs. The Q.FLAT-G6 may only be used with Q CELLS solar modules with the dimensions 1673 mm × 1030 mm × 32 mm (e.g. Î Q.PEAK DUO BLK-G9) and 1840 mm × 1030 mm × 32 mm (e.g. Q.PEAK DUO ML-G9), including frame. -
Page 4: Required Material
V01: Assembly after adding the bulk material brace V02: Assembly before adding the bulk material Cross brace connector Side cover 10° Module clamp as middle and Cable duct cover end clamp INSTALLATION AND OPERATION MANUAL FOR FLAT ROOF SYSTEM Q.FLAT-G6 – Q CELLS... -
Page 5: Required Tools
REQUIRED TOOLS REQUIRED OPTIONAL Rubber hammer Tape measure Ring spanner Chalk line for mounting foot Bit for mounting foot Torque spanner (PH3) with SW5 hexagon socket attachment INSTALLATION AND OPERATION MANUAL FOR FLAT ROOF SYSTEM Q.FLAT-G6 – Q CELLS... -
Page 6: Assembly
ASSEMBLY Just 4 steps to the finished system Required Optional INSTALLATION AND OPERATION MANUAL FOR FLAT ROOF SYSTEM Q.FLAT-G6 – Q CELLS... -
Page 7: Lay Out, Connect And Set Up Main Base
INFO All Q CELLS base profiles are fitted with 11 mm thick high-tech protective mats. The gaps between the protective mats ensure free water drainage. The protective mats prevent damage to the roof covering due to mechanical impact and long-term damage due to plasticiser migration. -
Page 8: Position Centre Component Tower E
The latching connection must be checked for proper fit and form fit (latching tab must lie flush in the surface). CORRECT INCORRECT ATTENTION Always ensure that the click latch is correctly seated and “locked”. INSTALLATION AND OPERATION MANUAL FOR FLAT ROOF SYSTEM Q.FLAT-G6 – Q CELLS... -
Page 9: Optional Step
M8x16 screws. NOTE: The location and position of the ridge connectors can always be found in the current project report. INSTALLATION AND OPERATION MANUAL FOR FLAT ROOF SYSTEM Q.FLAT-G6 – Q CELLS... -
Page 10: Assembly Of The Ridge Connector In
, the system can also be connected in a straight line without changing the pitch in order to convert obstacles. The assembly is identical to the ridge connector INSTALLATION AND OPERATION MANUAL FOR FLAT ROOF SYSTEM Q.FLAT-G6 – Q CELLS... -
Page 11: Mount Connecting Component Cross Brace And Ballast Brace F
If cross braces and ballast braces planned continuously in a continuous double module row, they must be attached to the same side of the tower INSTALLATION AND OPERATION MANUAL FOR FLAT ROOF SYSTEM Q.FLAT-G6 – Q CELLS... -
Page 12: Optional Step
The exact position must be determined on site, as it depends on the course of the underlying roof structure. INSTALLATION AND OPERATION MANUAL FOR FLAT ROOF SYSTEM Q.FLAT-G6 – Q CELLS... -
Page 13: Ballast Block
Devi- ations from the project report must be agreed with Q CELLS and only carried out after written approval. The position of the ballast elements must be selected in such a way that slipping down, tilting or wobbling is permanently prevented. - Page 14 The number and weight of the ballast blocks required can be found in the current project report. The system is planned as standard with ballast blocks with the dimensions 40 × 40 × 4 cm; if the dimensions of the ballast blocks differ, manual adjustment may be necessary on site. INSTALLATION AND OPERATION MANUAL FOR FLAT ROOF SYSTEM Q.FLAT-G6 – Q CELLS...
-
Page 15: Ballast Trough Typ V01 O
Ensure even coverage in the ballast trough ATTENTION Ensure minimum cover in the ballast trough according to the project report! The maximum fill height must not exceed 70 mm. INSTALLATION AND OPERATION MANUAL FOR FLAT ROOF SYSTEM Q.FLAT-G6 – Q CELLS... -
Page 16: Ballast Trough Typ V02 O
ATTENTION Ensure minimum cover in the ballast trough according to the project report! The maximum fill height must not exceed 70 mm. INSTALLATION AND OPERATION MANUAL FOR FLAT ROOF SYSTEM Q.FLAT-G6 – Q CELLS... -
Page 17: Mount And Screw On Module Clamps H
It must be ensured that the torque specification is adhered to. Otherwise there is a risk of damaging components and impairing stability. INSTALLATION AND OPERATION MANUAL FOR FLAT ROOF SYSTEM Q.FLAT-G6 – Q CELLS... -
Page 18: Optional Step
The side cover is a component relevant to stability. The omission of the side covers specified in the project report will inevitably lead to an exclusion of liability by Q CELLS. INSTALLATION AND OPERATION MANUAL FOR FLAT ROOF SYSTEM Q.FLAT-G6 – Q CELLS... -
Page 19: Cable Duct Cover O
INFO In order to protect the string lines from permanent and damaging environmental influences, especially UV radiation, all Q CELLS base rails have receptacles for cable duct covers. The installation of the cable duct covers is possible after each work step of the system assembly. -
Page 20: Final Inspection
(maintenance interval at least once a year, observe the maintenance log). Changes and deviations from the planning documents must be agreed in writing with Hanwha Q CELLS GmbH! INSTALLATION AND OPERATION MANUAL FOR FLAT ROOF SYSTEM Q.FLAT-G6 – Q CELLS... - Page 21 +49 (0)9225 9550 - 999 EMAIL info@pmt.solutions www.pmt.solutions HANWHA Q CELLS GMBH OT Thalheim Sonnenallee 17 – 21 06766 Bitterfeld-Wolfen Germany +49 (0)3494 66 99 – 23222 +49 (0)3494 66 99 – 23000 EMAIL sales@q-cells.com www.q-cells.com Subject to change © Q CELLS Installation_Manual_East-West_Orientation_Q.FLAT-G6_2021-01_Rev01_EN...
Need help?
Do you have a question about the Q.FLAT-G6 and is the answer not in the manual?
Questions and answers