
Related Manuals for Siemens HA010FBR1M


Summary of Contents for Siemens HA010FBR1M
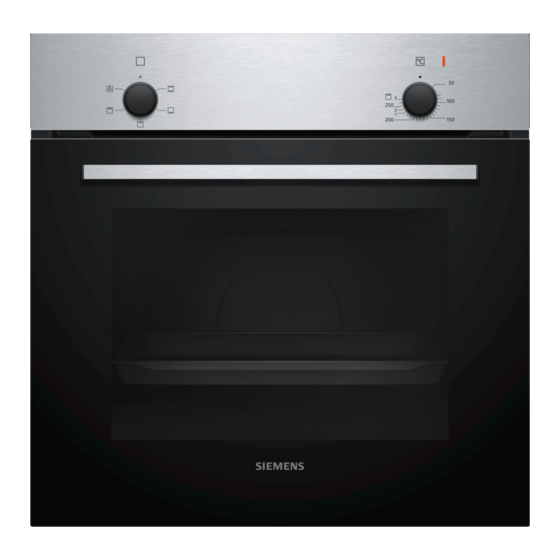
- Page 1 Oven HA010FBR1M User manual and installation instructions Register your product on My Siemens and discover exclusive ser- vices and offers. siemens-home.bsh-group.com/welcome The future moving in. Siemens Home Appliances...
-
Page 2: Table Of Contents
en Safety 1.3 Restriction on user group Table of contents This appliance may be used by children aged 8 or over and by people who have reduced physical, sensory or mental abilities or inad- USER MANUAL equate experience and/or knowledge, Safety .............. 2 provided that they are supervised or have been instructed on how to use the appliance Preventing material damage ....... -
Page 3: Preventing Material Damage
Preventing material damage en Accessories and cookware get very hot. WARNING ‒ Risk of electric shock! ▶ Always use oven gloves to remove ac- If the insulation of the power cord is dam- cessories or cookware from the cooking aged, this is dangerous. compartment. -
Page 4: Environmental Protection And Saving En- Ergy
en Environmental protection and saving energy The prolonged presence of moisture in the cooking Using oven cleaner in a hot cooking compartment compartment leads to corrosion. damages the enamel. Allow the cooking compartment to dry after use. Never use oven cleaner in the cooking compartment ▶... -
Page 5: Familiarising Yourself With Your Appliance
Familiarising yourself with your appliance en 4 Familiarising yourself with your appliance 4.1 Control panels Function selector Use the function selector to set the types of You can use the control panel to configure all functions heating and other functions. of your appliance and to obtain information about the You can turn the function selector clockwise or operating status. - Page 6 en Familiarising yourself with your appliance Symbol Function Zero setting The appliance does not heat up. 50–275 Temperature range Set the temperature in the cooking compartment in °C. 1, 2, 3 Grill settings Depending on the appliance type, set the grill settings for the grill, for the large area and grill, or for the small area.
- Page 7 You will find a comprehensive range of products for Wire rack Insert the wire rack with the open your appliance in our brochures and online: side facing the appliance door and www.siemens-home.bsh-group.com the curved lip facing downwards. Accessories vary from one appliance to another. When Baking tray...
-
Page 8: Basic Operation
en Basic operation 6 Basic operation When the dish is ready, switch off the appliance. 6.1 Switching on the appliance Tip: The most suitable type of heating for your food Turn the function selector to any position other than ▶ can be found in the description of the types of heating. the "Off"... -
Page 9: Rails
Rails en 8 Rails To clean the rails and cooking compartment thor- ATTENTION! oughly, you can remove the shelf supports. Incorrect assembly Never move the rail before the two hooks are se- ▶ cured fully in the upper holes. Otherwise the 8.1 Unhooking the rails enamelled coating may be damaged and break. -
Page 10: Appliance Door
en Appliance door 9 Appliance door It is normally sufficient if you clean the outside of the Open the locking levers on the left- and right-hand appliance door. If the appliance door is very dirty on hinges. the inside and outside, you can remove the appliance door and clean it. - Page 11 Appliance door en Turn the two screws at bottom followed by the two 9.5 Attaching the appliance door screws at the top in an anti-clockwise direction. Reattach the oven door in the reverse sequence to re- moval. WARNING ‒ Risk of injury! The oven door might accidentally fall or a hinge may suddenly snap shut.
-
Page 12: Troubleshooting
en Troubleshooting 9.6 Additional door safety WARNING ‒ Risk of burns! Additional safety devices have been fitted to prevent During long cooking times, the oven door may become contact with the oven doors. Always attach these safety very hot. devices when children could come near the oven. You Supervise small children when the oven is in opera- ▶... -
Page 13: Transportation And Disposal
Transportation and disposal en 11 Transportation and disposal You can find out here how to prepare your appliance 11.2 Transporting the appliance for transportation. You will also find out how to dispose Keep the original appliance packaging. Only transport of old appliances. the appliance in the original packaging. - Page 14 en How it works Use the recommended settings when configuring WARNING ‒ Risk of fire! the appliance settings. Opening the appliance door creates a draught. WARNING ‒ Risk of scalding! Greaseproof paper may come into contact with the Hot steam may escape when you open the appli- heating element and catch fire.
- Page 15 How it works en Topic Use bakeware made of ¡ The baking tin must be silicone, glass, plastic or heat-resistant up to ceramic. 250 °C. ¡ Cakes in these types of bakeware brown less. Recommended settings Cakes in tins Meal Accessory/cookware Shelf posi- Type of Temperature Cooking...
- Page 16 en How it works Meal Accessory/cookware Shelf posi- Type of Temperature Cooking tion heating in °C time, minutes Choux pastry, e.g. profiteroles, eclairs Universal pan 190–210 35–50 Biscuits Meal Accessory/cookware Shelf posi- Type of Temperature Cooking tion heating in °C time, minutes Viennese whirls Universal pan 140-150 30-40...
- Page 17 How it works en 13.6 Bread and bread rolls ATTENTION! When the cooking compartment is hot, any water in- The values for bread dough apply to both dough side it will create steam. The change in temperature placed on a tray and dough placed in a loaf tin. may cause damage.
- Page 18 en How it works Meal Accessory/cookware Shelf posi- Type of Temperature Cooking tion heating in °C time, minutes Pierogi Ovenproof dish 180–200 55–65 Empanadas Universal pan 180–200 40–50 Pies and tarts made from yufka dough Universal pan 190–210 35–45 Preheat the appliance. ¡...
- Page 19 How it works en ¡ Place the cookware onto the wire rack. ¡ It is more convenient to roast and braise meat in the cookware. You can take the joint out of the cooking ¡ Meat, poultry and fish can also become crispy in a compartment more easily in the cookware, and pre- covered roasting dish.
- Page 20 en How it works Topic You want the meat (e.g. ¡ When the roast is roast beef) to remain hot ready, switch off the and succulent. oven and leave the meat to rest for 10 minutes in the cooking compartment with the door closed. This helps distribute the meat juices more evenly.
- Page 21 How it works en Food Accessories/cook- Shelf posi- Type of Temperature Cooking ware tion heating in °C/grill set- time in mins ting Meat loaf, 1 kg Cookware without lid 190–200 70–80 At the start, add liquid to the cookware so that at least 2/3 of the joint is covered in liquid Turn the dish 2/3 of the way through the cooking time.
- Page 22 en How it works Food Accessories/cook- Shelf posi- Type of Temperature Cooking ware tion heating in °C/grill set- time in mins ting Potato products, frozen, e.g. chips, cro- Universal pan 200–220 25–35 quettes, potato pockets, rösti Stir 30 g yoghurt into the milk. 13.11 Yoghurt Pour the mixture into small containers, e.g.
- Page 23 How it works en Pour 500 ml hot water (approx. 80 °C) into the uni- Once all of the jars are bubbling, reduce the tem- ‒ versal pan. perature to 120 °C. Use the recommended setting values when config- Switch off the appliance after the specified resid- ‒...
- Page 24 en How it works Tip: If you want to preheat the oven, do not carry out the final proving stage in the appliance. Recommended settings Proving dough The temperature and time are dependent on the type and quantity of the ingredients. The values in the table are therefore guide values only.
- Page 25 Installation instructions en Grilling Food Accessories/cook- Shelf posi- Type of Temperature in Cook- ware tion heating °C/grill setting ing time in mins Toasting bread Wire rack 0.2–1.5 14 Installation instructions Observe this information when installing the appliance. 14.2 Appliance dimensions You can find the appliance dimensions here. 14.1 Important information This appliance is designed for use up to a maximum height of 4000 metres above sea level.
- Page 26 en Installation instructions ¡ To ventilate the appliance, the intermediate floor ¡ The appliance must be disconnected from the must have a ventilation cut-out. power supply whenever installation work is being ¡ Secure the worktop to the built-in unit. carried out. ¡...
- Page 27 Installation instructions en 14.8 Power cable with protective contact plug Connect the appliance only to a correctly installed, earthed socket. If the plug can no longer be accessed following install- ation, provide a separator in the phases in the fixed electrical installation in accordance with the set-up in- structions.
- Page 28 BSH Hausgeräte GmbH Carl-Wery-Straße 34 81739 München GERMANY www.siemens-home.bsh-group.com Manufactured by BSH Hausgeräte GmbH under the trademark licence of Siemens AG *9001630112* 9001630112 (010402) A...
Need help?
Do you have a question about the HA010FBR1M and is the answer not in the manual?
Questions and answers