Table of Contents
Advertisement
Advertisement
Table of Contents

Related Manuals for Siemens HS636GD.1


Summary of Contents for Siemens HS636GD.1
- Page 2 Built-in oven HS636GD.1 siemens-home.com/welcome Register your product online...
-
Page 4: Table Of Contents
Table of contents e n I n s t r u c t i o n m a n u a l Intended use ......4 Time-setting options . -
Page 5: Intended Use
8 years old and by persons with replacement parts and services can be found at reduced physical, sensory or mental www.siemens-home.com and in the online shop capabilities or by persons with a lack of www.siemens-eshop.com experience or knowledge if they are... -
Page 6: Important Safety Information
Important safety information en Water in a hot cooking compartment may (Important safety ■ create hot steam. Never pour water into the information hot cooking compartment. Warning General information Risk of injury! i n f o r m a t i o n I m p o r t a n t s a f e t y Scratched glass in the appliance door may Warning... -
Page 7: Steam
Causes of damage Steam ]Causes of damage Warning General information Risk of scalding! C a u s e s o f d a m a g e The water in the water tank may become ■ Caution! very hot if you continue to operate the Accessories, foil, greaseproof paper or ovenware on ■... -
Page 8: Steam
Environmental protection en Steam 7Environmental protection Caution! Baking tins: Ovenware must be heat and steam ■ Your new appliance is particularly energy-efficient. Here resistant. Silicone baking tins are not suitable for t e c t i o n E n v i r o n m e n t a l p r o you can find tips on how to save even more energy combined operation with steam. -
Page 9: Getting To Know Your Appliance
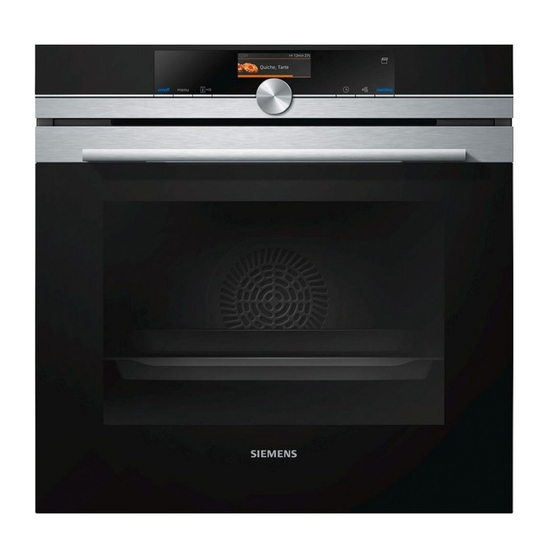
Getting to know your appliance Depending on the appliance model, individual Note: *Getting to know your details and colours may differ. appliance Control panel In this chapter, we will explain the displays and controls. In the control panel, you can use the various buttons y o u r a p p l i a n c e G e t t i n g t o k n o w You will also find out about the various functions of your... -
Page 10: Operating Modes Menu
Getting to know your appliance en Operating modes menu Countdown If you have started your appliance without a cooking The menu is divided into different operating modes. In time, you can see how long the operation has already this way, you can quickly access the required function. been running for at the top right in the status bar. -
Page 11: Steam
Getting to know your appliance Pizza setting 30-250 °C For preparing pizza and dishes which require a lot of heat from underneath. The bottom heating element and the ring heating element in the back panel heat up. Slow cooking 70-120 °C For gentle and slow cooking of seared, tender pieces of meat in ovenware without a lid. -
Page 12: Water Tank
Accessories en Cooling fan _Accessories The cooling fan switches on and off as required. The hot air escapes above the door. Your appliance is accompanied by a range of A c c e s s o r i e s Caution! accessories. -
Page 13: Inserting Accessories
Accessories set other heating modes at high temperatures, take the When inserting baking trays, ensure that lug ‚ is at the steam container out of the cooking compartment. High rear and is facing downwards. The sloping edge of the temperatures can cause permanent deformations and accessory ƒ... -
Page 14: Optional Accessories
Accessories en Optional accessories Glass roasting dish (5.1 litres) HZ915001 For stews and bakes. You can buy optional accessories from the after-sales service, from specialist retailers or online. *You will find Particularly suitable for the "Meals" operating a comprehensive range of products for your appliance mode. -
Page 15: Before Using For The First Time
Before using for the first time Setting the time KBefore using for the first The time starts at 12:00. time Use the rotary selector to set the current time. Touch the ¿ arrow Before you can use your new appliance, you must t h e f i r s t t i m e B e f o r e u s i n g f o r make some settings. -
Page 16: Cleaning The Accessories
The on/off symbol above the button is illuminated in compartment. ~ "After every steam operation" blue. on page 19 The Siemens logo appears in the display, and then a Notes type of heating and a temperature. So that the appliance adapts to a new installation ■... -
Page 17: Selecting An Operating Mode
Operating the appliance Selecting an operating mode Rapid heat up When you select an operating mode, the appliance You can use the c button to heat up the cooking must be switched on. compartment particularly quickly. The rapid heat up function is not possible for all types of Press the menu button. -
Page 18: Steam
Steam en Insert the accessories in the order specified: `Steam Level 3: Wire rack with steam containers, size S ■ Level 2: Steam container, size XL ■ Level 1: Universal pan Food can be cooked particularly gently using steam. ■ S t e a m With some types of heating, you can prepare food with steam assistance. -
Page 19: Reheating
Steam prompting you to fill up the water tank. The operation Starting continues without adding steam. Fill the water tank. Only switch on Dough proving once the Note: Cancelling steam addition cooking compartment has completely cooled down To switch off steam assistance early, touch the "Added (to room temperature). -
Page 20: Filling The Water Tank
Steam en Filling the water tank Insert the filled water tank (Fig. ). Ensure that the water tank locks into place behind both holders ‚ The water tank is located behind the control panel. (Fig. Before starting an operation with steam, open the control panel and fill the water tank with water. -
Page 21: Time-Setting Options
Time-setting options Notes OTime-setting options Once the appliance has been switched off, the X ■ field remains lit for a little longer to remind you to empty the water tank. Your appliance has different time-setting options. Remove limescale marks with a cloth soaked in i o n s T i m e - s e t t i n g o p t ■... -
Page 22: Cooking Time
Time-setting options en Cooking time Touch the "End y" field. The end time is displayed. If you set the cooking time for your meal, the operation stops automatically once this time has elapsed. The oven stops heating. Prerequisite: A type of heating and a temperature have been set. -
Page 23: Childproof Lock
Childproof lock AChildproof lock QBasic settings Your appliance is equipped with a childproof lock so There are various settings available to you in order to C h i l d p r o o f l o c k B a s i c s e t t i n g s that children cannot switch it on accidentally or change help use your appliance effectively and simply. -
Page 24: Changing The Time
Sabbath mode en FSabbath mode Operation after switching Main menu Heating modes With the Sabbath mode, a cooking time of up to 74 Steaming S a b b a t h m o d e hours can be set. You can keep the food in the cooking Dishes* compartment warm without having to switch the oven Night-time dimming... -
Page 25: Meat Thermometer
Meat thermometer @Meat thermometer The meat thermometer Plus makes precise cooking M e a t t h e r m o m e t e r possible. It measures the temperature inside the food. Once the set temperature has been reached, the appliance automatically switches itself off. -
Page 26: Core Temperatures Of Different Foods
Meat thermometer en Touch the "Core temperature" field and set the core Core temperatures of different foods temperature using the rotary selector. Do not use frozen food. The figures in the table are Press the Start/Stop button to start. given as a guide. They depend on the quality and The progress line shows the core temperature as it composition of the food. -
Page 27: Cleaning Function
Cleaning function Mix 500 ml water with 150 ml liquid descaler to .Cleaning function make a descaling solution. Press the On/Off button. Remove the water tank and fill with descaling Your appliance has the "Descaling" operating mode. C l e a n i n g f u n c t i o solution. -
Page 28: Cleaning Agent
Cleaning agent en DCleaning agent Door panels Hot soapy water: Clean with a dish cloth and then dry with a soft cloth. With good care and cleaning, your appliance will retain Do not use a glass scraper or a stainless steel C l e a n i n g a g e n t its appearance and remain fully functioning for a long scouring pad. -
Page 29: Surfaces In The Cooking Compartment
Cleaning agent Notes Caution! Slight differences in colour on the front of the Do not use oven cleaner on the self-cleaning surfaces. ■ appliance are caused by the use of different This will damage the surfaces.If oven cleaner does get materials, such as glass, plastic and metal. -
Page 30: Rails
Rails en Attaching the rails pRails The rails only fit on the right or the left side. For both rails, ensure that the curved rods are at the front. With good care and cleaning, your appliance will retain R a i l s First, insert the rail in the middle of the rear socket ‚, its appearance and remain fully functional for a long until the rail rests against the cooking compartment... -
Page 31: Appliance Door
Appliance door Fitting the appliance door qAppliance door Reattach the appliance door in the opposite sequence to removal. With good care and cleaning, your appliance will retain A p p l i a n c e d o o r When attaching the appliance door, ensure that both its appearance and remain fully functional for a long hinges are inserted straight into the opening (figure... -
Page 32: Removing The Door Cover
Appliance door en Removing the door cover Loosen and remove the screws on the left and right of the appliance door (figure The stainless steel inlay in the door cover may become Before closing the door again, trap a tea towel which discoloured. -
Page 33: Trouble Shooting
Trouble shooting Close the appliance door. Caution! Do not use the cooking compartment again until the panels have been correctly fitted. 3 Trouble shooting If a fault occurs, there is often a simple explanation. T r o u b l e s h o o t i n g Warning Before calling the after-sales service, please refer to the Risk of electric shock! -
Page 34: Maximum Operating Time Exceeded
Trouble shooting en The panel for removing the tank does The plug is not plugged into the mains Connect the appliance to the electricity supply not open Power cut Check whether other kitchen appliances are working The circuit breaker is faulty Check in the fuse box to make sure that the fuse for the appliance is in working order X field sensor faulty... -
Page 35: Customer Service
Customer service 4Customer service PDishes Our after-sales service is there for you if your appliance You can use the "Dishes" operating mode to prepare a C u s t o m e r s e r v i c e D i s h e s needs to be repaired. -
Page 36: Selecting And Setting Food
Tested for you in our cooking studio en Meat thermometer JTested for you in our For some food, you can also use the meat cooking studio thermometer. Once you have inserted the meat thermometer into the appliance, the food that is suitable for it will be displayed. - Page 37 Tested for you in our cooking studio Tinplate baking tins, ceramic dishes and glass dishes Shelf positions extend baking time and mean that the baked item will Use the indicated shelf positions. not brown evenly. If you wish to bake using these baking tins/dishes and using top/bottom heating, slide Baking on one level in the tin/dish at level 1.
- Page 38 Tested for you in our cooking studio en Dish Accessories/cookware Shelf posi- Type of Tempera- Steam in- Cooking tion heating ture in °C tensity time in mins. Sponge cake, delicate Ring tin/cake tin 150-170 60-80 Fruit flan made from sponge mixture, "Gugelhupf"...
-
Page 39: Tips On Baking
Tested for you in our cooking studio Dish Accessories/cookware Shelf posi- Type of Tempera- Steam in- Cooking tion heating ture in °C tensity time in mins. Small baked items Small cakes (preheat oven for 5 mins.) Baking tray 150* 25-35 Small cakes (preheat oven for 5 mins.) Baking tray 150*... -
Page 40: Bread And Rolls
Tested for you in our cooking studio en The cake has risen in the middle but Only grease the base of the springform cake tin. After baking, loosen the cake carefully with a knife. is lower around the edge. The fruit juice overflows. Next time, use the universal pan. - Page 41 Tested for you in our cooking studio The setting values apply to dishes placed into a cold Baking tins Dark- coloured metal baking tins are most suitable. cooking compartment. By doing so, you can make energy savings of up to 20 per cent. If you preheat the Tinplate baking tins, ceramic dishes and glass dishes oven, you can reduce the indicated baking times by extend baking time and mean that the baked item will...
-
Page 42: Pizza, Quiche And Savoury Cakes
Tested for you in our cooking studio en Dish Accessories Shelf posi- Type of Temperature in Steam in- Cooking tion heating °C/grill setting tensity time in mins. Bread rolls Part-cooked rolls or baguette, pre- Universal pan baked** Part-cooked rolls or baguette, pre- Baking tray 200-220 10-15... - Page 43 Tested for you in our cooking studio Baking on four levels: Some frozen products may be unevenly pre-baked. 4 wire racks with greaseproof paper Uneven browning may remain even after baking. ■ First wire rack: Level 5 Second wire rack: Level 3 Recommended setting values Third wire rack: Level 2 In the table, you can find the ideal heating type for...
-
Page 44: Bakes And Soufflés
Tested for you in our cooking studio en Dish Accessories Shelf posi- Type of Tempera- Steam in- Cooking tion heating ture in °C tensity time in mins. Mini pizzas** Universal pan Mini pizzas, diameter 7 cm, 4 levels 4 wire racks 5+3+2+1 180-200* 20-30... -
Page 45: Poultry
Tested for you in our cooking studio The levels of steam intensity are indicated as numbers in the table: 1 = Low ■ 2 = Medium ■ 3 = High ■ Dish Accessories/cookware Shelf posi- Type of Tempera- Steam in- Cooking tion heating... - Page 46 Tested for you in our cooking studio en cooked in several stages. These are indicated in the Recommended setting values table. In the table, you can find the ideal heating type for the kind of poultry you are cooking. The temperature and Steaming cooking time depend on the amount, composition and Poultry products are cooked more gently using the...
-
Page 47: Meat
Tested for you in our cooking studio Dish Accessories/cookware Shelf posi- Type of Temperature in Steam in- Cooking tion heating °C/grill setting tensity time in mins. Chicken Chicken, 1 kg Wire rack 200-220 60-70 Chicken, 1 kg Wire rack 190-200 20-25 200-220 35-40... - Page 48 Tested for you in our cooking studio en The steam evaporates in the cookware when roasting. Roasting on the wire rack Carefully pour in more liquid if required. On the wire rack, meat will become very crispy on all sides. Meat can also become crispy in a covered roasting dish.
- Page 49 Tested for you in our cooking studio As a general rule: the larger a roasting joint is, the lower Meat thermometer the cooking temperature and the longer the cooking You can cook accurately using a meat thermometer. time. Read important notes on using the meat thermometer in the corresponding chapter.
- Page 50 Tested for you in our cooking studio en Dish Accessories/cookware Shelf posi- Type of Temperature in Steam in- Cooking tion heating °C/grill setting tensity time in mins. Beef Fillet of beef, medium, 1 kg Wire rack 210-220 40-50 Fillet of beef, medium, 1 kg Cookware, uncovered 190-200 50-60...
-
Page 51: Fish
Tested for you in our cooking studio The roast looks good but the juices Next time, use a larger roasting dish and add less liquid if necessary. are too clear and watery. The meat gets burned during brais- The roasting dish and lid must fit together well and close properly. ing. - Page 52 Tested for you in our cooking studio en Turn any fish which is not in swimming position after Recommended setting values approx. ^ to Z of the indicated time. You can find the ideal heating type for your fish dishes in the table.
-
Page 53: Vegetables, Side Dishes And Eggs
Tested for you in our cooking studio Vegetables, side dishes and eggs Baking and grilling Only use original accessories. Here, you can find information on steaming fresh and frozen vegetables, potatoes, rice, cereals and eggs. Cooking on one level You can also find information on cooking frozen chips, Use the shelf positions indicated in the settings tables. - Page 54 Tested for you in our cooking studio en Dish Accessories/cookware Shelf posi- Type of Temperature in Steam in- Cooking tion heating °C/grill setting tensity time in mins. Vegetables, fresh Steam artichokes, whole Steam container 30-35 Steam cauliflower, whole Steam container 25-35 Steam broccoli florets Steam container...
-
Page 55: Dessert
Tested for you in our cooking studio Dish Accessories/cookware Shelf posi- Type of Temperature in Steam in- Cooking tion heating °C/grill setting tensity time in mins. Parboiled rice, 1:1.5 Cookware, flat 15-20 Risotto, 1:2 Cookware, flat 25-35 Cereals Couscous, 1:1 Cookware, flat 6-10 Millet, whole, 1:2.5... -
Page 56: Save Energy With Eco Heating Types
Tested for you in our cooking studio en Dish Accessories Shelf position Type of Tempera- Cooking heating ture in °C time in mins. Yogurt Individual portion moulds Cooking compart- 35-40 300-360 ment floor Rice pudding, 1:2.5 Universal pan 25-35 Fruit compote, 1/3 water Universal pan 10-20 Save energy with Eco heating types... -
Page 57: Acrylamide In Foodstuffs
Tested for you in our cooking studio Dish Accessories/cookware Shelf posi- Type of Tempera- Cooking tion heating ture in °C time in mins. Small baked items Muffins Muffin tray 160-180 15-25 ‘ Small cakes Baking tray 150-160 25-35 ‘ Puff pastry Baking tray 170-190 20-35... - Page 58 Tested for you in our cooking studio en Meat can be carved immediately following slow has fully cooled down. Allow the cooking compartment cooking. No standing time is required. Due to the to warm up for approx. 15 minutes with the cookware special cooking method, the meat looks pink, but is not inside.
-
Page 59: Drying
Tested for you in our cooking studio Tips for slow cooking Slow-cooking duck breast. Place the cold duck breast into a pan and fry the skin side first. After slow cooking, grill for 3 to 5 minutes until crispy. The slow-cooked meat is not as hot as So that the roasted meat does not cool so quickly, warm the plates and serve the sauces very hot. -
Page 60: Proving Dough
Tested for you in our cooking studio en Vegetables: Fill the jars with the vegetables along with universal pan in underneath to collect any juice. Use the hot, boiled water. settings indicated in the table. Wipe the rims of the jars, as they must be clean. Place After cooking, wrap the berries in a cloth and squeeze a damp rubber ring and a lid on each jar. -
Page 61: Defrosting
Tested for you in our cooking studio Dish Accessories/cookware Shelf posi- Type of Step Tempera- Cooking tion heating ture in °C time in mins. Yeast dough, sweet E.g. small baked items Bowl Dough fer- 35-40 30-45 mentation Baking tray Final fermen- 35-40 10-20 tation... -
Page 62: Reheating
Tested for you in our cooking studio en Dish Accessories Shelf posi- Type of Tempera- Cooking tion heating ture in °C time in mins. Cake Cake, moist Baking tray 70-90 Cake, dry Baking tray 60-75 Fruit, vegetables Berries Steam container 40-50 15-20 Vegetables... -
Page 63: Keeping Warm
Tested for you in our cooking studio Keeping warm Baking tins/dishes on the wire rack ■ First wire rack: Level 3 You can keep cooked dishes warm using the "Keeping Second wire rack: Level 1 warm" heating type. You can use the various moisture levels to prevent the cooked dishes from drying out. - Page 64 Tested for you in our cooking studio en Shelf positions for steaming on two levels (use a Steaming maximum of 1.8 kg per level): Always slide the universal pan in under the perforated Perforated steam container (size XL): Level 5 steam container (size XL).
- Page 65 BSH Hausgeräte GmbH Carl-Wery-Straße 34, 81739 München, GERMANY siemens-home.com *9001055081* 9001055081 941219...
Need help?
Do you have a question about the HS636GD.1 and is the answer not in the manual?
Questions and answers