Table of Contents
Advertisement
Advertisement
Table of Contents

Related Manuals for Abbott Pima ANALYSER


Summary of Contents for Abbott Pima ANALYSER
- Page 1 Pima ANALYSER USER GUIDE...
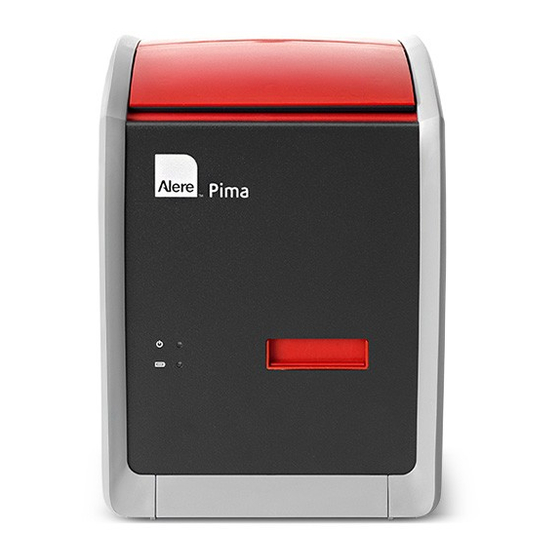
- Page 2 Designed equally to suit the needs of the healthcare professional in the field or in the laboratory the Pima Analyser is an affordable, effective and valuable point-of-care diagnostic tool.
-
Page 3: Table Of Contents
INTRODUCTION GETTING STARTED RUNNING A TEST ANALYSIS MENU MAIN MENU: RESULTS MAIN MENU: SETTINGS MAIN MENU: POWER OFF ERROR CODES & TECHNICAL SUPPORT ERROR WARNINGS & MESSAGES Pima™ ANALYSER USER GUIDE... - Page 4 12 Pima Analyser Status Lights 12 Pima Analyser Display 13 Charging the Pima Analyser 13 Charging Status Light 14 Switching On the Pima Analyser/Power Status Light 15 User Interface 15 Navigation 16 3 RUNNING A TEST 16 Initiating a Test...
- Page 5 34 Service Export 35 Device Info 36 Connectivity 36 Local Network 37 7 MAIN MENU: POWER OFF 37 Turning Off the Pima Analyser 38 8 ERROR CODES & TECHNICAL SUPPORT 38 Error Code Window 38 Technical Support 39 Error Codes 40 9 ERROR WARNINGS &...
-
Page 6: Introduction
25 microliters (µL) of capillary or venous whole blood is collected into the test cartridge, which is then capped. The Pima test cartridge is inserted into the Pima Analyser and the sample sealed within the cartridge is processed. During the course of test processing, data is recorded, analyzed and interpreted using software embedded in the Pima Analyser. -
Page 7: Pima Analyser Specifications
100 - 240 V + 10 % (A/C) at 47 - 63 Hz Declaration of Conformity The Pima Analyser complies with the Essential Requirements of the Directive 98/79/EC Annex I and was tested according to EN 61010-1, EN 61010-2-101, EN 61326-1 and EN 61326-2-6. -
Page 8: Pima Analyser Recharging Intervals During Storage
Unpacking, Installation & Transport Unpack the Pima Analyser and place safely on a clean, flat, level and stable surface. Do not put the Pima Analyser on surfaces that may vibrate, e.g. the top of a freezer or refrigerator or next to a laboratory centrifuge. -
Page 9: Maintenance & Cleaning
Maintenance & Cleaning The Pima Analyser is a maintenance free instrument and has no serviceable parts. In the case of encountered Pima Analyser failures or damages, contact your local distributor. Use cleaning solutions containing alcohol (for example 70 % Ethanol or Isopropanol). - Page 10 Only use the Pima Analyser as described in this document. Only insert USB Printers, USB storage devices or other authorized devices into the USB ports of the Pima Analyser. Do not use USB 3.0 storage devices. Placement of the Pima Analyser should allow easy disconnection from mains A/C power at any time.
- Page 11 Pima Analyser at a Glance Display Power On Keypad 2 × USB ports Cartridge slot door Both Pima USB ports are designed to be used with USB storage media, USB Printers or other authorized devices only. Power connector port Pima™ ANALYSER USER GUIDE...
-
Page 12: Getting Started
Display of currently active menu or sub-menu. During analysis and in the result windows, the name of the test is displayed here. Message Lines Area to display menu items, test results, Pima Analyser activities and function messages. 2 GETTING STARTED... - Page 13 A/C power cable Charging Status Light Upon connecting to mains A/C power the yellow charging status light located on the front of the Pima Analyser will be illuminated, indicating the charge state of the analyzer battery. Pima Analyser battery fully charged...
- Page 14 If the Pima Analyser fails correct initialization and self-test, an error code is displayed. It may not be possible to turn the Pima Analyser off via the route described in section 7. In such a case press and hold the Power On button on the back of the Pima Analyser until the screen turns black and you hear a single "beep", confirming that the Pima Analyser is now switched off.
- Page 15 User Interface All operator interacti ons with the Pima Analyser are performed using the analyzer keypad. Navigati on (UP) key to navigate menus, operator and result lists ⌱ (DOWN) key to navigate menus, operator and result lists ⌲ (OK) key to confi rm selected menu items and entered text 〈...
-
Page 16: Running A Test
Initiating a Test The Pima test consists of a disposable Pima CD4 test cartridge, containing dried reagents, and the Pima Analyser. Pima test cartridges are supplied in boxes containing a product insert detailing instructions for sample collection as well as the test specific performance characteristics. - Page 17 Inserting the Pima Test Cartridge Insert cartridge into the Pima Analyser in the direction indicated by the arrow on the cartridge. The Pima Analyser is designed to be used in combination with the Pima test cartridge only. No other cartridges, test strips or devices should be inserted into the Pima Analyser.
- Page 18 Operator ID Entry The «Operator List» is displayed with all archived operators in alphabetical order. 2020-11-01 11:05 Select an operator from the list by • OPERATOR LIST using and confirm the ⌱ ⌲ New Operator selection with 〈. Anton Or, if the operator is not yet in the Chris list, select «New Operator»...
- Page 19 «Analysis done. Remove cartridge» Analysis done. window appears and prompts the Remove cartridge operator to remove the cartridge from the Pima Analyser. 2020-11-01 11:25 Once the cartridge has been • PIMA CD4 removed, the Pima Analyser Sample...
- Page 20 This option is only available if a USB Printer is attached to the Pima Analyser via the USB port. For information on Pima accessories, please view www.globalpointofcare.abbott and refer to the USB Printer User Guide (UG-m-PIMA-02). A Pima Test Report can be printed...
- Page 21 The «Pima Test Report» (example shown below) contains all information • displayed on the result windows of the Pima Analyser. After successful printing, the Pima Analyser returns automatically to the Pima test result window. Pima™ ANALYSER USER GUIDE...
-
Page 22: Analysis Menu
Should the operator discover that an error has been made in the entry of Operator and / or Sample ID, these entries can be changed as long as the cartridge is not removed from the Pima Analyser. After removal of the cartridge no changes to the selected Operator or entered Sample ID are possible anymore. - Page 23 To abort the export, deletion or printing of results, proceed in the same manner. Press to open the «Abort process» window. «NO» is selected by ⌨ default. Select «YES» and confirm with 〈 The Pima Analyser will abort the current process. Pima™ ANALYSER USER GUIDE...
-
Page 24: Main Menu: Results
5 MAIN MENU: RESULTS The «Main Menu» window can only be selected, if there is no analysis currently in progress. View Results from Archive To view the result options, select • 2020-11-01 11:30 «Results» from the «Main Menu» MAIN MENU and confirm with Results 〈... - Page 25 Print Results from Archive For printing, a USB Printer needs to be attached to the Pima Analyser via the USB port. 2020-11-01 11:30 To print results select «Print» from • RESULTS the «Results» window and confirm View with 〈. Print...
- Page 26 • In case the USB storage medium is not recognized, please refer to p. 42 for Export Error message. In case a mobile modem is used, please refer to “Connectivity Pack IV – Annex to Pima Analyser User Guide UG-PIMA-01”. 5 MAIN MENU: RESULTS...
- Page 27 If more than one result was selected, the «Export» window appears and «NO» is selected by default. Select «YES» and confirm with to export selected results from the Pima Analyser archive. 〈 Press or select «NO» to exit this window and return to the «Export ⌨...
- Page 28 Note: The storage medium does not need to be removed to continue, however, removal is recommended, especially when the Pima Analyser is operated on the integrated battery. Export and Delete Results from Archive To export and delete results at •...
- Page 29 Select «YES» and confirm with • 〈 DELETE and selected results are deleted Do you want to from the Pima Analyser archive delete 35 after their export onto the exported storage medium. All other results results ? remain in the archive.
- Page 30 Select «YES» and confirm with • 〈 2020-11-01 11:30 DELETE and selected results are deleted from the Pima Analyser archive. Do you want to All other results remain in the delete 35 results ? archive. The deleting status is indicated by a progress bar.
-
Page 31: Main Menu: Settings
6 MAIN MENU: SETTINGS Settings 2020-11-01 11:05 To change general Pima Analyser • MAIN MENU settings, select «Settings» from the Results «Main Menu» and confirm with 〈. Settings Power Off A list of all available settings is • displayed. Use to scroll ⌱... - Page 32 Edit an Operator ID Editing of existing operators is only possible when no analysis is running. Select «Operator» from the «Settings List » and confirm with to enter the 〈 «Operator List». • Select the operator that needs to 2020-11-01 11:05 be edited.
- Page 33 «Operator List». Date Select «Date» from the «Settings • 2020-11-01 11:05 SETTINGS LIST List» and confirm with to set 〈 the date on the Pima Analyser. Operator Date Time Service Export Device Info 2020-11-01 11:05 to select the •...
- Page 34 Archive". Note: The Service Export tool is meant to assist Technical Support in trouble shooting the Pima Analyser. Service Export files can only be read using matching decrypting software. Service Exports may take up to an hour, depending on the number of files needed to be exported and the USB storage medium used.
- Page 35 Serial Number of the Pima Analyser Software: Software version installed on the Pima Analyser Battery: Current charging status of the internal battery Archive: Number of results stored in the archive Connectivity: Mobile modems that can be used with this Pima Analyser Pima™ ANALYSER USER GUIDE...
- Page 36 0.43.0 or higher. Service Export For wireless connectivity please Device Info refer to “Connectivity Pack IV – Connectivity Annex to Pima Analyser User Guide UG-PIMA-01” or contact your local distributor. Local Network This option is only available in •...
-
Page 37: Main Menu: Power Off
7 MAIN MENU: POWER OFF Turning Off the Pima Analyser 2020-11-01 11:05 • To turn off the Pima Analyser MAIN MENU select «Power Off» from the Results «Main Menu» and confirm Settings with 〈 Power Off • The «Power Off» window appears... -
Page 38: Error Codes & Technical Support
"beep", confirming that the analyzer is now switched off. Restart the Pima Analyser. Error Code Window The Pima Analyser performs a series of checks to ensure that all steps of the analysis process are completed successfully. Should one of these checks discover... - Page 39 Error Codes Error Code Action Switch off the Pima Analyser via Main Menu and restart. If Error persists contact your local distributor. Check cartridge control window was fully filled. Repeat test with new cartridge. Check cartridge cap was completely closed.
- Page 40 «Archive full» window. No further analyses can be Archive full performed by the Pima Analyser until data has been downloaded and the archive emptied. Even if the storage capacity is reached, all menu functions are still active.
- Page 41 If the cartridge barcode does not 2020-11-01 11:05 • FAILURE encode for a test type uploaded onto the Pima Analyser, Invalid the following window is displayed. barcode For information regarding available test software please contact your local distributor. Entry Errors...
- Page 42 At this point the Pima Analyser is fully functional and the analysis can be continued. It is recommended to connect the Pima Analyser to A/C power before starting another analysis. • Press to continue.
- Page 43 Menu functions may still be active at this point. Press to continue. • 〈 ⌨ It is recommended to connect the Pima Analyser to A/C power before the integrated battery is completely discharged. Printer Errors 2020-11-01 11:05 Should the operator attempt to print...
- Page 44 Selection Error Should the operator attempt to 2020-11-01 11:05 print, export, export and delete or INVALID SELECTION delete stored test results without No test selecting a result prior to executing selected the command the following window is displayed. • Press and select one or more ⌨...
- Page 45 Pima Analyser menus and to start a new test. • In case the error caused the Pima Analyser to stall, press and hold the Power On button on the back of the analyzer until the screen turns and remains black. Then restart the Pima Analyser.
- Page 46 Before each analysis, the Pima 2020-11-01 11:05 FAILURE Analyser checks the sample volume loaded on the Pima test cartridge. No sample If the Pima Analyser detects detected Error 201 insufficient volume the following window is displayed. Press and the «Abort 〈...
- Page 48 Abbott Rapid Diagnostics Jena GmbH Orlaweg 1 D-07743 Jena, Germany www.globalpointofcare.abbott © 2021 Abbott. All rights reserved. Version 08 UG-PIMA-01-08-EN All trademarks referenced are trademarks of either the Revision date: 21-01-2021 Abbott group of companies or their respective owners.
Need help?
Do you have a question about the Pima ANALYSER and is the answer not in the manual?
Questions and answers