
Related Manuals for CAME G4040Z


Summary of Contents for CAME G4040Z
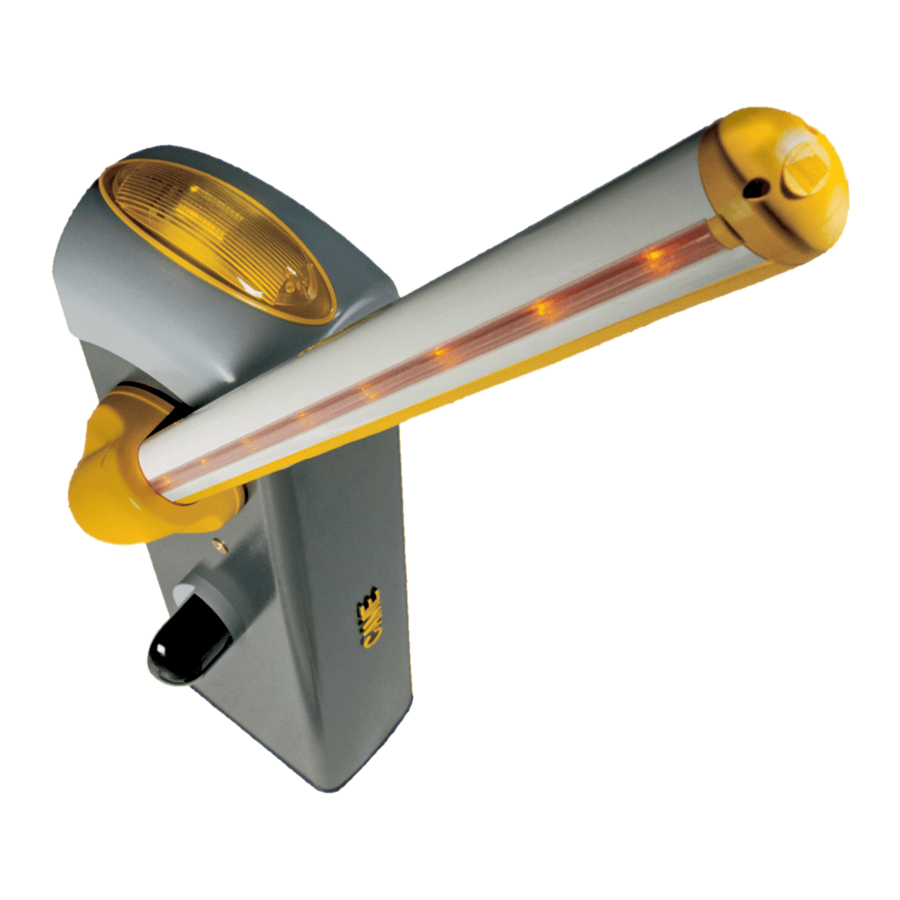
- Page 1 BARRIERE AUTOMATICHE FA 006 88 M 0 4 Italiano English Manuale d’installazione Français G4040Z - G4040IZ Русский...
-
Page 2: Leggere Attentamente
AREA DI MANOVRA DELLA BARRIERA ENERE L PRODOTTO DEVE ESSERE DESTINATO SOLO ALL USO PER IL QUALE È STATO ESPRES . CAME FUORI DALLA LORO PORTATA I DISPOSITIVI DI COMANDO A DISTANZA TRASMETTITORI SAMENTE STUDIATO GNI ALTRO USO È DA CONSIDERARSI PERICOLOSO ’... - Page 3 La barriera automatica è stata progettata per l’utilizzo in parcheggi privati o pubblici. Ogni installazione e uso difformi da quanto indicato nel seguente manuale sono da considerarsi vietate. Limiti d’impiego Tipo G4040Z - G4040IZ Larghezza max. passaggio utile (m) 3,75 Dati tecnici...
- Page 4 Descrizione delle parti 1. Cupola 9. Fermo meccanico di registro asta 2. Piastra albero motore 10. Braccio leva 3. Piastra intermedia 11. Lamierino porta-micro 4. Copri-attacco asta 12. Motoriduttore con encoder 5. Copertura di protezione anticesoiamento 13. Sportello di ispezione 6.
- Page 5 INDICAZIONI GENERALI PER L'INSTALLAZIONE ⚠ L’installazione deve essere effettuata da personale qualificato ed esperto e nel pieno rispetto delle normative vigenti. Importante! L’uso di dispositivi di comando, di sicurezza e di accessori originali CAME garantisce una facile installazione e manutenzione dell’impianto.
-
Page 6: Installazione
INSTALLAZIONE ⚠ Le seguenti illustrazioni sono solo esempi in quanto lo spazio per il fissaggio della barriera e degli accessori varia a seconda della zona di installazione. Spetta all’installatore scegliere la soluzione più adatta. ⚠ Attenzione! Usare delle attrezzature di sollevamento per trasportare e posizionare la barriera. Durante le fasi di premontaggio e fissaggio, la barriera potrebbe essere instabile e potrebbe esserci il rischio di ribaltamento. - Page 7 Riempire di terra lo scavo attorno al blocco di cemento. Togliere i dadi e le rondelle dalle viti. Inserire i cavi elettrici nei tubi fino a farli uscire di 600 mm circa. Preparazione della barriera Togliere le due viti dalla cupola superiore, inserire la chiave nella serratura e girarla in senso antiorario . Sollevare la cupola e rimuovere lo sportello d’ispezione .
- Page 8 Installazione della barriera È consigliabile installare l’armadio con lo sportello di ispezione dal lato più pratico per eventuali interventi e regolazioni. Posizionare l’armadio sulla piastra di fissaggio e fissarlo con le rondelle e i dadi. Assemblare il copri-attacco asta, la piastra intermedia e la piastra albero motore con una vite. Lasciare la vite allentata per facilitare il successivo inserimento dell’asta.
- Page 9 Inserire l’asta nel corpi-attacco asta e fissarla con le viti. UNI5931 M8x12 UNI5931 M8x20 Tagliare i profili copri cava della lunghezza necessaria e inserirli nelle canaline dell’asta su entrambi i lati . Inserire il profilo di gomma antiurto nell’asta e tagliare la parte eccedente . Fissare il tappo per asta con le viti .
- Page 10 Bilanciamento dell’asta Prima di bilanciare l’asta, verificare, con la tabella sottostante, la congruenza tra molla scelta, accessori da applicare e luce passaggio. LUCE PASSAGGIO (max 3,75 m) Molla 001G02040 Ø 40 mm Molla 001G04060 Ø 50 mm Molla 001G06080 Ø 55 mm COMPOSIZIONE DELL’ASTA 1,5 ÷...
- Page 11 Agganciare il tirante a occhiello alla staffa di ancoraggio . Sbloccare il motoriduttore e ruotare manualmente la molla per aumentare o diminuire la trazione . L’asta deve stabilizzarsi a 45°. Fissare il controdado e ribloccare il motoriduttore. Verifi care il corretto funzionamento della molla. Con asta posizionata in verticale la molla non è...
-
Page 12: Descrizione Delle Parti
COLLEGAMENTI ELETTRICI E PROGRAMMAZIONE ⚠ Attenzione! Prima di intervenire sul quadro comando, togliere la tensione di linea e, se presenti, scollegare le batterie. Alimentazione del quadro e dei dispositivi di comando: 24 V AC/DC. Le funzioni vengono impostate con i DIP, le regolazioni con i trimmer. Tutte le connessioni sono protette da fusibili rapidi. -
Page 13: Dispositivi Di Comando
Collegamento di fabbrica Il motoriduttore è già collegato. Per l’installazione a destra della barriera, seguire le indicazioni riportate nel paragrafo PREPARAZIONE DELLA BARRIERA. Motoriduttore 24 V DC Microinterruttore di Arancione apertura Bianco Arancione Rosso Marrone Microinterruttore di chiusura Dispositivi di segnalazione Lampada spia barriera (Portata contatto: 24 V AC - 3 W max). -
Page 14: Dispositivi Di Sicurezza
Dispositivi di sicurezza Fotocellule Fotocellule DELTA-S Configurare il contatto C1 e/o C5 (NC), ingresso per dispositivi di sicurezza tipo fotocellule. C1 riapertura durante la chiusura. In fase di chiusura dell’asta, l’apertura del contatto provoca l’inversione del movimento fino alla completa apertura; ... - Page 15 Per correggere la posizione verticale dell’asta: - abbassare asta; - aprire lo sportello d’ispezione; - ruotare il fermo meccanico di apertura in senso orario per aumentare la corsa dell’asta o antiorario per diminuirla . Fissare il fermo con il controdado . ...
- Page 16 Attivazione del comando radio Collegare il cavo RG58 dell’antenna agli appositi morsetti . Per i trasmettitori della serie TOP, TAM e TWIN con frequenza 433,92 MHz, posizionare il jumper della scheda AF come indicato in figura . Inserire la scheda AF sul connettore della scheda elettronica . ⚠...
- Page 17 Programmazione delle funzioni Settaggio di default 3 4 5 6 7 8 9 10 Descrizione delle funzioni 1 ON CHIUSURA AUTOMATICA (1 OFF - disattivata) 2 ON SOLO APRE dal pulsante su 2-7 e/o dal trasmettitore (con scheda AF inserita) 2 OFF APRE-CHIUDE-INVERSIONE dal pulsante su 2-7 e/o dal trasmettitore (con scheda AF inserita) 3 ON...
-
Page 18: Regolazione Della Velocità
Regolazione della velocità Min. = minimo Med. = medio Max. = massimo COM = comune DIS. 27370 Max. Med. Min. Min. Max. Per regolare la velocità di marcia, Per regolare la velocità di rallentamento, spostare il faston A su Min., Med. o Max. spostare il faston B su Min. - Page 19 SBLOCCO DELL’ASTA ⚠ L’operazione deve essere eff ettuata in assenza di tensione. Inserire la chiave nella serratura e girarla in senso orario . Alzare manualmente l’asta e ribloccarla girando la chiave in senso antiorario ⚠ ATTENZIONE! L’operazione di sblocco può rappresentare un possibile pericolo per l’utente quando, per un qualsiasi motivo -asta mal fissata alla sua sede durante il montaggio, asta divelta o spezzata da un incidente ecc.- le molle in tensione non garantiscono più...
- Page 20 COLLEGAMENTO ABBINATO CON COMANDO UNICO Stabilire la barriera Master e quella Slave. MASTER SLAVE Sulla scheda elettronica della barriera MASTER, eseguire i collegamenti elettrici, l’attivazione del comando radio, la programmazione delle funzioni e le regolazioni. MASTER 3 4 5 6 7 8 9 10 Sulla scheda elettronica della barriera SLAVE, collegare l’alimentazione su L-N, il lampeggiatore su 10-E , posizionare il DIP 7 in ON e regolare la velocità...
-
Page 21: Risoluzione Dei Problemi
Collegare le due schede utilizzando i morsetti RX-TX-GND come da fi gura. Nero Rosso Cavo schermato 2402C 22AWG Nero Rosso SCHEDA ELETTRONICA SLAVE SCHEDA ELETTRONICA MASTER RISOLUZIONE DEI PROBLEMI PROBLEMA RIFERIMENTO VERIFICA L’asta non si apre e non si chiute 1-2-3-4-6-8-18 1 - Chiudere lo sportello d’ispezione con la chiave L’asta si apre ma non si chiude... - Page 22 REGISTRI DI MANUTENZIONE Manutenzione periodica ☞ Prima di qualsiasi operazione di manutenzione, togliere la tensione, per evitare possibili situazioni di pericolo causate da accidentali movimentazioni dell’asta. Registro manutenzione periodica a cura dell’utente (semestrale) Data Annotazioni Firma...
-
Page 23: Riferimenti Normativi
___________________________________________________________________________________________________ DISMISSIONE E SMALTIMENTO ☞ CAME S.p.A. implementa all’interno dei propri stabilimenti un Sistema di Gestione Ambientale certificato e conforme alla norma UNI EN ISO 14001 a garanzia del rispetto e della tutela dell’ambiente. Vi chiediamo di continuare l’opera di tutela dell’ambiente, che CAME considera uno dei fondamenti di sviluppo delle proprie strategie operative e di mercato, semplicemente osservando brevi indicazioni in materia di smaltimento: SMALTIMENTO DELL’IMBALLO... - Page 24 Came S.p.A. Came S.p.A. Via Martiri Della Libertà, 15 Via Cornia, 1/b - 1/c 31030 Dosson di Casier Dosson di Casier 33079 Sesto al Reghena Sesto al Reghena Treviso Treviso - Italy Pordenone Pordenone - Italy (+39) 0422 4940 (+39) 0434 698111...
- Page 25 AUTOMATIC BARRIERS FA 00688 - EN Installation manual G4040Z - G4040IZ English...
-
Page 26: Read Carefully
OR EVEN ONES WITHOUT ANY EXPERIENCE PROVIDED THIS HAPPENS UNDER HIS PRODUCT SHOULD ONLY BE USED FOR THE PURPOSE FOR WHICH IT WAS . CAME S. CLOSE SUPERVISION OR ONCE THEY HAVE BEEN PROPERLY INSTRUCTED TO USE THE EXPLICITLY DESIGNED... -
Page 27: Dimensions (Mm)
The automatic barrier is designed for private and public parking facilities. Any installation and/or use other than that specified in this manual is forbidden. Limits to use Type G4040Z - G4040IZ Maximum clearance width of the passage (m) 3.75 Technical data... - Page 28 Description of parts 1. Dome 9. Boom setting mechanical stop 2. Motor-shaft plate 10. Lever arm 3. Mid plate 11. Micro-switch housing plate 4. Boom-attachment cover 12. Gearmotor with encoder 5. Protective casing shear proof 13. Inspection hatch 6. Cabinet 14.
- Page 29 GENERAL INSTRUCTIONS FOR INSTALLING ⚠ Only skilled, qualified staff must install this product. Important! Using original CAME control and safety devices and accessories ensures easy installation and system maintenance. Preliminary checks ⚠ Before beginning, do the following: • make sure the plate is anchored to a solid spot;...
-
Page 30: Installation
INSTALLATION ⚠ The following illustrations are mere examples. Consider that the space available in which to fit the barrier and accessories will vary depending on the area where it is installed. It is up to each installer to select the most suitable solution. ⚠ ... - Page 31 Fill the hole with earth around the concrete block. Remove the nut and washer from the bolts Fit the electric cables into the tubes so that they come out about 600 mm. Preparing the barrier Remove the two screws on the top dome, fit the key into the lock and turn it counter clockwise . Lift the dome and remove the inspection hatch .
- Page 32 Installing the barrier The cabinet should be installed with the inspection hatch on the most accessible side to make any adjusting easier. Place the cabinet onto the anchoring plate and fasten it using nuts and washers. Assemble the boom-attaching cover, the mid plate and motor-shaft plate with a screw. Leave the screw loose to then facilitate fitting the boom. ⚠...
- Page 33 Fit the boom into the boom-attachment cover and fasten it using the screws. UNI5931 M8x12 UNI5931 M8x20 Cut the groove covering frames to the right length and fit them into the boom grooves on either side . Fit the shock-proof frame into the boom and cut off any excess . Fasten the end cap using the screws .
- Page 34 Balancing the boom Before balancing the boom, check on the table below for congruences between the chosen spring, accessories and passage clearance. PASSAGE CLEARANCE 8(max 3.75 m) Spring 001G02040 Ø 40 mm Spring 001G04060 Ø 50 mm Spring 001G06080 Ø 55 mm BOOM LENGTH (m) 1,5 ÷...
- Page 35 Hook the eyelet rod to the anchoring rod . Release the gearmotor and manually turn the spring to increase or reduce traction . The boom should stabilize at 45°. Fasten the counter nut and lock the gearmotor again. Check the proper working state of the spring. With the boom raised vertically the spring is not taut.
-
Page 36: Description Of Parts
ELECTRICAL CONNECTIONS AND PROGRAMMING ⚠ Warning! Before working on the control panel, cut off the main current supply and, if present, remove any batteries. Power supply to the control panel and control devices: 24 V AC/DC. The features are set using the DIP switches, the adjustments using the trimmer. All connections are quick-fuse protected. -
Page 37: Warning Devices
Factory wiring The gearmotor is already connected. To install the barrier on the right, follow the instructions in the PREPARING THE BARRIER paragraph. 24 V DC gearmotor Opening micro Orange switch White Orange Blue Brown Closing micro switch Warning devices Barrier indicator light (contact rated for: 24 V AC - 3 W max). - Page 38 Safety devices DIR photocells DELTA-S photocells Configure contact C1 and/or C5 (NC), input for safety devices such as photocells. C1 reopening while closing. When the boom is closing, opening the contact causes its movement to invert until fully opened; If unused, shortcircuit contact 2-C1. C5 immediate closing.
- Page 39 To correct the boom's vertical position: - lower the boom; - open the inspection hatch; - turn the opening mechanical stop clockwise to increase the boom's travel or counter clockwise to reduce it . Fasten the stop with a counter nut . ...
- Page 40 Activating the radio control Connect the RG58 cable antenna cable to the corresponding terminals . For TOP, TAM and TWIN series transmitters with 433.92 MHz frequency, set the AF card jumper as shown in the figure . Fit the AF card into the control board connector . ⚠...
- Page 41 Programming the features Default settings 3 4 5 6 7 8 9 10 DIP-SWITCH Description of functions 1 ON AUTOMATIC CLOSING (1 OFF - deactivated) 2 ON ONLY OPEN from button 2-7 and/or from transmitter (with AF card fitted) 2 OFF OPEN-CLOSE-INVERT from the button on 2-7 and/or from a transmitter (with AF card fitted) 3 ON 24 V output on 10-E during the boom's movement phases and when it is in closed position...
-
Page 42: Adjusting Speed
Adjusting speed Min. = minimum Med. = medium Max. = maximum COM = common DIS. 27370 Max. Med. Min. Min. Max. To regulate the travel speed, move faston To adjust the slow-down speed, move A on Min., Med. or Max. faston B to Min. - Page 43 RELEASING THE BOOM ⚠ This procedure must be done with the mains power cut off . Fit the key into the lock and turn it clockwise . Manually raise the boom and lock it back into place by turning the key ...
- Page 44 PAIRED CONNECTION WITH A SINGLE COMMAND Establish the Master barrier and the Slave barrier. MASTER SLAVE On the MASTER barrier's electronic board, make the necessary electrical connections, activate the radio control, program the functions and settings. MASTER 3 4 5 6 7 8 9 10 On the SLAVE barrier's control board, connect the power supply to L-N, the fl...
-
Page 45: Troubleshooting
Connect the two control boards using terminals RX-TX-GND as shown in the fi gure. Black Screened cable 2402C 22AWG Black SLAVE CONTROL BOARD MASTER CONTROL BOARD TROUBLESHOOTING PROBLEM REFERENCE CHECK The barrier neither opens nor closes 1-2-3-4-6-8-18 1 - Lock the inspection hatch with the key The boom opens but does not close 4-7-10 2 - Deactivate the MAINTAINED ACTION function... -
Page 46: Maintenance Log
MAINTENANCE LOG Periodic maintenance ☞ Before doing any maintenance, cut off the power supply, to prevent any hazardous situations caused by accidental boom movements. Periodic maintenance log kept by users (every six months) Date Notes Signature... -
Page 47: Dismantling And Disposal
________________________________________________________________________________________________ DISMANTLING AND DISPOSAL ☞ CAME S.p.A. complies with a certified Environmental Management System at its premises, compliant with the UNI EN ISO 14001 standard to ensure the environment is safeguarded. Please continue safeguarding the environment. At CAME we consider it one of the fundamentals of our operating and market strategies. Simply... - Page 48 Came S.p.A. Came S.p.A. Via Martiri Della Libertà, 15 Via Cornia, 1/b - 1/c 31030 Dosson di Casier Dosson di Casier 33079 Sesto al Reghena Sesto al Reghena Treviso Treviso - Italy Pordenone Pordenone - Italy (+39) 0422 4940 (+39) 0434 698111...
-
Page 49: Manuel D'installation
BARRIÈRES AUTOMATIQUES FA 006 88 -FR Manuel d’installation G4040Z - G4040IZ Français... - Page 50 UTILISATION POUR LAQUELLE IL A DISPOSITIFS DE COMMANDE FIXES OU DE STATIONNER DANS LA ZONE DE MANŒUVRE ÉTÉ EXPRESSÉMENT CONÇU OUTE AUTRE UTILISATION EST À CONSIDÉRER COMME . CAME S. DE LA BARRIÈRE ONSERVER HORS DE LEUR PORTÉE LES DISPOSITIFS DE COMMANDE DANGEREUSE DÉCLINE TOUTE RESPONSABILITÉ...
- Page 51 La barrière automatique a été conçue pour une utilisation dans des parkings privés ou publics. Toute installation et toute utilisation autres que celles qui sont indiquées dans ce manuel sont interdites. Limites d’utilisation Type G4040Z - G4040IZ Largeur maximum du passage (m) 3,75 Données techniques...
- Page 52 Description des parties 1. Couvercle 9. Butée mécanique de réglage de la lisse 2. Plaque arbre moteur 10. Bras du levier 3. Plaque intermédiaire 11. Support fins de course 4. Cache-plaque de fixation de la lisse 12. Motoréducteur avec encodeur 5.
-
Page 53: Contrôles Préliminaires
⚠ L’installation doit être effectuée par du personnel qualifié et dans le plein respect des normes en vigueur. Important ! L'utilisation de dispositifs de commande, de sécurité et d'accessoires CAME garantit la simplicité du montage et de l'entretien de l'installation. - Page 54 INSTALLATION ⚠ Les illustrations suivantes ne sont que des exemples étant donné que l'espace pour la fixation de la barrière et des accessoires varie en fonction de la zone d'installation. C'est donc l'installateur qui doit choisir la solution la plus indiquée. ⚠ ...
- Page 55 Remplir de terre le trou autour du bloc de ciment. Enlever les écrous et les rondelles des vis. Introduire les câbles électriques dans les gaines jusqu'à ce qu'ils sortent d'environ 600 mm. Préparation de la barrière Enlever les deux vis de la coupole, supérieure, introduire la clé dans la serrure et la tourner dans le sens anti-horaire . Soulever la coupole et enlever la porte de visite .
- Page 56 Installation de la barrière Il convient d'installer l'armoire avec la porte de visite du côté le plus pratique pour les éventuelles interventions et les réglages. Positionner l'armoire sur la plaque de fixation et la fixer à l'aide des rondelles et des écrous. Assembler le cache-plaque de fixation de la lisse, la plaque intermédiaire et la plaque de l'arbre moteur à...
- Page 57 Introduire la lisse dans le cache-plaque et la fixer à l'aide des vis. UNI5931 M8x12 UNI5931 M8x20 Couper les profilés couvre-joint selon la longueur nécessaire et les introduire dans les rainures de la lisse des deux côtés . Introduire le profilé antichoc en caoutchouc dans la lisse et couper la partie en trop . Fixer le couvercle pour lisse à...
- Page 58 Équilibrage de la lisse Avant d'équilibrer la lisse, contrôler à l'aide du tableau ci-dessous la correspondance entre le ressort choisi, les accessoires à appliquer et la section de passage. SECTION DE PASSAGE (max. 3,75 m) Ressort 001G02040 Ø 40 mm Ressort 001G04060 Ø...
- Page 59 Accrocher le tirant à œillet à l'étrier de fixation . Débloquer le motoréducteur et tourner manuellement le ressort pour augmenter ou réduire la traction . La lisse doit se stabiliser à 45°. Fixer le contre-écrou et rebloquer le motoréducteur. Contrôler le bon fonctionnement du ressort. Avec lisse positionnée dans le sens vertical, le ressort n'est pas tendu.
-
Page 60: Description Des Parties
BRANCHEMENTS ÉLECTRIQUES ET PROGRAMMATION ⚠ Attention ! Avant d'intervenir sur l'armoire de commande, mettre hors tension et déconnecter les éventuelles batteries. Alimentation de l'armoire et des dispositifs de commande : 24 VAC/DC. Les fonctions sont configurées au moyen des micro-interrupteurs DIP et les réglages à l'aide des trimmers. Toutes les connexions sont protégées par des fusibles rapides. -
Page 61: Dispositifs De Commande
Connexion par défaut Le motoréducteur est déjà connecté. Pour une installation de la barrière à droite, suivre les indications fournies au paragraphe PRÉPARATION DE LA BARRIÈRE. Motoréducteur 24 V DC Micro-interrupteur Orange d'ouverture Blanc Orange Bleu Rouge Marron Micro-interrupteur de fermeture Dispositifs de signalisation Lampe témoin barrière (Portée contact : 24 VAC - 3 W max.). - Page 62 Dispositifs de sécurité Photocellules Photocellules DELTA-S Configurer le contact C1 et/ou C5 (NF), entrée pour dispositifs de sécurité type photocellules. C1 réouverture durant la fermeture. Durant la phase de fermeture de la lisse, l'ouverture du contact provoque l'inversion du mouvement jusqu'à l'ouverture totale ; ...
- Page 63 Pour corriger la position verticale de la lisse : - baisser la lisse ; - ouvrir la porte de visite ; - tourner la butée mécanique d'ouverture dans le sens des aiguilles d'une montre pour augmenter la course de la lisse ou dans le sens contraire pour la réduire .
- Page 64 Activation de la commande radio Connecter le câble RG58 de l’antenne aux bornes spécifi ques . Pour les émetteurs des séries TOP, TAM et TWIN, avec une fréquence de 433,92 MHz, positionner le cavalier de la carte AF comme indiqué...
-
Page 65: Description Des Fonctions
Programmation des fonctions Réglage par défaut 3 4 5 6 7 8 9 10 Description des fonctions 1 ON FERMETURE AUTOMATIQUE (1 OFF - désactivée) 2 ON OUVERTURE UNIQUEMENT depuis le bouton sur 2-7 et/ou depuis l'émetteur (avec carte AF activée) 2 OFF OUVERTURE-FERMETURE-INVERSION depuis le bouton sur 2-7 et/ou depuis l'émetteur (avec carte AF activée) 3 ON... -
Page 66: Opérations Finales
Réglage de la vitesse Min. = minimum Moy. = moyen Max. = maximum COM = commun DIS. 27370 Max. Med. Min. Min. Max. Pour régler la vitesse de marche, Pour régler la vitesse de ralentissement, déplacer la cosse A sur Min., Moy. ou déplacer la cosse B sur Min. - Page 67 DÉBLOCAGE DE LA LISSE ⚠ Mettre hors tension avant d'eff ectuer cette opération. Introduire la clé dans la serrure et la tourner dans le sens horaire . Lever manuellement la lisse et la bloquer à nouveau en tournant la ...
- Page 68 CONNEXION VIS-À-VIS À COMMANDE UNIQUE Défi nir la barrière Maître et la barrière Esclave. MAÎTRE ESCLAVE Eff ectuer, sur la carte électronique de la barrière MAÎTRE, les branchements électriques, l'activation de la commande radio, la program- mation des fonctions et les réglages. MAÎTRE 3 4 5 6 7 8 9 10 Sur la carte électronique de la barrière ESCLAVE, connecter l'alimentation sur L-N, le feu clignotant sur 10-E, positionner le commutateur...
-
Page 69: Résolution Des Problèmes
Connecter les deux cartes à l'aide des bornes RX-TX-GND comme indiqué sur la fi gure. Noir Rouge Câble blindé 2402C 22AWG Noir Rouge CARTE ÉLECTRONIQUE ESCLAVE CARTE ÉLECTRONIQUE MAÎTRE RÉSOLUTION DES PROBLÈMES PROBLÈME RÉFÉRENCE CONTRÔLE La lisse ne s'ouvre pas et ne se ferme pas 1-2-3-4-6-8-18 1 - Fermer la porte de visite avec la clé... - Page 70 REGISTRES D'ENTRETIIEN Entretien périodique ☞ Avant toute autre opération d'entretien, il est conseillé de mettre hors tension pour éviter toute situation de danger provoquée par des déplacements accidentels de la lisse. Registre d'entretien périodique tenu par l'utilisateur (semestriel) Date Remarques Signature...
-
Page 71: Références Normatives
___________________________________________________________________________________________________ MISE AU REBUT ET ÉLIMINATION ☞ CAME S.p.A. adopte dans ses établissements un Système de Gestion Environnementale certifié et conforme à la norme UNI EN ISO 14001 qui garantit le respect et la sauvegarde de l'environnement. Nous vous demandons de poursuivre ces efforts de sauvegarde de l'environnement, que CAME considère comme l'un des fondements du développement de ses propres stratégies opérationnelles et de marché, en observant tout simplement de brèves indications en matière... - Page 72 Came S.p.A. Came S.p.A. Via Martiri Della Libertà, 15 Via Cornia, 1/b - 1/c 31030 Dosson di Casier Dosson di Casier 33079 Sesto al Reghena Sesto al Reghena Treviso Treviso - Italy Pordenone Pordenone - Italy (+39) 0422 4940 (+39) 0434 698111...
- Page 73 АВТОМАТИЧЕСКИЕ ШЛАГБАУМЫ FA00688-RU Инструкция по монтажу G4040Z - G4040IZ Русский...
- Page 74 ТО ИЗДЕЛИЕ ДОЛЖНО ИСПОЛЬЗОВАТЬСЯ ИСКЛЮЧИТЕЛЬНО ПО НАЗНАЧЕНИЮ ЕОБХОДИМО ОСТАВЛЯТЬ СВОБОДНЫМ И ЧИСТЫМ УЧАСТОК ДЕЙСТВИЯ ШЛАГБАУМА Л С ЮБОЕ ДРУГОЕ ПРИМЕНЕНИЕ РАССМАТРИВАЕТСЯ КАК ОПАСНОЕ CAME S НЕ ЛЕДУЕТ ПРОВЕРИТЬ ЧТОБЫ В ЗОНЕ ДЕЙСТВИЯ ФОТОЭЛЕМЕНТОВ И ПЕТЕЛЬ ДАТЧИКА • Н НЕСЕТ НИКАКОЙ ОТВЕТСТВЕННОСТИ ЗА УЩЕРБ...
-
Page 75: Условные Обозначения
Автоматический шлагбаум предназначен для использования на частных и общественных парковках. Запрещается использовать устройство не по назначению и устанавливать его методами, отличными от описанных в настоящей инструкции. Ограничения в использовании Модель G4040Z - G4040IZ Максимальная ширина проезда (м) 3,75 Технические характеристики Модель... - Page 76 Основные компоненты 1. Куполообразная крышка лампы 9. Упор регулировки положения стрелы 2. Фланец крепления стрелы 10. Коромысло 3. Пластина крепления стрелы 11. Микровыключатели 4. Кронштейн крепления стрелы 12. Мотор-редуктор 5. Декоративная накладка 13. Дверца 6. Тумба 14. Нижнее крепление пружины 7.
-
Page 77: Предварительные Проверки
ОБЩИЕ ИНСТРУКЦИИ ПО МОНТАЖУ ⚠ Монтаж должен производиться квалифицированным персоналом в полном соответствии с требованиями действующих норм безопасности. Важно! Использование оригинальных устройств управления, безопасности и аксессуаров компании CAME гарантирует исправную работу системы, упрощает ее эксплуатацию и техническое обслуживание. Предварительные проверки... - Page 78 МОНТАЖ ⚠ Приведенные ниже рисунки носят иллюстративный характер, так как пространство для крепления шлагбаума и дополнительных принадлежностей может меняться от случая к случаю. Выбор наиболее подходящего решения должен осуществляться установщиком на месте. ⚠ Внимание! Для перемещения оборудования используйте необходимые грузоподъемные приспособления. Во...
- Page 79 Засыпьте пространство вокруг цементного блока землей. Отвинтите гайки и снимите шайбы с винтов. Вставьте электрические кабели в трубы таким образом, чтобы с другого конца они выходили как минимум на 600 мм. Подготовка тумбы шлагбаума Отверните два винта верхней крышки, вставьте ключ в замок и поверните его против часовой стрелки . Снимите...
- Page 80 Установка тумбы шлагбаума Рекомендуется установить тумбу таким образом, чтобы смотровая дверца была обращена в более удобную для обслуживания сторону. Установите тумбу на монтажное основание и прикрепите ее с помощью гаек и шайб. Поместите пластину крепления стрелы между фланцем и кронштейном и закрепите. Не затягивайте винт, чтобы было проще установить...
- Page 81 Вставьте стрелу в кронштейн и зафиксируйте ее. UNI5931 M8x12 UNI5931 M8x20 Отрежьте прозрачный профиль требуемой длины и вставьте его в пазы стрелы с обеих сторон . Вставьте противоударный резиновый профиль в стрелу и отрежьте лишнее . Установите торцевую заглушку . Установите...
- Page 82 Балансировка стрелы Перед тем как приступить к балансировке стрелы, проверьте по предложенной ниже таблице соответствие между выбранной пружиной, устанавливаемыми аксессуарами и шириной проезда. ШИРИНА ПРОЕЗДА (макс. 3,75 м) Пружина 001G02040 Ø 40 мм Пружина 001G04060 Ø 50 мм Пружина 001G06080 Ø 55 мм ДЛИНА...
- Page 83 Прикрепите нижнее крепление к кронштейну . Разблокируйте редуктор и вращайте пружину вручную, чтобы увеличить или уменьшить силу тяги . Стрела должна остановиться под углом в 45°. Затяните контргайку и заблокируйте привод. Проверьте правильность работы пружины: - при вертикальном положении стрелы пружина находится в...
- Page 84 ЭЛЕКТРИЧЕСКИЕ ПОДКЛЮЧЕНИЯ И ПРОГРАММИРОВАНИЕ ⚠ Внимание! Перед началом работ по эксплуатации, ремонту, настройке и регулировке блока управления отключите сетевое электропитание и/или отсоедините аккумуляторы. Электропитание блока и устройств управления: ~/=24 В. Для установки функций и режимов работы используются DIP-переключатели и регулировки с помощью триммеров. Все...
- Page 85 Заводские подключения Электродвигатель и микровыключатели уже подключены. В случае правосторонней установки шлагбаума следуйте инструкциям, содержащимся в параграфе "ПОДГОТОВКА ШЛАГБАУМА". Привод =24 В Микровыключетель Оранжевый замедления при открывании Белый Оранжевый Синий Красный Коричневый Микровыключетель замедления при закрывании Устройства сигнализации Лампа-индикатор открытого положения шлагбаума (макс.
- Page 86 Фотоэлементы Фотоэлементы Устройства безопасности DELTA-S Выполните конфигурацию контактов C1 и/или C5 (Н.З.), предназначенных для подключения устройств безопасности, например, фотоэлементов. C1: "Открывание в режиме закрывания". Размыкание контакта во время закрывания шлагбаума приводит к изменению направления движения на противоположное, вплоть до полного открывания.
- Page 87 Для корректировки вертикального положения стрелы: - опустите стрелу; - откройте дверцу тумбы; - поверните механический упор открывания по часовой стрелке для увеличения хода стрелы или против часовой стрелки для его уменьшения . Зафиксируйте упор с помощью контргайки . Для...
- Page 88 Активация радиоуправления Подключите антенну кабелем RG58 к соответствующим контактам . При использовании передатчиков серий TOP, TAM и TWIN с частотой 433,92 МГц установите перемычку платы AF, как показано на рисунке . Вставьте плату AF в разъем блока управления . ⚠...
- Page 89 Выбор функций и режимов работы Установки по умолчанию 3 4 5 6 7 8 9 10 МИКРОПЕРЕКЛЮЧАТЕЛЬ Описание функций и режимов работы 1 ON АВТОМАТИЧЕСКОЕ ЗАКРЫВАНИЕ (1 OFF — выкл.) ТОЛЬКО ОТКРЫТЬ кнопкой, подключенной к 2-7, и/или брелоком-передатчиком (при установленной 2 ON плате...
-
Page 90: Заключительные Работы
Регулировка скорости Min. = минимальное значение Med. = среднее значение Max. = максимальное значение COM = общий DIS. 27370 Max. Med. Min. Min. Max. Для регулировки скорости движения Для регулировки скорости замедления переместите фастон A в положение переместите фастон B в положение "Min.", "Med."... - Page 91 РАЗБЛОКИРОВКА ШЛАГБАУМА ⚠ Перед выполнением операции обесточьте систему. Вставьте в замок ключ и поверните его по часовой стрелке . Поднимите стрелу вручную и заблокируйте ее снова, повернув ключ против часовой стрелки ⚠ ВНИМАНИЕ! Процедура разблокировки может представлять собой опасность для пользователя в том случае, если...
- Page 92 ПОДКЛЮЧЕНИЕ ШЛАГБАУМОВ ДЛЯ СИНХРОННОЙ РАБОТЫ С ЦЕНТРАЛИЗОВАННЫМ УПРАВЛЕНИЕМ Определите, какой шлагбаум будет Master (ведущим), а какой Slave (ведомым). MASTER SLAVE На плате управления ВЕДУЩЕГО шлагбаума выполните электрические подключения, активацию радиоуправления, программи- рование функций и режимов работы. MASTER 3 4 5 6 7 8 9 10 На...
-
Page 93: Устранение Неисправностей
Подключите блоки управления так, как показано на рисунке, используя контакты RX-TX-GND. Черный Красный Экранированный кабель 2402C 22AWG Черный Красный ЭЛЕКТРОННАЯ ПЛАТА SLAVE (ВЕДОМЫЙ) ПЛАТА УПРАВЛЕНИЯ MASTER УСТРАНЕНИЕ НЕИСПРАВНОСТЕЙ НЕИСПРАВНОСТЬ ССЫЛКИ СПОСОБ УСТРАНЕНИЯ Стрела не двигается. 1-2-3-4-6-8-18 1 - Закройте дверцу ключом на замок. Шлагбаум... - Page 94 БЛАНКИ РЕГИСТРАЦИИ РАБОТ Периодическое техническое обслуживание ☞ Перед выполнением работ по техническому обслуживанию отключите питание во избежание возникновения опасных ситуаций, вызванных непроизвольным движением стрелы. Журнал периодического технического обслуживания, заполняемый пользователем (каждые 6 месяцев) Дата Выполненные работы Подпись...
-
Page 95: Утилизация Упаковки
Выполненные работы ___________________________________________________________________________________ ___________________________________________________________________________________________________ УТИЛИЗАЦИЯ ☞ CAME S.p.A. имеет сертификат системы защиты окружающей среды UNI EN ISO 14001, гарантирующий экологическую безопасность на ее заводах. Мы просим, чтобы вы продолжали защищать окружающую среду. САМЕ считает одним из фундаментальных пунктов стратегии рыночных отношений выполнение этих кратких руководящих принципов: УТИЛИЗАЦИЯ... - Page 96 Came S.p.A. Came S.p.A. Via Martiri Della Libertà, 15 Via Cornia, 1/b - 1/c 31030 Dosson di Casier Dosson di Casier 33079 Sesto al Reghena Sesto al Reghena Treviso Treviso - Italy Pordenone Pordenone - Italy (+39) 0422 4940 (+39) 0434 698111...
Need help?
Do you have a question about the G4040Z and is the answer not in the manual?
Questions and answers