
Subscribe to Our Youtube Channel
Related Manuals for Knauer BlueShadow 50D


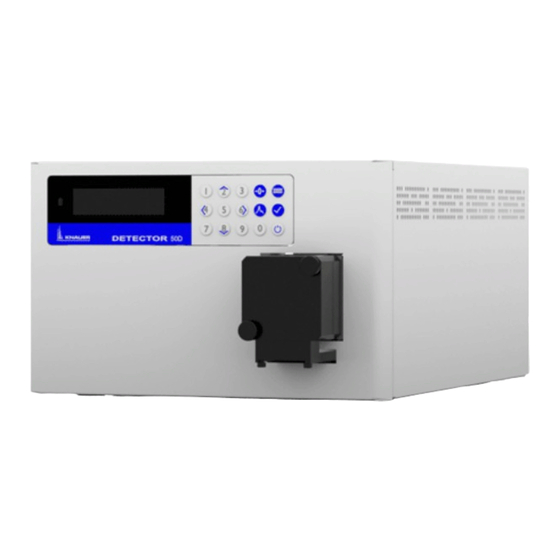
Summary of Contents for Knauer BlueShadow 50D
- Page 1 BlueShadow Detector 50D Service Instructions HPLC HPLC Document No. VSM-021 Document Number: V6700...
- Page 2 For the latest version of the service instruction, visit the partner area on our website (login required): www.knauer.net/Service-instructions Copyright: This document contains confidential information and may not be reproduced without written consent of KNAUER Wissenschaftliche Geräte GmbH. © KNAUER Wissenschaftliche Geräte GmbH 2021 All rights reserved.
-
Page 3: Table Of Contents
Table of Contents General . . . . . . . . . . . . . . . . . . . . . . . . . . . . . . . . . . . . . . . . . . . . . . . . . . . . . . . . . . . . . . . . . . . . . . . . . . . . . . 2 1 .1 About these service instructions . - Page 4 Table of Contents 11. Repairing the optical bench . . . . . . . . . . . . . . . . . . . . . . . . . . . . . . . . . . . . . . . . . . . . . . . . . . . . . . . . . . .22 11 .1 Repair measures .
- Page 5 Table of Contents 14. Spare parts . . . . . . . . . . . . . . . . . . . . . . . . . . . . . . . . . . . . . . . . . . . . . . . . . . . . . . . . . . . . . . . . . . . . . . . . . .57 14 .1 Caution Labels .
-
Page 6: General
Observe the RoHS conformity for mainboards! Never perform mainte- on the mainboard nance on the mainboards independently. Always replace the mainboards and return the defective boards to KNAUER technical support, otherwise the warranty will lapse. Signal words Possible dangers related to the device are distinguished in personal and material damages. -
Page 7: Additional Typographical Conventions
ƒ 1.4.2 Warranty conditions For information on warranty please refer to our general terms and conditions on the website: https://www.knauer.net/terms. 1.4.3 Declaration of conformity The declaration of conformity is enclosed as a separate document with the product and can be obtained online: www.knauer.net/en/Support/Declarations-of-conformity. -
Page 8: Safety Instructions And Authorization For Service Technicians
These service instructions are intended for the following professional groups: repairs? Task Authorized Maintenance KNAUER service technicians ƒ Service technicians authorized by KNAUER ƒ who have completed a service training Level 2 Repair KNAUER service technicians ƒ Service technicians authorized by KNAUER ƒ... -
Page 9: Service Request Form And Decontamination Report
ƒ of drugs, alcohol or medication. Service request form and decontamination report We advise you not to repair devices which are not accompanied by the completed document “Service request form and decontamination report” (www.knauer.net/decontamination-report). BlueShadow® Detector 50D Service Instructions, VSM-021... -
Page 10: Protective Measures
3. Protective measures The following applies for all repairs of the device: Symbols Warning instructions DANGER! High voltage can be lethal! Never replace the lamps of the detector during operation! High voltages can build up in the detector. Switch off the device and pull the power plug to com pletely isolate it from the supply voltage. -
Page 11: What Is Maintained Or Repaired
4. What is maintained or repaired? Hours of Procedures device operation 1 000 ƒ Check the operating time and light intensity of the halogen lamp and replace the lamp if necessary. 2 000 ƒ Check the operating time and light intensity of the D2 lamp and replace the lamp if necessary. -
Page 12: Disassembling The Housing
5. Disassembling the housing It is necessary to remove the device hood to carry out certain maintenan- ce and repair work. Disassembly of the device hood, suitable for certain maintenance ƒ and repair work inside a device. Electric shock Danger of electric shock from voltage-carrying parts inside the device. -
Page 13: Overview Of The Device
Disassembling the housing Process Figure 1. Tilt the end of the device hood up and pull it towards you with both hands. Fig. 2: Removing the device hood Result The device has been opened. Next steps Repair work possible: Replacing the timing belt ƒ... -
Page 14: Replacing The Display
6. Replacing the display Prerequisite The hood has been removed. Tools T10 Torx screwdriver ƒ Note: A firmware update is possible via KNAUER Service tool. Process Figure Remove FFC from 1. Remove the 5 pin flexible mainboard flat cable (FFC) from the mainboard. - Page 15 Replacing the display Process Figure Open fixing bracket of 1. Open slide lock of keypad FFC keypad and removing socket and pull out the FFC the display board 2. Remove 4 T10 Torx screws and gently pull out the display communication board from display PCB.
-
Page 16: Replacing The Keypad
7. Replacing the keypad The keypad is adhesive. The adhesive surface is covered by a protective film. Prerequisite The device hood has been removed. Procedure The following steps are recommended for replacing the keypad: 1. Remove cable. 2. Remove keypad. 3. -
Page 17: Installing A New Keypad
Installing a new keypad Process Figure 1. Bend the ribbon cable away from the keypad. 2. Remove the protective film from the adhesive surface. Pay attention that the ribbon cable does not touch the adhesive surface. Note: Do not bend the keypad in order not to damage the display or the buttons. -
Page 18: Replacing The Lamps
8. Replacing the lamps To allow access to the device hood, make sure that the sides of the device are not obstructed when replacing the lamps. Electric shock Danger of electric shock from voltage-carrying parts inside the device. The housing serves as a protective cover against voltages inside the device. -
Page 19: Replacing The Fan
9. Replacing the fan Note the following when repairing the fan: The fan is fastened on the rear panel of the device with a fan sleeve. ƒ The fan can be removed from the inside of the device without the use ƒ... -
Page 20: Inserting A New Fan
Replacing the fan Process Figure 2. Turn the fan sleeve clockwise until the knobs align with the bigger holes. 3. Pull the fan sleeve together with the fan out of the rear panel of the device. This is pos- sible without additional tools. - Page 21 Replacing the fan Process Figure 4. Insert the fan cable into the PIN connector of the mainboard. Fig. 18: Fan cable at the mainboard Legend: Power supply Fan with fan sleeve PIN connector on the main board Fig. 19: Inserting a new fan Note: Both PIN connectors on the main board that can be reached with...
-
Page 22: Replacing The Mainboard
10. Replacing the mainboard Electronic defect Electrostatic discharge can destroy the electronics. ÎWear a protective bracelet against electrostatic discharge and ground. Note: Not all plug connectors on the mainboard are designed confusi- on-proof. Take care not to mix up the reference and signal channel of the detector. -
Page 23: Procedure For Replacement Of The Mainboard
Replacing the mainboard 10.1 Procedure for replacement of the mainboard Electronic defect Electrostatic discharge can destroy the electronics. ÎWear a protective bracelet against electrostatic discharge and ground. Fig. 21: Board connector with snap lock Disconnect all cable connections on the mainboard. ƒ... -
Page 24: Configurating The Plug Connectors
Replacing the mainboard 10.1.1 Configurating the plug connectors Legend: Fan connectors, (doubled) Main power supply connector D2/Halogen power supply adapter Display connector Filter wheel motor Grating motor Optical bench: reference channel Optical bench: signal channel Fig. 22: Mainboard 10.1.3 Unlocking flexible flat cable (signal and ref erence channel) Note: Prevent functional failure of the device! Functional failures of the... -
Page 25: Replacing Fuses On The Mainboard
Replacing the mainboard 10.1.4 Replacing fuses on the mainboard Steps 1. Loosen and pull out the safe- ty fuses on the mainboard with tweezers. 2. When inserting new safety fuses, ensure that the specifica- tion label is pointing upwards. Fig. 24: Safety fuses pro tect the mainboard... -
Page 26: Repairing The Optical Bench
11. Repairing the optical bench The optical bench contains all structural components of the opti cal light path. In the 50D detector, the eluent runs through a flow cell that is loca- ted within the optical light path of the UV/VIS detector. 11.1 Repair measures Replace lamps (halogen and deuterium lamp) -
Page 27: Entrance Diaphragm
The entrance diaphragm is maintenance free. Fig. 26: Entrance diaphragm: Pre-adjusted screws 11.2 Adjusting grating unit The grating unit is adjusted by the KNAUER technical service because special tools and calibration devices are necessary. BlueShadow® Detector 50D Service Instructions, VSM-021... -
Page 28: Optical Light Path
Repairing the optical bench 11.3 Optical light path The light is guided to the grating (wavelength selective device) from the halogen and deuterium lamp by focussing mirrors and deflecting mirrors. The grating splits the white light into its spectral components. The light is guided to the exit slit via a focussing mirror and passing the filter wheel. -
Page 29: Replacing The Filter Wheel Drive
Repairing the optical bench 11.4 Replacing the filter wheel drive The filter wheel drive contains the filter wheel and the stepper motor. It is already adjusted. Note: Replace filter wheel drive when the filters are broken or dirty. Prerequisite Device hood has been removed. T10 Torx screwdriver Tools Legend:... -
Page 30: Removing Cable Plug From The Mainboard
Repairing the optical bench 11.4.1 Removing cable plug from the mainboard 1. Remove the 4-wired filter wheel drive cable from the cable holders. 2. Pull the cable plug out of the cable conector on the mainboard. Note: Ensure not to tear the cable holders off. Press the cable holders down e.g. -
Page 31: Removing Filter Wheel Drive
Repairing the optical bench 11.4.2 Removing filter wheel drive Process Figure Removing the cover 1. Loosen the 2 T10 Torx screws 2. Turn the cover slightly to be able to remove it carefully from between the optical bench and the lead frame. Fig. -
Page 32: Installing Filter Wheel Drive
Repairing the optical bench 11.4.3 Installing filter wheel drive Alternative: Clean dirty filters of the filter wheel with a lint-free cloth and isopropa- ƒ nol. Reinstall filter wheel drive afterwards. 11.4.4 Inserting the filter wheel drive and reconnecting the cable plug onto the mainboard Process Figure 1. - Page 33 Repairing the optical bench Process Figure 5. Insert the 4-wired cable plug into the connector on the mainboard. Fig. 39: 4-wired cable plug 6. Carefully insert the cover of the filter wheel drive with the opening to the right. Fig. 40: Filter wheel drive cover 7.
-
Page 34: Removing Timing Belt
Repairing the optical bench 11.5 Removing timing belt Process Figure Remove timing belt 1. Loosen 2 T10 Torx screws slightly 2. Remove timing belt Fig. 42: Loosen screws Fig. 43: Remove timing belt Next step Replace the timing belt. 11.5.1 Installing timing belt Process Figure... - Page 35 Repairing the optical bench Process Figure 2. Tighten the 2 T10 Torx screws Fig. 45: Tighten screws BlueShadow® Detector 50D Service Instructions, VSM-021...
-
Page 36: Tightening The Timing Belt
Repairing the optical bench 11.6 Tightening the timing belt The timing belt should neither exceed nor fall short of a specific tension. Tool Acoustic measuring device or smartphone app ƒ Note: Tighten the timing belt of the stepper motor with the help of an acoustic measuring device (specification for the oscillation frequency range: 280–320 Hz). -
Page 37: Replacing The Signal Board
Repairing the optical bench 11.7 Replacing the signal board Prerequisite Device hood has been removed ƒ Capillaries have been disconnected from the flow cell ƒ Tools T20 Torx screwdriver ƒ Allen wrench (1.5 mm) ƒ Tweezers ƒ Process Figure Flow cell and 1. - Page 38 Repairing the optical bench Process Figure Removing 5. Slide the flexible flat cable out the flexible flat cable of the cable clips 6. Pull flexible flat cable of the reference board out of the plug connection. 7. Unlock both locking devices (with tweezers or the tips of your fingers).
-
Page 39: Removing The Signal Board
Repairing the optical bench 11.7.1 Removing the signal board Process Figure 1. Turn screws out of the cente- ring piece using a T20 Torx screw driver. Fig. 56: Signal board, loosen screws 2. In order to exchange the signal board, remove it from the hou- sing with twee zers Fig. -
Page 40: Installing Signal Board
Repairing the optical bench 11.7.2 Installing signal board Process Figure Note: A flat conductor 1. Put flat conductor cable into cable is not included the plug connection. in the scope of delivery 2. Place both locking devices of the new signal board! into the plug connection (with tweezers or the tips of your fingers). -
Page 41: Installing The Flow Cell
Repairing the optical bench Process Figure 6. Insert carriage into the device and guide flat conduc- tor cable to the main board inside the device. Fig. 63: Insert the carriage of the flow cell into the device 11.7.3 Installing the flow cell Process Figure 1. -
Page 42: Installing The Flexible Flat Cable
Repairing the optical bench Process Figure 3. Guide both knurled-head screws through the end cap and the flow cell and tighten. Fig. 66: Secure the housing of the signal board with the two screws 11.7.4 Installing the flexible flat cable Process Figure 1. - Page 43 Repairing the optical bench Process Figure 5. Insert the flexible flat cable into the cable clips Fig. 69: Insert the flexible flat cable into the cable clips BlueShadow® Detector 50D Service Instructions, VSM-021...
-
Page 44: Replacing The Reference Board
Repairing the optical bench 11.8 Replacing the reference board 11.8.1 Preparatory actions Remove the signal board. ƒ Remove optical bench from device bottom. ƒ Prerequisite Device hood has been removed. Tools Torx T10 and T20 screwdriver ƒ 7 mm open-end wrench ƒ... - Page 45 Repairing the optical bench Process Figure 3. Open the cable holders Fig. 72: Open the cable holders 1. Remove both knurled thumb screws from the end cap (housing for the signal board). Fig. 73: Loosen the screws from the housing of the signal board 2.
- Page 46 Repairing the optical bench Process Figure 4. Turn the threaded pin out of the carriage by using an Allen wrench (1.5 mm). Fig. 75: Unscrew the threaded pin out of the carriage 5. Slide the flexible flat cable out of the cable clips Fig.
- Page 47 Repairing the optical bench Fig. 79: Removed optical bench BlueShadow® Detector 50D Service Instructions, VSM-021...
-
Page 48: Removing The Reference Board
Repairing the optical bench 11.8.3 Removing the reference board Process Figure 1. Loosen 3 screws from the base plate with a Torx T20 screwdriver. Fig. 80: Optical bench: Unscrew base plate Note: Scope of delive- 2. Unlock both locking devices ry of the new refe rence of the cable connector (with board without flexible... -
Page 49: Installing The Reference Board
Repairing the optical bench 11.8.4 Installing the reference board Process Figure 1. Clean dirty reference photodi- with a cotton swab and isopropanol; check the contact surfaces of the flexible flat cable for cleanness. Fig. 83: Clean reference photo- diode Note: Scope of delive- 2. -
Page 50: Replacing The Mirrors
Repairing the optical bench 11.9 Replacing the mirrors All mirrors of the optical bench have been mounted in the same way. The mirrors have to be replaced if the surface is dirty or damaged. Prerequisite Deuterium and halogen lamp have been removed. Circlip pliers Tools ƒ... -
Page 51: Inserting The Plane Mirror (Halogen Lamp Housing)
Repairing the optical bench Process Figure 4. Remove cover with tweezers. Fig. 90: Optical bench: Plane mir ror: Remove cover Note: Always replace 5. Remove plane mirror the mirror if dirty. It cannot be cleaned. Fig. 91: Optical bench: Remove plane mirror 11.9.2 Inserting the plane mirror (halogen lamp housing) -
Page 52: Cleaning Lens Of The Halogen And Deuterium Lamp Housing
Repairing the optical bench Process Figure 3. Insert the washer Fig. 94: Circlip and washer 4. Squeeze circlip with the circlip pliers and place it on the plane mirror cover. Fig. 95: Optical bench: Plane mir ror: Insert circlip Note: A nut is provided 5. -
Page 53: Replacing The Plane Concave Mirror Of The Colli Mator
Repairing the optical bench Process Figure 2. Clean dirty lens of the deu- terium lamp housing with a cotton swab and iso propanol. Fig. 98: Deuterium lamp housing: Clean the lens 11.9.4 Replacing the plane concave mirror of the colli mator 1. -
Page 54: Replacing The Concave Mirror
Repairing the optical bench 11.9.5 Replacing the concave mirror All mirrors of the optical bench have been mounted in the same way and are replaced with the same procedure. Legend: Cover of the concave mirror (col limator) Fig. 101: Optical bench: Cover of the concave mirror (collima tor) BlueShadow®... -
Page 55: Replacing Plane Mirror (Main Part Of The Optical Bench)
Repairing the optical bench 11.9.6 Replacing plane mirror (main part of the optical bench) All mirrors of the optical bench have been mounted in the same way and are replaced with the same procedure. Legend: Cover of the plane mirror (main part of the opti cal bench) Fig. -
Page 56: Removing The D2 Power Supply
12. Removing the D2 power supply Prerequisite The device hood has been removed. ƒ Tools T10 Torx screwdriver ƒ Process Figure Removing the 1. Remove the Torx power supply screw 2. Pull the D2 power sup- out from above. Note: Remove the spa- cer in order to mount it onto the new D2 power supply. -
Page 57: Troubleshooting
13. Troubleshooting First measures 1. Check all cabling 2. Check all screw fittings 3. Check whether air bubbles are in the flow cell 4. Check device for leaks 5. Observe system messages on the display 13.1 Possible problems and repair solutions Problem Solution Baseline drift... -
Page 58: System Messages
Troubleshooting 13.2 System messages If other system notifications are displayed besides those listed below, please turn the device off and then on. Inform the tech nical support of the manufacturer in case the system message persists. The system messages are in alphabetical order: System message Solution At least one wave-... - Page 59 Troubleshooting System message Solution Filter move error Restart calibration. ƒ Replace filter unit (Q0120). ƒ If replacing the filter unit didn‘t help, check ƒ the signal board, the reference board and the mainboard. If the system message appears again, notify ƒ...
- Page 60 Troubleshooting Error number Index Error_88 Cannot execute the command during calibration Error_91 Cannot proceed: D2 lamp heating Error_92 Cannot proceed: Lamps are off Error_93 D2 lamp does not start Error_94 Calibration failed Error_95 Wavelength check failed Error_98 I2C failed for lamp(s) Error_99 I2C failed for panel Error_100...
-
Page 61: Spare Parts
14. Spare parts To order spare parts and wear parts contact KNAUER customer support. 14.1 Caution Labels V0372 V0530 Order no. Name Model V0372 High voltage V0530 Hot lamps 14.2 Fan M2431 G5029 Order no. Name Model G5029 M2431 Fan sleeve... -
Page 62: Fuses
14.3 Fuses M0731 M0734 Order no. Name Model M0731 Safety fuse, 250 mA M0734 Safety fuse, 62 mA 14.4 Housing G2080 Q0177 M2106 Order no. Name Model M2106 Foot, self-adhesive Q0177 Hood G2080 Front plate BlueShadow® Detector 50D Service Instructions, VSM-021... -
Page 63: Lamps
14.5 Lamps A5195 A5194 Order no. Name Model A5194 Deuterium lamp, Ceramic, HBST E6521XC, E6520XC A5195 Halogen lamp E6521XC 14.6 Mainboard and cabling M2182 M1961 M1958 G0995 M1267 M1960 M1982 ZG1146XD Order no. Name Model ZG1146XD Mainboard M1267 Cable holder, self-adhesive M1960 FFC cable, 12 pin, top/bottom M1961... -
Page 64: Optical Bench
14.7 Optical bench A4123 N0043 G1149 G1149 Order no. Name Model G1149 Reference-sensor board (right figure) N0043 Silica glass plate G1149 Signal sensor board (left figure) A4123 Test cell G7008 P2621-1 P7504 Order no. Name Model G7008 Flow cell screw P2621-1 Signal PCB cap P7504... - Page 65 Q0120 P4663 Order no. Name Model P4663 Cover filter wheel Q0120 Filter wheel drive P3449 Order no. Name Model P3449 Ferrule, glass ceramic BlueShadow® Detector 50D Service Instructions, VSM-021...
- Page 66 N0159 P3471 P3471 N0175 Order no. Name Model N0159 Plano-concave mirror, 11/100 N0175 Plane mirror, 10 E6521XC P3471 Sleeve, mirror, D=11x2 sw N0161 P3471 N0160 P3473 Order no. Name Model N0160 Plano-concave mirror, 15/150 N0161 Plane mirror, 10 P3473 Sleeve, mirror, D=17x2 sw P3471 Sleeve, mirror, D=11x2 sw M1999...
-
Page 67: Power Supply For The Deuterium Lamp
14.8 Power supply for the deuterium lamp E1228V4 Order no. Name Model E1228V4 D2 power supply for the deuterium lamp G0788XA P4458 Order no. Name Model G0788XA Adaptor board P4458 Insulation strip 14.9 Display and keypad G1957A Order no. Name Model G1957A LC display... - Page 68 M3220C Order no. Name Model M3220C Keypad G1813XA M1958 Order no. Name Model G1813XA Board for LC display M1958 FFC cable, 5 pin, top/top BlueShadow® Detector 50D Service Instructions, VSM-021...
- Page 69 Latest KNAUER instructions online: www.knauer.net/service-instructions KNAUER Phone: +49 30 809727-0 Wissenschaftliche Geräte GmbH Fax: +49 30 8015010 Hegauer Weg 38 E-Mail: info@knauer.net 14163 Berlin Internet: www.knauer.net © KNAUER 2021...
Need help?
Do you have a question about the BlueShadow 50D and is the answer not in the manual?
Questions and answers