Table of Contents
Advertisement
Quick Links
Advertisement
Table of Contents
Troubleshooting

Subscribe to Our Youtube Channel
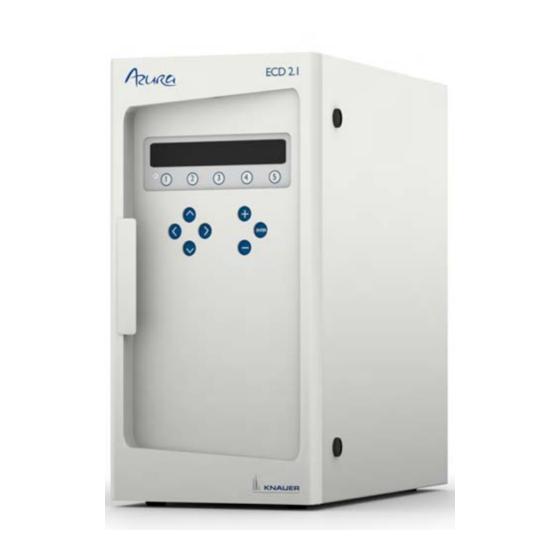
Related Manuals for Knauer Azura ECD 2.1


Summary of Contents for Knauer Azura ECD 2.1
- Page 1 Detector ECD 2.1 Instructions HPLC Document No. V6685...
- Page 2 For the printed versions of our instructions, we use environmentally friendly paper from sustainable forests. Copyright: This document contains confidential information and may not be repro- duced without written consent of KNAUER Wissenschaftliche Geräte GmbH. © KNAUER Wissenschaftliche Geräte GmbH 2019 All rights reserved.
-
Page 3: Table Of Contents
Table of contents Table of contents 1. General information ..............1 Intended use . - Page 4 Table of contents 8. Pulsed Amperometric Detection (PAD) ..........50 Introduction.
-
Page 5: General Information
1. General information Intended use The ECD 2.1 is used in combination with (Ultra) High Performance Liquid Chromatography for the electrochemical detection of suitable analytes in liquid samples. With this technique the amount of electroactive substan- ces in mobile phase can be quantified. The instrument can be used for the chromatographic analysis of a wide range of electroactive analytes in the fields of for example: Bioanalytical analyses... -
Page 6: Weee Directive
General information WEEE directive All equipment of KNAUER which are subjected to the WEEE directive shipped after August 13, 2005 are compliant with the WEEE marking requirements. Such products are labelled with the “crossed out wheelie”, depicted on the left site. -
Page 7: Warning Symbols
General information Warning symbols The following symbols are used in this guide: This sign warns about the risk of electric shock. It calls attention to a procedure or practice which, if not adhered to, could result in loss of life by electrocution. Do not pro- ceed beyond a danger sign until the indicated conditions are fully understood and met. -
Page 8: Safety Instructions
General information Safety instructions Adhere to the following standard quality control procedures and the following equipment guidelines when using the ECD 2.1 detector. The following safety practices are intended to ensure safe operation of the instrument. Working environment & safety The intended use of the instrument is to detect electroactive substances in liquid samples in combination with a (U) HPLC system in a GLP-appro- ved environment. - Page 9 General information The ECD 2.1 must only be used with appliances and power sources with proper protective grounding to prevent damage through build-up of sta- tic electricity. The power source should exhibit minimal power transients and fluctuations. If necessary connect to a filtered mains socket. Replace blown fuses with fuses of proper type and rating as indicated on the rear panel and as listed in the list of accessories and spares (appendix D).
- Page 10 ECD 2.1. If necessary the instrument must be decontaminated before decommissioning or ship- ment of the instrument for repair to KNAUER or its representatives. When shipped to KNAUER every instrument has to be accompanied with a de- contamination form which should be completely filled in and signed by the customer.
-
Page 11: Introduction
2. Introduction Congratulations on your purchase of the AZURA® Detector ECD 2.1. This detector enables you to perform all (U)HPLC applications using electro- chemical detection. The ECD 2.1 includes a highly stable Faraday-shiel- ded oven compartment accommodating column and flow cell. This flow cell has surprised researchers for its unsurpassed S/N ratio and therefore you now possess the best possible combination for extremely sensitive EC analyses. - Page 12 Introduction Legend Instrument rear panel Type label (pn, sn etc.) Digital I/O connector (25-pins sub-D fem) Analog data (9-pins sub-D fem) Valve connector (9-pins sub-D male) LAN connector (RJ45 jack) USB connector (USB B) Fuse & power rating Mains switch/inlet Grounding stud Fuse compartment Ventilation holes...
-
Page 13: Installation
ClarityChrom® chromatography software are listed in the ClarityChrom® instructions (document no. V1670, Website: www.knauer.net/cc-instructions) and in the list of supported drivers and software packages for all KNAUER devices (document no. V1667, Web- site: www.knauer.net/softwarecontrol). Laboratory requirements Your instrument is intended for indoor use only in an industrial or com- mercial environment (EN55011 group 1 class A ISM equipment). -
Page 14: Unpacking
Installation Requirements for the laboratory bench on which the instrument will be installed: Stabile, clean, flat and smooth surface. ƒ Enough mechanical strength to hold at least the weight of the detec- ƒ tor: a full-dressed detector with flow cells, columns and valves can weigh up to 20 kg. - Page 15 Installation To unpack the detector, lift it from its box by both hands (Fig. 4). Never lift the detector at its front door, but at its sides. Fig. 4 Lift instructions With both hands under the instrument lift the detector to its operation location.
-
Page 16: Mains Connection
Installation Do not place object/instruments on top of the detector. Objects can be placed on any side of the detector; however, make sure these objects are placed at a distance of 5 cm from the detector, in case that objects are placed at only one side of the instrument. - Page 17 Installation In the following section the procedure to connect the instrument to the PC using the crossover UTP cable is described. Configure the IP address of the PC LAN network card by executing the following steps (in this example Windows 7 OS is used, in Windows 8 the example screens may look different): 1.
- Page 18 Installation Fig. 8 Internet protocol menu 4. Open the menu ‚Internet Protocol Version 4 (TCP/IPv4)‘ menu (double click). 5. Configure the network IP address and subnet mask as depicted in the screen dump below (IP 192.168.5.10, Subnet mask: 255.255.255.0). Gateway and DNS fields are not filled. 6.
-
Page 19: Software
Installation Fig. 9 Example of LAN connection between PC and ECD 2.1. A direct connection requires the special crossover UTP cable delivered in the detector ship kit. With a Ethernet switch any regular UTP cable can be used. Software The ECD 2.1 can be used remote in combination with PC control soft- ware. - Page 20 Installation Dialogue Elite To install the software: Download the latest version of the Dialogue Elite from the Antec web- ƒ site www.myantec.com (register to get access). Double click on the setup.exe file to start the installation wizard. ƒ Follow the instructions of the installation wizard for successful installa- ƒ...
-
Page 21: Hplc Fluid Connections
(document no. V1670) which can be found on the KNAUER website: www.knauer.net/claritychrom You find more information about supported software packages and firm- ware versions in the list „KNAUER software device support“ (document no. V1663)which can be found on the KNAUER website: www.knauer.net/softwarecontrol HPLC fluid connections In this section the installation &... - Page 22 Installation For columns and injection valves etc. use only nuts, ferrules or finger tights recommend by the respective manufacturer of the parts. The use of unsuitable connectors may lead to damage of the parts or the introduc- tion of dead volumes. Please note that the tubing length (length L below) required to make a good connection differs for each brand of connection.
- Page 23 Installation Mobile Phase Electrochemical detection is a sensitive detection technique characte- rized by extremely low detection limits. A typical detection limit of 100 pmol/L or lower for catecholamines is no exception. Improving detec- tion limits will always be limited by the weakest link in an LC-EC system. In daily practice a couple of ‘rules’...
- Page 24 Installation of carbohydrates using anion-exchange chromatography with NaOH as mobile phase). All gases except helium are removed completely. Helium is not EC active and does not change the mobile phase properties signi- ficantly. To prevent mobile phase contamination, only high-purity helium must be used.
- Page 25 Installation Make sure that all parts that are not acid-resistant such as: nylon in- let filters, column and flow cell are not connected during this step. 5. After flushing with nitric acid, the system must be thoroughly flushed with demi water. Make sure that no traces of nitric acid are left in the tubing or pulse dampener (check with pH paper).
- Page 26 Installation Legend Cell clamp Cell Inlet (tubing connec- tion from column–to–cell) Cell outlet (tubing connection from cell-to- waste) WE contact (red) AUX contact (blue) REF contact (black) Fig. 14 Left: SenCell with ISAAC reference mounted under an angle of approximately 45° in the detector. Make sure that the outlet [3] is positioned on the top side to prevent entrapped air bubbles.
-
Page 27: Maintenance & Shutdown
4. Maintenance & shutdown Maintenance In this paragraph all maintenance is described which can be performed by the end-user, all other maintenance & service procedures may be per- formed by authorized service engineers only. Periodic check for leakage Perform leak checks on LC tubing, flow cells and connections on a dai- ly basis and check if the drain on the bottom of the oven compartment is not blocked or closed. -
Page 28: Shutting Down The System
This could cause fire. In case the fuses blow out repetitively contact KNAUER or its representati- ves for instructions and/or service of the instrument. Shutting down the system There are a couple of steps to take to switch off an LC system with ƒ... - Page 29 Maintenance & shutdown Open the cell, flush with water, use some tissues to carefully dry the ƒ cell. Be careful not to damage the spacer in the case of a VT-03 or Flex- Cell (the SenCell does not have a spacer). Close the cell and store dry.
-
Page 30: Ecd 2.1 Controller
5. ECD 2.1 controller Introduction The ECD 2.1 has been designed for maximum functionality and ease of use. The control of ECD 2.1 parameters via the keyboard & LCD display is designed in a way that without reading this chapter, it should be possible to operate the detector. -
Page 31: Overview Of Ecd 2.1 Screens
ECD 2.1 controller Overview of ECD 2.1 screens DC mode AZURA® Detector ECD 2.1 Instructions, V6685... - Page 32 ECD 2.1 controller Pulse mode AZURA® Detector ECD 2.1 Instructions, V6685...
- Page 33 ECD 2.1 controller Scan mode CONFIC menu AZURA® Detector ECD 2.1 Instructions, V6685...
- Page 34 ECD 2.1 controller DIAG menu AZURA® Detector ECD 2.1 Instructions, V6685...
-
Page 35: Parameters
ECD 2.1 controller Parameters Explanation: Type S is status, F is function and C is control. Parameter Screen Description Type 28 > 30˚C dc stat Displays the actual (left value) and the pre-set oven tempe- pulse stat rature (right value). scan stat AZERO dc stat, run,... - Page 36 ECD 2.1 controller Parameter Screen Description Type Filt pulse setup, Filter settings: Off and 0.5 Hz to 0.001 Hz cut off frequency, (PULSE pulse stat in 1, 2, 5 steps. (Fcut-off / filter coefficients based on 1 Hz mode) input frequency in pulse mode ) Filt Reflects the actual filter setting.
- Page 37 ECD 2.1 controller Parameter Screen Description Type P18(AZERO) Programmable input: can be configured that the signal of cell 1, 2 or 3 is zeroed when active, or ALL cells. P21(START) Programmable input: can be configured that the data-ac- quisition on sensor board 1, 2 or 3 is started when active, or on ALL sensor boards.
-
Page 38: Claritychrom® Ecd 2.1 Control Module
ECD 2.1 controller ClarityChrom® ECD 2.1 control module Full control and data acquisition of the DC and Pulse measurement mode for both the ECD 2.1 is supported in the ClarityChrom® chromatography software. Fig. 16 ECD 2.1 method window in ClarityChrom®. On the main tab the main measurement conditions can be set/controlled (measurement mode &... -
Page 39: Dialogue Elite
ECD 2.1 controller Dialogue Elite Dialogue Elite for Windows is a multi-functional program to control the ECD 2.1. Fig. 17 ECD 2.1 Detector window in Dialogue Elite. On the detector tab the main measurement conditions can be set/controlled (measurement mode & potential settings) Dialogue Elite is a tool for: controlling all operational parameters ƒ... -
Page 40: Detection And Parameters
6. Detection and Parameters Introduction One of the characteristics of electrochemical detection is its tremendous dynamic range. In amperometric detection peak heights may vary from micro-amperes down to the pico-ampere range. The ECD 2.1 covers such a wide range from 200 µA down to 10 pA full scale, without being limited by electronic noise. -
Page 41: Internal Organization
Detection and Parameters Essentially, for the oxidation or reduction reaction it would be sufficient to use only two electrodes. However, the three-electrode configuration has several advantages over a two-electrode configuration. If the working po- tential would be applied only over an AUX versus the WE (without REF), the working potential would continuously change due to polarization effects at the electrodes, resulting in highly unstable working conditions. - Page 42 Detection and Parameters Serial mode detection In serial mode one LC system is used, with 2 flow cells in series. For data acquisition 2 data channels are applied with the same time base. Serial mode detection is especially suitable for OX-RED or RED-OX applicati- ons, examples are analysis of vitamin K and nitro-tyrosine, using micro HPLC.
- Page 43 Detection and Parameters Fig. 22 ECD 2.1 with 2 columns and 2 SenCell flow cells for parallel detec- tion. Navigation in dual cell menu All menus for a dual flow cell system are similar to a single cell system with 2 exceptions. First, in the top right corner a number is visible which indicates the active cell in display.
-
Page 44: Parameters
Detection and Parameters Parameters Operational parameters are controlled from the SETUP screens in the ECD 2.1. Parameters are filter, cell potential and offset. Temperature is set in CONFIG menu. T e m p 3 0 ° C C o n t r a s t C O N F I V a l... - Page 45 Detection and Parameters Table III. PAD ranges and maximum compensation: Range FS Max comp Range FS Max comp 200 µA 2.5 mA 500 nA 25 µA 100 µA 2.5 mA 200 nA 25 µA 50 µA 2.5 mA 100 nA 25 µA 20 µA 2.5 mA...
- Page 46 Detection and Parameters DC mode In the tables below the available filter settings for the DC mode are listed with the corresponding data rate of the output. Data rate is expressed as number of data points per second (Hz). In the DC mode the data rate is not an adjustable parameter but is coupled to the filter setting, except for RAW.
-
Page 47: Noise Suppression: Adf
7. Noise suppression: ADF™ Introduction Besides for its tremendous linear dynamic range and selectivity, elec- tro-chemical detection is well-known for its very low limits of detection. To further improve these detection limits the manufacturer‘s engineers have developed ADF (Advanced Digital Filter) and the ECD 2.1 has been equipped with it as a standard. -
Page 48: Frequency Of Signal And Noise
Noise suppression: ADF™ 400000 300000 200000 100000 -100000 t (min) -200000 -300000 4.15 4.56 -400000 Fig. 27 Sine of Fig. 26: A full period is 0.41 min (25 s) which corresponds to a frequency of 1/25 = 0.04 Hz. Frequency of signal and noise Also a chromatographic peak can be expressed in terms of frequencies. - Page 49 Noise suppression: ADF™ Typically in chromatography narrow peaks are in front of a chromatogram while peaks with longer retention times get wider. As a consequence frequencies are not constant but vary between 0.1 – 0.01 Hz, which corre- sponds to 10 – 100 s peak width. 698000 598000 10 s...
-
Page 50: Amplitude Response Plot
Noise suppression: ADF™ Analogue filters are made of hardware, from capacitors, resistors and amplifiers (opamps). Digital filters are mathematical routines to process an acquired signal. Traditionally, in many detectors for chromatography an analogue low- pass filter is applied (rise time filter). A ‘passive’ RC filter consists of resis- tors and capacitors. - Page 51 Noise suppression: ADF™ There are several ways to describe the filter characteristics. An amplitude response plot gives important information on filter behavior. Suppose our signal of interest has a frequency between 0 - 1 Hz, and all higher frequencies are noise. An ideal filter is shown in Fig. 32 where signal fre- quencies between 0 –...
-
Page 52: Applying Adf In Chromatography
Noise suppression: ADF™ Note that the sum of coefficients is exactly 1. Y[n] is the output data point, X[n] are input data points. Generally spoken, the performance of a digi- tal filter improves with more input data points, but also more processor capacity is required for the large number of calculations. - Page 53 Noise suppression: ADF™ The ECD 2.1 has a number of filter settings to optimize for best possi- ble signal-to-noise ratio. The width of the peaks of interest is important because wider peaks allow stronger filter settings simply because of the lower frequency of such peaks.
-
Page 54: Pulsed Amperometric Detection (Pad)
8. Pulsed Amperometric Detection (PAD) Introduction The ECD 2.1 can operate in PAD mode. In pulsed amperometric detecti- on (PAD) the working electrode (WE) is regenerated at a frequency of 0.5 - 3 Hz by the application of a series of potential changes. This is particu- larly useful for certain applications where the working electrode is rapidly fouled due to adsorption of insoluble reaction products. - Page 55 Pulsed Amperometric Detection (PAD) High pH of mobile phase In carbohydrate analysis another ‘special’ consideration has to be taken into account. Detection is done in the pulse mode using a flow cell with gold electrode. For separation an anion exchange column is used with a mobile phase of around 20-100 mmol/L sodium hydroxide.
- Page 56 Pulsed Amperometric Detection (PAD) Fig. 38 Potential steps in pulsed amperometric detection. During t1 the detection potential is applied, detection occurs during ts. Steps t2, t3 and t4 are for regenerating the electrode. This process repeats itself continuously as soon as the cell is on. During the next time intervals (t2..t4) the electrode is ‘cleaned’...
- Page 57 Pulsed Amperometric Detection (PAD) Fig. 39 A detailed part of a chromatogram acquired at different data frequen- cies. The data rate is (A) 5x, (B) 2.5x, (C) 1.2x, (D) 0.6x and (E) 0.3x the frequency of the pulse. C is 1 Hz data rate. Working electrode material Gold and platinum are used as working electrodes for PAD.
-
Page 58: Optimization Of The Working Potential
9. Optimization of the working potential Introduction A current - voltage (I/E) relationship, or voltammogram, characterizes an analyte. It gives information on the optimum working potential, which can be used to improve detection sensitivity and selectivity. There are several ways to obtain a voltammogram: A hydrodynamic voltammogram is obtained in the DC mode by run- ƒ... -
Page 59: Hydrodynamic And Scanning Voltammogram
Optimization of the working potential Hydrodynamic and scanning voltammogram Hydrodynamic voltammogram A hydrodynamic voltammogram is constructed when the pure analyte is not available and separation over an analytical column is required. Furthermore, under real chromatographic conditions reliable informa- tion about the S/N ratio is obtained. The peak heights obtained from the sequence of chromatograms are plotted against the working potential used. - Page 60 Optimization of the working potential Scanning Voltammetry Waveform Time (Seconds) Fig. 42 Scanning voltammetry potential waveform. The current is plotted against the working potential to give a voltam- mogram (I/E curve). An example is shown in Fig. 43. A difference with a hydrodynamic in scanning voltammetry is that no HPLC separation is involved.
-
Page 61: Optimization Using A Voltammogram
Optimization of the working potential Ecell (V) Fig. 43 Scanning voltammetry of 1.0 µmol/L norepinephrine (A) at a glassy carbon working electrode, at a scan speed of 10 mV/s. Scan (B) is the blank solvent. With respect to sensitivity, a high working potential is important. Howe- ver, at higher working potentials, more analytes are detectable. - Page 62 Optimization of the working potential Fig. 44 Selectivity in LC-EC of compound X and Y is optimised by choosing the working potential with the largest difference in peak height. Electrochemical reactions are pH sensitive (Fig. 45). For norepinephrine the I/E curve is shifted to a lower potential at higher pH. When the wor- king potential is high (E2), and the signal is diffusion limited, an increase in pH will result only in a small increase of the peak height.
-
Page 63: Construction Of A Hydrodynamic Voltammogram
Optimization of the working potential Construction of a hydrodynamic voltammogram Before a hydrodynamic voltammogram can be obtained, the chroma- tographic conditions should be optimized. Then the following steps are taken: 1. A solution of the analyte at a concentration between 1 - 100 µmol/L, is prepared in mobile phase. -
Page 64: Construction Of A Scanning Voltammogram
Optimization of the working potential Construction of a scanning voltammogram A scanning voltammogram can be recorded using the ECD 2.1 scan mode. The scan mode is programmed in the ‘SCAN SETUP’ screen of the ECD 2.1. Depending on the data acquisition software that is used and the experimental set-up, a full, half or continuous scan cycle can be chosen. - Page 65 Optimization of the working potential Fig. 49 ECD 2.1 scanning voltammetry set-up with a syringe pump. The Antec dual syringe infusion pump which can be obtained as accesso- ry has as an advantage that it can be controlled in Elite Dialogue software as well.
- Page 66 Optimization of the working potential Fig. 51 Scan (cycle: half) of a 20 µM Serotonin in mobile phase at a glassy carbon working electrode. Scan speed 20 mV/s. The following procedure is advised to record scanning voltammogram of analytes: Use a voltammetry set-up as shown in Fig. 57 (preferably) in combi- ƒ...
- Page 67 Optimization of the working potential A scan can be started (stand-alone) by pressing the ‘START’ button in ƒ the ‘SCAN STAT’ menu or by starting a single run in Dialogue: press the ‘F5’ button or click ‘start single run’ under the ‘Options’ menu. To record a background (blank) scan repeat the experiment with the ƒ...
-
Page 68: Technical Data
10. Technical data 10.1 Environmental, dimensions, weight and power requirements Working temperature 10 - 40 °C (indoor use only) Storage temperature –25 - +50 °C Humidity 20 - 80% RH Safety and EMC According to EC-directives; Emission Group I Class A; cMETus approved Equipment class Installation category Pollution degree... -
Page 69: General
Technical data 10.2 General Operating modes DC, PULSE SCAN Other mode CONFIG, DIAG and SERVICE Sensors Up to 3 flow cells Autozero triggered by keyboard, rear panel TTL, or remote PC control (LAN) Max. current compen- 25 nA - 2.5 mA in DC and PULSE mode de- sation (Autozero) pendent on range setting Offset... -
Page 70: Pulse Mode
Technical data 10.4 PULSE mode Range 10 nA - 200 µA in 1, 2, 5 increments Filter (ADF) 0.5 - 0.001 Hz in 1, 2, 5 increments OFF: for unprocessed data Potential (Ec) -2.50 V to + 2.50 V with 10 mV increments Data Rate 1/(pulse duration) Hz Waveform... -
Page 71: Rear Panel I/O
11. Rear panel I/O In this chapter all rear panel functionality is described. The ECD 2.1 has besides the mains inlet in total 5 connectors on the rear panel for com- munication, data output and I/O. A photo of the rear panel connectors is shown below in Fig. -
Page 72: Lan Connector
Rear panel I/O 11.2 LAN connector RJ-45 bus for serial instrument control over LAN: 10Base-T or 100Base-TX (Auto-Sensing) serial-to-ethernet connectivity. ƒ Network configuration of Xport via Lantronix device installer software ƒ utility. Fixed communication baud rate: 921600 bps ƒ Communication over LAN is used for parametric instrument control ƒ... - Page 73 Rear panel I/O For a manual valve the status (LOAD/INJ) read-out is established by con- necting the LOAD/INJ sensor wires/leads of a manual valve to pin 5 and 6 (contact closure). Inject marker A connected valve enables the inject marker (pin 9)|. The contact is high when the valve is in ‘load’...
- Page 74 Rear panel I/O Fig. 55 Dialogue Elite Device settings. Fig. 56 ECD 2.1 detector window with Valve control. Manual valve configuration In case of a manual valve the valve present parameter has to be set manu- ally. Configuration of a manual valve can be done via the LCD screen or the Dialogue Elite software.
- Page 75 Rear panel I/O Fig. 57 Dialogue Elite EC device settings, manual valve check box (encircled in red). Valve status & control In stand-alone mode the valve status for both an electrically-actuated val- ve and manual valve is displayed in the STAT screens on the LCD display. For example see the screen dumps of the STAT screen for a ECD 2.1 SCC (top) and TCC detector.
- Page 76 Rear panel I/O Fig. 59 Example of the valve flow path of a 6-port valve. In Dialogue Elite the valve status/position is shown under the monitor tab. To make it visible in the left table, check the valve position checkbox in the item selector (by default the valve position is not shown).
-
Page 77: Analog Data Connector
Rear panel I/O Fig. 61 Dialogue Elite Events tab with an example of two programmed events switching the valve to Inject (t = 0.01 min) and back to Load (t = 0.05 min). For more detailed information about valve control of the elec- trically-actuated VICI valves in the ClarityChrom®... - Page 78 Rear panel I/O T e m p 3 5 ° C C o n t r a s t C O N F I V a l v e = P r e s e n t V o u t s o u r c e = D A C m a s t...
- Page 79 Rear panel I/O Ic (nA) = Vout (mV) x Range setting (nA) 1000 mV So for example a signal on the output of 250 mV in the 200 nA range cor- responds with an actual cell current of (250/1000)*200 nA = 50 nA. I/E output The I/E output is the unprocessed analog signal from the I/E converter circuit.
-
Page 80: Digital I/O Connector
Rear panel I/O For reference, the layout of the analog data out connector is shown in the table below. Table VII. Analog data output connector lay-out. Layout Vout 1 Vout 2 Vout 3 Vout 4 Vout 5 To measure for example the analog signal of cell 1 with an external A/D converter: Connect the signal wire, lead of pin 1 (Vout1), to the analog measure- ƒ... - Page 81 Rear panel I/O The maximum rating for these contact closure outputs are 24 VDC (swit- ching voltage) and 0.25 A. The relays can be controlled in the Elite Dialo- gue software and ClarityChrom® Chromatography software. The ECD 2.1 has 4 free programmable TTL outputs AUX1 – AUX4 (pin 7 –...
- Page 82 Rear panel I/O P 1 1 ( O V L D ) = 1 P 1 8 ( A Z E R O ) = 1 P 1 2 ( C - O N ) = A L L P 2 1 ( S T A R T ) = A L L P 1 5 ( C - O F F ) = 2 P R E V Fig.
- Page 83 Rear panel I/O Start The ECD 2.1 has 4 TTL inputs (pin 21 – 24) available to start data-acqui- sition and/or start a scan. One start input is configurable (pin 21) in the IO menu and can be used for example to start the data-acquisition of all cells synchronously using only one trigger input when the setting ‘All’...
- Page 84 Rear panel I/O Fig. 68 Dialogue Elite Event Editor window. Programming of output A. Fig. 69 Dialogue Elite Event table window with an example of programming timed events for output A (in this case Relay 1). AZURA® Detector ECD 2.1 Instructions, V6685...
- Page 85 Rear panel I/O Table VIII. DIGITAL I/O connector layout. Type I/O Function Configu- Description (default) rable I/O 1,2,3 Relay 1 Relay 1 Contact between 3 (common) and 1 (default), activated by time file Outp 0100 or Command 47 4,5,6 Relay 2 Relay 2 Contact between 6 (common) and 4...
- Page 86 Rear panel I/O Type I/O Function Configu- Description (default) rable I/O TTL IN Autozero Trigger to zero/null the cell current (com- pensation Ic) TTL IN Start 1 A,1-5 Trigger to start a Scan and Data-acquisition TTL IN Start 2 Trigger to start a Scan and Data-acquisition TTL IN...
-
Page 87: Chassis Grounding Stud
Rear panel I/O 11.6 Chassis grounding stud On the rear panel a chassis grounding stud is available at the lower right-side, next to the ventilation holes of the power supply compartment. This grounding stud which is connected to the central grounding point of the instrument can be used for shielding purposes. -
Page 88: Functionality Tests
12.1 Installation Qualification (IQ) The customer may request the Installation Qualification, which is free of charge. In case of a request, the Customer Support of KNAUER or from a provider authorized by KNAUER performs this functionality test during the installation. -
Page 89: Troubleshooting
13. Troubleshooting Even though great care was taken in the design of the ECD 2.1, problems may occur during operation of the instrument. The information in this chapter may help you to identify and solve the source of the problems. Errors can be categorized in two types: Instrument errors ƒ... - Page 90 Troubleshooting Furthermore the following messages can be displayed on the LCD screen or PC control software during a measurement: Table X. Messages. Message Advice 01 Out of range* Output is either above +1.0V or below –1.0V. Pressing AZERO may give an adequate read-out again.
-
Page 91: Analytical Troubleshooting
Troubleshooting 13.2 Analytical troubleshooting Analytical problems like loss of signal, increase in noise level, high cell current, loss in sensitivity etc. may occur in any (U)HPLC-ECD 2.1 system. It may be hard to find the cause and several checks need to be perfor- med to eliminate the source of the problem. - Page 92 Troubleshooting well-functioning VT-03 flow cell in an ideal (U)HPLC set-up. The noise ge- nerated via the dummy should be less than 2 pA if the filter of the control- ler is set to off, provided that the dummy is within the fully closed Faraday shield at the same position as the flow cell.
-
Page 93: Stop Flow Test
Troubleshooting N O I S E V o u t = + 0 . 0 0 7 V = + 2 . 6 6 7 n A P R E V Fig. 74 Output voltage To be able to start an internal dummy cell test you need to check the In- ternal dummy cell checkbox () under the Settings tab (controls section) in the device settings window (see Fig. - Page 94 Troubleshooting Fig. 76 Disconnect tubing connection Disconnect the outlet tubing from the flow cell. ƒ Connect the other end of the tubing (of the tubing connected to the ƒ inlet of the flow cell) to the outlet of the flow cell. The fluidic path of the flow cell is now completely isolated from the ƒ...
- Page 95 Troubleshooting Noise: If a significant drop of the noise only is observed it could be sig- nature of for example pump problem (check valves, air in pump head, compressibility issues or leaking seals). Fig. 78 Significant drop in noise In case no significant drop in noise or cell current is observed service or replace the cell.
- Page 96 Troubleshooting High cell current Possible cause Remedy Contaminated buffer Replace buffer, do not recycle the buffer High WE potential Optimize potential, if possible: use smaller WE diameter Salt bridge in REF not Refill with wetted KCl crystals saturated Retained peaks from Wait for elution of these (very) broad peaks previous runs Column is ‘bleeding’...
- Page 97 Troubleshooting Baseline oscillations Possible cause Remedy Malfunctioning pump Check pump (seals, valves) (regular pattern) Over-tightened cell Adjust cell bolts, check pump pressure bolts Air bubbles in cell or Maintenance REF Temperature Set oven temperature oscillations Contaminated buffer Replace buffer, do not recycle the buffer (high I cell Fouled WE...
-
Page 98: Reorders
14. Reorders The electrochemical detector is shipped together with a number of parts. The listing in Table below may not be complete, see check list of delivery for complete listing. Table XII. Accessory kit A07548-4 (175.0200) for the ECD 2.1 detector Part number Component 2.500.040... -
Page 99: Index
15. Index Fuse replacement 5, 26 ADC 38 ADF 45 Helium degassing 21 Amplitude response 48 ANALOG DATA 8, 75 Applications: quality control 6 Auxiliary electrode 38 converter 38, 39 output 77 relationship 56 Biological hazard 6 Inject marker 71 Buffer pH 21 Installation 9 Buttons on keyboard 28... - Page 100 Index Voltage clamp 38 Voltammogram Parallel mode detection 40 construction 61, 62 Passivation with nitric acid 22 introduction 56 pH 21, 53 Polarity 43 Potential optimization 56 Warning symbols 3 Power supply fan 11 Waste disposal 6 Pulsed Amperometric Detection (PAD) 52 WEEE directive 2 Pulse mode Working electrode 38...
- Page 101 Latest KNAUER instructions online: www.knauer.net/library KNAUER Phone: +49 30 809727-0 Wissenschaftliche Geräte GmbH Fax: +49 30 8015010 Hegauer Weg 38 E-Mail: info@knauer.net 14163 Berlin Internet: www.knauer.net © KNAUER 2019...
Need help?
Do you have a question about the Azura ECD 2.1 and is the answer not in the manual?
Questions and answers