
Subscribe to Our Youtube Channel
Related Manuals for JJRC HERON


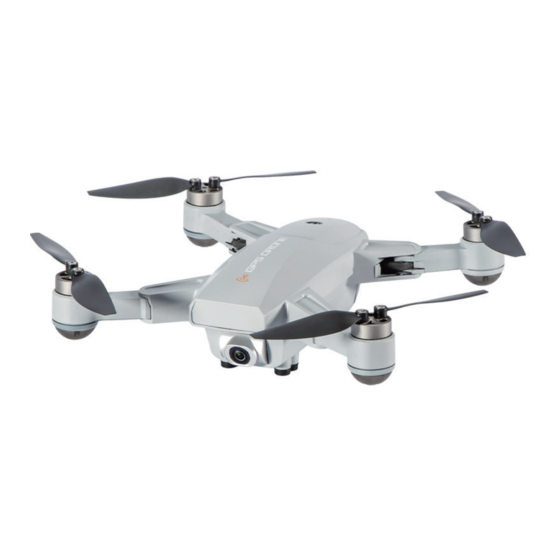
Summary of Contents for JJRC HERON
- Page 1 AGE 14+ HERON GPS BRUSHLESS DRONE WITH 2.7K HD CAMERA *Please read this manual carefully before operation and keep it properly for future reference. After-sales email: nostech1@hotmail.com...
-
Page 2: Table Of Contents
Important Statement -------------------------------------------------------------------------------------------1 Flight Safety Guidelines ------------------------------------------------------------------------------------1-2 2.PRE-FLIGHT PREPARATION Flight Environment ----------------------------------------------------------------------------------------------3 Pre-flight Inspection --------------------------------------------------------------------------------------------3 3.INTRODUCTION AND ASSEMBLY OF DRONE Know Your HERON ---------------------------------------------------------------------------------------------4 Accessories -------------------------------------------------------------------------------------------------------4 Unfolding the Crankshafts ------------------------------------------------------------------------------------5 Propeller Installation, Replacement ------------------------------------------------------------------------5 4.CHARGING FOR DRONE Battery Charging for Drone -----------------------------------------------------------------------------------5... - Page 3 7.DRONE INDOOR FLIGHT MODE Pairing Remote Control with Drone --------------------------------------------------------------------15 Unlock ---------------------------------------------------------------------------------------------------------15 Takeoff and Landing ---------------------------------------------------------------------------------------15 Calibrate the Gyroscope ----------------------------------------------------------------------------------15 8.OPTIONAL ACCESSORIES ----------------------------------------------------------------16 9.FAQ -------------------------------------------------------------------------------------------------------17 Email: nostech1@hotmail.com...
-
Page 4: Important Statements And Safety Guidelines
Important Statement and Safety Guidelines Thank you for purchasing product. Please read this manual carefully before use and retain it for future reference. Package should be retained for future reference. Important Statement ● This drone is not a toy, but hobby grade model. It should be assembled and operated properly. Pilot must operate this drone in safe way. - Page 5 ● Bear proper operation and safe flight guidelines in mind Please take a careful look at the manuals before flights for important information of product functions and operation tips, and learn how to use the accessory. Safe flight always comes first. Stay informed of and abide strictly by relevant local laws and regulations.
-
Page 6: Pre-Flight Preparation
PRE-FLIGHT PREPARATION 1.Flight Environment Indoor: Spacious spaces away from barriers, crowds or pets are preferred. Outdoor: Sunny, windless and breezy weathers are preferred. Please keep the drone in sight during the flight and keep it away from barriers, high-tension cables, trees and people. Do not fly in extreme environment, such as hotness, coldness, strong wind or heavy rain. -
Page 7: Introduction And Assembly Of Drone
INTRODUCTION AND ASSEMBLY OF DRONE 1.Know Your HERON The drone uses 2.4GHz frequency, which allows multiple players to fly same models at the same time without interference to each other. The drone is equipped with a 5GHz-wifi FHD 120° wide-angle camera. -
Page 8: Unfolding The Crankshafts
3.Unfolding the Crankshafts Unfold the crankshafts in the following order: ①Unfold the rear crankshafts. ②Then unfold the front crankshafts (near the camera). And follow steps in reverse order to fold the crankshafts. Unfolded Crankshafts Camera ② ② ① ① 4.Propeller Installation, Replacement Please replace with new propellers if there’s propeller damaged due to crashes or collisions. -
Page 9: Battery Assembly For Remote Control
2.Battery Assembly for Remote Control ①Open the Remote Control Battery Cover Open the battery compartment cover with a philips screwdriver. ②Assemble the Battery AA batteries *3 1.5V “AA” 1.5V “AA” 1.5V “AA” Open the cover of battery compartment, insert three AA batteries (not included). Notes: 1. -
Page 10: Battery Instructions
Battery lnstructions There is a certain risk when using battery. It may cause fire, body injury or property loss. Users must be aware of the risks and take full responsibility of using battery improperly. If battery leakage occurs, please avoid contacting your eyes or skin with electrolyte. Once it happens, please wash your eyes with clean water and seek medical care immediately. -
Page 11: Know Your Remote Control
KNOW YOUR REMOTE CONTROL 1.Operation Board of Remote Control GPS Signal TX Battery Power Flight Mode Signal RX Battery Power Fast Speed Headless Mode Slow Speed Speed Level Height Horizontal Distance Function of Transmitter Display Light 1 Light 2 Light 3 Light 4 Function of Transmitter indicator light Light 1: Headless mode is on;... -
Page 12: Button Function For Transmitter
2.Button Function for Transmitter ①Turn on Default Mode The default mode is beginner mode(height: 30m, distance: 30m), long press the turn back button for 5 seconds to remove the fence limit. (height: 120 meters, distance: 500 meters) Long Press for 5 Seconds to Switch to Master Mode ②GPS Switching The default mode is GPS mode. -
Page 13: ④Throttle&Direction Control Of Transmitter
④Throttle&Direction Control of Transmitter Push the left joystick up/down to ascend/descend. Ascend Descend Push the left joystick left/right to rotate counter-clockwise/clockwise. Turn Left Turn Right Push the right joystick up/down to fly forward/backward. Forward Backward Push the right joystick left/right to fly left/right. Left Sideward Right Sideward Email: nostech1@hotmail.com... -
Page 14: ⑤Hovering
⑤Hovering Operate the left joystick to make the drone ascend and then release the joystick. The drone will hover at the height you release the joystick. ⑥Headless Mode Put the drone directly in front of the remote control, with the drone facing forward, calibrate it horizontally after pairing, and short press the headless mode button (as shown in Figure 1). -
Page 15: ⑦Return To Home
⑦Return to Home When the drone reaches a certain distance and player want to call back the drone without maneuvering the drone, player can simply press the Return To Home button to trigger return to home function. When the function is triggered, the remote controller beeps and the second indicator light on it lights on, they drone will start returning to the home point where it took off. -
Page 16: Outdoor Flight Of The Drone
OUTDOOR FLIGHT OF THE DRONE 1.Pairing Remote Control with Drone ①Long press the power button of the drone (as shown in Figure 1), the drone starts up, and front indicator lights flash quickly. At this time, drone is testing the gyroscope. After waiting for 3-4 seconds, the lights of the drone flash alternately (as shown in Figure 2). -
Page 17: Calibrate The Gyroscope
3.Calibrate the Gyroscope Gyroscope calibration: pull the left and right Joystick of the remote control at the same time (as shown in Figure 1), and the drone will have 4 lights quick flashing after about 3 seconds(as shown in Figure 2), It represents in calibrating. Release the Joystick and return to the flashing state before the calibration. -
Page 18: Drone Indoor Flight Mode
DRONE INDOOR FLIGHT MODE 1.Pairing Remote Control with Drone ①Long press the power button of the drone (as shown in Figure 1), the drone starts up, indicator lights flash quickly. At this time, drone is testing the gyroscope. After waiting for 3-4 seconds, the lights of the drone flash alternately (as shown in Figure 2). -
Page 19: Optional Accessories
OPTIONAL ACCESSORIES 01 Upper Casing 02 Lower Casing 03 Propeller A 04 Propeller B 05 Motor Arm 06 Brushless Motor 07 Battery 08 USB Charging Cable 09 Remote Control 10 Phillips Screwdriver 11 Screw Notes: There is a chance that accessory is broken. If so, please contact local retailer and purchase new accessory items from them. -
Page 20: Faq
PROBLEMS CAUSES SOLUTIONS The voltage of the remote The remote control control is lower than 3.8V Replace the battery of transmitter. makes a ”DiDi” sound and it is in low power state. Make sure the drone is within 500 Beyond to the drone meters and flying at an altitude of control range.
Need help?
Do you have a question about the HERON and is the answer not in the manual?
Questions and answers