Table of Contents
Advertisement
Google play
○ For your safety and to avoid loss of property, please read this manual carefully.
○ Please do not attempt to disassemble, modify or repair the aircraft. If necessary, please contact the agent.
○ This manual is concise. For more details, please go to the "Help" in the upper right corner of the APP
main interface and download the electronic documents, or visit www.jjrc.com for more instructions and
tutorials.
X7 Operation Manual
Important
APP Store
Advertisement
Table of Contents

Related Manuals for JJRC X7


Summary of Contents for JJRC X7
- Page 1 ○ Please do not attempt to disassemble, modify or repair the aircraft. If necessary, please contact the agent. ○ This manual is concise. For more details, please go to the "Help" in the upper right corner of the APP main interface and download the electronic documents, or visit www.jjrc.com for more instructions and tutorials.
-
Page 2: Table Of Contents
1.Power on --------------------------------------------- 19 IV.Technical support ----------------------------------7 2.Connect with the APP -------------------------------- 19 V.Newbie mode --------------------------------------7 3.Initiate aircraft ---------------------------------------- 20 VI.Know X7 ------------------------------------------7 4.Photo and video -------------------------------------- 22 1.Aircraft -------------------------------------------------7 5.Flight mode ------------------------------------------ 22 2.Remote controller --------------------------------------8 6.RTH -------------------------------------------------- 24... -
Page 3: I.important Notes
X7 Operation Manual I. Important Notes 1. Flight safety (1) This aircraft is not a toy. It is applicable for users of 14 years of age and above. (2) Please familiarize with the local laws,regulations and flying environment before flying. Stay away from sensitive places, and only fly where it's legal to fly a drone. -
Page 4: Gps Mode And Flight Mode
X7 Operation Manual 3. GPS mode and ight mode The aircraft has built-in GPS positioning module, which will be used to position locations in autonomous flight. Follow the steps herein and the aircraft will enter GPS Positioning Mode: (1) The remote controller is in P (Position Hold) Mode. - Page 5 X7 Operation Manual the compass is abnormal , please re-calibrate the compass. Please keep away from the environment with magnetic interference when calibrating, otherwise it may cause calibration failure. The built-in compass helps keep the aircraft oriented.Please ensure it works well every time before flight.
- Page 6 X7 Operation Manual (2) Compass calibration Step 1:Horizontal calibration When the APP prompts you to rotate the aircraft horizontally,put the aircraft in your hand horizontally and then rotate it horizontally until the status indicator light on the arm of the aircraft turns red and green light flashing alternately (i.e., the horizontal calibration is successful).
-
Page 7: Ii.instructions For Lithium Battery Usage
X7 Operation Manual II. Instructions for lithium battery usage Warning:Read the entire user manual and familiarize with the functions of the product before proceeding. If the product is not properly operated, it may cause serious injury, or lead to product damage and property loss. -
Page 8: Storage And Transportation
X7 Operation Manual even accidents. We will not bear the responsibility for consequences resulting from improper charging. (2) When charging, please place the battery and charger on the non-flammable and combustible ground (such as cement ground). Please pay attention to the charging process to avoid accidents. -
Page 9: Iv.technical Support
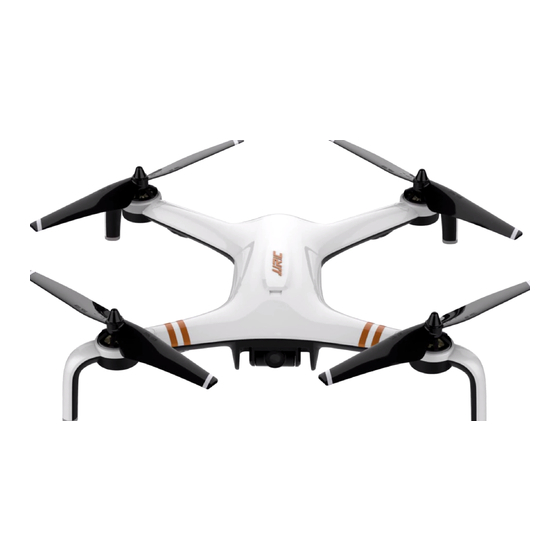
X7 is a flying camera equipped with gimbal and high-definition camera. X7 features with functions such as way point flying,follow me, RTH,point of interest, one key take-off and landing, etc. It is equipped with a camera that can adjust the pitch angle, so that you can get a unique perspective and composition, and take unique photos and videos. -
Page 10: Remote Controller
X7 Operation Manual Observe the indicator light to keep track of the status of the aircraft. Please refer to the following instructions of different indicator lights. ○ Optical ow status indicator(Front arm indicator) Indicator Light Status Indication ▂▂▂▂▂▂▂▂▂▂▂▂ Solid blue light on start-up Self-inspection ▂▂▂▂▂▂▂▂▂▂▂▂... -
Page 11: Download The App
X7 Operation Manual 2) Power indicator light ○ Charging(Turn off the remote control before charging.) Indicator Light Status Indication ▂ ▂ ▂ ▂ ▂ ▂ ▂ ▂ ▂ Flashing green light Charging ▂▂▂▂▂▂▂▂▂▂▂▂ Solid green light Charging completed ○ In operation... -
Page 12: Vii.preparation Before Flight
X7 Operation Manual VII. Preparation before ight 1. Battery charging for aircraft (1) Connect USB adapter with the aircraft battery. (2) Connect the power cord with the charger at one end and plug in the socket at the other end. -
Page 13: Remote Controller Preparation
X7 Operation Manual 2. Remote controller preparation (If using the APP, please skip this step) 1) Before ying, please follow these steps to get the remote controller ready for ight a.Expand the antenna to each side b.Insert the bracket into the slot on the back of the remote controller c.Mount the phone to the phone holder... -
Page 14: Propeller Installation
X7 Operation Manual 4. Propeller installation on arm A 1) Install propeller 2) Screw the silver fixing nut of the propeller 3) Screw the silver fixing nut of the propeller 1) Assemble propeller A onto motor A (motor into the motor shaft, and rotate the nut with open spanner counterclockwise. -
Page 15: Battery Installation
X7 Operation Manual 5. Battery installation 1) Install Insert the battery into the battery compartment as shown. 2) Take out Press the lock button on both sides of the battery as shown,then take the battery out of the compartment. VIII. Fly with the remote controller 1. -
Page 16: Connect With The App
X7 Operation Manual 3) Self-inspection and pairing Power on the put the aircraft on flat ground for about 30seconds for self-inspection. When the aircraft's indicator light turns from flashing or solid blue to flashing green or solid, the aircraft has successfully paired with the remote controller. -
Page 17: Operate The Aircraft
X7 Operation Manual The APP can only be used when the remote controller turns off. For more details, please refer to the "Fly with the APP" below in this manual. 3. Operate the aircraft 1) Takeoff ○ Method 1: take off manually... -
Page 18: Photo And Video
X7 Operation Manual (2) Mode 1 Right Joystick Ascend Left Joystick Forward Descend Backward Left Right Left Rotation Right Rotation 4) Switch to mode 1 or mode 2 (1) Switch to mode 2 Toggle the left joystick ① to the lowest position and press the "One Key Takeoff/ Landing" button ② at the same time. Then turn on the remote controller ③... -
Page 19: Flight Mode
X7 Operation Manual During the flight, you can use the "Photo/ Video" button to take image or video footages. Short press the "Photo/ Video" button and wait until the remote controller beeps, indicating that you have successfully taken a photo. -
Page 20: Remove The Battery And Store It Separately
X7 Operation Manual Forward/Backward Forward Left Right Backward Note: As for the return to home point as precise as possible, please ensure the GPS positioning function has been turned on to record the aircraft's position before its takeoff and choose an area with no obstacles. -
Page 21: Ix.fly With The App
X7 Operation Manual (1) Turn on aircraft. (2) Rapidly and continuously press the aircraft power button for 4 times until the aircraft’s rear indicator light turns double-flashing blue, indicating the aircraft has been ready for pairing. (3) Press the "Photo/ Video" button and long press the power button for 2 seconds at the same time. Wait until the controller’s two indicator lights turn flashing green, indicating the remote controller is ready for pairing. -
Page 22: Initiate Aircraft
X7 Operation Manual 3. Initiate aircraft 1) Select control mode The default control mode is mode 2. Enter the "General Setting" on the APP to switch the control mode. 2) Position hold mode by default The aircraft's indicator light turns solid green or blue, indicating good GPS signal and the aircraft already located. - Page 23 X7 Operation Manual 4) Toggle the left and right joysticks to control its direction after takeoff Take off: Landing: Slowly push the throttle up to Slowly toggle the throttle joystick downward to control the control the aircraft to take off aircraft to land on the ground.
-
Page 24: Photo And Video
X7 Operation Manual 4. Photo and video During the fligh, click the "Photo/ Video" button to take image or video footages. Click the "Photo" button to save a photo in the album. Video Photo Album Long press the "Video" button and wait until the APP icon turns red, indicating it has been ready for video shooting. Long press the button again and wait until the APP icon turns white, indicating it has stopped recording. - Page 25 X7 Operation Manual 2) Point of interest In point of interest mode, the aircraft will circle around a definite subject. You can control it forward or backward or change its radius. Toggle the right joystick to increase or decrease the circling radius Click “point of interest”...
-
Page 26: Rth
X7 Operation Manual Warning:As for the return to home point as precise as possible, please fly the aircraft in open flat terrain (no tall buildings in 50 meters of radius, flat terrain in 10 meters of radius) with the GPS working well. Thus the return to home function will be able to activate. - Page 27 X7 Operation Manual Set altitude(default altitude is Click start 30m) Read the attention tips and confirm Caution:Please tap the waypoints within the circle (in radius of 100 meters). When the waypoint flying mode has been turned off, the aircraft will hover. To restart, you can tap other waypoints and turn on this mode again.
- Page 28 JJRC Technical Support Dear Customer, Thank you for choosing JJRC product. Please visit JJRC official website for more FAQ and information, if there is any problem of using our product. Product Operation: Please visit JJRC College for tutorial video or user manual.
Need help?
Do you have a question about the X7 and is the answer not in the manual?
Questions and answers