
Related Manuals for JJRC JJPRO EPIK


Summary of Contents for JJRC JJPRO EPIK
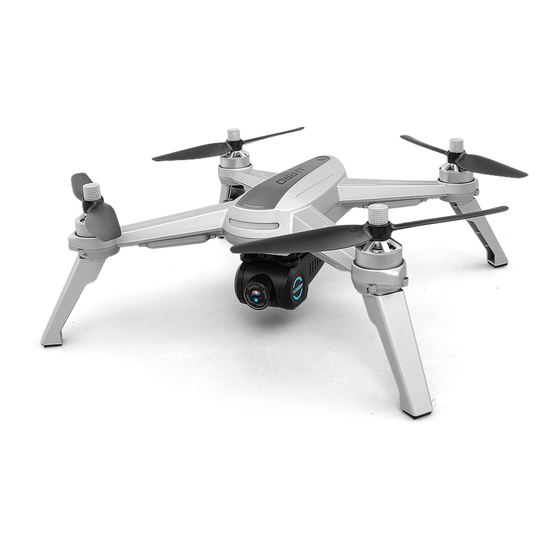
- Page 1 EPIK AGE14+ FOLLOW ME BRUSHLESS DRONE WITH GPS AND 5G-WIFI FPV *Please read this manual carefully before operation and keep it properly for future reference.
-
Page 2: Important Statement
Important statement and safety guidelines Thank you for purchasing JJPRO product. Please read this manual carefully before use and retain it for future reference. Packaging has to be kept since it contains important information. Important statement This drone is not a toy, but hobby grade model. It should be assembled and operated properly. Pilot must operate this drone in safe way. -
Page 3: Product Profile
Bear proper operation and safe flight guidelines in mind Please take a careful look at the manuals before flights for important information of product functions and operation tips, and learn how to use the accessory, safe flight always comes first. Stay informed of and abide strictly by relevant local laws and regulations. -
Page 4: Product Assemble
Product assemble How to attach and detach the propellers Attach propeller A: Put the propeller with marking ‘A’ into the clockwise rotating motor shaft (the side marked A should be upwards). Then, put the silicone rubber ring into the center bore of the propeller. Last, choose the propeller screw with dot and put it onto the motor shaft;... -
Page 5: Battery Installation
Undercarriage installation Insert the bulge of the undercarriage into the holes locating at the bottom of the motors and fix the screws by clockwise. Battery installation Slide the battery into the battery compartment at the rear of the drone by pushing with appropriate force, the drone will make beep sounds with LED lights flashing. - Page 6 How to charge the battery of drone Step 1. Make sure that your power adaptor (5V 1-2A) is connected with the power outlet (indicated as Pic. 1); Step 2. Connect the balance charger to the power adaptor by plug-in the USB cable accordingly (indicated as Pic.
- Page 7 Rechargeable batteries are only to be charged under adult supervision. Exhausted batteries are to be removed from the drone. The supply terminals are not to be short-circuited. The charging line to be used with the product should be regularly examined for potential hazard, such as damage to the cable or cord, plug, enclosure of other parts and that in the event of such damage, the product must not be used until that damage had been properly removed.
- Page 8 Warm tips: The camera works only with “JJPRO” APP. Please turn to Page 18 for the APP download and installation. Beginners are suggested to press “Help” button to learn about the camera operation method. Gimbal trimmer The camera angle can be adjusted within a 90 degree range by operating the gimbal trimmer to obtain a better aerial experience.
-
Page 9: Major Parts Of The Remote Controller
Battery compartment Front light Rear light Major parts of the remote controller [1] One-key unlock [2] One-key takeoff/ One-key landing [3] Left stick [4] Gesture/GPS mode switch [5] Power switch [6] Power indicator [7] One-key return [8] Photo/shooting [10] [9] Right stick [11] [10] Headless mode switch Model... -
Page 10: Lcd Screen
LCD screen Altitude against Home Point Return-to-Home Remote Controller (RTH) Battery Level Satellite Amount Video Model Photo GPS Mode Headless Mode Aircraft Battery Level Signal Strength Distance against Home Point Remote Controller Throttle Mode How to install the battery of remote controller Open the battery door, install 4*AA batteries into the battery compartment according to the given polarity and then close the battery compartment. -
Page 11: Throttle Mode Switch
How to connect the signal of the drone with the remote controller Step 1: Keep pressing the red button “ ” and turn on the remote controller (indicated as Pic. 1). The remote controller makes 2 beep sounds, and the indicator light keeps flashing; the remote controller is under signal connection status. -
Page 12: How To Change Throttle Mode
How to change throttle mode: Step 1. Keep pressing the red button and turn on the remote controller, the remote controller is under signal connection status (indicated as Pic. 1); Step 2. Keep pressing the RTH button “ ” for 3 seconds to choose the throttle control mode (indicated as Pic. -
Page 13: Remote Controller Status Indicator
Remote controller status indicator Remote controller status Description The remote controller is under signal connection Indicator lights flash quickly. status. Indicator lights flash slowly with steady beep.. The remote controller is in low voltage status. beep sound and the battery legend “ ”... - Page 14 Drone initialization detection After signal connection, the drone enters into initialization detection procedure with front and rear lights flashing red, green and yellow alternatively. Make sure that the drone is set on a flat and still surface for the initialization detection. The drone initialization detection takes about 8 seconds. Once the remote controller sends out "Di Di"...
-
Page 15: Gyroscope Calibration
Attention: To fly at GPS mode, please choose an open and wide space for the flight, and make sure that the satellite amount is over 7. Please do not calibrate the compass in strong magnetic area, such as magnetic field, parking place or construction areas with underground reinforcement. -
Page 16: Flight Mode
Operate the drone Drone Drone Remote controller Remote controller Turn Right Turn Left Ascent Front Model Model Rear Descent Backward Leftward flight Front Model Model Rear Forward Rightward flight Flight mode One-key takeoff/landing After the drone unlocked, short-press the “ ”... -
Page 17: Return-To-Home (Rth)
GPS mode Slide the button to position “B” (indicated as below), the drone is in GPS mode and can precisely position and hover by the assitance of the GPS module. Model Headless mode Slide the Headless mode switch button to position “B” (indicated as below); the drone enters into headless mode. -
Page 18: Failsafe Rth
Failsafe RTH If the GPS signal is available (more than 7 satellites is presented) and the Home Point is recorded previously. Failsafe RTH will be triggered if the remote controller signal is lost for more than 6 seconds, the flight-control system will control the drone automatically and the drone will fly back to the last recorded Home Point. -
Page 19: Low Voltage Warning
Low voltage warning ●When the battery icon “ ” is shown on the LCD screen, and the drone front lights glow solid on and the rear lights keep flashing slowly, it means that the battery is nearly low voltage. ●When the battery icon “ ”... - Page 20 When “ ” legend is shown, it means WiFi connecting is successful. Exit settings and tap “JJRC X” APP at your mobile device, then select your drone model on the home page; click “ ” to enter into the real-time image transmission interface.
- Page 21 5G WiFi Channel Selection Guide The product uses 5G WiFi and works at channels of 36 and 149. Factory default is set at the 36 channel. Corresponding country/area available channel lists are as follows: Frequency South Channel Europ Japan Singapor China Taiwan Korea...
-
Page 22: Product Components
Product components Basic parts Flight-control Upper cover Main frame Undercarriage board Transparent front Front/Rear GPS module lamp cover light Bar Counter-clockwise Clockwise motor Charging converter Battery motor Lamp cover of the Interleaving paper Vibration-absorbed Screws pack front and rear light ball -21-... -
Page 23: Optional Accessories
Clockwise propeller Vibration-absorbed Propeller screws/ Propeller A/B fixing connector counter-clockwise changing tool propeller screws Silicone rubber Mobile phone Remote controller ring holder Optional accessories 2K 5G WIFI camera Trouble shooting Phenomenon Solution The Gyro of the drone is under signal detecting condition, set The lights are flashing quickly. - Page 24 JJRC TECHNICAL SUPPORT Dear Customer, Thank you for choosing JJRC product. Please visit JJRC official website for more FAQ and information if there is any problem of using our product. -Product Operation: Please visit JJRC College for tutorial video or user manual.
Need help?
Do you have a question about the JJPRO EPIK and is the answer not in the manual?
Questions and answers