
Related Manuals for PVA JDX


Summary of Contents for PVA JDX
- Page 1 WHERE PRECISION DRIVES PRODUCTION JDX Jet Valve OWNER’S MANUAL Revision H Precision Valve & Automation One Mustang Drive Cohoes, NY 12047 www.pva.net...
- Page 2 JDX PVA This document is based on information available at the time of its publication. While efforts have been made to ensure the contents of this manual are accurate, the information contained herein does not purport to cover all specific details or variations in hardware, or to provide for every possible contingency in connection with installation, operation, or maintenance.
-
Page 3: Table Of Contents
How to Use the Valve with Portal ............22 Setup Mode ....................... 22 Select a Recipe ....................24 Jetter Maintenance ................... 25 How to Use the Jet with the PVA JDX Jet Valve Controller ....... 26 Jet and Fluid Pressure ..................28 Temperature Controller ..................28 6.2.1 To change the SV temperature .............. - Page 4 JDX PVA 6.2.2 To turn ON the heater ................29 6.2.3 To turn OFF the heater................29 LCD Display Functions and Selection Keys ............30 Trigger Button and LED ..................31 Exploded View ..................32 7.1.1 Item Numbers and Descriptions ............... 32 Replacement Parts and Accessories ............
-
Page 5: Introduction
Before you operate this system, read the operation and setup manual. This will help you to become familiar with the product and ensure successful operation. If any questions or problems arise, contact PVA’s Technical Support department for support. PVA Contact Information... -
Page 6: Safety
JDX PVA Safety Certain warning symbols are affixed to the machine and correspond to notations in this manual. Before operating the system, identify these warning labels and read the notices described below. Not all labels may be used on any specific system. -
Page 7: Theory Of Operation
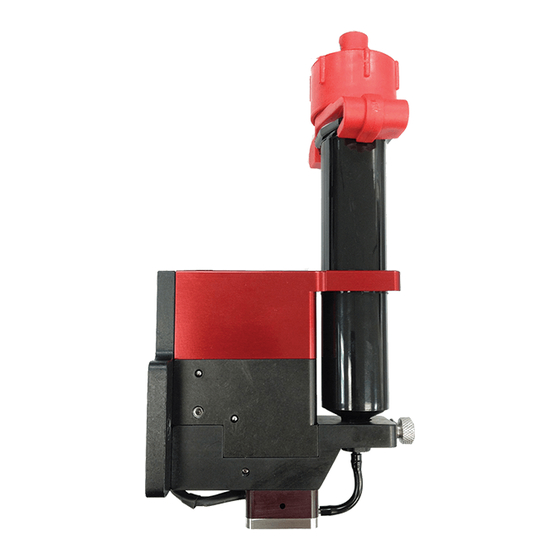
The unique diaphragm design allows for fast cycling of the jet, up to 300Hz for high speed line dispensing. The JDX is designed to dispense coatings, underfill, encapsulant, SMT glue, grease, and more with very fine control. -
Page 8: Necessary Tools
JDX PVA Necessary Tools PVA offers tools and cleaning accessories to maintain the JDX jet valve. Part Number Description 02597 3mm hex wrench Philips screwdriver Setup Before you operate the jet, know the components. Follow the steps instructed below for safe and correct operation. -
Page 9: Operation
It is not necessary to remove the jet valve to do the procedures. Install the Diaphragm 1. Set the jet valve to open with the operator interface of JDX controller box. 2. Align the ribs on top of the diaphragm to the groove features on the bottom of the heater block. -
Page 10: Install Nozzle Plate And Feed Tube
JDX PVA Install Nozzle Plate and Feed Tube 1. Align the feed tube with the barb inlet on the nozzle plate. 2. Push the feed tube onto the barb inlet. Figure 4: Feed Tube and Nozzle Plate 3. Align the nozzle plate on the heater block with the barb inlet facing toward the syringe bracket. -
Page 11: Figure 7: Tighten The Screws To Attach The Nozzle Plate
JDX PVA 5. Use a hex wrench to tighten the recessed screws in the two holes shown. Turn the screws clockwise until they are tight and the nozzle plate does not move. Figure 7: Tighten the Screws to Attach the Nozzle Plate 6. -
Page 12: Prime The Jet
JDX PVA Prime the Jet 1. Set the jet to close with the operator interface or JDX controller box. 2. Fill the syringe with material. 3. Attach the air cap to the syringe. Figure 9: Attach the Air Cap 4. Set the supply pressure to 10 psi. -
Page 13: Set The Heater Temperature
The fluid pressure supplies the material to the jet chamber to keep the drop size correct and consistent. Higher fluid pressure is usually better. 1. Set the jet to open with the operator interface or JDX controller box. 2. Start at 10 psi and increase the fluid pressure until a steady stream or a continuous flow of dots exit the nozzle. -
Page 14: Jet Pressure
JDX PVA Jet Pressure Jet pressure is the force that pushes the fluid out of the jet when it is dispensed. Too little jet pressure and the fluid will not leave the nozzle completely and material will accumulate on the nozzle. Too much jet pressure and the fluid will have satellites or splatter when it hits the surface of the product. -
Page 15: Figure 11: Remove The Syringe
JDX PVA 5. Loosen and remove the feed tube off of the syringe. 6. Remove the syringe. Figure 11: Remove the Syringe 7. Use a 3mm hex wrench to loosen the two recessed screws and remove the nozzle plate. Figure 12: Remove the Nozzle Plate 8. -
Page 16: Clean The Wetted Parts
JDX PVA Clean the Wetted Parts 1. Clean the diaphragm with cotton tipped swabs and solvent. Figure 13: Clean the Diaphragm 2. Remove the feed tube from the nozzle plate and discard it. 3. If necessary, soak the nozzle plate in ultrasonic cleaner for 5 minutes. -
Page 17: Replace The Orifice
JDX PVA Replace the Orifice 1. Loosen the three screws in the nozzle plate. Figure 15: Remove the Nozzle Plate Screws 2. Remove the barb plate. Figure 16: Remove the Barb Plate 3. Remove the O-ring from the barb plate. Clean and replace as necessary. -
Page 18: Figure 18: Barb Plate And Orifice O-Rings
JDX PVA Figure 18: Barb Plate and Orifice O-rings 4. Remove the orifice (the orifice shown is ceramic; you may have a different orifice). You may have to turn the nozzle plate over and push on the orifice tip to remove the orifice. -
Page 19: Figure 21: Install The Barb Plate
JDX PVA Figure 21: Install the Barb Plate 8. Turn the nozzle plate over and install the three screws. Make sure the screws are correctly tightened. Do not damage the screws when you tighten them Figure 22: Install the Nozzle Plate Screws 9. -
Page 20: Figure 24: Extended Nozzle And Carbide Orifice Examples
JDX PVA Figure 24: Extended Nozzle and Carbide Orifice Examples NOTE: Nozzle plates have the part number and orifice size engraved in them. Figure 25: Nozzle Plate Part Number Revision H (2016) 20 of 39... -
Page 21: Maintenance
JDX PVA Maintenance Interval Action Daily • Examine the material outlets for contamination and cured material. Weekly • Examine material containers or cartridges for signs of cured or dried material. Shutdown • Flush or clean the system. • Clean or replace the nozzle plate, diaphragm, and feed tube. -
Page 22: How To Use The Valve With Portal
How to Use the Valve with Portal If your valve is on a workcell with PVA Portal, use the screens that follow to operate the valve. Refer to the Portal manual for additional information on how to use the program. -
Page 23: Figure 27: Jdx Setup Options
JDX PVA Figure 27: JDX Setup Options 4. Double click on any parameter to open an edit window. NOTE: Most settings for the Jet Valve are set with the PVA JDX Jet Valve Controller. Figure 28: JDX Parameter Edit Windows 5. -
Page 24: Select A Recipe
To select a recipe in Manual mode do the steps below. 1. Select Manual Mode. 2. Select the Valves tab. 3. Click on the Select Valve drop down menu, and select a recipe for the JDX valve. A screen will show that the parameters are loading. Figure 29: Valves Tab NOTE: The settings are found in the tabs shown when you select the Jetter tab. -
Page 25: Jetter Maintenance
JDX PVA Jetter Maintenance 1. Select “Manual” from the cycle stop screen. 2. Select the “Jetter” tab. Figure 30: Jetter Maintenance 3. Select the Clean Jetter “Go” button to move the valve to the vacuum cup 4. Select the Vacuum “ON” and “OFF” buttons to turn the vacuum on and off. -
Page 26: How To Use The Jet With The Pva Jdx Jet Valve Controller
How to Use the Jet with the PVA JDX Jet Valve Controller If your valve is on a workcell with the PVA JDX Jet Valve Controller, use the screens that follow to operate your valve. Figure 31: PVA JDX Jet Valve Controller Front Panel 1. -
Page 27: Figure 32: Pva Jdx Jet Valve Controller Rear Panel
JDX PVA Figure 32: PVA JDX Jet Valve Controller Rear Panel 12. Air inlet – This port should be connected to the source pressure with a 6mm diameter hose. 13. Jet Pressure outlet – This port provides air pressure for the jet dispenser and should be connected with a 6mm diameter hose. -
Page 28: Jet And Fluid Pressure
JDX PVA Jet and Fluid Pressure The PVA JDX Jet Valve controller has integrated air regulators (7, 10) which control the pressure to the Jet and the Fluid supply. Two digital gages (2, 6) show the pressure levels. The Fluid Pressure can be turned off with the air switch (11). -
Page 29: To Turn On The Heater
JDX PVA 6.2.2 To turn ON the heater 1. Press the INDEX key until you see the Run-Stop Output Control screen (r-5) on the top line of the display. 2. Now use the arrow key to select run setting to turn ON the heater as shown by the figure below. -
Page 30: Lcd Display Functions And Selection Keys
JDX PVA LCD Display Functions and Selection Keys There are 8 settings available on the main LCD menu. The UP/DOWN keys are used to change the values in the settings. The LEFT/RIGHT keys are used to select the settings. The selected setting is shown with a blinking cursor. The settings are described below. -
Page 31: Trigger Button And Led
JDX PVA Figure 38: Additional Parameters • The RCP: option selects the timing recipe from #1 to #6. The AFTER: and REFILL++: values are equivalent to the Add XX msec after YY seconds in the Timing Recipes menu. Press the LEFT and RIGHT keys at the same time twice to accept the new settings, the LCD display will return to the main menu. -
Page 32: Exploded View
JDX PVA Exploded View Figure 39: Exploded View 7.1.1 Item Numbers and Descriptions Item Description Part Number Jet body, includes syringe holder (1a), thumb screw (1b), and heater (1c) Diaphragm Refer to Table 2 Nozzle Plate Refer to Table 2... -
Page 33: Replacement Parts And Accessories
JDX PVA Replacement Parts and Accessories Table 2: Replacement Parts and Accessories Description Notes Part number Diaphragm – Silicone AD09-2023 Old flat design Diaphragm – Silicone AD09-2029 New dimple design Diaphragm - Kalrez AD09-2026 Old flat design Diaphragm - Kalrez... - Page 34 125µm Nozzle cleaning kit CL-125 150µm Nozzle cleaning kit CL-150 200µm Nozzle cleaning kit CL-200 300µm Nozzle cleaning kit CL-300 400µm Nozzle cleaning kit CL-400 Contact PVA for information on replacement parts or to order. Revision H (2016) 34 of 39...
-
Page 35: Technical Specifications
JDX PVA Technical Specifications Table 3: JDX Technical Specifications Weight Approximately 348 g (0.77lbs) Material inlet Female Luer Operating fluid pressure 10-60 psi Operating air pressure 35-65 psi Viscosity range 1-400,000 Cps Minimum shot size 10 nl Maximum speed Up to 300 Hz continuous duty Maximum heater temperature 70°C... -
Page 36: Troubleshooting
JDX PVA Troubleshooting Troubleshooting Possible Cause Corrective Action Problem Material does not • Material cured in nozzle plate • Heater may be too hot, decrease dispense temperature. Disassemble and clean nozzle • Disassemble and clean nozzle • Nozzle plate is clogged •... -
Page 37: Notes
JDX PVA Notes Revision H (2016) 37 of 39... -
Page 38: Warranty
Unauthorized repair or modification of the enclosed product, and/or the use of spare parts not directly obtained from PVA (or from factory authorized dealers) will void all warranties. -
Page 39: Table Of Figures
Figure 29: Valves Tab ......................24 Figure 30: Jetter Maintenance ..................25 Figure 31: PVA JDX Jet Valve Controller Front Panel ............26 Figure 32: PVA JDX Jet Valve Controller Rear Panel ............27 Figure 33: Temp Control ....................28 Figure 34: To Change the SV Temperature ...............
Need help?
Do you have a question about the JDX and is the answer not in the manual?
Questions and answers