Table of Contents
Advertisement
Changes in this Issue
• New Service Manual Issue
• Amend Grill Element Dismantling
Service
Information
© 2018 Reg. Office: Peterborough PE2 9JB Registered in London: 106725
Whirlpool UK Appliances Ltd
5413481 Issue 2
C00507867 ~ SM032185
HOTPOINT
MULTIFUNCTION
BUILT IN
PYRO
SINGLE OVEN
Model
Covered
SI5854PIX
Feb. 2018
Comm.
Code
96797
Advertisement
Table of Contents

Related Manuals for Hotpoint SI5854PIX


Summary of Contents for Hotpoint SI5854PIX
- Page 1 PYRO SINGLE OVEN Model Comm. Covered Code Changes in this Issue SI5854PIX 96797 • New Service Manual Issue • Amend Grill Element Dismantling Service Information Whirlpool UK Appliances Ltd © 2018 Reg. Office: Peterborough PE2 9JB Registered in London: 106725...
-
Page 2: Rating Plate Example
8. Whilst the Company has endeavoured to ensure the accuracy of the data within this publication they cannot hold themselves responsible for any inconvenience or loss occasioned by any error within. RATING PLATE EXAMPLE 9 Digit Serial Number Example - Hotpoint Branded 7 01 05 3741 Four remaining digits = Check number... -
Page 3: Table Of Contents
Whirlpool UK Appliances Ltd INDEX Rating Plate Example............2 Introduction . -
Page 4: Introduction
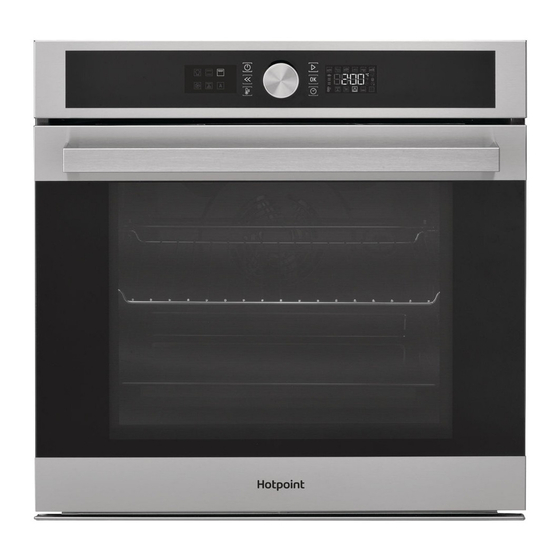
INTRODUCTION OF THE HOTPOINT MULTIFUNCTION PYRO BUILT IN SINGLE OVEN Model SA5854PIX was introduced into the Hotpoint built in range during February 2017. This model has 15 cooking functions, 8 Traditional - 7 Tailored, touch and dial controls, electronic programmable timer, Pyrolytic automatic cleaning, full door seal, turn spit/rotisserie, wire shelf, drip tray, baking tray, oven lamp and quadruple glazed door. -
Page 5: Disposal
Whirlpool UK Appliances Ltd Turnspit Motor T125, 4W, 1.2 - 1.4 rpm Oven Fan Cooling Fan Plaset 42W / 12W Mains Cable Supplied, with 13 amp plug, 1.0 metre, H05RRF 3 x 1.5 mm Mains cable inlet is situated rear lower right when viewed from the rear. - Page 6 Whirlpool UK Appliances Ltd By ensuring this product is disposed of correctly, you will help prevent potential negative consequences for the environment and human health, which could otherwise be caused by inappropriate waste handling of this product. symbol on the product or on the accompanying documentation indicates that it should not be treated as domestic waste but must be taken to an appropriate collection centre for the recycling of electrical and electronic equipment.
-
Page 7: Safety Information
Whirlpool UK Appliances Ltd SAFETY INFORMATION The following information has been taken from the User Instructions: SAFETY WARNINGS Very young (0-3 years) and young children (3-8 years) shall be kept away from the appliance unless continuously supervised. Children from 8 years old and above and persons with reduced physical, sensory or mental capabilities or lack of experience and knowledge can use this appliance only if they are supervised or have been given instructions on safe use and understand the hazards involved. -
Page 8: Installation Instructions
Whirlpool UK Appliances Ltd INSTALLATION INFORMATION Taken from the Health & Safety and Installation Guide. The appliance must be handled and installed by two or more persons. Use protective gloves to unpack and install the appliance. Installation and repairs must be carried out by a qualified technician, in compliance with the manufacturer's instructions and local safety regulations. - Page 9 Whirlpool UK Appliances Ltd INSTALLATION DIAGRAMS 90°C Service Manual UK English 9 of 43...
- Page 10 Whirlpool UK Appliances Ltd INSTALLATION DIAGRAMS 89° max min 550 min 550 583 + 2 min 560 min 560 Service Manual UK English 10 of 43...
- Page 11 Whirlpool UK Appliances Ltd INSTALLATION DIAGRAMS Service Manual UK English 11 of 43...
-
Page 12: Description Of The Appliance
Whirlpool UK Appliances Ltd DESCRIPTION OF THE APPLIANCE OVERALL VIEW 1. Control Panel 2. Fan 3. Circular Heating Element (not visible) 4. Shelf Guides (the level is indicated on the front of the oven) 5. Door 6. Upper Heating Element/Grill 7. - Page 13 Whirlpool UK Appliances Ltd DESCRIPTION OF THE DISPLAY Not all functions are available on this model ACCESSORIES WIRE SHELF DRIP TRAY BAKING TRAY GRILL PAN SET TURNSPIT INSERTING THE WIRE SHELF AND OTHER ACCESSORIES Insert the wire shelf onto the level you require by holding it tilted slightly upwards and resting the raised rear side (pointing upwards) down first.
- Page 14 Whirlpool UK Appliances Ltd USING THE TURNSPIT Push the skewer through the centre of the meat (bound with string if poultry) and slide the meat onto the skewer until it is positioned firmly on the fork and cannot move. Push the second fork onto the skewer and slide it on until it holds the meat firmly in place.
-
Page 15: Functions
Whirlpool UK Appliances Ltd FUNCTIONS CONVENTIONAL For cooking any kind of dish on one shelf only. GRILL For grilling steaks, kebabs and sausages, cooking vegetables au gratin or toasting bread. When grilling meat, we recommend using a drip tray to collect the cooking juices; Position the pan on any of the levels below the wire shelf and add 500 ml of drinking water. - Page 16 Whirlpool UK Appliances Ltd SPECIAL FUNCTIONS FAST PREHEATING For preheating the oven quickly. Once preheating has finished, the oven will select the 'Conventional' function automatically. Wait for preheating to finish before placing food in the oven. TURBO GRILL For roasting large joints of meat (legs, roast beef, chicken). We recommend using a drip tray to collect the cooking juices;...
-
Page 17: Using The Oven
Whirlpool UK Appliances Ltd USING THE APPLIANCE FOR THE FIRST TIME 1. SET THE TIME You will need to set the time when you switch on the oven for the first time. The two digits for the hour will start flashing: Turn the knob to set the hour and press to confirm. - Page 18 Whirlpool UK Appliances Ltd DAILY USE 1. SELECT A FUNCTION When the oven is off, only the time is shown on the display. Press and hold to switch the oven on. Turn the knob to view the main functions available on the left hand display. Select one and press To select a sub-function (where available), select the main function and then press to confirm and go to the main function menu.
- Page 19 Whirlpool UK Appliances Ltd DURATION When the icon flashes on the display, use the adjustment knob to set the cooking time you require and then press to confirm. You do not have to set the cooking time if you want to manage cooking manually: Press to confirm and start the function.
- Page 20 Whirlpool UK Appliances Ltd 3. ACTIVATE THE FUNCTION Once you have applied the settings you require, press to activate the function. You can press and hold at any time to pause the function that is currently active. 4. PREHEATING Some functions have an oven preheating phase: Once the function has started, the display indicates that the preheating phase has been activated.
- Page 21 Whirlpool UK Appliances Ltd AUTOMATIC FUNCTIONS TEMPERATURE RECOVERY If the temperature inside the oven decreases during a cooking cycle because the door is opened, a special function will be activated automatically to restore the original temperature. While the temperature is being restored, the display will show a 'snake' animation until the set temperature has been reached.
- Page 22 Whirlpool UK Appliances Ltd KEY LOCK To lock the keypad, press and hold for at least 5 seconds. Do this again to unlock the keypad. Please Note: The keylock can also be activated while cooking is in progress. For safety reasons, the oven can be switched off at any time by pressing Service Manual UK English 22 of 43...
-
Page 23: Useful Tips
Whirlpool UK Appliances Ltd USEFUL TIPS HOW TO READ THE COOKING TABLE The table lists the best function, accessories and level to use to cook different types of food. Cooking times start from the moment food is placed in the oven, excluding preheating (where required). Cooking temperatures and times are approximate and depend on the amount of food and type of accessory used. - Page 24 Whirlpool UK Appliances Ltd PIZZA Lightly grease the trays to ensure the pizza has a crispy base. Scatter the mozzarella over the pizza two thirds of the way through cooking. RISING It is always best to cover the dough with a damp cloth before placing it in the oven. Dough proving time with this function is reduced by approximately one third compared to proving at room temperature (20 - 25°C).
-
Page 25: Maintenance & Cleaning
Whirlpool UK Appliances Ltd MAINTENANCE & CLEANING Make sure that the oven has cooled down before carrying out any maintenance or cleaning. Do not use steam cleaning equipment. Use protective gloves during all operations. The oven must be disconnected from the mains before carrying out any kind of maintenance work. - Page 26 Whirlpool UK Appliances Ltd ACCESSORIES Soak the accessories in a washing-up liquid solution after use, handling them with oven gloves if they are still hot. Food residues can be removed using a washing-up brush or a sponge. REPLACING THE LIGHT Disconnect the oven from the power supply and ensure the oven is cool.
- Page 27 Whirlpool UK Appliances Ltd 5. Try closing the door and check to make sure that it lines up with the control panel. If it does not, repeat the steps above. The door could become damaged if it does not work properly. “CLICK”...
-
Page 28: Error Codes
Whirlpool UK Appliances Ltd ERROR CODE Failure Failure Type Suggested Repair Action Code Probe Temperature Probe error. First check probe connection, if ok disconnect the probe and measure its resistance (1000 +3.75* Temp ambient). If value is in range check AM. Temperature Temperature error. -
Page 29: Configuration & Test Mode
Whirlpool UK Appliances Ltd CONFIGURATION & TEST MODE IMPORTANT NOTE: There is a wireless communication port which is located in the upper / right part of the product as shown and is used to programme the main board during the manufacturing process. BE CAREFUL: CONFIGURE THE OVEN WITH THE TOP COVER IN PLACE OTHERWISE YOU WILL RECEIVE AN F04 ERROR AND IN ADDITION IT WILL BE NOT POSSIBLE TO REPROGRAMME THE MAIN BOARD BECAUSE OF THE LIGHT AFFECTS ON THE OPTICAL... - Page 30 Whirlpool UK Appliances Ltd 9. The Software version (Su) of the User Interface (UI) will be displayed. Press the Start Button The Data Version (ds) will be displayed. These are not relevant to the repair. An00 10. Press the Start button .
- Page 31 Whirlpool UK Appliances Ltd 13. The alarm message is switched off. The cavity temperature is displayed. 14. Press the Start button . If the oven has a meat probe feature the cavity lamp will be switched on. When the meat probe is connected to the oven the current temperature will be displayed as well.
- Page 32 Whirlpool UK Appliances Ltd 17. The following images are showing the sequence of tested loads, to proceed to the next step, wait for OFF to appear and then always press the Start button Locking Door Cooling Fan on double speed Unlocking Door * The verification of the Door Lock system will take a certain time.
- Page 33 Whirlpool UK Appliances Ltd Lamp switched on Left grill switched on - optional Turn Spit switched on Pump switched on - optional Boiler switched on 18. Press the Start button and the very last and very important step is reached. Switch the 'Tested Flag' to the ON position by turning the central knob.
-
Page 34: Wiring Diagram
WIRING DIAGRAM 5413493wd.pdf SI4854PIX W10677631... -
Page 35: Wiring Connection Diagram
WIRING CONNECTION DIAGRAM 5413493har.pdf SI4854PIX W11028714... -
Page 36: Demo Mode
Whirlpool UK Appliances Ltd DEMO MODE In this state the user interface allows an interactive navigation that represents the oven features. All loads are switched off. The only load that is managed is the oven lamp. How to Activate the DEMO MODE 1. -
Page 37: Dismantling Instructions
Whirlpool UK Appliances Ltd DISMANTLING INSTRUCTIONS Safety Notes Before carrying out any work ensure that the appliance is disconnected from the mains supply Carry out insulation resistance, continuity and functional tests on appliance after service. Personal safety precautions must be taken to protect against accidents caused by sharp edges on metal, glass and plastic parts. - Page 38 Whirlpool UK Appliances Ltd Removing the Oven from the Cabinet Remove the 2 screws from the perimeter of the frame. Control Panel Remove the oven from the cabinet (see 2). Remove the top panel (4 screws). Remove the control knob by pulling off. Disconnect the cable from the timer display board to the main board.
- Page 39 Whirlpool UK Appliances Ltd Cooling Fan Remove the oven from the cabinet (see 2). Remove the top panel, 4 screws. Remove the single fixing screw (Fig. 2). It may be necessary to remove the two front top fixing screws for the rear panel also to enable easier access. Using a small flat bladed screwdriver, lift the securing tab and turn the complete fan assembly clockwise to release.
- Page 40 Whirlpool UK Appliances Ltd Oven Lamp Assembly Securing Remove the oven from the cabinet (see 2). Wing Remove the top panel, (4 screws). Remove the rear panel (4 screws). From inside the oven cavity, remove the glass lamp cover and lamp (do not touch the lamp with fingers). From the rear of the oven cavity, carefully manoeuvre Fig.
- Page 41 Whirlpool UK Appliances Ltd 12) Oven Door Disassembly Remove the oven door (see 1) and rest it on a soft surface with the handle downwards. At the bottom of the door, remove the 2 lower screws from the left hand and right hand glass panel retainers (Fig.
- Page 42 Whirlpool UK Appliances Ltd 14) Turnspit Motor Remove the oven from its housing (see 2). Remove the oven furniture. Remove the top panel (4 screws). Remove the rear panel (4 screws). Remove the 2 screws securing the motor, note the wiring connections and withdraw the motor, Fig.
- Page 43 Whirlpool UK Appliances Ltd Service Manual UK English 43 of 43...
Need help?
Do you have a question about the SI5854PIX and is the answer not in the manual?
Questions and answers