Advertisement
Available languages
Available languages
Quick Links
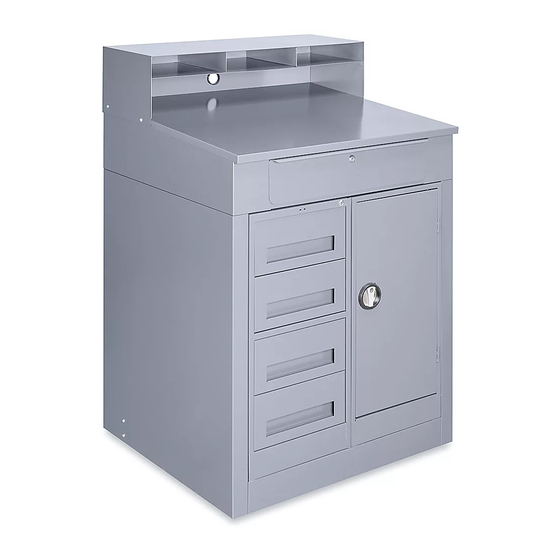
H-7646, H-7647
H-7648, H-7649
STORAGE SHOP DESK
TOOLS NEEDED
Phillips Screwdriver
Pedestal x 2
* Varies depending
on product
purchased.
Back Support x 1
Front Support x 1
CABINET ASSEMBLY
1.
Using 10 mm wrench and Phillips screwdriver,
assemble back panel, and left and right side panels
together with twelve M6 flange nuts and Phillips
head bolts. (See Figure 1)
PAGE 1 OF 9
1-800-295-5510
uline.com
10 mm Wrench
9/16" Wrench
PARTS
Side Panel x 2
Back Panel x 1
Pedestal Bracket x 1
ASSEMBLY
Pour le français, consulter les pages 7-9.
Top Shelf x 1
Phillips Head Bolt x 42
3/8-16 x 3/4" Hex Bolt x 2
Figure 1
Para Español, vea páginas 4-6.
Drawer and Desk Top x 1
M6 Flange Nut x 42
3/8-16 Flange Nut x 2
0721 IH-7646
Advertisement

Related Manuals for U-Line H-7646


Summary of Contents for U-Line H-7646
- Page 1 Para Español, vea páginas 4-6. Pour le français, consulter les pages 7-9. H-7646, H-7647 1-800-295-5510 H-7648, H-7649 uline.com STORAGE SHOP DESK TOOLS NEEDED Phillips Screwdriver 10 mm Wrench 9/16" Wrench PARTS Pedestal x 2 Side Panel x 2 Back Panel x 1...
- Page 2 ASSEMBLY CONTINUED 2. Using 10 mm wrench and Phillips screwdriver, 4. Set desk top assembly upright and recheck all assemble front and back supports with eight Phillips screws and nuts for tightness. (See Figure 4) head bolts and M6 flange nuts. (See Figure 2) Figure 4 Figure 2 TOP SHELF ASSEMBLY...
- Page 3 ASSEMBLY CONTINUED PEDESTAL AND DRAWER INSTALLATION 3. Insert drawer into desk top. (See Figure 8) Insert two pedestals on top of front and back Figure 8 supports. (See Figure 6) Figure 6 2. Open top pedestal drawer and/or cabinet door of both pedestals.
-
Page 4: Herramientas Necesarias
H-7646, H-7647 800-295-5510 H-7648, H-7649 uline.mx ESCRITORIO CON ALMACENAMIENTO PARA TALLER HERRAMIENTAS NECESARIAS Desarmador de Cruz Llave de 10 mm Llave de 9/16" PARTES 2 Paneles Laterales 1 Panel Posterior 1 Repisa Superior 1 Cajón y Escritorio 2 Pedestales * Varía dependiendo del producto adquirido. - Page 5 CONTINUACIÓN DE ENSAMBLE 2. Usando una llave de 10 mm y un desarmador de 4. Enderece el ensamble del escritorio y verifique cruz, ensamble los soportes frontal y posterior con nuevamente que todos los tornillos y tuercas estén ocho pernos de cruz y tuercas con reborde M6. apretados.
- Page 6 CONTINUACIÓN DE ENSAMBLE INSTALACIÓN DEL PEDESTAL Y EL CAJÓN 3. Inserte el cajón en el escritorio. (Vea Diagrama 8) Inserte dos pedestales en la parte superior de los Diagrama 8 soportes frontal y posterior. (Vea Diagrama 6) Diagrama 6 2. Abra el cajón superior del pedestal y/o la puerta del gabinete de ambos pedestales.
-
Page 7: Outils Requis
H-7646, H-7647 1-800-295-5510 H-7648, H-7649 uline.ca BUREAU DE RANGEMENT D'ATELIER OUTILS REQUIS Tournevis cruciforme Clé de 10 mm Clé de 9/16 po PIÈCES Panneau latéral x 2 Panneau arrière x 1 Tablette supérieure x 1 Surface de travail et tiroir x 1... - Page 8 MONTAGE SUITE 2. Assemblez les supports arrière et avant à l’aide de 4. Placez la surface de travail assemblée à l'endroit huit boulons cruciformes et écrous à embase M6 et vérifiez que tous les boulons et écrous sont bien en vous servant de la clé de 10 mm et du tournevis serrés.
- Page 9 MONTAGE SUITE INSTALLATION DES CAISSONS ET DU TIROIR 3. Insérez le tiroir dans la surface de travail. (Voir Figure 8) Insérez deux caissons sur les supports arrière et Figure 8 avant. (Voir Figure 6) Figure 6 2. Ouvrez le tiroir supérieur ou la porte d’armoire des deux caissons.
Need help?
Do you have a question about the H-7646 and is the answer not in the manual?
Questions and answers