
Related Manuals for ORION Images 21REDPH


Summary of Contents for ORION Images 21REDPH
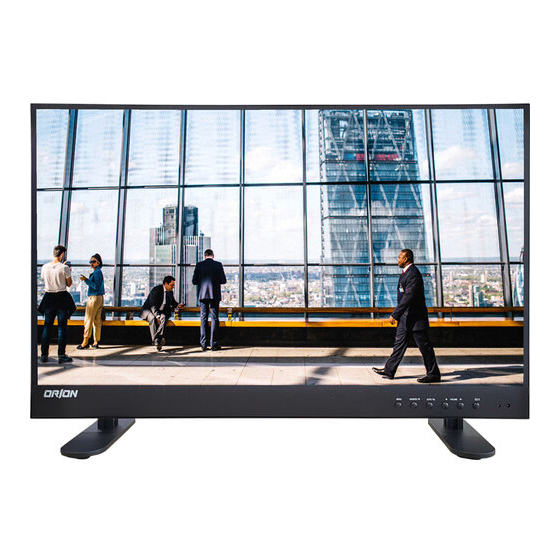
- Page 1 Installation and User's Guide USER MANUAL PREMIUM WIDE ASPECT RATIO LED SERIES <All contents of this document may change without prior notice, and actual product appearance may differ from that depicted herein>...
- Page 2 Warranty Orion Images Corporation (“OIC”) warrants to the first purchaser that its LCD Display monitors are free from defects in materials and workmanship under normal use. The warranty is three years beginning on the date of invoice, as further described in the following text.
-
Page 3: Table Of Contents
[ USER MANUAL ] <TABLE OF CONTENTS> SAFETY INSTRUCTION FCC RF INTERFERENCE STATEMENT INSTALLATION OSD MENU SETTING FEATURE VGA / HDMI / DP / HDA Mode Table TROUBLESHOOTING... -
Page 4: Safety Instruction
[ USER MANUAL ] 1. SAFETY INSTRUCTION • Follow this safety instruction to use the monitor properly and prevent the damage. * This safety instruction has “Warning” & “Caution” as below Warning - If the user does not follow this instruction, it may cause the serious damage to the user. - Page 5 [ USER MANUAL ] Warning For cleaning do not use liquid cleaners. Do not install this monitor on the outside Never touch the power plug with wet- and near water. It may cause damage to hands. the product, electric shock and fire. When lightning and thundering, unplug Unplug this product from the wall outlet, the monitor from the wall outlet and...
- Page 6 [ USER MANUAL ] Cautions Place this product on a stable place. Install this monitor some distance If not, it may fall, causing serious from the wall and do not install unless damages to the monitor and people. proper ventilation is provided. The openings must not be blocked by When carrying this monitor, be careful curtain, rug or other similar surface.
- Page 7 [ USER MANUAL ] Cautions Install this monitor about 50cm far from Do not press the LCD panel with hands or the eyes and an angle of 0~15 degrees the sharpened material hardly. below eyes. Too close installation may cause having weak sight. For cleaning, unplug the monitor from the Do not use the chemical liquid for cleaning.
-
Page 8: Fcc Rf Interference Statement
[ USER MANUAL ] 2. FCC RF INTERFERENCE STATEMENT NOTE This equipment has been tested and found to comply with the limits for a Class A digital device, pursuant to Part 15 of the FCC Rules. These limits are designed to provide reasonable protection against harmful interference in a residential installation. -
Page 9: Installation
[ USER MANUAL ] 3. INSTALLATION PARTS LCD Monitor User Manual Power Cable Adapter(21~32”) Remote Controller Battery DP Cable *Please use only the DisplayPort cable provided with Monitor. This monitor is not compatible with other DisplayPort cables. **Depending on the product model type, there may be variations in appearance. - Page 10 [ USER MANUAL ] HOW TO INSTALL 1) KEY BUTTON SHORT KEY FUNCTION OSD Key Function MENU Activate the menu function / Exit from the menu SOURCE / ▼ Input source menu / Source selection(move down from OSD menu) AUTO / ▲ Auto-fit screen with PC-RGB input / move up from OSD menu ◀(VOL) Decrease the level of volume and move the previous menu...
- Page 11 [ USER MANUAL ] 2) CONNECTION - 21, 23REDPH ① ② ③ ④ ⑤ ⑥ ⑦ ① DP signal input ② HD analog signal input ③ HDMI HDMI signal input ④ VGA(PC RGB) signal input ⑤ AUDIO(PC) Stereo audio input for VGA ⑥...
- Page 12 [ USER MANUAL ] 2) CONNECTION - 27REDPH ① ② ③ ④ ⑤ ⑥ ⑦ ① DP signal input ② HDMI HDMI signal input ③ VGA(PC RGB) signal input ④ AUDIO(PC) Stereo audio input for VGA ⑤ For FW Update ⑥...
- Page 13 [ USER MANUAL ] 2) CONNECTION - 32REDPH ① ② ③ ④ ⑤ ⑥ ⑦ ① DP signal input ② HD analog signal input ③ HDMI HDMI signal input ④ VGA(PC RGB) signal input ⑤ AUDIO(PC) Stereo audio input for VGA ⑥...
- Page 14 [ USER MANUAL ] 2) CONNECTION - 43, 55REDPH ① ② ③ ④ ⑤ ⑥ ⑦ ① DP signal input ② HD analog signal input ③ HDMI HDMI signal input ④ VGA(PC RGB) signal input ⑤ AUDIO(PC) Stereo audio input for VGA ⑥...
- Page 15 [ USER MANUAL ] 3) REMOTE CONTROLLER MODE SELECT MENU HDMI Select HDMI mode Select DP mode VGA (RGB) Select VGA mode S.SET Select Input source OSD CONTROL MENU POWER Turn ON / OFF the monitor MUTE Turn ON / OFF the sound AUTO Auto adjust position of the screen (in VGA mode) COLOR...
-
Page 16: Osd Menu Setting
[ USER MANUAL ] 4. OSD MENU SETTING MENU STRUCTURE When user presses the menu key, the first “PICTURE” menu is displayed. Select by "◀" key then two types of menu functions are shown as below. PICTURE : Menu related to PICTURE Function OPTION : Other OSD Menu Status Control and Firmware Update If press "▲, ▼"... - Page 17 [ USER MANUAL ] 1) Picture Mode Picture Mode can select 4 modes as Mild, Dynamic, Standard and User as shown in the figure below. Press the "◀, ▶" key to change the mode. Three of the four modes except for User mode are shipped with fixed values at the time of shipment from the factory.
- Page 18 [ USER MANUAL ] 3) Aspect Ratio Aspect Ratio allows user to select the each aspect ratio as shown in the figure below. (However, activated list is according to the input port and the input resolution.) 4) Noise Reduction Noise Reduction can select 5 modes as Off, Low, Middle, High, Default as shown in the figure below. 5) Screen Screen enables to set the active area of the display when using PC-RGB input port.
- Page 19 [ USER MANUAL ] 6) Pixel shift Select auto pixel shift (On, Off) OPTION MENU The Option Menu can be selected from the following 7 modes by pressing the ▲ or ▼ key. OSD Language Selectable OSD Menu Language OSD Duration Setting Duration time of OSD Menu Restore Factory Default Software Update(USB)
- Page 20 [ USER MANUAL ] 1) OSD Language As shown in the figure below, OSD Language can be selected by "▲, ▼ " key. 2) OsdDuration OSD menu Duration can select 4 modes as 5, 10, 15Sec and Off by pressing the “▶ SELECT” key. 3) Restore Factory Default Restore factory default can be selected by pressing the "▶...
- Page 21 [ USER MANUAL ] 5) Key Lock Key lock default can be selected by pressing the "▶ SELECT" key. 6) DPMS The function can be activated(ON) or deactivated(OFF) with the button ▶. 7) Cycle setup Select auto input source with the button ▶. mode ON/OFF, input source ON/OFF INPUT SOURCE Input Source can be selected from the following four input modes by using the ▲...
-
Page 22: Feature
[ USER MANUAL ] 5. FEATURE 21 Inches 24 Inches 27 Inches Screen Size 21.5 inches 23.8 inches 27.0 inches Resolution 1920*1080 1920*1080 1920*1080 Pixel Pitch 0.248*0.248 mm 0.275*0.275 mm 0.311*0.311 mm Brightness 250 cd/m² 250 cd/m² 300 cd/m² Contrast Ratio 1000:1 1000:1 1000:1... - Page 23 [ USER MANUAL ] 5. FEATURE 32 Inches 43 Inches 55 Inches Screen Size 31.5 inches 42.51 inches 54.64 inches Resolution 1920*1080 1920*1080 1920*1080 Pixel Pitch 0.364*0.364 mm 0.4902*0.4902 mm 0.630*0.630 mm Brightness 400 cd/m² 450 cd/m² 500 cd/m² Contrast Ratio 4000:1 1100:1 1200:1...
-
Page 24: Vga / Hdmi / Dp / Hda Mode Table
[ USER MANUAL ] 6. VGA / HDMI / DP / HDA Mode Table MODE RESOLUTION VERTICAL FREQUENCY (Hz) 640 x 480 60 / 72 / 75 SVGA 800 x 600 56 / 60 / 72 / 75 1024 x 768 60 / 70 / 75 Mode SXGA... -
Page 25: Troubleshooting
[ USER MANUAL ] 7. TROUBLESHOOTING * When the following troubles are occurred, follow the trouble shooting. Before contacting service center. Troubleshooting Troubleshooting Tip 1. Make sure if the power supply is connected property The screen doesn’t 2. Turn on the power. show up 3.
Need help?
Do you have a question about the 21REDPH and is the answer not in the manual?
Questions and answers