Table of Contents
Advertisement
(https://manuals. baro.com)
Please choose page
Downloads
Declarations
Declarations of conformity:
HC3L-001.pdf (https://manuals. baro.com/content/declarations/HC3L-001.pdf)
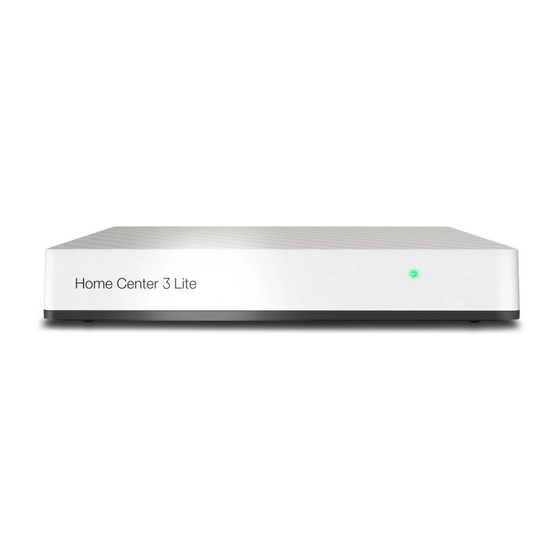
Description and features
Description
FIBARO Home Center 3 Lite is the core element of the FIBARO System.
It enables the integration of smart home devices into a single system to provide convenient control and a
powerful automation platform. The gateway is now even more secure, reliable, and versatile.
Features
Provides a reliable foundation for FIBARO System,
Capable of controlling all FIBARO and other compatible devices using the following radio standards:
Z-Wave (700 series),
Wi-Fi – 2.4 GHz (802.11 b/g/n).
Allows to add up to:
Home Center 3 Lite
HC3L-001
Back To Top
Back To Top
Advertisement
Table of Contents

Related Manuals for FIBARO Home Center 3 Lite


Summary of Contents for FIBARO Home Center 3 Lite
- Page 1 Description and features Description FIBARO Home Center 3 Lite is the core element of the FIBARO System. It enables the integration of smart home devices into a single system to provide convenient control and a powerful automation platform. The gateway is now even more secure, reliable, and versatile.
-
Page 2: Radio Communication
40 Z-Wave devices (recommended), 1 IP camera, 20 scenes, 10 Quick Apps, 5 plugins. No Internet cable required, works on Wi-Fi, Modern interface designed for ease of use, Enhanced and convenient scene editor, Support for more advanced apps and drivers, May be used with all devices certi ed with the Z-Wave Plus certi cate and should be compatible with such devices produced by other manufacturers. -
Page 3: First Installation
Back To Top Buttons R – Reboot Restart: hold R button for 5s D – Recovery Put the gateway in Recovery mode: hold D button during start-up Switch between Dynamic and Static IP: hold D button for 10s, then click when diode is blinking: yellow blinking: IP will switch to Dynamic green blinking: IP will switch to Static Reset network settings: hold D button for 20s, then click when diode is blinking red... - Page 4 Back To Top Interfaces Con guration Interface Redesigned Con guration Interface is the new way to manage your FIBARO System. This new interface gives access to your all devices, history, and settings. Opening Con guration Interface Using FIND FIBARO web app In your Internet browser go to ...
- Page 5 , and view their statuses, History – a register/record of events that occur in your whole FIBARO system, Scenes – a list of all scenes in your system that allows to start scenes and view their status, Climate – a list of all heating and cooling schedules in your system.
-
Page 6: Console Overview
In top right corner click Choose Account Settings from the menu. Change Theme switching mode setting to Auto. Back To Top Console The gateway has an all-new console that can provide detailed information about ongoing processes concerning the Z-Wave network, Quick Apps, and scenes. This means that the new console aggregates all messages pushed by “print”, “debug”, “trace”, “warning”, “error”... -
Page 7: Mobile Apps
To control the gateway with a mobile device, install the Home Center app (https://www. baro.com/en/smart-home-app/). You can download the Home Center mobile app here: FIBARO Home Center for iOS (iPhone) (https://apps.apple.com/app/ baro-home-center/id1421839464) FIBARO Home Center for Android (https://play.google.com/store/apps/details? id=com. baro.homecenter&hl=en) You can also scan the codes on your mobile device directly: ... - Page 8 Follow instructions of the device. There are a few adding options you can choose in the Add Device window: Options you can choose: Device is located far from the gateway (disable it for more security), NWI – Network-Wide inclusion (useful for devices that are not near the gateway, but withing networks range), Add in security mode if device supports it.
- Page 9 FIBARO devices allows to customize their operation to user’s needs using con gurable parameters. The settings can be adjusted via Z-Wave controller to which the device is added. In the FIBARO interface parameters are presented as simple options in Advanced Settings of the device.
- Page 10 Go to > Devices. Click the device you want to copy the parameters to. Open the Parameters tab. In the Copy con guration from eld choose device you want to copy the parameters from. Click COPY. Save parameters. If the device is battery powered, wake it up manually or wait for next automatic wake up. If the device changes con guration, you will be asked to refresh the screen.
- Page 11 When you choose the main device for the Humidi er, it means that the actions of the switches selected in this Linked Device will depend on the readings from the main device: If the humidity (%) drops below your desired humidity range , the devices selected as humidi ers will turn on.
- Page 12 Click Video Gate. Enter the name of the video gate. Choose a Room. Choose the Camera. Select Input for bell push and Output to open the gate. Save. Switches (a group of switches) Advanced and complex smart homes often consist of many switches placed within close areas which we want to control at once.
- Page 13 If we have more blinds or awnings in the same area we usually control at once, it is a good idea to grup them in one device. All blinds in that group will follow the master device of our choice. Usually, devices such as Roller Shutters support few devices of such type, so we need to select appropriate role for the main device: blind without positioning,...
- Page 14 Go to > Devices. Click Choose Other Device. Choose Sprinklers. Enter the name. Choose a room. Choose watering devices. Select soil moisture sensor (optional). Set default watering time. Set humidity level to turn o watering. Save. Binary sensors You can combine multiple binary sensors of the same type to create one main sensor. It will calculate its value from the values of the linked devices using the logical operator you choose.
-
Page 15: Adding Cameras
Save. Multilevel sensors You can combine multiple multilevel sensors of the same type to create one main sensor. It will calculate its value from the values of the linked devices using the mathematical function you choose. Available functions: Average Median Maximum Minimum... - Page 16 Quick Apps The concept of Quick Apps is an evolution of plugins and virtual devices found in previous FIBARO gateways. It is possible to use Quick Apps to prepare integrations with the devices which are not Z-Wave, but o er some API which can be implemented in our Quick App.
- Page 17 Drag & drop items and enter the Lua code (learn more here (/home-center-3-quick-apps)). Click Save. Learn more about programming Quick Apps (/home-center-3-quick-apps) Downloading le Open the Con guration Interface. Go to > Devices. Click > next to the Quick App. Open the Advanced tab.
- Page 18 Window sensor. Back To Top Noti cations Setting noti cations for the device Choose the states of the device you want to be informed about. Available options depend on the device type. Choose the interval for the noti cation: Once (will be done once when the event occurs), Once per minute (at the full minute), Once per hour (at the full hour),...
-
Page 19: Adding An Icon
Open the Con guration Interface. Go to > Devices. Click > next to the device. Choose one of the categories: Lights, Blinds, Ambience, Climate, Gates, Safety, Security, Multimedia, Remotes, Other. Changing Icon Open the Con guration Interface. Go to > Devices. Click >... -
Page 20: Con Guration
Save. Back To Top Con guration Rooms and sections Rooms and sections are used to organize devices to re ect their place in your house. Sections Sections represent areas in your house (e.g. oors) and rooms can be assigned to them. Adding sections Open the Con guration Interface. - Page 21 Save. Editing rooms Open the Con guration Interface. Go to > Rooms. Click in the top right corner of the room icon. Click Edit. Edit room information: Category – categories are used for ltering rooms by type, Name – name of the room, Section –...
-
Page 22: Resetting Network Settings
Red – Wi-Fi in Access Point mode (ready to con gure) Pulsing copper – disconnected from Internet Green – connected to Internet 2) By checking the network status in the Con guration Interface: > Network > Internet Status Wi-Fi connection Connecting to a Wi-Fi network: Open the Con guration Interface. -
Page 23: Secure Connection
Using button on the cover: Hold the D button for 20 seconds. Click when the indicator is blinking red. Using Recovery Interface: Open the Recovery Interface. In Network Settings section click Reset. Secure connection The gateway can use HTTP and HTTPS protocols for communication. Use HTTPS to ensure security by encrypting communication. - Page 24 Chose the gateway which you want to add the user to. Click > next to the Open button. Click Add user button. Enter FIBARO ID e-mail address of the user you want to give access to your gateway. Click Add. Open the Con guration Interface.
- Page 25 Open the Con guration Interface. Go to > Access > Users. Click > next to the user. To add a mobile device to the gateway, log in to the mobile application on the given device. To remove a mobile device from the gateway, click the next to it and then con rm action by clicking DELETE.
-
Page 26: Remote Access
Installer Access The FIBARO System can be con gured on your own or by a certi ed FIBARO Installer. In case your system has been con gured by the FIBARO Installer, the Installer Access may facilitate his later work by allowing him to monitor and access to selected information of your system. - Page 27 Time and units The gateway gives you possibility to set the time, time zone, units and even separators! To adjust the settings: Open the Con guration Interface. Go to > General. Open the Time & Units tab. Now you can change settings, such as: Date and time: Time zone, Date and time (you can get it from the NTP server or set manually),...
- Page 28 Drag the map so that you see your home address. Click the location of your home to update the pin. Set the radius accordingly to your house and property size, e.g. 100m. Save. To add another location: Go to > General > Location (tab). Click Add Location.
- Page 29 It is not possible to implement all functionalities of the FIBARO System with Block Scenes, but are the best way for a basic user to enhance home automation. Lua Scenes (/home-center-3-lua-scenes/) are most advanced, but allow user to fully utilize all FIBARO System capabilities.
- Page 30 Click Delete. Duplicating scene Open the Con guration Interface. Go to > Scenes. Click next to the scene you want to duplicate. Click Copy to con rm. Converting Block Scene to Lua Scene Open the Con guration Interface. Go to > Scenes. Click next to the scene you want to duplicate.
- Page 31 Changing other settings Open the Con guration Interface. Go to > Scenes. Click > to expand the scene. Edit scene settings: Allow to restart a running scene – if set toYes, every new activation of the scene restarts it, if set to No, scene can’t be activated again if it is already running.
- Page 32 Events Custom events may be used to expand the functionality of scenes. Similar to variables, they can be used to connect di erent scenes, but they do not store any additional information, only that something happened (speci ed by you). You can emit your custom event in scenes and QuickApps, then use it to trigger other scenes.
-
Page 33: Adding Zones
Go to > Devices. Click Choose Other Device. Click Thermostat. Enter the name of the thermostat. Choose a Room. Choose the main device. Select heating and/or cooling devices. Save. Adding zones Open the Con guration Interface. Go to > Climate. Click Add Zone. Select how zones should be created: Automatically –... - Page 34 Save. If you want to use the same schedule on multiple days, you can set it once, then copy it to the remaining days. Editing zone name and devices Open the Con guration Interface. Go to > Climate. Click the to edit the zone.
- Page 35 Go to > Devices. Find your sprinkler on the list. Click > next to the sprinkler you want to edit. Click EDIT DEVICE. Edit settings and Save. Adding and con guring watering schedules Adding watering schedule Open the Con guration Interface. Go to >...
- Page 36 Creating pro les Open the Con guration Interface. Go to > Pro les. Click Add Pro le. Name the new pro le. If you want to copy settings from another pro le, select it in Based on eld. Select icon for the new pro le. Click Add.
- Page 37 On the top bar click the name of current pro le. Click on the name of the pro le you want to activate. Back To Top Alarms Alarm feature allows to create alarm zones using sensors in your system. Breaching any sensor in an armed zone will trigger an alarm.
-
Page 38: Maintenance
Save. Setting delay for arming/disarming Open the Con guration Interface. Go to > Alarm. Enter delay time (in seconds) for the zone: Entry delay – the alarm will delay triggering to allow you to disarm the zone when you enter Exit delay –... -
Page 39: Entering Recovery Mode
Open the Con guration Interface. Go to > General. Click Generate next to Generate system report A new window with the report will open ready to print. Back To Top Recovery Mode Recovery Mode allows retrieving the geteway operating system in case of technical problems, e.g. when the Con guration Interface is not reachable after update. -
Page 40: Switching Between Systems
In case of problems after updating your system, you can quickly repair it by using auto-repair. It will switch to copy of your system from before the last system update. Enter the Recovery Mode. Click Auto-repair. Con rm. Switching between systems You can switch between system A and B at any moment using the Recovery Mode, e.g. -
Page 41: Restoring Factory Defaults
Depending on how you have entered the Recovery Mode, di erent system will be available for recovering: inactive when entered via con guration interface or active when entered using button. Switch system to recover the other one. Enter the Recovery Mode. Click Recover System A/B. -
Page 42: Creating Backups
Click Install Update. Click Update to con rm the update. Updating connected devices Updating the devices is not possible via the Remote Access. To update devices: Go to > Update > Devices (tab). Click Update next to available update or select multiple and click Install Updates. Read the changelog and check the tickbox that you want to continue. -
Page 43: Restoring Backups
Open the Con guration Interface. Go to > Backup > Cloud Backup. Click Create backup. Enter a description for the new backup. Con rm. Wait for the process to end (interface will be unavailable while creating the backup). The backup will be added to your cloud backups. Creating local backups ... - Page 44 Are you tired of constantly searching for functions on your smartphone? Do you want your smart home to work on demand? This is possible thanks to the assistants. Check out the assistants that work with FIBARO! Assistants that works with FIBARO:...
- Page 45 List of FIBARO Smart Home Bot commands (https://manuals. baro.com/knowledge-base-browse/fshb- commands/) Connecting FIBARO Smart Home Bot (https://manuals. baro.com/knowledge-base-browse/ baro-smart- home-bot/) FIBARO Smart Home Bot – Frequently Asked Questions (https://manuals. baro.com/knowledge-base- browse/fshb-faq/) Back To Top Downloads Declarations Description and features ...
- Page 46 Real estate development (https://www. baro.com/en/partnership/developer/) FIBARO Installer iOS App (https://itunes.apple.com/us/app/ baro-installer/id1414461902?ls=1&mt=8) FIBARO Installer Android App (https://play.google.com/store/apps/details?id=com. baro.installer&hl=en) ABOUT Newsroom (http://newsroom. baro.com/en/) About us (https://www. baro.com/en/about-us/) Why FIBARO (https://www. baro.com/en/why- baro/) Works with FIBARO (https://www. baro.com/en/compatibility/) Where to Buy (https://www. baro.com/en/where-to-buy/) Contact (https://www.
Need help?
Do you have a question about the Home Center 3 Lite and is the answer not in the manual?
Questions and answers