Table of Contents
Advertisement
Quick Links
Advertisement
Table of Contents

Subscribe to Our Youtube Channel
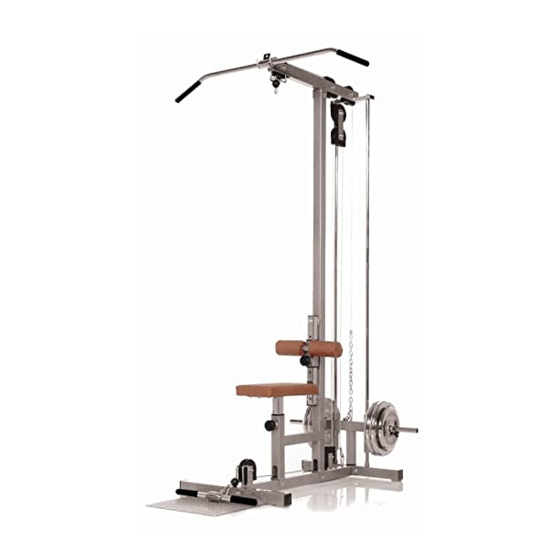
Summary of Contents for Finnlo 3862
-
Page 2: Table Of Contents
Index Inhaltsverzeichnis Seite/Page Safety instructions Sicherheitshinweise General Allgemeines Packaging Verpackung Assembly Montage Check list Checkliste Assembly Steps Montageschritte Care and Maintenance Pflege und Wartung Training manual Trainingsanleitung Trainings photos Übungsbilder Adjustments Verstellmöglichkeiten 5.2.1 Leg fixation 5.5.1 Kniefixierung 5.2.2 Seat adjustment 5.2.2 Sitzhöhenanpassung Explosion drawing Explosionszeichnung... -
Page 3: Sicherheitshinweise
1. Sicherheitshinweise 1. Safety instructions WICHTIG! IMPORTANT! l Es handelt sich diesem Kraftgerät l The gym is produced according to DIN EN 957-1/2 class Trainingsgerät der Klasse HC, nach DIN EN 957- 1/2. l Max. user weight is 120 kg. l Max. -
Page 4: Allgemeines
2. Allgemeines 2. General Der Anwendungsbereich dieses Trainingsgerätes ist der This training equipment is for use at home. The equipment Heimbereich. Das Gerät entspricht den Anforderungen der DIN complies with the requirements of DIN EN 957-1/2 Class HC. Damage to health cannot be ruled out if this equipment is not EN 957-1/2 Klasse HC. -
Page 5: Checkliste
3. Aufbau 3. Assembly Um den Zusammenbau des Kraftgerätes für Sie so einfach wie In order to make assembly of the gym as easy as possible for möglich zu gestalten, haben wir die wichtigsten Teile bereits you, we have preassembled the most important parts. Before vormontiert. -
Page 7: Montageschritte
3.2 Montageschritte / Assembly steps Schritt / Step 1 Schritt / Step 2... - Page 8 Schritt / Step 3...
- Page 9 Schritt / Step 4...
- Page 10 Schritt / Step 5 Schritt / Step 6...
- Page 11 Schritt / Step 7 Schritt / Step 8...
- Page 12 Schritt / Step 9 Schritt / Step 10...
- Page 13 Schritt / Step 11...
- Page 14 Schritt / Step 12...
- Page 15 Schritt / Step 13...
-
Page 16: Care And Maintenance
4. Pflege und Wartung 4. Care and Maintenance Wartung Maintenance Grundsätzlich bedarf das Gerät keiner Wartung principle, equipment does require Kontrollieren Sie regelmäßig alle Geräteteile und den maintenance. festen Sitz aller Schrauben Verbindungen Regularly inspect all parts of the equipment and the Tauschen Sie defekte Teile über unseren Kunden- secure seating of all screws and connections. -
Page 17: Trainings Photos
5.1 Trainings photos 5.1 Übungsbilder Biceps. Bizeps: Start position: Stand on the pedal. Arms are nearly complete Ausgangsposition: Stellen Sie sich auf die Trittplatte. Ihre Arme straight. sind fast gesteckt. Endposition: Fix the ellbow at side of your body and move the Endposition: Fixieren Sie die Ellenbogen am Körper und führen die forearms up. - Page 18 Armheben: Arm lifting: Ausgangsposition: Stellen Sie sich auf die Trittplatten. Ihre Arme Start position: Arms are nearly complete straight Endposition: Lift of your ellbow, till they reached the height of the sind fast gestreckt. shoulders. Endposition: Führen Sie die Ellenbogen an der Seite ihres Körpers Attention: Fix the upper body.
- Page 19 Triceps, laying version: Trizeps, liegend: Start position: Lay in front of the pedals in such a position, that Ausgangsposition: Legen Sie sich vor die Trittplatte, in einem the cable is tight. Abstand dass das Seil gespannt ist. Ihre Arme sind angewinkelt. Endposition: Straight your your arms in the ellbow joint.
- Page 20 Lat-Ziehen: Lat pull: Ausgangsposition: Ellenbogen sind fast gestreckt. Schultern sind Start position: Arms are nearly complete straight. Fix your legs in der Horizontalen fixiert. Beine mit dem Rundpolster fixieren. with the round cushion. Endposition: Latissimusstange nach unten führen, bis diese fast Endposition: Pull down the lat bar, until it nearly touch your neck.
-
Page 21: Adjustments
5.2 Verstellmöglichkeiten 5.2 Adjustments 5.2.1 Beinfixierung 5.2.1 Leg fixation Lockern Sie die Griffschraube (14) indem Sie diese im Release the adjustment knob (14) and pull it out. Slide the leg Uhrzeigersinn lösen und dann herausziehen. Verschieben Sie fixation (19) in a comforatable position and let the adjustment die Beinfixierung (19), bei gezogener Griffschraube (14), in eine knob (14) go of. -
Page 22: Explosion Drawing
6. Explosionszeichnung Explosiondrawing... -
Page 23: Parts List
Gebrauch ausgetauscht intensive or long-term use. In this case, please contact Finnlo werden müssen. In diesem Falle wenden Sie sich bitte an den Customer Service. You can request the parts and be charged Finnlo –... -
Page 24: Warranty (Germany Only)
8. Garantiebedingungen / Warranty (Germany only) Für unsere Geräte leisten wir Garantie gemäß nachstehenden Bedingungen: Wir beheben unentgeltlich nach Maßgabe der folgenden Bedingungen (Nummern 2-5) Schäden oder Mängel am Gerät, die nachweislich auf einem Fabrikationsfehler beruhen, wenn sie uns unverzüglich nach Feststellung und innerhalb von 36 Monaten nach Lieferung an den Endabnehmer gemeldet werden. - Page 25 Abt. Kundendienst PER FAX an: 0731-9748864 Von-Liebig-Str. 21 Ort: ........Datum: ........89231 Neu-Ulm Ersatzteilbestellung Ich bin Besitzer des FINNLO Gerätes Multi-Lat-Tower, Art.Nr.:3862, Po-Nr.:.... Kaufdatum: ........Gekauft bei Firma: ............(Garantieansprüche nur in Verbindung mit einer Kopie des Kaufbeleges!) Bitte liefern Sie mir folgende Ersatzteile:...


Need help?
Do you have a question about the 3862 and is the answer not in the manual?
Questions and answers