
Related Manuals for Prestigio RoadRunner 700X


Summary of Contents for Prestigio RoadRunner 700X
- Page 1 RoadRunner 700X PCDVRR700X Portable Car Video Recorder User Manual Version 1.0 www.prestigio.com...
- Page 2 - Prestigio continuously strives to improve its products. Due to software upgrading, some contents in this user manual may be different from your product. Prestigio reserves the rights to revise this user manual or withdraw it at any time without prior notice. Please take your product as standard.
-
Page 3: Table Of Contents
Contents 1. Unboxing ......................... 1 Open your package .........................1 Your DVR at a glance .......................2 Remote control ........................3 2. Getting started ......................... 4 Insert a memory card ......................4 Insert the battery ........................4 Replace the cover ........................5 Install the TFT display screen ....................5 Use the waterproof case ......................6 Mount your DVR ........................6 Power on your DVR .........................7... -
Page 4: Unboxing
1. Unboxing Open your package • Prestigio DVR • Car charger • Suction mount • Bicycle bracket • Pouch • Remote control • Waterproof case • Bracket • Lanyard • Anti-slide pad • Accessory for flat installation • Micro SD card • Rechargeable battery • CD ROM • Quick start guide • HDMI cable • Warranty card... -
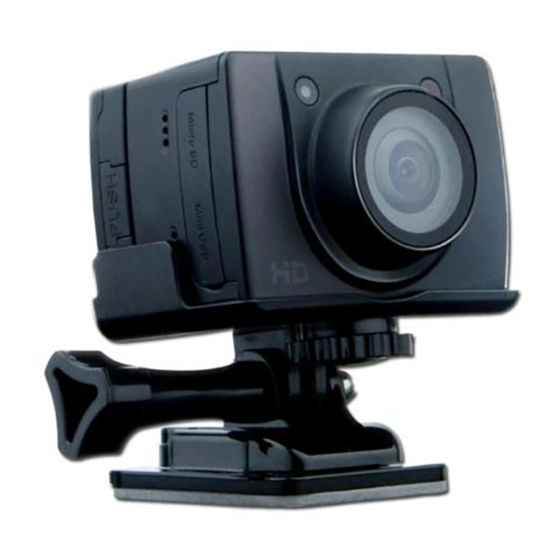
Page 5: Your Dvr At A Glance
Your DVR at a glance LCD segment screen Power switch Capture button Record button Recording indicator VOX switch Working/charging indicator Microphone TFT display screen Buzzer Menu button Micro SD card slot Up button Right button Left button OK button Down button Mini USB port Recall button Push to remove screen... -
Page 6: Remote Control
Remote control Record Capture Stop Pair the remote control with your DVR 1. Power off your DVR. 2. Press and hold the Record button on your DVR. 3. Slide the Power switch on your DVR to ON. 4. Release the Record button on your DVR. 5. -
Page 7: Getting Started
2. Getting started Congratulations on your purchase and welcome to Prestigio. To get the most of your product and enjoy all Prestigio has to offer, please access: http://www.prestigio.com/catalogue/DVRs More details about your product, please access: http://www.prestigio.com/support Please read the "12. Safety precautions" on page 19 before use. -
Page 8: Replace The Cover
• Be careful not to damage your fingernails when you remove the back cover. • Do not bend or twist the back cover excessively. Doing so may damage the cover. 2. Insert the battery (with its exposed copper contacts first) into the battery compartment. Please use only original batteries that came in the box or replacements that we recommend (Lithium battery PLB700). -
Page 9: Use The Waterproof Case
Follow the steps below to mount your DVR. Remember to power off your DVR before mounting it. For car use You need the following accessories to mount your DVR for car use. • Prestigio DVR • Suction mount • Anti-slide pad • Accessory for flat installation... -
Page 10: Power On Your Dvr
For flat surfaces You need the following accessories to mount your DVR for a flat surface. • Prestigio DVR • Accessory for flat installation • Waterproof case if necessary • Bracket if necessary For outdoor sports You need the following accessories to mount your DVR for a bicycle use. -
Page 11: Basics
3. Basics Charge the battery A new battery is partially charged. Do the following to charge the battery: Use the adapter 1. Plug the small end of the charger into the USB port of the device, and plug the large end to the adapter. -
Page 12: Connect To Your Tv Or Monitor
Connect to your TV or Monitor Your car DVR’s HDMI cable lets you watch the videos and view photos on your TV. • Connect your DVR to the TV by using the supplied HDMI cable. • Connect your DVR to the TV by using the supplied AV cable. Status icons on the segment screen The icons in the status bar on the segment screen give information about your DVR: Icons... -
Page 13: Video Record
4. Video record With your DVR, you can record high-quality videos, which can be the evidence when the accident happens. Please confirm that there is a memory card connected before video recording. Camcorder settings Before recording videos, customise your camcorder settings. 1. -
Page 14: Photo Capture
5. Photo capture With your DVR, you can capture photos in burst, which can be the evidence when the accident happens. Please confirm that there is a memory card connected before photo capturing. Camera settings Before capturing photos, customise your DVR settings. 1. -
Page 15: Vioce Record
6. Vioce Record Please confirm that there is a memory card connected before vioice recording. Record voice 1. Slide the Power Switch to ON to power on your DVR. You will hear a buzzer beep. Your DVR goes to preview mode at this time. 2. -
Page 16: Multimedia
7. Multimedia You can watch the videos and view the photos taken by the DVR. You need to connect the Segment screeen to your DVR to watch the videos and view the photos. Watch a video 1. Slide the Power Switch to ON to power on your DVR. You will hear a buzzer beep. Your DVR goes to preview mode at this time. -
Page 17: File Management
8. File management Delete a file 1. Slide the Power Switch to ON to power on your DVR. You will hear a buzzer beep. Your DVR goes to preview mode at this time. 2. Press [ ] to enter playback mode. 3. - Page 18 About DPOF DPOF (Digital Print Order Format) is a standard to record the print orders sent to the Micro SD card. You can dedignate the photos to be printed and the number of their copies. After you set DPOF to the photos, you just need to insert the Micro SD card into a DPOF compatible printer to output the photos as ordered.
-
Page 19: Settings
9. Settings Set up your DVR Follow the steps to finish settings: 1. Slide the Power Switch to ON to power on your DVR. You will hear a buzzer beep. Your DVR goes to preview mode at this time. 2. Press [M] to enter settings. 3. -
Page 20: Specifications
10. Specifications Item Specification Viewing angles 170° Sensor size 5.0 Mega CMOS sensor (2592*1944) Recording resolution 1080P(1920x1080/30fps) 720P/60(1280x720/60fps) 720P/30(1280x720/30fps) WVGA(848x480P) Video format Picture format Battery 1000mAh Lithium Battery Power consumption 350mA@ 3.7V (MAX) Video recording duration About 2.5h Voice recording duration About 3h Voice control standby About 250h... -
Page 21: Troubleshooting
11. Troubleshooting The device does not switch on Charge the device immediatelly. Unplug the charger and try to switch the device Your device seems to over heat You might be using a charger that was not intended for use with your device. -
Page 22: Safety Precautions
12. Safety precautions Please observe all safety precautions before using your DVR. Please follow all procedures outlined in this user manual to correctly operate the device. • Do not attempt to open the shell or attempt to repair, if the device or any parts are defective, please go to the professional maintenance point for repairing. - Page 23 User manual. Prestigio hereby states that this RoadRunner complies to basic requirements and another relevant regulations given by the EU directive1999/5/EC. Full version of the declaration of conformity is available on: http://www.prestigio.com/compliance.
Need help?
Do you have a question about the RoadRunner 700X and is the answer not in the manual?
Questions and answers