Table of Contents
Advertisement
Available languages
Available languages
Quick Links
Advertisement
Table of Contents

Subscribe to Our Youtube Channel
Related Manuals for Abilia Control Medi Standard


Summary of Contents for Abilia Control Medi Standard
- Page 1 Control Medi Standard Manual Art. Nr: 429220-1 SE, EN, 4.0...
-
Page 3: Table Of Contents
Innehållsförteckning/Content SE: Svensk Bruksanvisning Control Medi Standard ................6 Inledning ............................ 6 Produktbeskrivning ......................6 Avsedd användning ......................6 Allmänt om Control Medi ....................7 Teckenförklaring ........................ 8 Sätta i batterier ........................8 Byta batterier ........................8 Viktig information ........................9 Säkerhet .......................... - Page 4 Sammanställning snabbguide ....................26 GB: English Manual Control Medi Standard ..................29 Introduction ..........................29 Product description ......................29 Intended purpose......................29 General information about Control Medi ................30 Symbols .......................... 31 Inserting Batteries ......................31 Change the batteries ....................... 31 Important information .......................
- Page 5 Summary and Quick guide ....................49...
-
Page 6: Se: Svensk Bruksanvisning Control Medi Standard
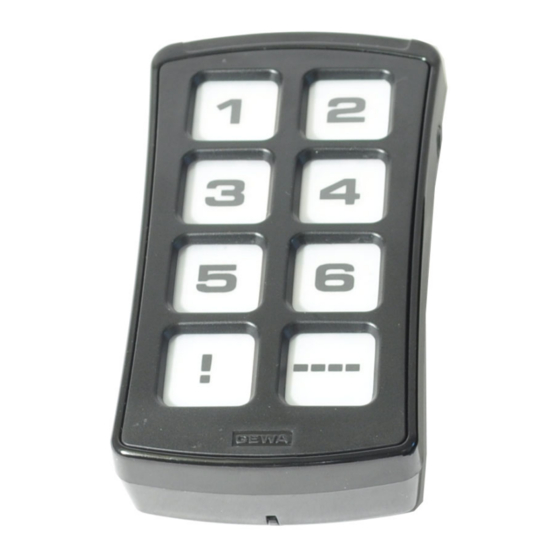
Control Medi Standard är en programmerbar IR-sändare som ersätter vanliga fjärrkontroller till TV, DVD, stereo mm. Control Medi Standard har totalt 28 olika programmeringsplatser fördelade på fyra nivåer. Man trycker direkt på knapparna för att sända signaler, och byter nivå med Nivå-knappen. -
Page 7: Allmänt Om Control Medi
1.3 Allmänt om Control Medi Innan man börjar använda Control Medi finns det vissa saker som man bör veta: VARNING: Innan du använder produkten måste du kontrollera att alla anslutna apparater och elektronisk utrustning är korrekt installerade, används enligt anvisningarna och är säkra att använda. VARNING: Säkerställ att användaren alltid kan få... -
Page 8: Teckenförklaring
1.4 Teckenförklaring Följande symboler kommer att finnas med i texten: X och Y Valfri knapp på Control Medi Valfri knapp på annan sändare som ska läras in 1 … 6 Knapp 1-6 Kod-knapp Nivå-knapp 2 sek Nivå-knapp som hålls nedtryckt i ca 2 sekunder --- + 1 2 sek Nivå-knapp och knapp 1 som hålls nedtryckta i ca 2 sekunder... -
Page 9: Viktig Information
Tänk alltid på säkerheten när du använder produkten. Om produkten används på annat sätt än avsett kan det innebära risker som Abilia AB inte tar ansvar för. Produktens uppskattade livslängd gäller vid användning i enlighet med dess avsedda användnings- och underhållsinstruktioner. -
Page 11: Inställningar
Fyra indikeringslampor visar vilken nivå man befinner sig på (se Fig 1). Control Medi Standard levereras med endast nivå 1 öppen, övriga nivåer är stängda. För att öppna ytterligare nivåer se avsnitt Öppna/stänga en nivå. - Page 12 Tabell 1: Grundinställning Gewa Link-kanaler Tabell 1 visar vilka kanaler/koder som är inlagda i Control Medi Standard vid leverans. GewaLink-kanalernas placering Nivå 1-4 Knapp på Control Medi (indikeras rött) Standard Om endast en nivå är öppen blir Nivå-knappen automatiskt en kanal. Det är den första kanalen på nästa nivå.
-
Page 13: Låsa/Låsa Upp Inställningslås
3.4 Låsa/låsa upp inställningslås För att skydda inställningarna i Control Medi kan man aktivera inställningslås. När inställningslås är aktiverat är inställningarna skyddade. Om man försöker att ändra inställningar utan att först låsa upp ges signal ”Fel”. Gör enligt följande för att låsa/låsa upp Inställningslåset: Tryck först på... -
Page 14: Inlärning Av Ir-Kanaler Från En Annan Sändare
3.6 Inlärning av IR-kanaler från en annan sändare Se till att batterierna i båda sändarna har god kapacitet. Placera inte sändarna i starkt ljus vid inlärning (t.ex. solljus). Lägg båda sändarna på ett bord med originalsändaren riktad mot den bakre gaveln på Control Medi, se bild. -
Page 15: Lägga In Gewalink-Kanal
3.7 Lägga in GewaLink-kanal Control Medi Standard levereras med GewaLink-kanalerna 16-39 (se Tabell 1). Om man vill använda en annan GewaLink-kanal på en viss knapp kan man lägga in en vald GewaLink-kanal så här: 1. Tryck först på --- och sedan samtidigt på 1 i 2 sekunder. När man släpper knapparna hörs signal ”Inställning”... - Page 16 Kod-knappen har vid leverans samma kod oavsett vilken nivå man befinner sig på. Behöver man lägga in en ny kodad kanal så finns det två metoder för att göra detta. Man kan ställa in 4096-kod på valfri nivå och knapp. Rekommenderat är att ha 4096-kod på Kod-knappen. OBS! Då...
-
Page 17: Kopiera Knapp
3.9 Kopiera knapp Med Control Medi har man möjlighet att kopiera en knapps funktion till en annan knapp. OBS! Koden/kanalen ligger även kvar på ursprungsplatsen. Tryck först på --- och sedan samtidigt på 1 i 2 sekunder. När man släpper knapparna hörs signal ”Inställning”... -
Page 18: Inställning Av Anslagsfördröjning
Grundinställning: Anslagsfördröjning = AV (0 sek) 3.12 Repetera senaste funktion I Control Medi Standard kan ha en knapp som repeterar den senast sända funktionen. Gör enligt följande för att lägga in repetera senaste funktion på valfri knapp: Tryck först på --- och sedan samtidigt på 2 i 2 sekunder. När man släpper knapparna hörs signal ”Inställning”... -
Page 19: Skapa Automatisk Sekvens (Macro)
3.13 Skapa automatisk sekvens (Macro) Control Medi har möjlighet att sända sekvenser. Genom att trycka på en knapp utför Control Medi automatiskt en serie av knapptryckningar. T.ex. för att komma till en sida på text-TV behöver man göra minst 4 knapptryckningar. Dessa 4 tryckningar går att lära in så att endast en tryckning behöver göras. -
Page 20: Direktstyrning
3.14 Direktstyrning I Control Medi är det möjligt att direktstyra en knapp med en yttre manöverkontakt. Man kan välja vilken knapp som ska aktiveras då man trycker på manöverkontakten. Man kan även direktstyra två knappar med några sekunders mellanrum. Tiden kan ställas från 2 till 8 sekunder. -
Page 21: Kanalområde
3.15 Kanalområde Med Control Medi har man möjlighet att ställa in olika kanalområden som sändaren ska arbeta inom. När inställningen görs försvinner eventuellt inlärda kanaler och en ny slumpvis kod läggs in på Kod- knappen ! . Normalt behöver man inte byta kanalområde. Om flera GewaLink-sändare ska användas i samma område och man INTE vill styra samma utrustning kan det vara nödvändigt att använda olika kanalområden. -
Page 22: Märkning
Man kan anpassa märkningen med hjälp av färdiga mallar med lämpliga symboler och text, se www.abilia.se Man kan även ladda ner dokumentet. Märkningen skrivs ut på overheadfilm eller vitt papper och sticks i fickan på Control Medi. -
Page 23: Rengöring
Alternativt kan Control Medi görs rent med en trasa som doppats i vatten med lite diskmedel i. Efter rengöring torkas den med en torr trasa. 8. Grundinställningar i Control Medi Vid leverans är Control Medi Standard inställd med vissa grundinställningar enligt följande: • Anslagsfördröjning är inställd på värde AV •... -
Page 24: Tekniska Data
Fysiska mått (L x B x H): 100 x 55 x 22 mm, inklusive gummifötter Vikt inkl batterier: 105 gram Temperaturområde (exkl batterier): -20°C – +45°C 9.2 Tillbehör som medföljer Control Medi Standard Art.nr Benämning Beskrivning Antal 429255 Control Medi Labelling 8 Märkning av knappar... -
Page 25: Förvaring Och Kassering
10. Förvaring och kassering 10.1 Förvaring Produkten ska förvaras inomhus i rumstemperatur och skyddad från fukt. 10.2 Kassering Control Medi innehåller elektronik som ska återvinnas efter produktens livslängd. Lämnas till miljöstation för elavfall. -
Page 26: Sammanställning Snabbguide
11. Sammanställning snabbguide Låsa upp/låsa inställningslås --- + 1 , 3 , tryck sedan önskat val 1 eller 2 2 sek 1 = Låsa upp. 2 = Låsa. Grundinställning: Upplåst Öppna/stänga nivå --- + 1 , 6 , välj nivå med --- , tryck sedan önskat val 1 eller 2 , --- 2 sek 2sek 1 = Stänga. - Page 27 Ställa in anslagsfördröjning , välj inställning. 2 sek = 0 sek, = 0,3 sek, = 0,6 sek, =1 sek Grundinställning: Anslagsfördröjning = AV (0 sek) Repetera senaste funktion , välj nivå och knapp 2 sek Grundinställning: AV (ingen) Lägga in Macro , skapa sekvens, , välj knapp 2 sek...
-
Page 29: English Manual Control Medi Standard
1. Introduction 1.1 Product description Control Medi Standard is a programmable IR transmitter, which replaces ordinary remote controls for TV, DVD, stereo etc. It has in all 28 different programming positions on four levels. Simply press the buttons to send signals, and change level by pressing the Level button. You can also connect an external control switch that can directly control one button on the transmitter. -
Page 30: General Information About Control Medi
1.3 General information about Control Medi To be able to use your Control Medi there are certain things that you should know: WARNING: Make sure that the user always can get help through a backup system if the product does not operate correctly. WARNING: Before you use the product, make sure that all connected appliances and electronic equipment are correctly installed, used as intended and safe to use. -
Page 31: Symbols
1.5 V). Insert the batteries according to the guidelines at the bottom of the battery compartment. NOTE: Use non-rechargeable alkaline batteries for Control Medi Standard. 1.6 Change the batteries When the batteries need replacing, the LED indicator blinks red and one... -
Page 32: Important Information
Abilia AB is not liable for any loss, damage or consequential loss if the product has been used or installed in any way other than as specified in this document. Any form of damage or tamp. -
Page 33: Settings
Four indication lights indicate the current level (see Fig Your Control Medi Standard is delivered with only level 1 open, other levels are closed. To open further levels, see section Opening/closing a level. - Page 34 Table 1: Default setting Gewa Link channels Table 1 shows the channels and codes for Control Medi Standard on delivery. GewaLink channels position Level 1-4 Button on Control Medi (red indicator) Standard code code code code If only one level is open the Level button automatically becomes one channel. It is the first channel on the next level.
-
Page 35: Locking/Unlocking The Settings Lock
3.4 Locking/Unlocking the Settings Lock In order to protect the programmed settings in your Control Medi, Settings Lock can be activated. When the Setting Lock is enabled, the settings are protected. If you try to change the settings without first unlocking, the “Error” alert is given. Do as follows to lock/unlock the Settings Lock: First press --- and then simultaneously press 1 for 2 seconds. -
Page 36: Recording Ir Channels From Another Transmitter
3.6 Recording IR Channels from another Transmitter Make sure the batteries in both transmitters are fully charged. Do not use the transmitters in intense light (e.g., sunlight) when programming. Place the two transmitters on a table with the original transmitter directed towards the rear of your Control Medi, see picture. -
Page 37: Adding A Gewalink Channel
3.7 Adding a GewaLink channel Your Control Medi Standard comes with GewaLink channels 16-39 (see Table 1). If you want to use another GewaLink channel on a certain button, you can insert a chosen GewaLink channel like this: 1. First press --- and then simultaneously press 1 for 2 seconds. When you release the buttons the “Setting”... - Page 38 The Code button always has the same code irrespective of which level you use. If you have to program a new coded channel there are two methods of doing so. You can set the 4096 code on any level and button. It is recommended to keep the 4096 code on the Code button. NOTE! When you add a new coded channel it is added to just one level.
-
Page 39: Copying A Button
3.9 Copying a button Using your Control Medi, it is possible to copy a buttons’ function to another button. NOTE! The code/channel remains in its original place. First press --- and then simultaneously press 1 for 2 seconds. When you release the buttons the “Setting”... -
Page 40: Setting An Acceptance Delay
Default setting: Acceptance delay = OFF (0 sec) 3.12 Repeating the last function Your Control Medi Standard can have a button that repeats the last sent function. Do as follows to add Repeat Last Function to a selected button: First press --- and then simultaneously press 2 for 2 seconds. When you release the buttons the “Setting”... -
Page 41: Creating An Automatic Sequence (Macro)
3.13 Creating an automatic sequence (Macro) Your Control Medi is able to send sequences of codes. When you press one button, Control Medi automatically carries out what is equivalent to pressing several buttons. To find a TV menu page for instance you need to press several buttons. -
Page 42: Direct Control
3.14 Direct control Your Control Medi can directly control a button with an external control switch. You can choose which button that should be activated when you press the control switch. It is also possible to direct control two buttons some seconds apart. The time can be from 2 to 8 seconds. -
Page 43: Setting The Channel Range
3.15 Setting the channel range Your Control Medi has the option to set different channel ranges for the transmitter to operate within. When the change of channel range is applied, programmed channels will disappear and a new random code is added on the Code button Normally, the channel range does not need to be changed. -
Page 44: Button Labelling
It is possible to create your own button labels using pre- designed templates with symbols and text, refer to www.abilia.com The document can also be downloaded. The labeling is printed on a clear sheet or white paper and inserted through the slit on your Control Medi. -
Page 45: Backups And Reinstallation
The backup copy can be used to reinstall the settings and recordings onto your transmitter. Use the Control Tool USB Interface accessory (sold separately). The software can be downloaded www.abilia.com. 7. Cleaning Your Control Medi can be cleaned with a damp cotton wool pad with surgical spirit, Chlorhexidine or ethyl alcohol. -
Page 46: Default Settings In Your Control Medi
8. Default settings in your Control Medi On delivery your Control Medi Standard will be set with certain default settings as follows: Acceptance delay is set to value OFF Feedback sound level is set to value 1 (0 – 5) Feedback vibration level is set to value 1 (0 –... -
Page 47: Technical Data
Measurements (L x W x H): 100 x 55 x 22 mm (incl. rubber feet) Weight (incl. batteries): 105g Operating temperature (excl. batteries): -20°C to +45°C 9.2 Accessories included with your Control Medi Standard Art.no Name Description 429255 Control Medi Labelling 8... -
Page 48: Storage And Disposal
10. Storage and disposal 10.1 Storage Keep the product indoors at room temperature and away from moist. 10.2 Disposal The Control Medi contains electronics components that must be recycled. Dispose the product at an applicable disposal location. - Page 49 11. Summary and Quick guide Locking/Unlocking the Settings Lock Press --- + 1 , 3 , then press your desired option 1 or 2 2 sec 1 = Unlock. 2 = Lock. Default setting: Unlocked Opening/Closing a Level Press --- + 1 , 6 , choose level with --- , then press the desired option 1 or 2 , 2 sec then ---...
- Page 50 Setting the acceptance delay Press --- + 2 , 2 , then choose the setting. 2 sec 1 = 0 sec, 2 = 0.3 sec, 3 = 0.6 sec, 4 =1 sec Default setting: Acceptance delay = OFF (0 sec) Repeat latest function Press --- + 2 , 5 , choose the level and button X .
- Page 51 Phone +46 (0)8- 594 694 00 | support@abilia.se | www.abilia.se Norway Abilia AS, Tevlingveien 23, 1081 Oslo, Norway Phone +47 23 28 94 00 | support@abilia.no | www.abilia.no United Kingdom Abilia UK Ltd, Unit12 Buckingway Business Park, Swavesey, Cambridge, CB24 4AE, United Kingdom Phone +44 (0) 1954 281 210 | support@abilia.uk |...
- Page 52 Abilia AB, Råsundavägen 6, Solna, Sweden Phone +46 (0)8-594 694 00 |info@abilia.se | www.abilia.se...
Need help?
Do you have a question about the Control Medi Standard and is the answer not in the manual?
Questions and answers