Table of Contents
Advertisement
Applicable Country & Regions:
All Regions
Product Service Manual – Level 2
Service Manual for BenQ:
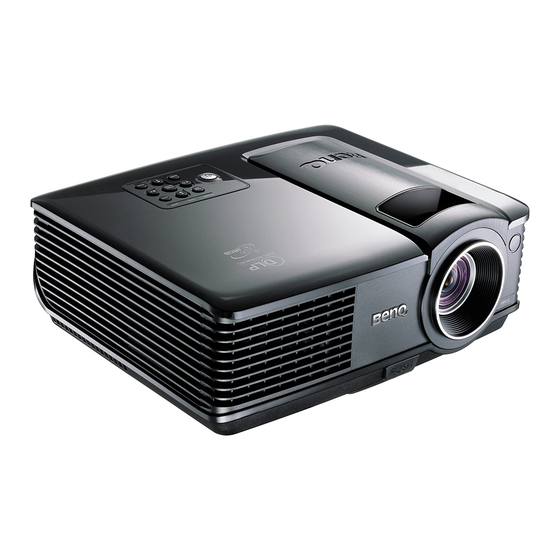
Projector/MP512
<9H.Y1277.000>
Version: 00a
Date:2008/06/12
Notice:
For RO to input specific "Legal Requirement" in specific NS regarding to responsibility and liability
statements.
Please check BenQ's eSupport web site, http://esupport.benq.com, to ensure that you have the most
recent version of this manual.
First Edition (Jun 2008)
© Copyright BenQ Corporation 2007. All Right Reserved.
1
Advertisement
Table of Contents

Related Manuals for BenQ MP512


Summary of Contents for BenQ MP512
- Page 1 Notice: For RO to input specific “Legal Requirement” in specific NS regarding to responsibility and liability statements. Please check BenQ’s eSupport web site, http://esupport.benq.com, to ensure that you have the most recent version of this manual. First Edition (Jun 2008)
-
Page 2: Table Of Contents
Content Index Abbreviations & Acronyms………………………………………………………….…...3 About This Manual………………………………………………………………….…...4 Trademark…………………………………………………………………………...4 Introduction……………………………………………………………………………...4 Important Service Information………………………………………….………..4 RoHS (2002/95/EC) Requirements – Applied to all countries require RoHS………4 Safety Notice......................…...5 Compliance Statement……………………………………………………….……..5 General Descriptions…………………………………………………………………….5 Related Service Information……………………………………………………………..5 Service Web Site…………………………………………………………………….5 Product Overview………………………………………………………………………..6 Specifications……………………………………………………………………….6 Packing……………………………………………………………………………17 Customer Acceptance……………………………………………………………..23 Level 1 Cosmetic / Appearance / Alignment Service……..……………………..………26 Operational Inspection Criteria.................26 Software/Firmware Upgrade Process…………………………………………..30... -
Page 3: Abbreviations & Acronyms
Abbreviations & Acronyms Analog to Digital BenQ BenQ Corporation Digital Light Processing / Texas Instruments® Digital Micro mirror Device Digital Video Interface DVI-I Digital Video Interface-Integrated Pond of Mirrors RS232 Interface Between Data terminal Equipment and Data Communications Equipment Employing... -
Page 4: About This Manual
About This Manual This manual contains information about maintenance and service of BenQ products. Use this manual to perform diagnostics tests, troubleshoot problems, and align the BenQ product. Important Only trained service personnel who are familiar with this BenQ Product shall perform service or maintenance to it. -
Page 5: Safety Notice
This Service Manual contains general information. There are 2 levels of service: Level 1: Cosmetic / Appearance / Alignment Service Level 2: Circuit Board or Standard Parts Replacement Related Service Information Service Web Site BenQ Global Service Website: http://support.benq.com/front/benqmain.asp eSupport Website: http://esupport.benq.com/v2... -
Page 6: Product Overview
Product Overview Specifications: 1.0 Optical Performance 2.0 Image Quality 3.0 Mechanical Specification 4.0 Packaging 5.0 Thermal Specification 6.0 Environmental 7.0 Regulatory 8.0 Reliability 9.0 Power Requirements 10.0 Panel Specification 11.0 Compatibility 12.0 Image Interface 13.0 Control Interface 14.0 User Interface... - Page 7 1.4.2 Light Leakage out of Active Area <0.65 lux with 50”~80“(Diagonal at 2m) image size (Except DMD Defect) Reference meter: BenQ YM5A/Measurement Center Integral 1.5 Color sphere 1.5.1 White 0.313±0.04 0.350±0.04 1.5.2 Red...
- Page 8 Slight flare is not counted as flare. Adjust focus from near to far until one corner clear, difference less 2.6.3 Focus unbalance than 50 cm Center of All other area 49”diagonal area 2.7 Lateral Color <2/3 <1 <2/3 <1 <1 <1 2.8 Image Quality 2.8.1 DMD Image Quality...
- Page 9 Normal mode: 33dBA @ 25°C Maximum Eco mode: 28dBA @ 25°C Operating: Without high altitude mode 0°C~35°C @ 0~1499m above sea level With high altitude mode 0°C~30°C @ 1500~3000m above sea 6.4 Altitude level Non-operating: 30℃@0~12,200m above sea level Safety cTUVus, TUV-GS, CCC, CB Report, PSE, GOST-R, PSB, SASO, eK, TUV-Argentina, CE, NOM FCC Class B requirements, C-Tick, VCCI, CE...
- Page 10 12.5 Analog RGB Output 15 pin D-Sub (Female) x 1 G(Y): Video amplitude 0.7/1.0 Vp-p : Impedance 75 RB(CbCr): Video amplitude 0.7 Vp-p : Impedance 75 HD/VD/CS: TTL Level 13.0 Control Interface 13.1 IR Receiver IR Receiver x1 (Front) Angle: ±30° Distance 0~8m 13.2 Serial Connector RS232 9pin, command table adhere to Appendix A 14.0 User Interface...
- Page 11 Appendix A - Electrical Specification 1. Timing Table The PC timing is as following: Refresh rate H-frequency Clock Resolution Mode (Hz) (kHz) (MHz) 720 x 400 720x400_70 70.087 31.469 28.3221 VGA_60 59.940 31.469 25.175 VGA_72 72.809 37.861 31.500 640 x 480 VGA_75 75.000 37.500...
- Page 12 2. Characteristics of inputs/outputs Signal Parameter Type RDATA Impedance GDATA Amplitude Volts peak-to-peak BDATA Black pedestal Volts Pixel Clock M Hz GDATA_SOG Impedance Amplitude Volts peak-to-peak Video amplitude Volts peak-to-peak Sync amplitude Volts peak-to-peak Black pedestal Volts Pixel Clock M Hz HDATA Impedance K ohm...
- Page 13 Video Input Definition Composite video Composite input input S-Video input Description Luminance Chroma Control Port Description Description RTSZ CTSZ...
- Page 14 Local Keyboard Description (Detailed description refer to SW Specification) Key Name Detailed Description Power Use this button to turn your Data Projector on and off (standby mode). Source To select input sources as Computer, Video, S-Video, YpbPr Auto Toggle auto-tracking image function Blank Press “Blank”...
- Page 15 4. Functionality The Following functionality will be supported: (Detailed description refer to SW Specification) Functionality Data (Computer) Video/S-Video YPbPr/YCbCr Volume Mute Preset Mode Brightness Contrast Color Tint Sharpness Color Temp H. Position V. Position H. Phase H. Size Keystone Language Auto Image Ratio Auto Off...
- Page 16 Appendix B - Power Supply Specification 1. Input Power Specification Specification Description Input Voltage Range The unit shall meet all the operating requirements with the range 90 ~ 264 VAC Frequency Range The unit shall meet all the operating requirements with an input frequency range 50 Hz ~ 60 Hz Power Consumption Normal operation: 280W (Max)
-
Page 17: Packing
Packing 【NOTE】The updated Service BOM is on SPO system. Please check it to order service parts. - Page 18 CTN LBL PRINTING (For BQA): CTN LBL PRINTING (For BQE):...
- Page 19 CTN LBL PRINTING (For BQP):...
- Page 20 CTN LBL PRINTING (For BQC)
- Page 21 SPEC LBL PRINTING 1. SPEC LBL PRINTING (For BQE, BQA, BQP) 2. SPEC LBL PRINTING (For BQC)
- Page 22 LAMP LBL PRINTING (For BQC)
-
Page 23: Customer Acceptance
Note: If BenQ defect undefined failure, and it judged that is reduce the merchandisebility, BenQ CM Inform this defect. After that parties make communication and decide how to solve. - Page 24 6.0 EXPRESSION OF DEFECTIVES Number of defects Percent of defects = ------------------------------------------ X 100% Number of products inspected 7.0 INSPECTION STANDARD Unless otherwise specified, the inspection standard will be defined by MIL-STD-105E, NORMAL INSPECTION LEVEL Ⅱ, SINGLE SAMPLING PLAN. Level Ⅱ is in use all the time, inspection levels are normal, reduce and tighten.
- Page 25 8.5 The evaluation must be within the limits of the product specification and, for not specified characteristics, refer to the sample machine or the judgment of BENQ QA Engineer. But any kind of proposals or judgments must be reasonable and acceptable by both sides.
-
Page 26: Level 1 Cosmetic / Appearance / Alignment Service
Level 1 Cosmetic / Appearance / Alignment Service OPERATIONAL INSPECTION CRITERIA 1. TEST PATTERN PATTERN PATTERN TEST ITEM ANSI Brightness、Bright Uniformity、FOFO Full white Contrast Ratio、CIE white coordinate、Throw Ratio、Zoom Ratio、Distortion Full Dark FOFO Contrast Ratio Full Red Impurity、CIE coordinate Full Green Impurity、CIE coordinate Full Blue Impurity、CIE coordinate... - Page 27 2. TEST CONTENT: Test Condition TEST ITEM Input Equipment Chroma pattern 1024x768 Focus/ Focus range D-SUB Chroma FULL W , R , G , B Impurity, CIE coordinate, PC Mode pixel fail At random PC sound check Audio CD-ROM HDTV NTSC Picture performance YPbPr...
- Page 28 NTSC/NTSC4.43/PAL(Incl Contrast: Preset Video uding PAL-M, PAL-n) VG828 Test pattern Brightness: Preset /SECAM/PAL60 NTSC (480i)/ 480p/ PAL YPbPr Contrast: Preset (576i)/576p, HDTV VG828 Test pattern Brightness: Preset (720P/1080i) 3.1 Power Consumption: Mode Condition Power Consumption LED Color Standby power < 5 W Normal <280 W Green...
- Page 29 5. IMAGE QUALITY SPECIFICATION: SEQ # TEST SCREEN ACCEPTANCE CRITERIA ≦ 4 visib le dark blemishes are allowed in the active area Major Dark Blue 60 Blemish 2. No blemish will be >1.5” long / diameter Major Light ≦ 4 visible light blemishes are allowed in the active area Blemish Gray 10 2.
-
Page 30: Software/Firmware Upgrade Process
Software/Firmware Upgrade Process How to download Hardware required Standard RS232 Download cable (P/N: 5K.Y1301.001) Personal computer or laptop computer Software required DDP2230 Composer lite New version FW DDP2230 Composer lite install procedure Installation Location The default installation directory is: C:\Program Files\DLP Composer Lite 7.0 If you want to install to a different directory (perhaps alongside a prior release of DLP Composer™... - Page 32 Download procedure Click on Flash Loader and browse the image file (new version firmware) Make sure to check “Skip Boot loader area (load all but the first 32KB)” Plug power cord into projector Plug in RS232 cable between computer and projector side Press Reset Bus first Press start download to begin update new firmware Wait till composer lite notice upgrade completed...
- Page 33 Method to enter factory menu: Use Keypad to enter factory menu Press Menu on keypad than the main menu popup When showing main menu, press Source + Mode at the same time Factory menu popup at the top-left of display Use Remote to enter factory menu At the FAQ page, enter Image and Installation icon At the Image and Installation page, enter Installation problem icon...
- Page 34 At the Installation problem page, press Up, Down, Left, Right key to enter Factory menu RS-232 connection: 1. Connection: Below shows the illustration of connection between PC and Projector. <CAUTION> Make sure that your computer and projector are turned off before connection. Power on the computer first, and then plug the power cord of the projector.
- Page 35 <pin assignment for this two end> Description Description Interface Settings RS-232 protocol Baud Rate 115200 bps (default) Changeable settings in User OSD (9600/19200/38400/57600/115200) Data Length 8 bit Parity Check None Stop Bit 1 bit Flow Control None Software specification 1. Each input character will be echoed. 2.
-
Page 36: Adjustment / Alignment Procedure
Adjustment / Alignment Procedure Content 1. Color Wheel Delay Alignment 2. Overfill adjustment 3. DMD Panel Alignment 4. PC Alignment Procedure 5. YUV Alignment Procedure... - Page 37 1. Color Wheel Delay Alignment (1)With Equipment: Equipment: Battery Biased Silicon PIN Detector Oscilloscope (Vertical scale set to 10mV) Probe Procedure: 1. Probe impedance matches 50 ohm 2. Open Factory OSD, and select color wheel delay item 3. Leave the image pure blue (DMD blue curtain) 4.
- Page 38 (2)Without Equipment: Procedure: Enter Factory Mode Enter Block 1 Change CW Delay by adjusting the following gray pattern to smooth 32 Gray pattern...
- Page 39 2. Overfill adjustment As the picture below, adjust light pipe to keep overfill image center.
- Page 40 3. DMD Panel Alignment Equipment: Pattern Generator Procedure: 1. Connect power, Video signal into projector. 2. Light on projector 3. Change pattern generator to full white pattern. 4. Watch the image if any pixel lost 5. Change pattern to full black. 6.
- Page 41 4. PC Alignment Procedure Equipment: Pattern generator (Chroma-2250) OSD Default value: Item Value Cal R Offset Cal G Offset Cal B Offset Cal R Gain Cal G Gain Cal B Gain YPbPr R Offset YPbPr B Offset Procedure: Gray Level: Connect power, D-sub, into projector.
- Page 42 5. YUV Alignment Procedure Equipment: Pattern generator (VG-828) OSD Default value: Item Value Cal R Offset Cal G Offset Cal B Offset Cal R Gain Cal G Gain Cal B Gain YPbPr R Offset YPbPr B Offset Procedure: 1. Connect power, YpbPr cable, into projector. 2.
-
Page 43: Level 2 Circuit Board And Standard Parts Replacement
Level 2 Circuit Board and Standard Parts Replacement Product Exploded View Module 1 – Total Exploded View... -
Page 45: Module 2 - Assy Upper Case
Module 2 – ASSY UPPER CASE... -
Page 46: Module 3 - Assy Lower Case
Module 3 – ASSY LOWER CASE... -
Page 47: Module 4 - Assy Front Case
Module 4 – ASSY FRONT CASE... -
Page 48: Product Disassembly/Assembly
Notice : When taking off screw*1 upper case module, don't draw the IR sensor wire in case of breaking. keypad LENS IR FRONT BENQ LOGO Take off the case left module and the front case module small sponge*2 upper case cover FRONT... - Page 49 Disassemble the screw*5, screw and take off the M/B driver shielding. screw*5 twin (1)Take off the long wire (one of twin fan wire), then disassemble the twin fan. (2)Take off the twin fan wire from M/B. take off this long wire first C/W sensor wire C/W FPC wire...
- Page 50 (1)Disassemble the screw*2, and take off the lamp door. screw (2)Disassemble the screw*1 driver screw*1 and lamp wire, and take off the lamp module. (1)Disassemble the screw*3. (2)Disassemble the screw grounding screw*1, and driver take off the Power B/D SHD. grounding screw *1 blower fan's screw*1...
- Page 51 Disassemble the screw*3, screw and take off the OPT eng driver anchor 定位 point 点 3pin wire Disassemble the screw*2, screw the ballast BD, and driver wire*3. 5pin 2pin wire wire screw*1 push button (1)Take off the push button . screw screw*1 (2)Disassemble the...
- Page 52 Disassemble the screw*4, and take off the HSINK screw and DMD chip with driver Chip BD. (1)Disassemble the baffle module DMD. screw (2)Disassemble the driver screw*3 and take off the CW module. baffle Rotate to open the switch screw on socket, and take off driver the DMD chip.
-
Page 53: Module Assembly Key Point - Optical Engine
Module Assembly Key Point - Optical Engine 1. Assembly Lamp module: 1.1 Washer, Screw, Mesh and Fin Assembly Assemble Washer and Screw to the HLD Lamp (Figure1-1). Assemble “MESH” with Lamp holder .Mesh hooks HLD Lamp first (Figure1-2) and press it assemble to the right position (Figure1-3). - Page 54 F/G datum Fig. 1-6 Fig. 1-7 Insert to HLD Lamp Fig. 1-8 Fig. 1-9 1.3 Lamp Wire Arrangement Lamp Wire arrangement have to look likes as below(Figure 1-11) Bending Angle have to face to backside of Lamp(Figure 1-12) Short Wire Short Wire Long Wire Fig.
- Page 55 Fig. 1-12 1.4 Lamp Assembly. Lamp Assembly sequence look likes below: (A) Insert lamp into HLD Lamp Lamp and touch to the Mesh Lamp (Fig. 1-13). (B) Push lamp slightly to the right side (Fig. 1-13). (C) Then push Lamp forward to touch DTM Lamp of HLD Lamp (Fig. 1-13). Insert Lamp into HLD Lamp Lamp and push Lamp forward to touch DTM Lamp of HLD Lamp (Fig.
- Page 56 Clip Up Lamp Clip Lamp Fig. 1-15 Fig.1-16 Breach is located on top of terminal Fig.1-17 Fig.1-18...
- Page 57 2. BKT Link Lamp and CW Shield Assembly: 2.1 Insert “CW Shield” and hook “BKT Link Lamp”(Fig. 2-1). 2.2 Lock Screw well (Fig. 2-2). 8F.1A752.3R0 Fig. 2-1 Fig. 2-2 3. Assembly CW Module: 3.1 CW Module Assembly Sequence as blow (Fig. 3-1, Fig. 3-2): (1) BKT CW (2) Damper CW (3) CW (4) Screw (8F.00345.5R6) (5) Sensor Board (6) Screw (8F.1A752.3R0) (7) CW CVR...
- Page 58 Fig. 3-2 4. Assembly LP module: 4.1 LP must datum well with “BKT_LP” show as Fig. 4-1. 4.2 Referring to Fig. 4-2, it must be visible clearance between “BKT_LP” and ”LP Opening” after assembling. Clearance Bottom Right Datum Datum Fig. 4-1 Fig.
- Page 59 4.5 Assembly LP Module to HSG DMD i. Assembly two Overfill adjustment screws (8F.1A752.8R0) to HSG DMD (Fig. 4-4). ** Adjustment criteria refer to below item 4.6. ii. Assembly “Clip LP” and lock with screw well (Fig. 4-5). iii. Press CLIP of BKT_LP first, and then push it into the hole (Fig. 4-6). iv.
- Page 60 1. Press down the Clip 2. Insert the LP Module Fig. 4-6 LP Datum of DMD HSG Overfill adjustment screws Fig. 4-7 1. Place Clips on BKT surface 3. Lock screw 8F.1A752.3R0 2. Push Baffle LP to Fig. 4-8-1 Fig. 4-8-2 hook DMD HSG...
- Page 61 Pre assemble this screw not over the side surface. Pre assemble this screw not over the bottom surface. Fig. 4-9 5. Assembly FM Module: 5.1 Place FM on “HLD FM” surface(Fig. 5-1) and use “Clip FM” to fix FM(Fig. 5-2). Clip FM hook the punch points Touch the...
- Page 62 6. Assembly HSG ILL Module: 6.1 CM Assembly Insert “Clip CM Side” first, and then place “Clip Front CM” to fixed-shaft of ILL SUB before locking screw (Fig. 6-1, Fig. 6-2). II. Assemble CM to HSG ILL and to make CM contact three datum on the HSG ILL Well (Fig.
- Page 63 Clip UP CM Fig. 6-4 Fig. 6-5 Sponge Fig. 6-6 Fig. 6-7...
- Page 64 7. AL, HSG ILL and HSG DMD Assembly: 7.1 Placed “AL” on the “HSG DMD”. The “raised surface” of “AL” shall toward “DMD direction” (Fig. 7-1). 7.2 To assemble ”HSG ILL SUB Module” with “HSG DMD” and cover over on “AL” and the then lock with screws(Fig.
- Page 65 Open notation Button Close notation Fig. 8-3 Fig. 8-4 8.4 Place Damper on the surface of Chip-BD Fig. 8-5. Damper Fig. 8-5. 9. Assembly Optical Engine: 9.1 Assemble “BKT Link Lamp & CW shield” on “DMD HSG” and then lock with screws well (Fig. 9-1).
- Page 66 10. Assembly OP ENG 10.1 Assemble “Baffle DMD” to “HSG DMD” (Fig.10-1). 10.2 Assemble Chip B/D Module to “HSG DMD” (Fig. 10-2). Fixed shafts of DMD HSG Fixed holes of ILL SUB HSG Fixed shafts of Fixed holes of DMD Fig.10-1 DMD HSG Fig.10-2...
- Page 67 10.4 Assemble “CW Module” to “DMD HSG” and lock with screws well (Fig.10-4). 8F.1A554.4R0 Fixed shafts of DMD HSG Fig.10-4 10.5 Assemble “PL Lens” and lock with screws well (Fig. 10-5). 8F.JA754.4R0 Fig. 10-5...
- Page 68 10.6 Assemble “Ring Zoom” before locking screws first, and then assemble “Ring Focus” (Fig. 10-6, Fig. 10-7). Ring Zoom 8F.1A752.3R0 Fig. 10-6 Ring Focus Fig. 10-7 10.7 Assemble Lamp Module to “BKT Link Lamp” and then lock with screw well (Fig. 10-8, Fig. 10-9).
- Page 69 Fig. 10-9 EMI Solution Solution : Gasket (4G.J2G04.002-LP2). 4G.J2G04.002 W15*H6*L30 mm Use gasket to connect optic engine H-Sink and BKT down.
-
Page 70: Module Assembly Key Point - Mechanical
Module Assembly Key Point - Mechanical Contents: Blower module assembly contents Lower case assemble contents. Twin Fan adhesive mylar sheet Upper Case assemble contents Front Case assemble content Ballast assemble & wire alignment concern Assy Mylar Ballast concern Assy Power BD and Wire alignment concern Bracket Power BD assemble concern Main BD Assemble and Wire alignment Main BD Shielding Assemble and Wire alignment... - Page 71 1. Blower module assembly contents This blower Module assemble method same with MP612 Model. But add New EMI part (1-1), fixed screw between BKT blowers And nozzle is (1-2) part. 1-2 Screw Wire Clip is above the Nozzle 8F.1D224.5R0 1-1 Clip 3D.05E04.001 2.
- Page 72 Led lens assemble with Upper Case Rubber Key and Led Lens and Power assemble in Upper Case 5 Front Case assemble content Assy Front case assemble 1) BenQ logo assemble 2) Name Plate 3) IR Lens assemble IR Lens BenQ logo...
- Page 73 IR Lens assemble direction 6 Ballast assemble & wire alignment concern 1) Ballast screw quantity *2 step1 : top-left; step2: bottom-right 2) Wire ballast to M/B alignment , (note 2) 3) Wire ballast to PWR/B alignment , (note 3) 4) Wire ballast to Lamp alignment , (note 4 ) Note 4 Note 2 Note 3...
- Page 74 7 Assy Mylar Ballast concern 7-1 Mylar Assemble alignment. 7-2 Mylar Assemble alignment. Ballast wire alignment through To hole on Mylar ballast 8 Assy Power BD and Wire alignment concern 8-1 Thermal Break wire alignment 8-2 Ballast wire alignment 8-3 Power BD alignment with lower case...
- Page 75 9 Bracket Power BD assemble concern 9-1 8F.VG564.8R0 *3 for BKT Power BD and Lower Case...
- Page 76 10 Main BD Assemble and Wire alignment 10-1 Wire Assemble for MB Blower Wire Fan Wire Sensor Wire CW Wire 5 pin Blst to MB Ground Wire 10-2 Main BD assemble for Screw Fix 8F.1D224.5R0...
- Page 77 11. Main BD Shielding Assemble and Wire alignment 11-1 Screw Assemble for MB shielding 11-1 11-2 Screw Assemble for MB shielding CW wire alignment 12 Engine and Lower case constrain concern Screw Type: 8F.VA564.7R0 First Fixed location Second Fixed location 3rd Fixed location...
- Page 78 13 Rear Cover Screw fix sequence Second Fixed location First Fixed location 14 Lamp Wire assemble concern Lamp wire connector insert to lower case tunnel, please check the high for connector lamp And rib of lower case be alignment. Please refer to Note 14-1. 14-1 15 Lamp door screw assemble sequence First Fixed...
- Page 79 16 Twin Fan Wire arrange Please following the Fan Wire arrange such as below photo. Wire Arrange Method...
-
Page 80: Block Diagram
Block Diagram Hardware Architecture Thermal break Keypad Main sensor Circuit Operation Circuit Fan Driver Circuit Circuit Input CW Index Lamp Ballast sensor Source Module Door board switch Circuit From AC To Lamp PFC Circuit socket Filter Figure 1 Hardware Architecture... - Page 81 Main Board RS-232 XDRAM DDP ASIC DLP Image Front IR Processor 16 M Flash Memory RGB888 D-Sub in YUV422 24bits A/D converter 16bits Digital Signal RGB analog signal Digital YPbPr NTSC/PAL Signal /SECAM Video Decoder MBRST DMD Power Color Wheel (15:0) Motor Driver Reset Driver...
-
Page 82: Troubleshooting
Troubleshooting Chapter 1 System Analysis Chapter 2 Optical Trouble Shooting Guide Chapter 3 Power Supply Trouble Shooting Guide Chapter 4 LED Messages Definition Chapter 5 Error Count Messages Definition... - Page 83 Chapter 1 - System Analysis Step: 1. Check Lamp Door 2. Check Power Board and Interlock Keypad LED OK 3. Check Connection between PWR BD and Main BD Check Main Board 1. Check Lampen wire , Lamp wire and Ballast wire 2.
- Page 84 Chapter 2 - Optical Trouble Shooting Guide Item Trouble Shooting Guide Brightness 1. Change lamp Uniformity 1. Change lamp 1. Check ADC calibration 2. Check user’s menu brightness & contrast are default FOFO Contrast 3. Clean DMD 4. Clean PL 5.
- Page 85 2-1. “Blue Edge” Trouble Shooting: I. Re-adjust “Overfill” first. For Overfill Re-adjustment: i. Those 2 Adjustment Screws must be released for around 2 mm first. ii. Alignment Sequence: To adjust “Horizontal Adjustment Screw” firstly, then “Vertical Adjustment Screw”. Refer to Figure 2-1.. (2) Overfill Vertical Adjustment Screw (1) Overfill Horizontal...
- Page 86 Chapter 3 - Power Trouble Shooting Guide...
- Page 88 Chapter 4 - LED Messages Definition Status Note Power Temp Lamp Stand-by Powering up Normal operation Normal power-down cooling Lamp Error Messages Lamp error in normal operation(single lamp) Scaler reset fail CW start fail Thermal Error Messages Fan 1 error (the actual fan speed is ±20% outside the Lamp Fan desired speed.) Fan 2 error (the actual fan speed is ±20% outside the...
- Page 89 Chapter 5 - Error Count Messages Definition Error Definition Specification Count LAMP OFF DETECT LAMPLIT LAMP Fail error LAMP FAN SPEED ERROR SPEED OVER ± 20% FAN 1 Speed Error FAN 2 Speed Error BALLAST FAN SPEED ERROR SPEED OVER ± 20% FAN 3 Speed Error BLOWER FAN SPEED ERROR SPEED OVER ±...
-
Page 90: Appendix 1 - Screw List / Torque
Appendix 1 – Screw List / Torque Model name :MP522/512 (MD) Screw P/N Description Torque Q'ty Where use Q’ty (kgf-cm Part name Type Head Length Surface Unit BKT MB == LC 8F.VG564.8R0 SCRW TAP PH 7.5+/-0. (DELTA BKT BLOWER==LC W/F M3*8L NI D-PT POWER==LC LAMP BOX==LC... -
Page 92: Appendix 2 - Code List: Ir / Rs232 / Ddc Table
Appendix 2 - Code List: IR / RS232 / DDC Data Remote Control Code: 1. IR Code (A) IR setting value Frequency: 38.5kHz Protocal: NEC format (B) IR command code CUSTOMER CODE DATA CODE FUNCTION 0030 POWER 0030 0030 SOURCE 0030 TIMER (ON) 0030... - Page 93 2. RS-232 Command Code ASCII ACTION condition (DDP2000) Power On <CR>*pow=on#<CR> Execute under Standby Power off <CR>*pow=off#<CR> Execute under power on Power Power Status <CR>*pow=?#<CR> VGA/YPbPr <CR>*sour=RGB#<CR> VGA/YPbPr-2 <CR>*sour=RGB2#<CR> YPbPr <CR>*sour=YPbr#<CR> DVI-A <CR>*sour=dviA#<CR> DVI-D <CR>*sour=dvid#<CR> Source Selection HDMI <CR>*sour=hdmi#<CR> Execute under power on (depend on models) HDMI-2 <CR>*sour=hdmi2#<CR>...
- Page 94 Lamp 1 Hour <CR>*ltim=?#<CR> Lamp 2 Hour <CR>*ltim2=?#<CR> Normal mode <CR>*lampm=lnor#<CR> Economic mode <CR>* lampm =eco#<CR> <CR>*lampm Dual Brightest 1. Execute under power on =dualbr#<CR> Lamp Control 2. System will execute after <CR>* lampm Dual Reliable commanding, but Lamp related =dualre#<CR>...
- Page 95 DDC Table ________________________________________________________________ 0 | 00 FF FF FF FF FF FF 00 09 D1 01 AC 01 01 01 01 10 | 01 12 01 03 0E 00 00 78 0A 54 AC A1 5A 5A 89 23 20 | 18 50 58 BD EE 80 31 59 45 59 61 59 81 80 81 00 30 | 81 40 01 01 01 01 A0 0F 20 00 31 58 1C 20 28 80 40 | 14 00 00 00 00 00 00 18 00 00 00 FE 00 42 45 4E 50 | 51 0A 20 20 20 20 20 20 20 20 00 00 00 FC 00 4D...
- Page 96 (48H-59H) Detailed Timing / Descriptor Block 2: ASCII Data: BENQ ______________________________________________________________________ (5AH-6BH) Detailed Timing / Descriptor Block 3: Monitor Name: MP512 ______________________________________________________________________ (6CH-7DH) Detailed Timing / Descriptor Block 4: Monitor Range Limits: Min Vertical Freq - 48 Hz Max Vertical Freq - 85 Hz Min Horiz.
Need help?
Do you have a question about the MP512 and is the answer not in the manual?
Questions and answers