Sign In
Upload
Download
Table of Contents
Contents
Add to my manuals
Delete from my manuals
Share
URL of this page:
HTML Link:
Bookmark this page
Add
Manual will be automatically added to "My Manuals"
Print this page
×
Bookmark added
×
Added to my manuals
Manuals
Brands
Dahua Manuals
Intercom System
VTO4202F-MK
Quick start manual
Dahua VTO4202F-MK Quick Start Manual
Modular door station
Hide thumbs
Also See for VTO4202F-MK
:
Quick start manual
(36 pages)
1
2
3
4
Table Of Contents
5
6
7
8
9
10
11
12
13
14
15
16
17
18
19
20
21
22
23
24
25
26
27
page
of
27
Go
/
27
Contents
Table of Contents
Bookmarks
Table of Contents
Foreword
Important Safeguards and Warnings
Table of Contents
1 Overview
Introduction
Features
2 Structure
Camera Module
Indicator Module
Audio Module
Button Module
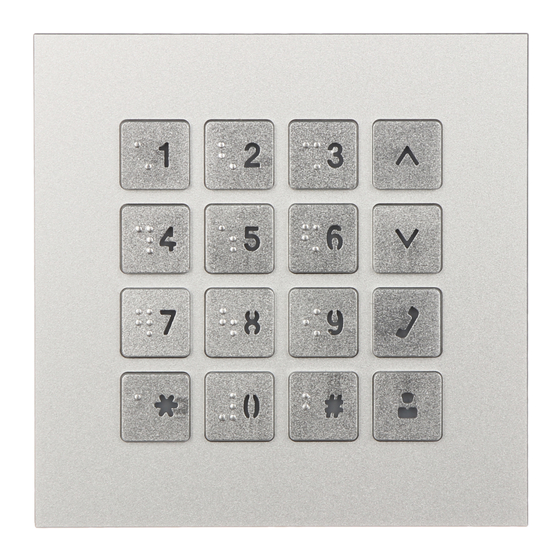
Keyboard Module (with Braille)
Card Module
Fingerprint Module
Display Module
Blank Module
Cascade Connection
3 Configuration and Commissioning
Procedure
Configuring VTO
Initialization
Configuring VTO Number
Configuring Network Parameters
Configuring SIP Servers
Adding VTO
Adding Room Number
Configuring the Module
Commissioning
VTO Calling VTH
VTH Monitoring VTO
Cybersecurity Recommendations
Advertisement
Quick Links
1
Introduction
2
Button Module
3
Keyboard Module (with Braille)
4
Configuring Vto Number
5
Configuring the Module
Download this manual
Modular Door Station
Quick Start Guide
V1.0.0
Table of
Contents
Previous
Page
Next
Page
1
2
3
4
5
Advertisement
Table of Contents
Need help?
Do you have a question about the VTO4202F-MK and is the answer not in the manual?
Ask a question
Questions and answers
Related Manuals for Dahua VTO4202F-MK
Intercom System Dahua VTO4202F-P Series Quick Start Manual
Modular vto (36 pages)
Security Camera Dahua VTO4202F Series Quick Start Manual
Modular vto (36 pages)
Intercom System Dahua VTO4202F-P-S2 Quick Start Manual
Modular door station (27 pages)
Intercom System Dahua VTO4202FB-P-S2 Quick Start Manual
Modular door station (27 pages)
Intercom System Dahua VTO4202F-MN User Manual
Modular door station (36 pages)
Intercom System Dahua VTO4202FB-MR Quick Start Manual
Modular door station (27 pages)
Intercom System Dahua VTO4202FB-MK Quick Start Manual
Modular door station (27 pages)
Intercom System Dahua VTO4202F-P1 User Manual
Villa door station (112 pages)
Intercom System Dahua VTO6 Series Installation Manual
Digital villa vto (32 pages)
Intercom System Dahua VTO2000A Quick Start Manual
Ip villa system (28 pages)
Intercom System Dahua VTK-VTO2000A-VTH1550 User Manual
(41 pages)
Intercom System Dahua Villa VTO Quick Start Manual
Version 3.1 (38 pages)
Intercom System Dahua Villa VTO Series Quick Start Manual
(43 pages)
Intercom System Dahua VTO Series Quick Start Manual
(39 pages)
Intercom System Dahua DHI-VTO2202F-P Quick Start Manual
(28 pages)
Intercom System Dahua DHI-VTO3211D-P4-S1 User Manual
(35 pages)
This manual is also suitable for:
Vto4202f-mb1
Vto4202f-mb2
Vto4202f-mb5
Vto4202f-mr
Vto4202f-ms
Vto4202f-mf
...
Show all
Vto4202f-ml
Vto4202f-ma
Vto4202f-p
Vto4202f-p-s2
Table of Contents
Print
Rename the bookmark
Delete bookmark?
Delete from my manuals?
Login
Sign In
OR
Sign in with Facebook
Sign in with Google
Upload manual
Upload from disk
Upload from URL


Need help?
Do you have a question about the VTO4202F-MK and is the answer not in the manual?
Questions and answers