
Related Manuals for Motorola DCP500 Series


Summary of Contents for Motorola DCP500 Series
- Page 1 D C P 5 0 0 S e r i e s D C P 5 0 1 H o m e T h e a t e r S y s t e m U s e r G u i d e...
- Page 2 CAUTION RISK OF ELECTRIC SHOCK CAUTION: TO REDUCE THE RISK OF ELECTRIC SHOCK, DO NOT REMOVE COVER (OR BACK). NO USER-SERVICEABLE PARTS INSIDE. REFER SERVICING TO QUALIFIED SERVICE PERSONNEL. Graphical symbols and supplemental warning marking locations on bottom of terminal. WARNING TO PREVENT FIRE OR SHOCK HAZARD, DO NOT EXPOSE THIS APPLIANCE TO RAIN OR MOISTURE.
- Page 3 I m p o r t a n t S a f e g u a r d s o É ~ Ç = á å ë í ê ì Å í á ç å ë ^ ä ä = í Ü É = ë ~ Ñ É í ó = ~ å Ç = ç é É ê ~ í á å Ö = á å ë í ê ì Å í á ç å ë = ë Ü ç ì ä Ç = Ä É = ê É ~ Ç = Ä É Ñ ç ê É = í Ü É = ~ é é ä á ~ å Å É = á ë = ç é É ê ~ í É Ç K = Retain instructions The safety and operating instructions should be retained for future reference.
- Page 4 Notwithstanding any information provided by Motorola in this manual regarding the use of batteries, the end user assumes all responsibility and liability to use and dispose of batteries in accordance with all applicable laws, rules and regulations. Motorola will not be liable to anyone for the end user's failure to use and/or dispose of batteries in the proper manner and in accordance with such laws, rules and regulations, or for any defect contained in batteries that may cause injury damage to persons or property.
- Page 5 According to 47 CFR, Parts 2 and 15 for Class B Personal Computers and Peripherals; and/or CPU Boards and Power Supplies used with Class B Personal Computers, Motorola, Inc., 6450 Sequence Drive, San Diego, CA 92121, 1-800-225-9446, declares under sole responsibility that the product identifies with 47 CFR Part 2 and 15 of the FCC Rules as a Class B digital device.
- Page 6 Motorola reserves the right to revise this publication and to make changes in content from time to time without obligation on the part of Motorola to provide notification of such revision or change. Motorola provides this guide without warranty of any kind, either implied or expressed, including, but not limited, to the implied warranties of merchantability and fitness for a particular purpose.
-
Page 7: Table Of Contents
C o n t e n t s I n t r o d u c t i o n Before Operating This Unit ........................1 Before You Begin .............................2 Document Conventions..........................2 O v e r v i e w Features........................ - Page 8 C o n t e n t s Speaker and Subwoofer Connections ....................30 Connecting speaker cords ......................30 Connecting Your Front Speakers and Active Subwoofer ............31 Connecting Your Front Speakers and Passive Subwoofer ............32 Connecting Your Surround and Center Speakers ............... 33 Connecting Your VCR......................
- Page 9 C o n t e n t s i i i Using the DVD Banner Display ......................86 Selecting a DVD Title ........................ 86 Selecting a DVD Chapter ......................87 Changing the Audio Language on a DVD..................87 Changing the Subtitle Language on a DVD.................
- Page 10 C o n t e n t s Other On-Screen Text Messages ....................109 Mute............................109 Volume up/down ........................109 DVD/CD Playback Control ....................... 109 Source Change ........................110 T r o u b l e s h o o t i n g S p e c i f i c a t i o n s Digital Cable Receiver ..........................
-
Page 11: I N T R O D U C T I O N
I n t r o d u c t i o n Congratulations on your purchase of Motorola’s new state-of-the-art Digital Convergence Platform—DCP500 Series Home Theater System. In the past, you may have connected your VCR or stereo through your TV. Now with the DCP501, you connect your TV, VCR, speakers, and other electronic devices through the DCP501 for easier control of your electronics. -
Page 12: Before You Begin
I n t r o d u c t i o n B e f o r e Y o u B e g i n You program and select options on your DCP501 with cursor buttons on the front of the DCP501 or with your remote control. -
Page 13: O V E R V I E W
O v e r v i e w This section provides information about: Features of the DCP501 Accessories included with the DCP501 DVD and CD information It also includes descriptions of the following: Front panel DCP501 display Rear panel Remote control unit Before you begin to install the DCP501, familiarize yourself with the various controls and displays. - Page 14 O v e r v i e w The DCP501 allows you to listen to your favorite digital and analog music in surround sound from selectable multiple audio sources, including: Digital audio on the CD player Digital or analog audio on TV channels tuned with the digital cable TV receiver feature* Digital audio on the digital audio tuner provided on your cable system* Local analog AM and FM stations with the DCP501 AM/FM tuner External analog audio cassettes...
-
Page 15: Supplied Accessories
O v e r v i e w S u p p l i e d A c c e s s o r i e s The following items are shipped with your DCP501: DCP501-R Universal Remote Control DCP501 Home Theater System User Guide DCP501 Home Theater System Quick Setup Guide Baseband video cable 6 ft. -
Page 16: Handling Discs
O v e r v i e w Do not use discs that are: Cracked Warped Contain adhesive tape or a disc label (as on rental discs) Handling D iscs When handling your discs: Do not touch the playback side (the blank side) of the disc Do not attach paper or tape to either side of the disc Cleaning Discs Your picture and sound quality may deteriorate due to fingerprints or dust on the disc. -
Page 17: Front Panel
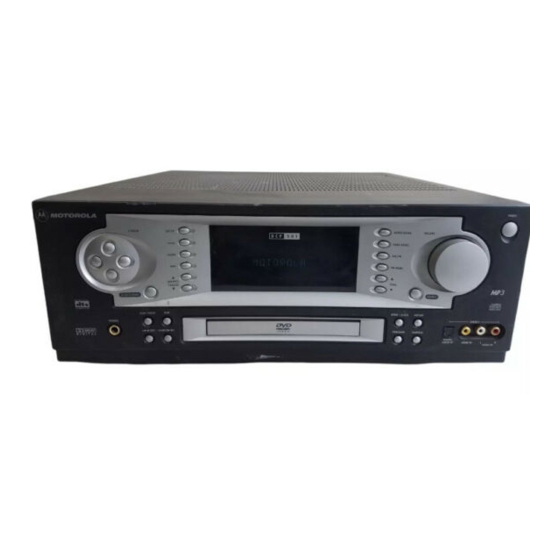
O v e r v i e w F r o n t P a n e l The DCP501 contains selection buttons, tuning buttons, a volume control knob, video 2 connection ports, and a single disc CD/DVD tray. For information on operating the DCP501, refer to the “Operation”... - Page 18 O v e r v i e w I tem Control Descri pti on AUDIO MODE Selects surround sound mode (toggle through all available modes). TONE/LEVEL Press once to enter Bass Level Change mode. Press twice to enter Treble Level Change mode. Press three times to enter Balance Level Change mode.
-
Page 19: Dcp501 Display
O v e r v i e w D C P 5 0 1 D i s p l a y For information on the controls and functions shown in the DCP501 display, see the “Operations” section. The icons on your DCP501 display are described in the tables below: F i g u r e 3 DCP 501 d i sp l ay 10 11... - Page 20 O v e r v i e w I tem I ndi cator/ I con Descri pti on On indicates DVD/CD has paused playing. DVD: On indicates DVD Parental Control Level has been set. DVD/CD: turns on to indicate you are playing the DVD/CD in programmed mode.
- Page 21 O v e r v i e w F i g u r e 4 DCP 501 d i sp l ay 33 34 35 I tem I ndi cator/ I con Descri pti on On indicates you have received incoming email from your cable operator. Use the program guide displayed on your TV to retrieve email.
- Page 22 O v e r v i e w I tem I ndi cator/ I con Descri pti on After selecting DVD/CD as the source and pressing DVD/CD button on the remote control, the following is displayed: DVD: displays the current chapter of the DVD (two-digit number). When tuner is selected as the source, displays the radio station in use.
-
Page 23: Rear Panel
O v e r v i e w R e a r P a n e l Figure 5 illustrates the rear panel of the DCP501. F i g u r e 5 DCP 501 r ear p an el MODEL NO.: DCP 501 À... - Page 24 O v e r v i e w I tem Descri pti on DIGITAL IN COAXIAL — digital audio input from digital audio output device with coaxial cable connector. OPTICAL 1 — digital audio input from digital audio output device with optical connector. Antenna FM 75 F-connector used for FM antenna.
-
Page 25: Operating The Remote Control
O v e r v i e w O p e r a t i n g t h e R e m o t e C o n t r o l The DCP501 uses the DCP501-R Universal Remote Control. Figure 6 illustrates the DCP501-R Universal Remote Control: F i g u r e 6 Rem ot e c on tr ol... - Page 26 O v e r v i e w Descriptions of the remote control functions are shown in the following table. When you press a button on the remote control, a mode button (CATV, DVD/CD,VCR1, VCR2, Tape, AM/FM, TV, V1 or V2) will turn on to indicate the current mode. Button I tem Descri pti on...
- Page 27 O v e r v i e w Button I tem Descri pti on TUNE Cable TV source: CATV application controlled. DVD/CD source: Press once: rewind and play (rewind 1). Press twice: rewind and play (rewind 2). Press three times: rewind and play (rewind 3). Press four times: rewind and play (rewind 4 for DVD only).
- Page 28 O v e r v i e w Button I tem Descri pti on Any DCP501 source: select current item on DCP501 display/on-screen display or select CATV application controlled item. TV source: Functions as E key. NTER VCR 1 or VCR 2 source: Functions as E key.
-
Page 29: Selecting Tv And Vcr Setup Codes
O v e r v i e w Button I tem Descri pti on DISC SKIP Not used on the DCP501. TONE Press once: enter bass level change mode. Press twice: enter treble level change mode. Press three times: enter balance level change mode. Press four times: enter fader level change mode. -
Page 30: Verifying A Setup Code Using Blink Back
O v e r v i e w Veri fyi ng a Setup Code Usi ng Bl i nk Back You can use the remote control’s blink back function to verify a previously entered setup code. The blink back function verifies a setup code by indicating the setup code number through a certain number of blinks on the 1, 2, 3, and 4 buttons on your remote control. -
Page 31: Finding A Setup Code
O v e r v i e w Fi ndi ng a Setup Code Setup codes for your TV and VCR are listed by brand in Appendix B, “TV and VCR Setup Codes”. If the setup code for your brand of TV or VCR is not listed, or if your TV or VCR does not respond to the setup codes listed for its brand, you can search for your setup code using your remote control’s Step and Set function. - Page 32 NOT E ! Use and dispose of batteries in accordance with all applicable laws, rules and regulations. Motorola will not be liable to anyone for the user's failure to use and/or dispose of batteries in the proper manner and in accordance with such laws, rules and regulations, or for any defect contained in batteries that may cause injury damage to persons or property.
-
Page 33: I N S T A L L A T I O N
I n s t a l l a t i o n In the past, you may have connected your VCR or stereo through your TV. With the DCP501, you connect your TV, VCR, speakers, and other electronic devices through the DCP501 for easier control of your electronics. -
Page 34: Before You Begin
I n s t a l l a t i o n B e f o r e Y o u B e g i n NOT E ! The clear protective film on the DCP501 display must be removed and transferred to the inside back cover of your DCP501 Home Theater System User Guide. -
Page 35: Recording Your Connections
I n s t a l l a t i o n R e c o r d i n g Y o u r C o n n e c t i o n s Use the diagram in Figure 8 to record your cable connections from the rear panel. You can use this diagram later to reconnect your system if you move the equipment or add new equipment. -
Page 36: Connecting Your Tv
I n s t a l l a t i o n C o n n e c t i n g Y o u r T V Before connecting your TV to the DCP501, you must determine which type of video connection to use. -
Page 37: Video
I n s t a l l a t i o n Video To connect your DCP501 to a TV that is not S-video capable: F i g u r e 10 Com p osi te vi d e o c on n e cti on s t o y ou r T V DCP501 MODEL NO.: DCP 501 À... -
Page 38: Connecting To Cable Tv
North America. Contact your local cable TV provider to determine whether the digital cable feature of your Motorola DCP501 can be activated. In cable systems where the digital cable feature cannot be activated, you may connect an external cable receiver provided by your local cable provider. -
Page 39: Connecting Your Speakers And Subwoofer
I n s t a l l a t i o n C o n n e c t i n g Y o u r S p e a k e r s a n d S u b w o o f e r This section includes information on connecting your speakers and optional subwoofer. -
Page 40: Speaker And Subwoofer Connections
I n s t a l l a t i o n Speaker and Subwoofer Connect ions This subsection provides instructions for: Connecting your front speakers and optional active subwoofer Connecting your front speakers and optional passive subwoofer Connecting your surround and center speakers Connecti ng Speaker Cords To connect your speaker cords: Twist the stripped ends of the speaker cords about 2/3 inch (10 mm). -
Page 41: Connecting Your Front Speakers And Active Subwoofer
I n s t a l l a t i o n Connecti ng Your Front Spea kers and Acti ve Subw oofer Connect your front speakers and active subwoofer (optional) as shown in Figure 13: F i g u r e 13 Con n e cti n g fr on t sp e ak er s an d acti ve su b w o o fer DCP501 MODEL NO.: DCP 501... -
Page 42: Connecting Your Front Speakers And Passive Subwoofer
I n s t a l l a t i o n Connecti ng Your Front Spea kers and Passi ve Sub w oofer Connect your front speakers and passive subwoofer (optional) as shown in Figure 14: F i g u r e 14 Con n e cti n g fr on t sp e ak er s an d p assi ve su b wo o fer DCP501 MODEL NO.: DCP 501... -
Page 43: Connecting Your Surround And Center Speakers
I n s t a l l a t i o n Connecti ng Your Surround and Cen ter Speake rs Connect your surround and center speakers as shown in Figure 15: F i g u r e 15 Con n e cti n g su r r ou n d an d cen ter sp eak er s DCP501 MODEL NO.: DCP 501 À... -
Page 44: Connecting Your Vcr
I n s t a l l a t i o n C o n n e c t i n g Y o u r V C R To connect your VCR to the DCP501, perform the following: Video connections Audio connections Video Connect ions for Your VCR Before connecting your VCR to the DCP501, you must determine which type of video connection... -
Page 45: S-Video
I n s t a l l a t i o n S-Vi deo Connect your VCR as shown in Figure 16: F i g u r e 16 S -vi d eo c on n e cti on s t o y ou r V CR DCP501 MODEL NO.: DCP 501 À... -
Page 46: Video
I n s t a l l a t i o n Vi deo Connect your VCR as shown in Figure 17: F i g u r e 17 Com p osi te vi d e o c on n e cti on s t o y ou r V CR DCP501 MODEL NO.: DCP 501 À... -
Page 47: Audio Connections For Your Vcr
I n s t a l l a t i o n Audio Connections for Your VCR Before connecting your VCR to the DCP501, determine if your VCR is stereo or monaural (mono). To determine whether your VCR is mono or stereo, check the connectors on the rear panel of your VCR or consult the manual supplied with your VCR. -
Page 48: Mono Vcr
I n s t a l l a t i o n M ono VCR To connect a mono VCR: F i g u r e 19 M on o V CR au d i o c on n e cti on s DCP501 MODEL NO.: DCP 501 À... -
Page 49: Connecting Other Audio/Visual Sources
I n s t a l l a t i o n C o n n e c t i n g O t h e r A u d i o / V i s u a l S o u r c e s You can connect an alternate audio/visual source such as another DVD player by following the diagram in Figure 20. -
Page 50: Digital Audio Connections
I n s t a l l a t i o n D i g i t a l A u d i o C o n n e c t i o n s Digital audio connections can be used with another DVD player, DAT players, and CD players. The DCP501 has three digital inputs: a single coaxial input and two optical inputs. -
Page 51: Connecting A Tape Deck Or Cd Player
I n s t a l l a t i o n C o n n e c t i n g a T a p e D e c k o r C D P l a y e r To connect an alternate stereo source such as a tape deck or CD player: F i g u r e 22 Au d i o c on n ec ti on s... -
Page 52: Connecting The Am And Fm Antennas
I n s t a l l a t i o n C o n n e c t i n g t h e A M a n d F M A n t e n n a s Connect your AM and FM antennas as shown in Figure 23: F i g u r e 23 An ten n a c on n ec ti on s... -
Page 53: Connecting For Power
I n s t a l l a t i o n C o n n e c t i n g f o r P o w e r After making all your connections, plug the DCP501’s power cord into a wall outlet, as shown in Figure 23. - Page 54 I n s t a l l a t i o n To connect a device to the front panel: F i g u r e 24 F r on t p an el con n e cti on s Cable(s) you will need: Mini-Disc Player or DAT Tape Player...
-
Page 55: O P E R A T I O N
O p e r a t i o n This section describes how to operate the DCP501. It includes instructions for: • Basic audio set-up • Cable TV • Sound effects • Digital Audio/Video Receiver — basic and advanced use •... -
Page 56: Setting Up Audio
Some notes about DCP501 operation: Lamp test When you turn on your DCP501, a lamp test is performed on the DCP501 display. This test causes all icons to turn on ½ second and then MOTOROLA is displayed for 2 seconds. Turning on the... - Page 57 O p e r a t i o n Press to display the menu on your TV, or A U D I O S E T U P I N P U T S E T SELECT the DCP501 display. O n-screen Di spl ay DCP501 Di spl ay A U D I...
- Page 58 O p e r a t i o n left/right (< < < < > > > > ) to select Press , or V C R 1 V C R 2 V I D E O 1 CURSOR Press to accept your selection.
-
Page 59: Subwoofer And Speakers
O p e r a t i o n Subwoofer and Speakers This option defines whether a subwoofer speaker is connected to the AUDIO PREOUT connector. If is selected, Speaker Size for all speakers defaults to . If you do not L A R G E have a surround mode selected, you cannot make adjustments to the rear speakers. - Page 60 O p e r a t i o n Press down arrow ( ∨ O n-screen Di spl ay DCP501 Di spl ay A U D I A K E O N E A D J A D V A N C E Press SELECT to display the...
- Page 61 O p e r a t i o n left/right (< < < < > > > > ) to display Press . If is selected, the box around the Y E S CURSOR (low frequency equipment) icon on the DCP501 turns off. Selecting defaults all L F E speaker sizes to...
- Page 62 O p e r a t i o n SUBWOOFER LEVEL: Press down arrow ( ) to select the subwoofer level, which is the volume ∨ level of the bass subwoofer. The factory setting is 0 d B O n-screen Di spl ay DCP501 Di spl ay U B W O O F U B W O O F...
- Page 63 O p e r a t i o n Press , or press left arrow (<). SELECT O n-screen Di spl ay DCP501 Di spl ay A K E U B W F U B W O O F G H T U R R O U N D A K E U R N...
- Page 64 O p e r a t i o n Press and the currently selected setting flashes. In this example, L A R G E SELECT flashes. The settings determine which speakers receive low frequency L A R G E S M A L L (bass) information.
- Page 65 O p e r a t i o n Press and the currently selected setting flashes. In this example, flashes. 1 0 f t SELECT O n-screen Di spl ay DCP501 Di spl ay G H T G H T M A L A N C E U R N...
- Page 66 O p e r a t i o n Press SELECT O n-screen Di spl ay DCP501 Di spl ay M A L A N C E U R N Press and the currently select setting flashes. In this example, flashes.
- Page 67 O p e r a t i o n Press down arrow ( ∨ O n-screen Di spl ay DCP501 Di spl ay A N C E A R G E A N C E U R N Press and the currently selected setting flashes. In this example, flashes.
- Page 68 O p e r a t i o n Press SELECT SURROUND SETUP: Press down arrow ( ∨ O n-screen Di spl ay DCP501 Di spl ay A K E U R R O U N D U B W O O F G H T U R R O U N D A K E...
- Page 69 O p e r a t i o n Press down arrow ( ∨ O n-screen Di spl ay DCP501 Di spl ay U R R O U N D A N C E U R R O U N D : A R G E A N C E U R N...
- Page 70 O p e r a t i o n Press SELECT O n-screen Di spl ay DCP501 Di spl ay A K E U R R O U N D U B W O O F G H T U R R O U N D A K E U R N SPEAKER RESET: Press down arrow (...
- Page 71 O p e r a t i o n Press flashes. SELECT O n-screen Di spl ay DCP501 Di spl ay A K E U R N Press right arrow (>) and flashes. Y E S O n-screen Di spl ay DCP501 Di spl ay A K E U R N...
-
Page 72: Test Tone Adjust
O p e r a t i o n Test Tone Adjust The Test Tone option allows you to hear test tones and adjust the level of these tones on speakers connected to your DCP501 to properly balance the sound system with the listening area. - Page 73 O p e r a t i o n Press down arrow ( ) twice. ∨ O n-screen Di spl ay DCP501 Di spl ay A U D I O N E A K E O N E A D J A D V A N C E Press...
- Page 74 O p e r a t i o n The current setting for the speaker flashes for 4-seconds and the test tone F R O N T L E F T plays. In this example flashes. 0 d B O n-screen Di spl ay DCP501 Di spl ay O N E A D J...
- Page 75 O p e r a t i o n After 4 seconds the output adjust continues and the speaker is selected as F R O N T R I G H T shown below: O n-screen Di spl ay DCP501 Di spl ay O N E A D J G H T...
-
Page 76: Advanced Audio Setup
O p e r a t i o n Advanced Audio Setup This section describes additional audio settings including: Fea tur e Descri pti on Default volume level Use to adjust the volume level at which the DCP501 plays when it is turned on. Night mode Allows you to enable/disable audio level compression and switch the DCP501 front lighting to a dimmer level. - Page 77 O p e r a t i o n Press down arrow ( ) three times. ∨ O n-screen Di spl ay DCP501 Di spl ay A U D I A D V A N C E A K E O N E A D J A D V...
- Page 78 O p e r a t i o n Press right arrow (>) and flashes. O n-screen Di spl ay DCP501 Di spl ay A D V A N C E U M E A U L A U L G H T M O D E M O D E...
- Page 79 O p e r a t i o n Press and the current setting flashes. In this example, flashes. 5 0 d B SELECT O n-screen Di spl ay DCP501 Di spl ay A D V A N C E U M E A U L A U L...
- Page 80 O p e r a t i o n NIGHT MODE: Press down arrow ( ∨ Enables/disables audio level compression and switches the DCP501 front lighting to a dimmer level. The factory setting is . Use Night Mode: O F F To reduce the light level emitted from the DCP501 display to minimize a visual distraction associated with TV viewing.
- Page 81 O p e r a t i o n Press right arrow (>) and flashes. With Night Mode enabled, DCP501 display is dimmer and the icon on the DCP501 display turns on. N I G H T O n-screen Di spl ay DCP501 Di spl ay A D V A N C E...
- Page 82 O p e r a t i o n Press right arrow (>) and flashes. Night Mode enabled with DCP501 display D I M + S O F T dimmer and light sound compression. The icon on the DCP501 display turns on. N I G H T O n-screen Di spl ay DCP501 Di spl ay...
-
Page 83: Using Dcp501 Cable Tv Functions
O p e r a t i o n U s i n g D C P 5 0 1 C a b l e T V F u n c t i o n s The DCP501 has an advanced CATV set-top terminal that allows you to view cable channels. The DCP501 must be authorized for cable TV operation by your cable TV operator before it will tune channels. - Page 84 O p e r a t i o n Press down arrow ( ) twice. ∨ O n-screen Di spl ay DCP501 Di spl ay M A I C A T A U D I C A T V C O R D C A T V C H A N N E C A N...
- Page 85 O p e r a t i o n Press right arrow (>) and flashes and the icon on the DCP501 display turns on. R E C The current Cable TV channel is directed to , and outputs regardless of the TAPE selected listening/viewing source.
-
Page 86: Using Catv Channel Scan
O p e r a t i o n Using CATV Channe l Scan Use this option only if you are NOT a digital cable TV subscriber. This feature enables the set-top terminal in the DCP501 to determine what analog cable channels are present on your cable system. - Page 87 O p e r a t i o n Press SELECT O n-screen Di spl ay DCP501 Di spl ay C A T C H A N N E C A N C A N ? C A T V C H A N N E C A N : T U R N...
- Page 88 O p e r a t i o n Press stops flashing and an analog CATV channel scan begins. When SELECT finished the DCP501 will tune to the first analog cable channel number. Note: Configuring the DCP501 in this manner disables third-party applications. This means that if you previously subscribed to digital channels, some third-party application will no longer be available.
-
Page 89: Using The Dcp501 Tuner
O p e r a t i o n U s i n g t h e D C P 5 0 1 T u n e r This section describes: How to tune radio stations How to Program the DCP501 to tune to your favorite stations with the preset option Tuning Radio Stations To tune the radio on the DCP501: Press... -
Page 90: Selecting Preset Radio Stations
O p e r a t i o n Selecting Preset Radio Stations To select preset radio stations with the DCP501: Press to tuner or press . DCP501 display shows: SOURCE the last radio station tuned the band (AM or FM) the preset number assigned to that station (if any) Press on the front of the DCP501, or channel up/down on the remote... - Page 91 O p e r a t i o n Press repeatedly to view all surround sound and DSP modes. AUDIO MODE When DOLBY DIGITAL is selected, the is displayed. When DOLBY Pro Logic II Surround is selected, the When DOLBY Pro Logic Surround is selected, the icon is displayed.
-
Page 92: Using The Dcp501 Digital Audio/Video Receiver
O p e r a t i o n U s i n g t h e D C P 5 0 1 D i g i t a l A u d i o / V i d e o R e c e i v e r This section describes: How to change the tone setting How to change balance and fade on the DCP501... - Page 93 O p e r a t i o n left/right (< < < < > > > > ) to set the balance between the front and rear speakers and Press CURSOR press SELECT Below are examples of what is displayed on your TV when you adjust the balance/fade response on your DCP501.
-
Page 94: Using The Dcp501 Dvd/Cd Player
O p e r a t i o n U s i n g t h e D C P 5 0 1 D V D / C D P l a y e r This section describes your DCP501 DVD/CD player. Press to display the DVD/CD icon. -
Page 95: Resume Play
O p e r a t i o n Resume Play To use the resume play feature: Press to display the icon. If no disc is present, the message D V D / C D N O D I S C SOURCE displayed. -
Page 96: Using The Dvd Banner Display
O p e r a t i o n Using the DVD Banner Dis play The on-screen Banner Display contains many DVD playback features. Each feature is represented with an icon. To view the DVD Banner Display, press while a disc is playing. INFO Press (<... -
Page 97: Selecting A Dvd Chapter
O p e r a t i o n Sel ecti ng a DVD Chapter Because DVD discs use digital technology, a title can be divided into individual chapters, which are similar to tracks on a CD. You can skip a specific chapter by using the Chapter feature on the Banner Display. -
Page 98: Changing The Subtitle Language On A Dvd
O p e r a t i o n Changi ng the Subti tl e Language on a DVD You can change the Subtitle language while you’re watching a disc, but only if the disc was created with subtitles. To change the DVD subtitle language: While a disc is playing, press to view the Banner Display on your TV. -
Page 99: Using Bookmarks On A Dvd
O p e r a t i o n Usi ng Bookm arks on a DVD The bookmark feature lets you mark a point on the disc that you can go to quickly. You can store up to 9 bookmarks. To use the bookmark feature: While a disc is playing, press to view the Banner Display on your TV. -
Page 100: Program Edit On A Dvd
O p e r a t i o n Program Edi t on a DVD You cannot enter Program Edit mode while a disc is playing. To create a Playlist: Press to display the screen on your TV. If there is no programmed P R O G R A M E D I T PROG Chapter on the... -
Page 101: Insert Chapter On A Dvd
O p e r a t i o n I nsert Chapte r on a DVD To insert a Chapter on a Playlist: Press to insert an entry into the . If there are already programmed Chapters P l a y l i s t PROG on the , the screen below is displayed when you press... -
Page 102: Using The Repeat Feature
O p e r a t i o n Usi ng the Repeat Featu re There are four Repeat options: Disc–repeat the disc that is playing. Title–repeat the title that is playing. Chapter–repeat the chapter that is playing. A-B–set the beginning (point A) and the end (point B) to make this part of the movie play repeatedly. -
Page 103: Using The Cd Banner Display
O p e r a t i o n Using the CD Banner Display When playing audio CDs, your DVD player has many of the same features as your CD player, including track skip, repeat play, and programmed playback. The on-screen Banner Display lets you choose various playback features. -
Page 104: Using Bookmarks On A Cd
O p e r a t i o n Usi ng Bookm arks on a CD The bookmark feature lets you mark a point on the disc that you can go to quickly. You can store up to 9 bookmarks. To use the bookmark feature: While a disc is playing, press to view the Banner Display on your TV. -
Page 105: Program Edit On A Cd
O p e r a t i o n Progra m Edit on a CD You cannot enter Program Edit mode while a disc is playing. To create a Playlist for a CD: Press to display the screen on your TV. P R O G R A M E D I T PROG Select specific... -
Page 106: Insert Track On A Cd
O p e r a t i o n I nsert Tra ck on a CD To insert a Track on a Playlist: Press to insert an entry into the . If there are already programmed Tracks on P l a y l i s t PROG , the screen below is displayed when you press P l a y l i s t... -
Page 107: Using The Repeat Feature
O p e r a t i o n Using the Repeat Feature There are three Repeat options for a CD: Disc–repeat the disc that is playing. Track–repeat the title that is playing. A-B–set the beginning (point A) and the end (point B) to make this part of the part of the CD play repeatedly. -
Page 108: Random Play
O p e r a t i o n Random Play To use Random Play on a CD: While a disc is playing, press to display R a n d o m P l a y SHUFFLE Each time you press turns on and off. -
Page 109: On-Screen Display When Playing An Mp3 Cd
O p e r a t i o n On-Screen D isplay when Play ing an MP3 CD When you insert an MP3 CD in the DCP501, a screen listing the CD contents is displayed similar to the example shown below. The first MP3 file on the CD starts playing and is listed at the top of the screen. -
Page 110: Deleting Selections From An Mp3 Cd
1 0 0 O p e r a t i o n Press and the selected file is copied to the right-hand side of the screen as SELECT shown in the example below. Repeat steps 2 and 3 to add selections to your Programmed Playlist. You can have up to 1025 selections in your Programmed Playlist. -
Page 111: Dvd Setup
O p e r a t i o n 1 0 1 DVD Setup The following DVD options are performed only through the on-screen display on your TV. Audio Subtitles Menus Rating Password TV Aspect Subtitles On/Off During DVD setup, the message is displayed on the DCP501 display. - Page 112 1 0 2 O p e r a t i o n Press on the front of the DCP501 or on your remote control to display the D V D SELECT menu. S E T U P AUDIO: Press to set .
- Page 113 O p e r a t i o n 1 0 3 SUBTITLES: Press to set . Use this option to set the language for DVD S u b t i t l e s SELECT subtitles. The factory setting is E n g l i s h Press up/down (...
- Page 114 1 0 4 O p e r a t i o n Press up/down ( ) to highlight , or and press E n g l i s h F r e n c h S p a n i s h O t h e r CURSOR ∧...
- Page 115 O p e r a t i o n 1 0 5 Press down arrow ( ) to highlight the option on the menu. P a s s w o r d D V D S E T U P ∨...
- Page 116 1 0 6 O p e r a t i o n Press up/down ( ) or the number buttons on the DCP501 remote control to enter CURSOR ∧ ∨ left/right (< < < < > > > > ) to move between digits. When all four the desired password, using CURSOR digits have been entered, press right...
- Page 117 O p e r a t i o n 1 0 7 SUBTITLES On/Off: Press to set . Use this option to set the S u b t i t l e s O n / O f f SELECT language for DVD subtitles.
-
Page 118: Resetting Your Password
1 0 8 O p e r a t i o n Resetting Your Password If you forget your DVD parental control password, you can reset the password. The DCP501 should not be in any DCP501 setup mode when performing this operation including: Main Setup DVD Setup Banner Display... -
Page 119: Other On-Screen Text Messages
O p e r a t i o n 1 0 9 Other On-Scree n Text Messages The following text is displayed on your TV when you press the corresponding button on the DCP501 front panel or your DCP501 remote control: M ute O n-screen Di spl ay DCP501 Di spl ay... -
Page 120: Source Change
1 1 0 O p e r a t i o n Source Change O n-screen Di spl ay DCP501 Di spl ay C A T C A T A D I V C R 1 C R 1 C R 2 C R 2 2. - Page 121 This section provides information to assist you in quickly detecting and resolving problems that might occur when using the DCP501. If you need assistance, call Motorola’s Customer Support Center at 1-866-668-2271 or 1-866-MOT-BCS1. If you have questions about or are having difficulties regarding your digital cable services, contact your local cable service provider.
-
Page 122: T R O U B L E S H O O T I N G
1 1 2 T r o u b l e s h o o t i n g Probl em Possi bl e Sol uti on Check that the center speaker has been properly connected to the DCP501. There is no sound Check that the speaker is working by utilizing the Test Tone function as or very little described in the “Operation”... - Page 123 T r o u b l e s h o o t i n g 1 1 3 Probl em Possi bl e Sol uti on Verify that the coaxial cable is properly connected to the DCP501 as defined There is no in the “Installation”...
- Page 124 1 1 4 T r o u b l e s h o o t i n g Probl em Possi bl e Sol uti on Use the DVD SETUP menu from the MAIN SETUP menu to select the desired Messages, languages for menus, messages, and subtitles.
-
Page 125: S P E C I F I C A T I O N S
S p e c i f i c a t i o n s D i g i t a l C a b l e R e c e i v e r Clear analog video 64 and 256-QAM demodulator Agile OOB tuner Return Path Both RF and integrated Telco Return capabilities... -
Page 126: Dvd/Cd Player
1 1 6 S p e c i f i c a t i o n s D V D / C D P l a y e r DVD/CD Player Playable Disc(s) Dolby® ® ® ® Digital Decoder, 6 channels DTS Decoder CD play programming Plays MP3-encoded discs... -
Page 127: Rear Panel Outputs
Embedded security Anti-copy Protection (Digital Cable Receiver and DVD) Macrovision Anti-copy Protection Renewable Security Motorola TVPass Card Interactive Applications Supports DCT2000 applications such as electronic program guide and other interactive services as made available by the local cable service provider. -
Page 128: Tv Setup Codes
T V a n d V C R S e t u p C o d e s You can set up your remote control for your TV and VCR by consulting the tables below. Note that you only need to set up your remote control for your TV, VCR 1 and VCR 2 (if applicable). For instructions on programming, verifying and finding setup codes for your remote control, see Remote Control in the “Overview”... - Page 129 1 2 0 T V a n d V C R S e t u p C o d e s M anufacturer TV Setup Code Curtis Mathes 0016, 0030, 0047, 0051, 0054, 0056, 0060, 0093, 0145, 0154, 0166, 0451, 0466, 0747, 1147, 1347 Daewoo 0019, 0092, 0451, 0623, 0624...
- Page 130 Megatron 0145, 0178 Memorex 0016, 0056, 0150, 0154, 0178, 0179, 0250, 0463 Midland 0017, 0047, 0051, 0747 Minutz 0021 Mitsubishi 0019, 0093, 0150, 0178 Motorola 0093 Multitech 0180 0156, 0166, 0178 0019, 0030, 0056 0092 Nikko 0030, 0092, 0178 Onwa...
- Page 131 1 2 2 T V a n d V C R S e t u p C o d e s M anufacturer TV Setup Code Realistic 0019, 0030, 0056, 0154, 0178, 0180 Runco 0017, 0030 0019, 0180 Sampo 0030 Samsung 0019, 0030, 0056, 0060, 0178 Sansei...
- Page 132 T V a n d V C R S e t u p C o d e s 1 2 3 M anufacturer TV Setup Code Vidikron 0054 Vidtech 0019, 0178 Wards 0016, 0019, 0021, 0030, 0054, 0056, 0178, 0179 White Westinghouse 0463, 0623, 0624 Yamaha...
-
Page 133: Vcr Setup Codes
1 2 4 T V a n d V C R S e t u p C o d e s M anufacturer VCR Setup Code Electrophonic 0037 Emerex 0032 Emerson 0000, 0002, 0037, 0043, 0121, 0184, 0209, 0278, 0479 Fisher 0047, 0104 Fuji... - Page 134 0035, 0162, 0454 Memorex 0000, 0035, 0037, 0039, 0046, 0047, 0048, 0104, 0162, 0209, 0240, 0454, 0479, 1037, 1162, 1262 Minolta 0042 Mitsubishi 0043, 0048, 0067 Motorola 0035, 0048 Multitech 0000, 0072 0038, 0041, 0067, 0104 Nikko 0037 Noblex 0240...
- Page 135 1 2 6 T V a n d V C R S e t u p C o d e s M anufacturer VCR Setup Code 0042 Samsung 0045, 0240 Sanky 0039, 0048 Sansui 0000, 0041, 0067, 0209, 0271, 0479 Sanyo 0046, 0047, 0104, 0240 Scott...
- Page 136 L a n g u a g e C o d e s The DVD menu language codes are included in the table below. For information on setting up your DVD language, see DVD Setup in the “Operations” section. Don’t forget to press E on the remote after you enter the code.
- Page 137 1 2 8 L a n g u a g e C o d e s Language Language Language Cod e Cod e Cod e Faroese 7079 Mongolian 7778 Turkmen 8475 Fiji 7074 Naru 7865 8487 Finnish 7073 Nepali 7869 Ukrainian 8575 French...
- Page 138 A b b r e v i a t i o n s a n d A c r o n y m s Audio/Video Amplitude Modulation CATV Cable TV Compact Disc Customer Service Representative Digital Audio Tape Digital Convergence Platform DCT 2000 Digital Consumer Terminal 2000 Digital Theater Systems.
- Page 139 1 3 0 A b b r e v i a t i o n s a n d A c r o n y m s on-screen display program clock reference packet identifier Pay-Per-View quadrature amplitude modulation QPSK quadrature phase shift keying Remote Control Unit Return for Service Authorization SPDIF...
- Page 140 NOT E ! The clear protective film on the DCP display must be removed and placed in the space below. The Unit Address and Serial Number found on the protective film is required for activation of your DCP cable TV receiver by your cable TV service provider.
- Page 141 485528-00 1 01/02 MGBI...
Need help?
Do you have a question about the DCP500 Series and is the answer not in the manual?
Questions and answers