Table of Contents
Advertisement
Available languages
Available languages
Quick Links
Advertisement
Chapters
Table of Contents

Related Manuals for Fancom I-FAN COMPLETE


Summary of Contents for Fancom I-FAN COMPLETE
- Page 1 GNDFI I-FAN COMPLETE MANUAL HANDLEIDING ANLEITUNG NOTICE MANUALE...
- Page 2 Gndfi N.B.: The original, authentic version of this manual is the English version produced by Fancom B.V. or one of its daughter companies (referred to further as Fancom). Any modifications introduced to this manual by third parties have neither been checked nor approved by Fancom. Modifications are taken by Fancom to include translations into languages other than English and the insertion and/or deletion of text and/or illustrations to/from the original contents.
-
Page 3: Table Of Contents
Gndfi Table of contents General introduction ..........................1 How to use this manual ........................1 Fancom helpdesk ........................... 1 Safety instructions and warnings ....................1 Installing the I-fan ............................2 Mount the I-fan and manual control ....................2 Connect the I-fan and manual control (MCA) ................. 5 Install the protective screen (optional) .................... -
Page 4: General Introduction
The guarantee does not apply if this product is installed in any other way than is indicated by Fancom and if the product's motor has been opened and changes have been made to the product. -
Page 5: Installing The I-Fan
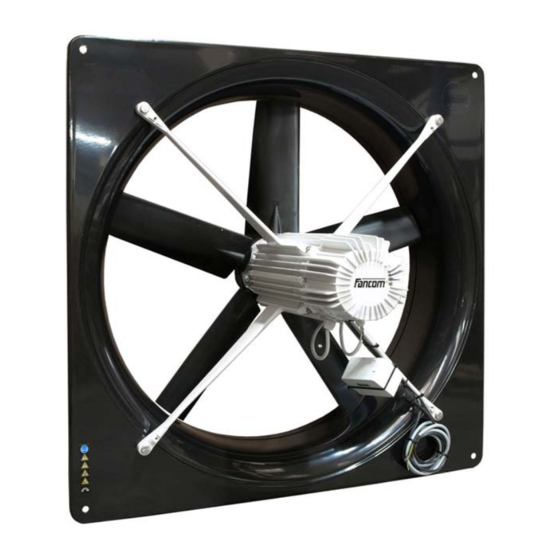
Take care to use suitable mounting material. The I-fan can be mounted on the wall with 4 screws. Most I-fan units are too heavy to lift. Take the necessary precautions. Fancom recommends mounting the I-fan as follows: Disassemble the I-fan from the shroud. - Page 6 Gndfi Make a hole in the wall. Take the dimensions of various types of I-fan into account here. Type Ø C Ø D Ø E Ø F Ø J (inch) (inch) (inch) (inch) (inch) (inch) (inch) (inch) (inch) (inch) (inch) ..35 (17.5) (15.9)
- Page 7 Gndfi Attach the I-fan inside the I-fan shroud. Check whether the I-fan can spin freely and that the screw fittings are on the underside of the motor. Place the protective screen on the I-fan (optional). Placement of a protective screen is necessary if the I-fan: •...
-
Page 8: Connect The I-Fan And Manual Control (Mca)
Gndfi Option 2: Connecting the central manual control Mount to the central manual control. Install a cable between the central manual control and the connection box(es) on the fan(s). Connect the I-fan and manual control (MCA) Before connecting, turn off the power and turn it back on only after the entire installation is ready. The motor/thermal protection is already integrated in the I-fan. - Page 9 Gndfi With manual control In order to connect the regulator's analogue output, the standard connection Analogue In (3) and Gnd (4) must first be removed from the cover. Connection box (MCA) Cover (MCA) Alarm contact, unpowered: 2A/30Vac/60Vdc Connect 1 fan Connect multiple fans Analogue: connects Analogue In (3) and Gnd Analogue: connects Analogue Out (5) and...
- Page 10 Gndfi Set the jumper to the proper position: Set the I/O address Using the table on the following pages, set an I/O address with the dipswitches on the <rgeg g sdf gprod> motor. In an I/O network, all I-fan units must have a unique address. Analogue control DIP 1 DIP 2 DIP 3 DIP 4 DIP 5 DIP 6 DIP 7 DIP 8...
- Page 11 Gndfi Digital control DIP 1 DIP 2 DIP 3 DIP 4 DIP 5 DIP 6 DIP 7 DIP 8 address ON: 10-0V dc ON: 50% (10V=0%, OFF: 100% 0V=100%) OFF: 0-10V dc (0V=0%, 10V=100%)
-
Page 12: Install The Protective Screen (Optional)
Gndfi Connect the power supply Specifications Type Voltage (V) Power Power Leakage Rated Noise at a supply draw (A) current power* distance of cable (mA) 2m and 7m ** (dB) IF35C 208-240 ±10% 1.17 61 / 50 IF40C 208-240 ±10% 1.43 64 / 53 IF45C... - Page 13 Gndfi Air inlet side Install the protective screen on the I-fan and secure it as shown in the illustration below. Air outlet side Hold the protective screen up to the I-fan and trace the three drill holes.
-
Page 14: Test The I-Fan
Do not touch any of the I-fan moving parts. Using the I-fan First use Do not touch any of the I-fan moving parts. Fancom advises to leave the I-fan on for about 6 hours after installation, to let it run in. Control options Analogue control (0-10V;10-0V) -
Page 15: Malfunctions
8 (ON=50%, OFF=100%, see also page 7). Maintenance The I-fan requires no specific maintenance. Fancom recommends that your installation technician inspects the complete climate installation, of which the I-fan is a component, every half-year. Inspect the I-fan periodically for any damages. Notify your installation technician immediately of any damages. -
Page 16: Technical Specifications
Gndfi Cleaning The I-fan may be cleaned wet, but consider the following: Do not use a high pressure hose or aim at motor seals or openings at close range. Do not turn the I-fan during or after the cleaning process. After cleaning the I-fan, it should run at 100% rpm for at least 30 minutes to remove all dampness. -
Page 17: Eg Declaration Of Conformity
Gndfi EG declaration of conformity Manufacturer: Fancom B.V. Address: Industrieterrein 34 City: Panningen (the Netherlands) Hereby declares that the: I-fan Complies with the provisions of the: Low voltage directive 2006/95/EC according to NEN-EN-IEC 60335-01: 2012 Machine directive 2006/42/EC Industrial ventilators according to NEN-EN-IEC 14461: 2002... - Page 18 N.B.: De originele, authentieke versie van deze handleiding is de door Fancom B.V. of door een van haar dochterondernemingen (verder aangeduid als Fancom) geproduceerde Engelstalige versie. Achteraf door derden aangebrachte wijzigingen in deze handleiding zijn door Fancom noch gecontroleerd, noch goedgekeurd. Onder wijzigingen verstaat Fancom o.a.
- Page 19 Inhoudsopgave Algemene inleiding ............................. 1 Hoe gebruikt u deze handleiding ....................1 Fancom-helpdesk ........................... 1 Veiligheidsinstructies en waarschuwingen ..................1 De I-fan installeren ............................2 De I-fan en de handbediening monteren ..................2 De I-fan en de handbediening (MCA) aansluiten ................5 Beschermrooster plaatsen (optie) ....................
-
Page 20: Algemene Inleiding
De garantie is niet van toepassing als dit product op een andere wijze is geïnstalleerd dan door Fancom is aangegeven en/of als de motor van het product is geopend en wijzigingen aan het product zijn aangebracht. -
Page 21: De I-Fan Installeren
Zorg voor geschikt bevestigingsmateriaal. De I-fan kan met 4 schroeven op de wand gemonteerd worden. De meeste I-fan-units zijn te zwaar om te tillen. Neem daarom de noodzakelijk voorzorgsmaatregelen. Fancom adviseert om de I-fan als volgt te monteren: Demonteer de I-fan van de rand. - Page 22 gNdfi Maak een gat in de wand. Houd bij montage rekening met de afmetingen van de verschillende typen I-fan. Type Ø C Ø D Ø E Ø F Ø J (inch) (inch) (inch) (inch) (inch) (inch) (inch) (inch) (inch) (inch) (inch) ..35 (17,5)
- Page 23 gNdfi Monteer de I-fan in de rand van de I-fan. Controleer of de I-fan vrij kan draaien en zorg dat de wartels aan de onderzijde van de motor zitten. Plaats het beschermrooster op de I-fan (optie). Het is nodig een beschermrooster te plaatsen als de I-fan: •...
-
Page 24: De I-Fan En De Handbediening (Mca) Aansluiten
gNdfi Optie 2: centrale handbediening aansluiten Monteer de centrale handbediening. Leg een kabel tussen de centrale handbediening en de aansluitbox(en) van de ventilator(en). De I-fan en de handbediening (MCA) aansluiten Schakel de spanning uit voordat u de unit aansluit en schakel deze pas in nadat volledige installatie gereed is. - Page 25 gNdfi Met handbediening Als u de analoge uitgang van de regelaar wilt aansluiten, moet eerst de standaardverbinding tussen de analoge ingang (3) (Analogue In) en aarde (4) (Ground) in de deksel worden verwijderd. Aansluitbox (MCA) Afdekkap (MCA) Alarmcontact, potentiaalvrij: 2 A/30 Vac/60 Vdc Eén ventilator aansluiten Meerdere ventilatoren aansluiten Analoog: verbindt Analogue In (3) en Gnd (4) met...
- Page 26 gNdfi Zet de jumper in de juiste stand: Het I/O-adres instellen Stel met behulp van de tabel op de volgende pagina's een I/O-adres in met de DIP-schakelaars op de <rgeg g sdf gprod>-motor. In een I/O-netwerk moeten alle I-fan-units een uniek adres hebben. Analoge sturing I/O-adres DIP 1 DIP 2 DIP 3 DIP 4 DIP 5 DIP 6...
- Page 27 gNdfi Digitale sturing I/O-adres DIP 1 DIP 2 DIP 3 DIP 4 DIP 5 DIP 6 DIP 7 DIP 8 ON: 10–0 Vdc ON: 50% (10 V = 0%, 0 V = OFF: 100% 100%) OFF: 0–10 Vdc (0 V = 0%, 10 V = 100%)
-
Page 28: Beschermrooster Plaatsen (Optie)
gNdfi De voeding aansluiten Technische gegevens Type Spanning (V) Voedings Stroomver Lekstroo Nominaal Geluidsterkte kabel bruik (A) m (mA) vermogen op 2 m en 7 * (W) m afstand ** (dB) IF35C 208–240 ±10% 1,17 61 / 50 IF40C 208–240 ±10% 1,43 64 / 53 IF45C... - Page 29 gNdfi Luchtinlaatzijde Plaats het beschermrooster op de I-fan en zet het vast zoals getoond in de afbeelding hieronder. Luchtuitlaatzijde Houdt het beschermrooster voor de I-fan en teken de drie boorgaten af.
-
Page 30: De I-Fan Testen
De I-fan gebruiken Eerste gebruik Raak de bewegende onderdelen van de I-fan niet aan. Fancom adviseert om de I-fan gedurende circa 6 uur na installatie ingeschakeld te laten zodat deze kan inwerken. Mogelijkheden voor sturing Analoge sturing (0–10 V; 10–0 V) -
Page 31: Storingen
gNdfi Digitale sturing (I/O-net) Als de I-fan via I/O-net wordt gestuurd, kan deze regeling met een handbediening via de 0–10V-ingang worden overbrugd. In dat geval is zowel het I/O-net als de 0–10V-verbinding aangesloten. Een handbediening heeft de volgende standen: • AUT: (0–1V) automatisch regelen via I/O-net •... -
Page 32: Technische Gegevens
gNdfi Reiniging De I-fan kan nat worden gereinigd. Houd daarbij echter rekening met het volgende: Niet hoge druk of op korte afstand een waterstraal op openingen of afdichtingen van de motor richten. Draai de I-fan niet tijdens of na het schoonmaken. Na het reinigen van de I-fan moet deze minimaal 30 minuten op 100% nadraaien om alle vocht zo snel mogelijk af te voeren. -
Page 33: Eg-Verklaring Van Overeenstemming
EG-verklaring van overeenstemming Fabrikant: Fancom B.V. Adres: Industrieterrein 34 Stad: Panningen (the Netherlands) Verklaart hiermee dat de: I-fan Voldoet aan de bepalingen van de: Laagspanningsrichtlijn 2006/95/EC conform NEN-EN-IEC 60335-01: 2012 Machinerichtlijn 2006/42/EC Industriële ventilatoren volgens NEN-EN-IEC 14461: 2002 EMC-richtlijn 2004/108/EG... - Page 34 Änderungen in dieser Anleitung wurden von Fancom weder geprüft noch genehmigt. Unter Änderungen versteht Fancom u. a. das Übersetzen in eine andere Sprache als das Englische sowie das Ergänzen und/oder Entfernen von Texten und/oder Abbildungen aus dem Original. Fancom übernimmt keinerlei Haftung für Schäden jeglicher Art, Verletzungen und Garantieforderungen sowie andere Forderungen im Zusammenhang mit derartigen Änderungen, soweit diese Änderungen dazu führen, dass der Inhalt von der von Fancom erstellten englischen...
- Page 35 Inhalt Allgemeine Einleitung ..........................1 Wie verwenden Sie diese Anleitung? ..................... 1 Fancom Helpdesk ........................... 1 Sicherheitshinweise und Warnungen ..................... 1 Installation des I-fan ........................... 2 Den I-fan und die Handbedienung montieren ................. 2 Den I-fan und die Handbedienung (MCA) anschließen ..............5 Einbau des Schutzgitters (optional) ....................
-
Page 36: Allgemeine Einleitung
Beispiel für eine praktische Anwendung der beschriebenen Funktion. Berechnungsbeispiel. Fancom Helpdesk Wenden Sie sich bei Fragen und für Hilfe an das Fancom Sales & Service Centre in Ihrer Nähe. Sicherheitshinweise und Warnungen Die Sicherheitshinweise, Bestimmungen und Auflagen müssen vor der Installation und Inbetriebnahme des I-fan aufmerksam gelesen werden. -
Page 37: Installation Des I-Fan
Achten Sie bei der Montage auf geeignete Befestigungsmaterialien. Der I-fan kann mit 4 Schrauben an der Wand befestigt werden. Die meisten I-fan-Einheiten sind zu schwer zum Anheben. Ergreifen Sie die erforderlichen Vorsichtsmaßnahmen. Fancom empfiehlt die Montage des I-fan wie folgt: Den I-fan von der Haube abnehmen. - Page 38 gnDfi Ein Loch in die Wand bohren. Hierbei die Abmessungen der verschiedenen I-fan-Typen beachten. Ø C Ø D Ø E Ø F Ø J (Zoll) (Zoll) (Zoll) (Zoll) (Zoll) (Zoll) (Zoll) (Zoll) (Zoll) (Zoll) (Zoll) 0,35 (17.5) (15.9) (0.3) (13.6) (14.4) (15) (3.7)
- Page 39 gnDfi Den I-fan in der Haube des I-fan befestigen. Kontrollieren Sie, ob sich der I-fan frei drehen kann und dass sich die Verschraubungen an der Unterseite des Motors befinden. Das Schutzgitter auf den I-fan aufsetzen (optional). Der Einbau eines Schutzgitters ist notwendig, falls der I-fan: •...
-
Page 40: Den I-Fan Und Die Handbedienung (Mca) Anschließen
gnDfi Option 2: Anschluss der zentralen Handbedienung Montage der zentralen Handbedienung. Ein Kabel zwischen der zentralen Handbedienung und der(den) Anschlussdose(n) am (an den) Ventilator(en) verlegen. Den I-fan und die Handbedienung (MCA) anschließen Vor dem Anschließen, die Stromversorgung abschalten und erst nach Abschluss des gesamten Einbaus wieder einschalten. - Page 41 gnDfi Mit Handbedienung Für den Anschluss des Analogausgangs des Reglers müssen zuerst der Standardanschluss Analogeingang (3) und Gnd (4) von der Abdeckung entfernt werden. Anschlussdose (MCA) Abdeckung (MCA) Alarmkontakt, stromlos: 2 A/30 V AC/60 V DC 1 Ventilator anschließen Mehrere Ventilatoren anschließen Analog: verbindet den Analogeingang (3) und Analog: verbindet den Analogausgang (5) und Gnd (4) mit dem Regler (Eingangsimpedanz 95...
- Page 42 gnDfi Setzen Sie die Steckbrücke auf die richtige Position: Die I/O-Adresse einstellen Stellen Sie anhand der Tabelle auf den folgenden Seiten mit den DIP-Schaltern eine I/O-Adresse am Motor des <rgeg g sdf gprod> ein. In einem I/O-Netz müssen alle I-fan-Einheiten eine eindeutige Adresse haben. Analoge Steuerung I/O-Adress DIP 1 DIP 2 DIP 3 DIP 4 DIP 5 DIP 6...
- Page 43 gnDfi Digitale Steuerung I/O-Adress DIP 1 DIP 2 DIP 3 DIP 4 DIP 5 DIP 6 DIP 7 DIP 8 EIN: 10-0 V DC EIN: 50% (10 V = 0 %, 0 V = AUS: 100% 100 %) AUS: 0-10 V DC (0 V = 0 %, 10 V = 100 %)
-
Page 44: Einbau Des Schutzgitters (Optional)
gnDfi Anschluss der Stromversorgung Technische Daten Spannung (V) Stromvers Stromaufn Verluststr Nennleist Geräuschent orgungsk ahme (A) om (mA) ung* (W) wicklung in abel (mm einem Abstand von 2 m und 7 m ** (dB) IF35C 208-240 ±10 % 1,17 61 / 50 IF40C 208-240 ±10 % 1,43... - Page 45 gnDfi Zuluftseite Das Schutzgitter auf dem I-fan montieren und wie in der nachfolgenden Abbildung gezeigt sichern. Abluftseite Halten Sie das Schutzgitter auf den I-fan und suchen Sie die drei Bohrlöcher.
-
Page 46: Überprüfung Des I-Fan
Berühren Sie keine beweglichen Teile des I-fan. Verwendung des I-fan Erstinbetriebnahme Berühren Sie keine beweglichen Teile des I-fan. Fancom empfiehlt, den I-fan für ca. 6 Stunden nach der Installation eingeschaltet zu lassen, damit er sich einlaufen kann. Steuerungsoptionen Analoge Steuerung (0-10 V;10-0 V) -
Page 47: Störungen
Einstellung von DIP-Schalter 8 aktiviert (ON = 50 %, OFF = 100 %, siehe auch seite 7). Wartung Eine spezielle Wartung dieses I-fan ist nicht erforderlich. Fancom empfiehlt, die gesamte Klimaanlage, zu der dieser I-fan gehört, alle sechs Monate von einen Installateur auf korrekte Funktion überprüfen zu lassen. -
Page 48: Technische Daten
gnDfi Reinigung Der I-fan kann feucht gereinigt werden, hierbei muss jedoch Folgendes berücksichtigt werden: Verwenden Sie keinen Hochdruckschlauch und richten Sie den Wasserstrahl nicht auf Motordichtungen aus geringer Entfernung. Drehen Sie den I-fan nicht während oder nach dem Reinigungsvorgang. Nach der Reinigung des I-fan sollte er sich mindestens 30 Minuten mit 100 % Leistung drehen, um sämtliche Feuchtigkeit zu beseitigen. -
Page 49: Eg-Konformitätserklärung
EG-Konformitätserklärung Hersteller: Fancom B.V. Adresse: Industrieterrein 34 Ort: Panningen (The Netherlands) Erklärt hiermit, dass: I-fan Die Bestimmungen erfüllt von: Niederspannungsrichtlinie 2006/95/EG gemäß NEN-EN-IEC 60335-01: 2012 Maschinenrichtlinie 2006/42/EG Industrielüfter gemäß NEN-EN-IEC 14461: 2002 EMV-Richtlinie 2004/108/EG Emissionen gemäß NEN-EN-IEC 61000-6-3: 2007 Immunität gemäß... - Page 50 N.B. : La version d’origine de ce manuel est en anglais et est publiée par Fancom B.V. ou l’une de ses filiales (ci-après désignées par Fancom). En cas de modifications apportées à ce manuel par un tiers, elles ne sont ni vérifiées ni approuvées par Fancom.
- Page 51 Table des matières Introduction générale ..........................1 Utilisation de ce manuel ........................1 Assistance utilisateurs Fancom ...................... 1 Consignes de sécurité et avertissements ..................1 Installation du I-fan ............................. 2 Montage du I-fan et de la commande manuelle ................2 Branchement du I-fan et de la commande manuelle (MCA) ............
-
Page 52: Introduction Générale
électricien certifié. La garantie n’est pas valable si ce produit n’est pas installé conformément aux instructions de Fancom, que le moteur du produit a été ouvert et que des modifications lui ont été apportées. N’installez jamais un I-fan endommagé ! Informez votre fournisseur de tout dommage matériel constaté. -
Page 53: Installation Du I-Fan
Prenez soin d’utiliser du matériel de montage adéquat. Le I-fan doit être fixé au mur au moyen de 4 vis. La plupart des unités I-fan sont trop lourdes pour être soulevées. Prenez toutes les précautions nécessaires. Fancom vous recommande de monter le I-fan comme suit : Détachez le I-fan du carénage. - Page 54 gndFi Percez un trou dans le mur. Tenez compte des dimensions des différents types de I-fan. Type Ø C Ø D Ø E Ø F Ø J (pouce) (pouce (pouc (pouc (pouc (pouc (pouc (pouc (pouc (pouce (pouce ..35 (17,5) (15,9) (0,3) (13,6)
- Page 55 gndFi Fixez le I-fan dans le carénage du I-fan. Vérifiez que le I-fan tourne librement et que les fixations à vis sont en dessous du moteur. Installez la grille de protection sur le I-fan (facultatif). Si nécessaire, installation d’une grille de protection dans le I-fan : •...
-
Page 56: Branchement Du I-Fan Et De La Commande Manuelle (Mca)
gndFi Option 2 : Branchement de la commande manuelle centrale Montez la commande manuelle centrale. Raccordez la commande manuelle centrale et le ou les boîtiers de raccordement du ou des ventilateurs au moyen d’un câble. Branchement du I-fan et de la commande manuelle (MCA) Avant d’effectuer le branchement, coupez le courant et ne le rétablissez qu’une fois toute l’installation terminée. - Page 57 gndFi Avec commande manuelle Pour brancher la sortie analogique du régulateur, vous devez d’abord retirer les prises analogiques In (3) et Gnd (4) standard. Boîtier de raccordement (MCA) Capot (MCA) Contact d’alarme, non alimenté : 2 A/30 Vca/60 Vcc Branchement d’un ventilateur Branchement de plusieurs ventilateurs Analogique : relie les connecteurs Analogue In Analogique : relie les connecteurs Analogue Out...
- Page 58 gndFi Placez le cavalier sur la position adéquate : Définition de l’adresse d’E/S Définissez l’adresse d’E/S au moyen des interrupteurs DIP du moteur du <rgeg g sdf gprod> conformément aux indications du tableau fourni dans les pages suivantes. Sur un réseau I/O, toutes les unités I-fan doivent avoir une adresse propre. Commande analogique Adresse DIP 1 DIP 2 DIP 3 DIP 4 DIP 5 DIP 6...
- Page 59 gndFi Commande numérique Adresse DIP 1 DIP 2 DIP 3 DIP 4 DIP 5 DIP 6 DIP 7 DIP 8 d’E/S ON : 10-0 V CC ON : 50 % (10 V=0 %, OFF : 100 % 0 V=100 %) OFF : 0-10 V CC (0 V=0 %, 10 V=100 %)
-
Page 60: Installation De La Grille De Protection (Facultative)
gndFi Branchement de l’alimentation électrique Spécifications Type Tension (V) Câble Prélèveme Fuite de Puissance Bruit à une d’alimenta nt de courant nominale* distance de tion courant (mA) 2 m et de 7 m électrique ** (dB) IF35C 208-240 ±10 % 3 x 1 1,17 61 / 50... - Page 61 gndFi Côté admission d’air Installez la grille de protection sur le I-fan et fixez-la comme sur l’illustration ci-dessous. Côté sortie d’air Tenez la grille de protection devant le I-fan et marquez l’emplacement des trois trous à percer.
-
Page 62: Test Du I-Fan
Ne touchez aucune partie mobile du I-fan. Utilisation du I-fan Première utilisation Ne touchez aucune partie mobile du I-fan. Fancom vous conseille de laisser le I-fan sous tension pendant 6 heures environ après l’installation. Options de commande Commande analogique (0-10 V ; 10-0 V) -
Page 63: Dysfonctionnements
(ON=50 %, OFF=100 %, voir aussi page 7). Entretien Le I-fan ne nécessite aucun entretien particulier. Fancom recommande que votre installateur inspecte l’ensemble de la climatisation dont le I-fan fait partie tous les six mois. Inspectez régulièrement le I-fan pour vous assurer qu’il n’est pas endommagé. Informez votre installateur de tout dommage matériel constaté. -
Page 64: Spécifications Techniques
gndFi Nettoyage Il est possible de nettoyer le I-fan à l’eau, mais vous devez tenir compte des consignes suivantes : N’utilisez PAS de flexible à haute pression et ne le dirigez pas vers les joints ou les ouvertures à faible distance. -
Page 65: Certificat Européen De Conformité
Certificat européen de conformité Fabricant : Fancom B.V. Adresse : Industrieterrein 34 Ville : Panningen (The Netherlands) certifie, par le présente, que : I-fan est conforme aux dispositions suivantes : Directive sur les basses tensions 2006/95/CE conformément à la norme NEN-EN-IEC 60335-01: 2012 Directive sur les machines 2006/42/CE Ventilateurs industriels conformément à... - Page 66 Fancom B.V. o da una delle sue società controllate (di seguito denominate Fancom). Qualsiasi modifica apportata al presente manuale da terzi non è né controllata né approvata da Fancom. Con modifiche la Fancom intende tra le altre cose la traduzione in una lingua diversa da quella inglese e l'aggiunta e/o l'eliminazione di testo e/o figure dal contenuto originale.
- Page 67 Indice Introduzione generale ..........................1 Come utilizzare il manuale ......................1 Helpdesk Fancom ........................... 1 Istruzioni ed avvertenze di sicurezza ....................1 Installazione del I-fan ..........................2 Montare il I-fan e il controllo manuale ..................... 2 Collegare il I-fan e il controllo manuale (MCA) ................5 Installare la griglia di protezione (opzionale) ...................
-
Page 68: Introduzione Generale
La garanzia non si applica se il prodotto viene installato in qualsiasi modo difforme da quanto indicato da Fancom e se il motore del prodotto è stato aperto e sono state apportate modifiche al prodotto. Non installare un I-fan danneggiato! Comunicare al fornitore la presenza di eventuali danni. -
Page 69: Installazione Del I-Fan
Fare attenzione ad usare un materiale di montaggio appropriato. Il I-fan può essere montato a parete con 4 viti. La maggior parte delle unità I-fan sono troppo pesanti da sollevare. Prendere le necessarie precauzioni. Fancom consiglia di montare il I-fan come segue: Smontare il I-fan dal convogliatore. - Page 70 gndfI Praticare un foro nella parete. In questa fase tenere in considerazione le dimensioni dei vari tipi di I-fan. Tipo Ø C Ø D Ø E Ø F Ø J (pollici) (pollici (pollic (pollic (pollic (pollic (pollic (pollic (pollic (pollici (pollici ..35 (17,5)
- Page 71 gndfI Fissare il I-fan all’interno del convogliatore del I-fan. Controllare se il I-fan può ruotare liberamente e se le viti si trovano nella parte inferiore del motore. Posizionare la griglia di protezione sul I-fan (opzionale). L’impiego di una la griglia di protezione è necessaria se il I-fan: •...
-
Page 72: Collegare Il I-Fan E Il Controllo Manuale (Mca)
gndfI Opzione 2: Connessione del controllo manuale centralizzato Montare il controllo manuale centralizzato. Installare un cavo tra il controllo manuale centrale e la/e scatole di giunzione sul/i ventilatori. Collegare il I-fan e il controllo manuale (MCA) Prima di collegare, spegnere e riaccendere solo dopo aver approntato l'intera installazione. Il motore/protezione termica è... - Page 73 gndfI Con controllo manuale Per collegare l'uscita analogica del regolatore, è necessario scollegare prima la connessione standard Ingresso analogico (3) e Terra (4) dal coperchio. Scatola di giunzione (MCA) Coperchio (MCA) Contatto allarme, non alimentato: 2 A/30 V CA/60 V CC Collegare 1 ventilatore Collegare più...
- Page 74 gndfI Impostare il ponticello nella posizione corretta: Impostare l'indirizzo I/O Utilizzando la tabella nelle pagine seguenti, impostare un indirizzo I/O con i dip-switch sul motore del <rgeg g sdf gprod>.
- Page 75 gndfI In una rete I/O, ogni I-fan deve avere un indirizzo univoco. Controllo analogico Indirizzo DIP 1 DIP 2 DIP 3 DIP 4 DIP 5 DIP 6 DIP 7 DIP 8 ON 10-0 V CC N/A (ON/OFF) (10 V = 0%, 0 V = 100%) OFF: 0-10 V CC (0V = 0%, 10 V =...
-
Page 76: Installare La Griglia Di Protezione (Opzionale)
gndfI Collegare l’alimentazione Dati tecnici Tipo Tensione (V) Cavo di Potenza Corrente Potenza Rumore a alimentazi assorbita dispersa nominale* una distanza one (mm (mA) di 2 m e 7 m ** (dB) IF35C 208-240 ±10% 1,17 61 / 50 IF40C 208-240 ±10% 1,43 64 / 53... - Page 77 gndfI Lato ingresso aria Posizionare la griglia di protezione sul I-fan e fissarla come mostrato nell’illustrazione seguente. Lato uscita aria Tenere la griglia di protezione sul I-fan e contrassegnare i tre fori.
-
Page 78: Collaudare Il I-Fan
Non toccare parti in movimento del I-fan. Utilizzo del I-fan Primo utilizzo Non toccare parti in movimento del I-fan. Fancom raccomanda di lasciare il I-fan acceso per circa 6 ore dopo l’installazione, per svolgere il corretto rodaggio. Opzioni di controllo Controllo analogico (0-10 V;10-0 V) -
Page 79: Malfunzionamenti
8 (ON=50%, OFF=100%, vedi anche pagina 7). Manutenzione Il I-fan non necessita di particolare manutenzione. Fancom raccomanda un’ispezione a cadenza semestrale svolta dal proprio installatore di fiducia sull’intero sistema di climatizzazione, di cui il I-fan è un componente. -
Page 80: Specifiche Tecniche
gndfI Pulizia Il I-fan può essere lavato, tenendo in considerazione quanto segue: Non utilizzare un tubo ad alta pressione né direzionarlo verso le guarnizioni del motore o del aperture a distanza ravvicinata. Non ruotare il I-fan durante la procedura di pulizia. Dopo la pulizia, il I-fan dovrebbe funzionare al 100% rpm per almeno 30 minuti per rimuovere completamente l’umidità. -
Page 81: Dichiarazione Di Conformità Eg
Dichiarazione di conformità EG Produttore: Fancom B.V. Indirizzo: Industrieterrein 34 Località: Panningen (the Netherlands) Con la presente dichiara che: I-fan È conforme con le disposizioni della: Direttiva bassa tensione 2006/95/CE secondo NEN-EN-IEC 60335-01: 2012 Direttiva macchine 2006/42/CE Ventilatori industriali secondo NEN-EN-IEC 14461: 2002...
Need help?
Do you have a question about the I-FAN COMPLETE and is the answer not in the manual?
Questions and answers