Advertisement
Quick Links
sauder.com
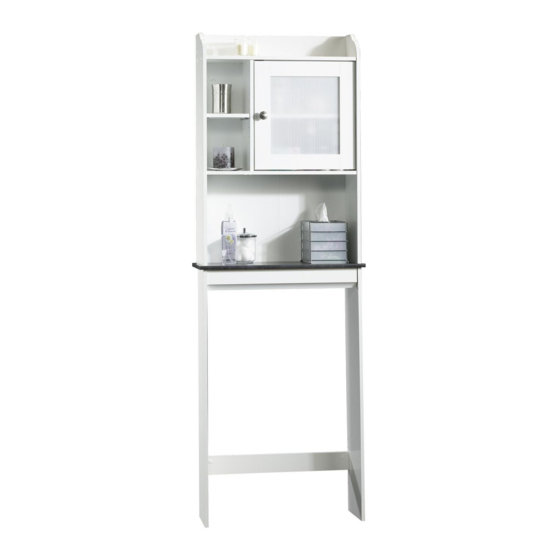
Etagere
Caraway Collection | Model 414111
Need help? Visit Sauder.com to view video assembly tips or chat with a live rep.
Prefer the phone? Call 1-800-523-3987.
Share your journey!
It's ok. We can't
pronounce it either.
NOTE: THIS INSTRUCTION
BOOKLET CONTAINS IMPORTANT
SAFETY INFORMATION.
PLEASE READ AND KEEP FOR
FUTURE REFERENCE.
English pg 1-15
Français pg 16-18
Español pg 19-21
Lot # 386719
12/08/15
Purchased: __________________
Be sure to give us a ring before
making any returns. 1-800-523-3987
Advertisement

Related Manuals for Sauder Caraway Etagere 414111


Summary of Contents for Sauder Caraway Etagere 414111
- Page 1 Caraway Collection | Model 414111 NOTE: THIS INSTRUCTION BOOKLET CONTAINS IMPORTANT SAFETY INFORMATION. Need help? Visit Sauder.com to view video assembly tips or chat with a live rep. PLEASE READ AND KEEP FOR FUTURE REFERENCE. Prefer the phone? Call 1-800-523-3987.
- Page 2 UPPER LEFT END (1) LOWER LEFT END (1) UPRIGHT (1) TOP SHELF (1) CENTER SHELF (1) BOTTOM SHELF (1) BACK (1) UPPER BACK (1) DOOR (1) LARGE ADJUSTABLE SHELF (1) SMALL ADJUSTABLE SHELF (1) BRACE (1) MOLDING (1) Page 2 414111 www.sauder.com/services...
- Page 3 BLACK 1-1/8" PAN HEAD SCREW - 1 BLACK 1/2" FLAT HEAD SCREW - 1 BROWN 1-1/2" FLAT HEAD SCREW - 22 SILVER 2" LARGE HEAD SCREW - 2 SILVER 7/8" MACHINE SCREW - 1 WHITE 7/16" LARGE HEAD SCREW - 2 www.sauder.com/services 414111 Page 3...
- Page 4 Look for this icon. It means a Step 1 video assembly tip is available at www.sauder.com/services/tips Assemble your unit on a carpeted fl oor or on the empty å carton to avoid scratching your unit or the fl oor. Scan this QR code or go to this address: http://qr.sauder.com/?ID=1579...
- Page 5 Fasten the CENTER SHELF (G) to the UPPER RIGHT å Lefty loosey. END (A) and UPRIGHT (E). Use four BROWN 1-1/2" FLAT HEAD SCREWS (14S). This hole must be here. Finished edge BROWN 1-1/2" FLAT HEAD SCREW (6 used in this step) www.sauder.com/services 414111 Page 5...
- Page 6 Fasten the MAGNETIC CATCH (5I) to the TOP SHELF (F). å Use a BLACK 1-1/8" PAN HEAD SCREW (9S). Curved edge BLACK 1-1/8" PAN HEAD SCREW (1 used in this step) BROWN 1-1/2" FLAT HEAD SCREW (6 used in this step) Page 6 414111 www.sauder.com/services...
- Page 7 å Use four BROWN 1-1/2" FLAT HEAD SCREWS (14S). Finished edge S u r f a c i t h r e h o l e BROWN 1-1/2" FLAT HEAD SCREW (4 used in this step) www.sauder.com/services 414111 Page 7...
- Page 8 Fasten the BACK (I) to your unit using the NAILS (1N). å NOTE: Be sure to tap NAILS into the holes that line up å over the CENTER SHELF (G). NAIL (35 used in this step) These holes must line up over the CENTER SHELF (G). Page 8 414111 www.sauder.com/services...
- Page 9 Rome. This can be built in a day. NOTE: Be sure the edges of the ANGLE BRACKETS are å even with the edges of the LOWER ENDS and MOLDING. BROWN 7/16" LARGE HEAD SCREW (9 used in this step) www.sauder.com/services 414111 Page 9...
- Page 10 Finished edge S u r f a c i t h o u t h o l e BROWN 7/16" LARGE HEAD SCREW (9 used in this step) Page 10 414111 www.sauder.com/services...
- Page 11 å Arrow Arrow Arrow Hole The arrow in the HIDDEN CAM must point toward the hole in the edge of the board. Turn a CAM SCREW into one of these holes to fasten the BRACE (N). www.sauder.com/services 414111 Page 11...
- Page 12 Use a SPACER between the unit and the wall if you have a baseboard. WHITE 7/16" LARGE HEAD SCREW SILVER 2" LARGE HEAD SCREW (2 used in this step) (2 used in this step) Page 12 414111 www.sauder.com/services...
- Page 13 BLACK 1/2" FLAT HEAD SCREW (11S). IMPORTANT: Only fasten one PIVOT HINGE to the DOOR in this step. BROWN 7/16" LARGE HEAD SCREW (1 used for the PIVOT HINGE) BLACK 1/2" FLAT HEAD SCREW (1 used for the STRIKE PLATE) www.sauder.com/services 414111 Page 13...
- Page 14 NOTE: To make adjustments to the DOOR, loosen the SCREW in the å HINGE, make needed adjustments, and tighten the SCREW. SILVER 7/8" MACHINE SCREW (1 used for the KNOB) BROWN 7/16" LARGE HEAD SCREW (1 used for the PIVOT HINGE) Page 14 414111 www.sauder.com/services...
- Page 15 This completes assembly. Clean with your favorite furniture polish or a damp cloth. Wipe dry. å And to celebrate, why not share your success story? 20 lbs. 10 lbs. 5 lbs. 20 lbs. (18 used) 20 lbs. To cover screws (8 used) To cover HIDDEN CAMS www.sauder.com/services 414111 Page 15...
- Page 16 EXTRÉMITÉ DROITE SUPÉRIEURE ....1 15H CHARNIÈRE À PIVOT ..........2 pour future référence. EXTRÉMITÉ DROITE INFÉRIEURE ....1 LOQUETEAU MAGNÉTIQUE ......1 Pour contacter Sauder en ce qui concerne cet EXTRÉMITÉ GAUCHE SUPÉRIEURE .....1 PLAQUE DE BUTÉE ............1 élément, faire référence EXTRÉMITÉ GAUCHE INFÉRIEURE ....1 RONDELLE ................1...
- Page 17 Repérer cette icône. Elle signifi e qu'un conseil de montage vidéo Fixer neuf CONSOLES À ÉQUERRE (5G) aux EXTRÉMITÉS est disponible à : www.sauder.com/services/tips INFÉRIEURES (B et D) et à la MOULURE (O). Utiliser neuf VIS TÊTE LARGE 11 mm MARRON (6S).
- Page 18 4. Fixer la CONSOLE DE SÉCURITÉ (1G) sur la surface inférieure de la TABLETTE SUPÉRIEURE (F). Utiliser une VIS TÊTE LARGE 11 mm BLANCHE (89S). Répéter l’installation sur MONTANTS si un second montant se trouve derrière l’unité. Page 18 414111 www.sauder.com/services...
- Page 19 Si EXTREMO DERECHO INFERIOR .....1 AGARRADOR MAGNÉTICO ........1 necesita ponerse en EXTREMO IZQUIERDO SUPERIOR ....1 PLACA DE CONTACTO ..........1 contacto con Sauder en EXTREMO IZQUIERDO INFERIOR ....1 ARANDELA ................1 cuanto a esta unidad, refi érase al número PARAL ...................1 42K POMO ...................1...
- Page 20 INFERIORES (B y D) y a la MOLDURA (O). Utilice nueve sauder.com/services/tips TORNILLOS MARRONES DE CABEZA GRANDE de 11 mm (6S). Ensamble la unidad sobre un piso alfombrado o sobre el cartón NOTA: Asegúrese que los bordes de los SOPORTES ANGULARES...
- Page 21 4. Fije la MÉNSULA DE SEGURIDAD (1G) a la superfi cie inferior del ESTANTE SUPERIOR (F). Utilice un TORNILLO BLANCO DE CABEZA GRANDE de 11 mm (89S). Repita la instalación del MONTANTE si encuentra un segundo montante detrás de la unidad. www.sauder.com/services 414111 Page 21...
- Page 22 • Los muebles sobrecargados. • Riesgo de lesiones. • Nunca exceda los límites de peso • Los muebles sobrecargados pueden indicados en las instrucciones. romperse. Page 22 414111 www.sauder.com/services...
- Page 23 à compter de la date d'achat la première fois et qui sont signalés à Sauder dans les limites de couverture de la contre tout défaut de matériaux ou de fabrication des composantes de mobilier Sauder.
- Page 24 Dear Valued Customer: So, how did it go? Thanks so much for choosing Sauder® furniture. I hope the Set a world record for speed? purchase and assembly process was a positive experience Feeling good about yourself? and you feel good about the furniture you just built. If you Nice.
Need help?
Do you have a question about the Caraway Etagere 414111 and is the answer not in the manual?
Questions and answers