Table of Contents
Advertisement
Quick Links
User Manual
SBB-MBOX
The color and the appearance may differ depending on the product, and the content in the
manual is subject to change without prior notice to improve the performance.
An administration fee may be charged in the following situations:
(a) An engineer is called out at your request, but it is found that the product has no defect
(i.e., where the user manual has not been read).
(b) You bring the unit to a repair center, but it is found that the product has no defect (i.e.,
where the user manual has not been read).
You will be informed of the administration fee amount before a technician visits.
© Samsung Electronics
Samsung Electronics owns the copyright for this manual. Use or reproduction of this manual in parts or entirety without the authorization of Samsung Electronics is prohibited. Trademarks other than Samsung Electronics are
property of their respective owners.
Advertisement
Table of Contents

Subscribe to Our Youtube Channel
Related Manuals for Samsung SBB-MBOX


Summary of Contents for Samsung SBB-MBOX
- Page 1 © Samsung Electronics Samsung Electronics owns the copyright for this manual. Use or reproduction of this manual in parts or entirety without the authorization of Samsung Electronics is prohibited. Trademarks other than Samsung Electronics are property of their respective owners.
-
Page 2: Table Of Contents
Table of contents Before Using the Product Connecting and using devices AMBIENT Safety Precautions Before Connecting Ambient Settings Safety symbols Pre-connection Checkpoints Auto Brightness Electricity and Safety Sleep After Connecting to a PC Installation Reset All Photos Connection Using an HDMI Cable Operation Connection Using an HDMI-DVI Cable My W Edition... - Page 3 Table of contents ENTERTAINMENT Screen Adjustment Sound Adjustment Notification Picture Mode Sound Output Settings Picture Size Settings Sound Mode Picture Mode Picture Size Wi-Fi Speaker Surround Setup Sound Mode Fit to Screen Sound Output Zoom and Position Expert Settings Game Mode Woofer &...
- Page 4 Power Saving Mode Using Bixby Signal Information Motion Lighting Starting Bixby using buttons on the Samsung The Wall Device Manager Auto Power Off Samsung Smart Remote Start Smart Hub Connection Test Getting to Know the Explore Bixby Screen Reset Smart Hub...
- Page 5 Table of contents Specifications General Preset Timing Modes Appendix Responsibility for the Pay Service (Cost to Customers) Not a product defect A Product damage caused by customer's fault Others License...
-
Page 6: Before Using The Product
Chapter 01 Before Using the Product Safety Precautions The following safety instructions are to ensure your personal safety and prevent property CAUTION damage. Please read the following to ensure the proper use of the product. RISK OF ELECTRIC SHOCK. DO NOT OPEN. Safety symbols CAUTION: TO REDUCE THE RISK OF ELECTRIC SHOCK, DO NOT REMOVE COVER (OR BACK). -
Page 7: Electricity And Safety
Product failure, an electric shock or fire may result from a damaged Only use the power cable provided with your product by Samsung. Do not use the cable. power cable with other products. -
Page 8: Installation
If the product is installed in an unusual location, the surrounding environment may Keep the remote control batteries and the small accessories out of the reach of cause a serious quality problem. Therefore, be sure to contact Samsung Customer children. Ensure children do not swallow any of them. - Page 9 If foreign substances such as water enter the product, be sure to disconnect the Insert each battery so that its polarity (+, –) is correct. power cord. Then contact Samsung Customer Service Center. If the polarity is not correct, the battery may rupture or the internal fluid may leak, •...
-
Page 10: Cleaning
Cleaning Warning Do not spray water or cleaner directly on the product. • The product’s surface may be damaged, or the markings may be erased. • An electric shock or fire may result. Caution When cleaning, be sure to disconnect the power plug and wipe gently with a soft and dry cloth such as superfine fibers or cotton flannels to prevent scratches. -
Page 11: Preparations
Chapter 02 Preparations Checking the Components " Contact the vendor where you purchased the product if any components are missing. " The appearance of the components Warranty card Batteries (AAA x 2) may differ from the images shown. Simple User Guide Power cord Remote Control (Not available in some... -
Page 12: Parts
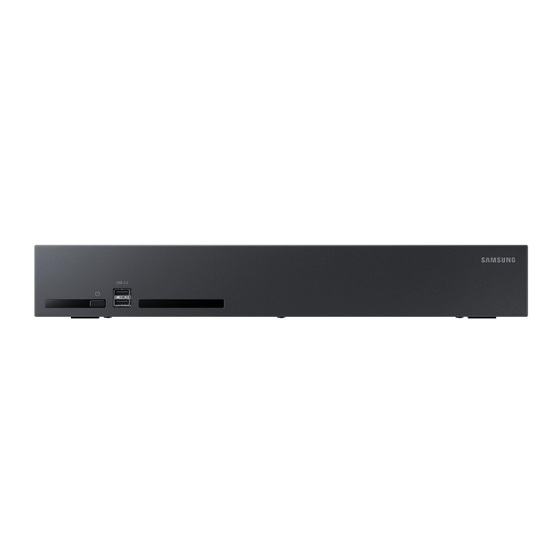
Parts Front Side " The color and shape of parts may differ from what is shown. Specifications are subject to change without notice to improve quality. Parts Description Turn the product on or off. USB 2.0 Connect to a USB memory device. -
Page 13: Reverse Side
Reverse Side " The color and shape of parts may differ from what is shown. Specifications are subject to change without notice to improve quality. Parts Description Parts Description ONE CONNECT (L1, L2, L3, L4) Dedicated to service technicians. Connects to a cable using an LC fiber cable. EX-LINK "... -
Page 14: Bridge Box
BRIDGE BOX " The color and shape of parts may differ from what is shown. Specifications are subject to change without notice to improve quality. Parts Description BLUETOOTH / WI-FI Connects to the Bluetooth/Wi-Fi module using the Bluetooth/Wi-Fi module cable. Connects to the BLUETOOTH / WI-FI port on the first cabinet using the enclosed 24 Pin System Cable. -
Page 15: Remote Control
Select If the automatic pairing does not Selects or runs a focused item. Moves the focus, and changes the values seen on the work, direct the Samsung Smart Remote at the front side of the product's menu. product and press together for 3 seconds. - Page 16 Press the button at the top rear of the Samsung Smart Remote. The body will pop out slightly from the body cover. Turn the remote over, and then slide the body of the remote upwards until the battery compartment is revealed.
-
Page 17: Prior To Installation
Prior to Installation Installing M-Box on Rack Case " The color and shape of parts may differ from what is shown. Specifications are subject to Precautions for installation change without notice to improve quality. • It is recommended that this device be installed in a 19-inch rack case, rather than under general consumer environment conditions. -
Page 18: Connecting And Using Devices
Chapter 03 Connecting and using devices Before Connecting Connecting to a PC • Do not connect the power cable before connecting all other cables. Pre-connection Checkpoints Ensure you connect a source device first before connecting the power cable. • A PC can be connected to the product in a variety of ways. "... -
Page 19: Connection Using An Hdmi-Dvi Cable
Connecting to a Video Device Connection Using an HDMI-DVI Cable " Connecting parts may differ in different products. • Do not connect the power cable before connecting all other cables. Ensure you connect a source device first before connecting the power cable. •... -
Page 20: Connection Using An Hdmi Cable
Connecting the LAN Cable Connection Using an HDMI Cable " Connecting parts may differ in different products. " Connecting parts may differ in different products. Using an HDMI Cable or HDMI to DVI Cable • For better picture and audio quality, connect to a digital device using an HDMI cable. •... -
Page 21: Connecting A Optical Cable
Connecting a Optical Cable Multiple Display Control " Connecting parts may differ in different products. Control multiple display devices connected to a PC simultaneously. Cable Connection ONE CONNECT LAN Cable • Pin assignment 1 2 3 4 5 6 7 8 •... - Page 22 Cross LAN cable (PC to PC) • Connector: RJ45 Direct LAN cable (PC to HUB) RJ45 Signal Signal Signal Signal...
- Page 23 Connection Last cabinet (Vertical Pillar) (IW008R) DATA IN DATA OUT2 M-Box First cabinet Last cabinet (Horizontal Pillar) (SBB-MBOX) BRIDGE BOX (IW008R) (IW008R) HDBT IN BLUETOOTH DATA IN ONE CONNECT HDBT OUT DATA IN DATA OUT 1 WI-FI...
-
Page 24: External Device Connection Cables
External Device Connection Cables These are descriptions on connection cables used to connect external devices to the product. Connection Cable Image Description Connection Cable Image Description DVI to HDMI cables may transmit digital video HDMI to HDMI DVI to HDMI signals only and not audio signals. -
Page 25: Connecting Using An Hdmi Cable
Connecting using an HDMI Cable • The following types of HDMI cables are recommended: – High Speed HDMI Cable – High Speed HDMI Cable with Ethernet – Premium High Speed HDMI Cable – Premium High Speed HDMI Cable with Ethernet –... -
Page 26: Changing The Input Source
Universal Remote Setup × sSource Select Start to set up Samsung The Wall remote as a universal remote for easy control of all your devices. First turn on the device you want to add and connect the device to The Wall. •... -
Page 27: Ambient
" The screen will be turned off if there is no remote input within the specified period of time. To turn on AMBIENT again, press button on the remote. • After 1 hour After 2 hours After 3 hours After 4 hours Reset All Photos Resets photos retrieved from a mobile device or Samsung Cloud. -
Page 28: Décor
Décor → Décor → Ú Ú About Décor About Art Use a variety of decoration themes to improve the elegance of your interior space. Choose Enjoy wonderful, splendid photos and works of art at home. A world-class collection of art preferred content or nature scenery that would match naturally with the space around The comes alive in your space. -
Page 29: My Collection
My Collection Using content effects → My Collection During playback of AMBIENT, press the “down” button to configure the following settings. Ú " Available setting items may vary, depending on the content. About My Collection Style & Settings Import photos or images from your tablet to turn your home space into a unique gallery. •... -
Page 30: Notification
Chapter 05 ENTERTAINMENT Notification Picture Mode Customize the screen and sound settings to suit your preferences and viewing environment. → Notification × ¾ " Brightness of the cabinet screen may become changed by the ambient light sensor / color sensor. View the list of event notifications for the product. -
Page 31: Sound Output
Sound Output Network Select the preferred speaker to play The Wall sound from. Configure The Wall's network. • Optical Bluetooth Speaker List Network Status Game Mode You can check the current network and Internet status. When connecting to a game console such as PlayStation™ or Xbox™, you can enjoy a more realistic gaming experience by selecting game mode. -
Page 32: Universal Remote Setup
Remote Control Universal Remote Setup Select Start to set up Samsung The Wall remote as a universal remote for easy control of all your devices. First turn on the device you want to add and connect the device to The Wall. -
Page 33: Screen Adjustment
Chapter 06 Screen Adjustment Configure the Picture settings (Brightness, Color Tone, etc.). The layout of the Picture menu options may vary depending on the product. Picture Mode Picture Size Settings → Settings → More → Picture → Picture Mode → Settings →... -
Page 34: Fit To Screen
Expert Settings Fit to Screen Adjusts the picture position. When selected, the full program image will be displayed. No part of the image will be cut off. → Settings → More → Picture → Expert Settings × ¿ ¿ • Auto Configure advanced picture settings to create your preferred picture. -
Page 35: Digital Clean View
Digital Clean View Contrast Enhancer Reduce picture noise to avoid distractions such as flickering. Automatically balance the contrast to prevent excessive differences between bright and dark areas. • Auto • High Auto Motion Plus Settings Film Mode Enhance picture sharpness to optimise for fast-moving images. Make frame transitions from older video sources smoother. -
Page 36: White Balance
White Balance Gamma Adjust the colour temperature of the picture so that white objects appear brighter. Adjust the primary colour intensity. " This option cannot be accessed while Picture Mode is set to Dynamic or Natural. • ST.2084 BT.1886 " This option cannot be accessed while Picture Mode is set to Dynamic... -
Page 37: Sound Adjustment
Chapter 07 Sound Adjustment Configure the sound (Sound) settings for the product. Sound Output Sound Mode → Settings → More → Sound → Sound Output → Settings → More → Sound → Sound Mode × ¿ ¿ × ¿ ¿ Select the preferred speaker to play The Wall sound from. -
Page 38: Wi-Fi Speaker Surround Setup
Wi-Fi Speaker Surround Setup × ¿ ¿ Configure a stereo or surround system using the Samsung Soundbar and wireless speakers Dolby Atmos Compatibility connected via Wi-Fi. Set it to On if the audio device connected via HDMI (ARC) port supports Dolby Atmos. -
Page 39: Intelligent Mode Settings
Chapter 08 General Intelligent Mode Settings Bixby Voice settings → Settings → More → General → Intelligent Mode Settings → Settings → More → General → Bixby Voice settings × ¿ ¿ × ¿ ¿ Intelligent Mode analyzes the surrounding environment, usage pattern, and content to Configure basic voice interaction features. -
Page 40: Before Using Bixby
" To use Bixby, you must register and sign in to your Samsung account. Some functions may not be supported if you are not signed in to your Samsung account. -
Page 41: Starting Bixby Using Buttons On The Samsung Smart Remote
Starting Bixby using buttons on the Samsung Smart Remote You can also make a conversation with Bixby using the Samsung Smart Remote buttons. Press and hold the button, say a voice command, and then release the button. To read the Bixby user guide, press button once. -
Page 42: Getting To Know The Explore Bixby Screen
ID. Registering a voice ID makes it possible to log in to your account using your voice. " If you are not logged into a Samsung account, you can log in by selecting Explore Bixby Profile. -
Page 43: Network
Network × → ¿ Settings → ¿ More → General → Network Configure The Wall's network. Network Status You can check the current network and Internet status. Open Network Settings Configure network settings to connect to an available network. Network Type Configure the network connection mode. -
Page 44: Network Settings (Wired)
Network Settings (Wired) • Depending on how your network is configured, you may be able to attach your product to your LAN by connecting the LAN port on the back of your product directly to a network wall outlet using a LAN cable. See the diagram below. - Page 45 Set the network connection to use Internet services such as perform software upgrades. How to set up manually Select Open Network Settings. The Open Network Settings session starts. Automatic Open Network Settings (Wired) The network test screen appears and the verification process starts. Press Cancel. The verification process stops.
-
Page 46: Network Settings (Wireless)
If you select the Pure High-throughput (Greenfield) 802.11n mode and the Encryption type is set to WEP, TKIP or TKIP AES (WPS2Mixed) on your AP or wireless router, Samsung When finished, select Done. The network connection screen appears and the verification products will not support a connection in compliance with new Wi-Fi certification process starts. - Page 47 Manual Network Setup (Wireless) How to set up manually Network Type Wireless from the Open Network Settings page. Offices may use static IP addresses. Network function searches for available wireless networks. When done, it displays a list If this is the case, ask the network administrator for the IP address, subnet mask, gateway and of the available networks.
-
Page 48: Reset Network
System Manager × ¿ ¿ Expert Settings Adjust Samsung The Wall's system and customize settings for your viewing environment. Configure advanced network settings. Time Power On with Mobile Configure various time-related settings. You can turn the product on or off using a mobile device connected to the same network as the Clock Set product. -
Page 49: Language
Auto Protection Time Set the menu language. Activate a screensaver when Samsung The Wall displays a still image for two hours. " A change to the language setting will only be applied to the onscreen menu display. It will •... -
Page 50: External Device Manager
Anynet+ with your Samsung product remote control. The Anynet+ system can be used only with Samsung devices that have the Anynet+ feature. To be sure your Samsung device has this feature, check if there is an Anynet+ logo on it. - Page 51 Troubleshooting for Anynet+ Problem Possible Solution • Check if the device is an Anynet+ device. The Anynet+ system supports Anynet+ devices only. • Check if the Anynet+ device power cord is properly connected. • Check the Anynet+ device’s Video/HDMI cable connections. •...
-
Page 52: Game Mode
Device Connect Manager When connecting to a game console such as PlayStation™ or Xbox™, you can enjoy a more Allow devices, like smartphones and tablets, on your network to share content with Samsung realistic gaming experience by selecting game mode. -
Page 53: Eco Solution
Eco Solution Minimum Backlight Set the minimum brightness for the signage screen. This function only works if its value is lower than the value set in the Picture menu's Backlight setting. → Settings → More → General → Eco Solution ×... -
Page 54: Accessibility
Accessibility Volume Adjust the volume of Voice Guide. • Loud Medium Soft → Settings → More → General → Accessibility × ¿ ¿ Accessibility Shortcuts allows quick access to various settings to accommodate special needs. Speed Press the volume button for 1 second or longer. Quickly enable or disable options such as Voice Guide, High... -
Page 55: Color Inversion
Color Inversion Remote Button Repeat Settings Invert the colours on the screen. White become black, black becomes white, orange becomes Set to decrease the button response speed while pressing down a button on the remote blue, and so on. control. Slow Button Repeat and adjust the response speed under Repeat... -
Page 56: Support
" When you upgrade software, all video settings you have made will return to their default settings. We advise you to write down your settings so that you can easily reset them after Use this test when you experience a problem with Samsung The Wall's picture. the upgrade. -
Page 57: Samsung The Wall Device Manager
¿ Start Smart Hub Connection Test View contact information and Samsung The Wall Specfications that you may need in order to receive service support from the Samsung Call Center or Samsung website. Use this to check the Smart Hub connection if you have a problem with using the network "... -
Page 58: Troubleshooting Guide
Chapter 10 Troubleshooting Guide Requirements Before Contacting Samsung Customer Service Center " Before calling Samsung Customer Service Center, test your product Testing the Product as follows. If the problem persists, contact Samsung Customer Service Check if your product is operating normally by using the product test function. -
Page 59: Check The Followings
Check the followings. Installation issue (PC mode) The screen keeps switching on and off. Check that the cable between the product and the PC is connected correctly. The blank spaces found on the screen have nothing to do with the product. Blank spaces on the screen are caused by the PC or graphics card. - Page 60 Screen issue The screen appears unstable and shaky. Check that the resolution and frequency of the PC and graphics card are set within a range compatible with the product. Then, change the screen settings if required by referring to 'Preset There are shadows or ghost images left on the screen.
- Page 61 Check the cable connections. I see red, green, and blue. This issue may happen when the screen of the product is defective. Contact a Samsung Service Center to resolve the issue. The screen may freeze when a resolution other than the recommended resolution is used or The display looks unstable and then freezes.
- Page 62 Source device issue A beeping sound is heard when my PC is booting. If a beeping sound is heard when your PC is booting, have your PC serviced. Other issue The product smells like plastic. The plastic smell is normal and disappears over time. Check the cable connection and connect it again if required.
-
Page 63: Specifications
Based on the AC voltage of the adapter. For the DC voltage settings if desired. of the product, refer to the product label. " For detailed device specifications, visit the Samsung Electronics website. Temperature: 32 °F - 104 °F (0 °C - 40 °C) Operating "... -
Page 64: Preset Timing Modes
Input Signal Plus set to Off. cycle. The reciprocal number of a horizontal cycle is called horizontal frequency. Horizontal frequency is Model Name SBB-MBOX measured in kHz. Horizontal Frequency 15 – 255 kHz " Vertical Frequency Synchronization The product displays a single image Vertical Frequency 24 –... - Page 65 The screen will automatically be adjusted if a signal that belongs to the following standard Horizontal Frequency Vertical Frequency Pixel Clock Sync Polarity signal modes is transmitted from your PC. If the signal transmitted from the PC does not Resolution (kHz) (Hz) (MHz)
-
Page 66: Appendix
External impact or drop. " When the service is requested, in spite of in warranty, we may charge you for a visit from a • Use of supplies or separately sold product unspecified by Samsung. service technician in the following cases. •... -
Page 67: License
In the case of using open source software, Open Source Licences are available on the product menu. Open Source Licence Notice is written only English. For information on the Open Source Licence Notice, contact the Samsung Customer Center or send email to oss.request@samsung.com.
Need help?
Do you have a question about the SBB-MBOX and is the answer not in the manual?
Questions and answers