Table of Contents
Advertisement
Quick Links
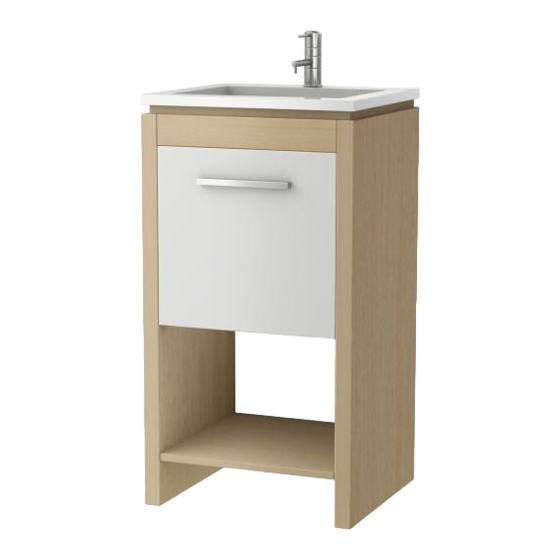
Bowmont Light Wood
Vanity Unit
Thank you for purchasing this Croydex product. Please follow the fixing and care instructions to
ensure that your Vanity Unit is fitted safely and that it retains its high quality finish.
Please retain this leaflet for future reference.
This installation guide applies to the following product:
WS040478 - Bowmont Light Wood Vanity Unit
Tools Required
Cross head screwdriver, Tape Measure, Drill, 6mm Drill Bit, 6mm Ceramic Drill Bit (Optional),
Spirit Level, Silicon sealant (Not Supplied)
KEEP DIY TOOLS OUT OF THE REACH OF CHILDREN
Home Safety Advice
Do not use power screwdrivers to assemble this product.
Do not overload the vanity unit.
Maximum safe working load for the shelf is 10kg evenly distributed.
Do not strike the product with hard or sharp objects.
It is recommended that two people fit this product to ensure that it is fitted safely.
Always take care when using power tools, particularly in the bathroom.
Always check for hidden cables and pipework before drilling and take extreme care if there is
any water in the working area.
Always wear suitable eye protection when drilling.
If the product is to be fitted on a ceramic tiled wall, a ceramic drill bit should be used.
Always ensure that the drill hole passes through the central tiled area rather than through the
grouted area. To prevent damage to the tile, mask the area around the hole with tape before
drilling.
Double check the drill bit size matches the wall plug diameter before drilling the wall.
Product Care
Do not use abrasive or chemical cleaners as these will damage the product.
1
WSH 015 R02
Advertisement
Table of Contents

Related Manuals for Croydex WS040478


Summary of Contents for Croydex WS040478
- Page 1 Bowmont Light Wood Vanity Unit Thank you for purchasing this Croydex product. Please follow the fixing and care instructions to ensure that your Vanity Unit is fitted safely and that it retains its high quality finish. Please retain this leaflet for future reference.
- Page 2 A x 12 B x 14 C x 16 D x 16 E x 1 F x 1 G x 4 H x 2 I x 4 J x 4 K x 1 L x 2 M x 2 N x 6 WSH 015 R02...
- Page 3 Two Door White Vanity Unit Assembly Instructions Step 1 Part 1, Part 2, Part 3 A x 6 Insert components A into the holes shown on parts 1, 2, 3. Step 2 Part 4 C x 8, E x 1, N x 3 Place the relevant components into the location shown in the illustration.
- Page 4 Step 4 Part 5, Part 6 G x 2 Secure the relevant components into the location shown in the illustration. Step 5 Part 1, Part 2, Part 3, Part 4 D x 4 Locate parts 1, 2, 3 as shown. To secure Component D rotate the screw clockwise until it locks onto Component C.
- Page 5 Step 7 Part 7 C x 8, F x 1, N x 3 Place the relevant components into the location shown in the illustration. The rails will only locate into the 3 screwholes when mounting to the correct side panel Step 8 Main Assembly, Part 7 D x 8...
- Page 6 Step 10 Part 12, Part 13 H x 2 Secure the relevant components into the location shown in the illustration. Step 11 Step 9 Assembly, Part 12, Part 13 B x 4 Secure the relevant components into the location shown in the illustration.
- Page 7 Step 13 Part 15 I x 4, K x 1, L x 2 Secure the relevant components into the location shown in the illustration. Step 14 Step 12 Assembly, Step 13 Assembly J x 4 Locate the assemblies of Step 12 and Step 13 as shown.
- Page 8 For details of the other items in the Croydex range please visit our website: www.croydex.com Croydex, Central Way, Andover, Hampshire, SP10 5AW, UK Tel: +44 (0) 1264 365881 Fax: +44 (0) 1264 356437 E-mail: info@croydex.co.uk...
Need help?
Do you have a question about the WS040478 and is the answer not in the manual?
Questions and answers