Advertisement
Available languages
Available languages
Quick Links
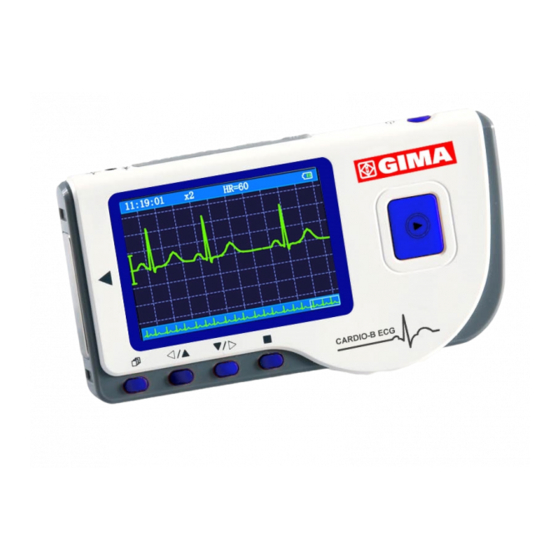
ECG Palmare Cardio B
Cardio-B Palm ECG
ATTENZIONE: Gli operatori devono leggere e capire completamente
questo manuale prima di utilizzare il prodotto.
ATTENTION: The operators must carefully read and completely
understand the present manual before using the product.
GIMA Spa
Fabbricante
Via Marconi, 1 - 20060
Gessate (MI) - Italia Made in P.R.C.
Manufacturer
Gima S.p.A. - Via Marconi, 1 - 20060 Gessate (MI) Italy
Italia: tel. 199 400 401 - fax 199 400 403
Export: tel. +39 02 953854209/221/225 fax +39 02 95380056
gima@gimaitaly.com - export@gimaitaly.com
w w w.gimaitaly.com
MANUALE D'USO E MANUTENZIONE
USE AND MAINTENANCE BOOK
0476
Advertisement

Related Manuals for Gima Cardio-B


Summary of Contents for Gima Cardio-B
- Page 1 Gima S.p.A. - Via Marconi, 1 - 20060 Gessate (MI) Italy Italia: tel. 199 400 401 - fax 199 400 403 Export: tel. +39 02 953854209/221/225 fax +39 02 95380056 gima@gimaitaly.com - export@gimaitaly.com w w w.gimaitaly.com ECG Palmare Cardio B Cardio-B Palm ECG MANUALE D’USO E MANUTENZIONE...
- Page 2 ITALIANO ATTENZIONE 1. Controllare l’apparecchio per assicurarsi che non ci siano danni evidenti che possano influire sulla sicurezza dell’utilizzatore e sulla misurazione. Interrompere l’utilizzo dell’unità se vi sono danni evidenti. 2. NON effettuare auto-diagnosi tramite le misurazioni o i risultati delle misurazioni, consultare sempre il medico se si presentano frequentemente dati anomali.
- Page 3 ITALIANO 1 Indicazioni generali 1.1 Aspetto esteriore Figura 1 Illustrazione dell’apparecchio...
- Page 4 ITALIANO Accensione: Tenendo premuto questo tasto (circa 2 secondi) si accende o si spegne l’apparecchio; premendolo brevemente si accende la luce del display. 2. Elettrodo metallico I, II Misurazione: pulsante avvio rapido per la misurazione, premere questo pulsante per iniziare la misurazione. 4.
- Page 5 ITALIANO Questo apparecchio non è utilizzato nelle cliniche o negli ospedali ma viene utilizzato ESCLUSIVAMENTE per esami in loco. I risultati delle misurazioni vengono utilizzati come riferimento per i medici ma non si possono formulare diagnosi o analisi dirette basandosi solo sulle informazioni fornite da questo apparecchio.
- Page 6 ITALIANO Dopo aver avviato il sistema, si accede ad un menu video come mostrato nella Figura 3-2. Nota: Durante l’inizializzazione premere il pulsante “ Invio” per accedere al menu video principale come mostrato nella Figura 3-2. Premendo “ Measurement” (misurazione), si accederà...
- Page 7 ITALIANO 3.2 Misurazione ECG 3.2.1 Metodi misurazione ECG Misurazione torace Al fine di ottenere le onde ECG ideali, si suggerisce il metodo della misurazione sul torace. Tenere il dispositivo con la mano destra. Assicurarsi che il palmo e le dita tocchino perfettamente gli elettrodi metallici I e II.
- Page 8 ITALIANO Misurazione con cavetti Per un migliore ECG, si può utilizzare la misurazione tramite cavetto di collegamento. Collegare il cavetto all’apparecchio tramite la relativa spina. Posizionare gli elettrodi e collegare i cavetti come nella figura accanto per ottenere il segnale ECG II Derivazione; se si desidera avere misurazioni con segnale I e III derivazione, collegare i cavetti agli elettrodi secondo la tabella seguente.
- Page 9 ITALIANO 3.2.2 Procedura misurazione 1. Premere “ Measure” (misurazione) per accedere alla schermata di misurazione ECG, come mostrato nella Figura 3-4. I primi 6 secondi sono una fase preparatoria durante la quale l’apparecchio verificherà se il posizionamento è corretto. Qualora l’onda rilevata non fosse omogenea, afferrate meglio il dispositivo.
- Page 10 ITALIANO Figura 3-5 Schermo risultati misurazione Figura 3-6 Memorizzazione dati “ Invio”: torna al menu principale direttamente senza salvare i valori della misurazione e i risultati correnti. “ Save” (salva) : salva il risultato della misurazione corrente e i suoi valori. I dati della misurazione corrente saranno salvati nella memoria dell’apparecchio automaticamente senza alcuna operazione in 6 secondi come mostrato nella Figura 3-6.
- Page 11 ITALIANO 3.3 Revisione onde 3.3.1 Descrizione funzionamento 1. Selezionare “Review” sullo schermo del menu principale e poi premere il tasto OK, lo schermo sarà visualizzato come nella Figura 3-9. Apparecchio: rivedere le registrazioni salvate nell’apparecchio. SD Card: rivedere le registrazioni salvate nella Card SD, se la Card SD non sarà inserita nell’apparecchio, l’icona della stessa sarà...
- Page 12 ITALIANO 1. “16: 14: 32”: orario della misurazione. 2. “X1”: ampiezza scala onde ECG. “X1/2”: dimensione a metà della scala nominale; “X1”: scala nominale; “X2”: dimensione doppia scala norminale; “X3”: dimensione tripla scala nominale. 3. “HR=66”: valore battito cardiaco 66bpm. 4.
- Page 13 ITALIANO 3.3.2 Descrizione risultati misurazione Quando l’apparecchio avverte un’inizializzazione o sospetta aritmia nelle onde ECG, “Poor signal, measure again- segnale scarso, misurare nuovamente (Figura 3-14)”, “Suspected a little slow beat - sospetto battito lento (Figura 3-15)” ecc. si possono ottenere 17 tipi di risultati di misurazione ECG.
- Page 14 ITALIANO N. Descrizione risultati misurazione ECG Onde Sospetto saltuario breve intervallo del battito Sospetto intervallo battiti irregolare Sospetto battito accelerato con intervallo breve 10 Sospetto battito lento con intervallo battito breve 11 Sospetto battito lento con intervallo battito irregolare 12 Aritmia 13 Sospetto battito accelerato con aritmia 14 Sospetto battito rallentato con aritmia 15 Sospetto intervallo battito rallentato occasionale...
- Page 15 ITALIANO 3.4 Gestione dati Selezionare “Memory” (memoria) dal menu principale poi premere “OK” per accedere alla schermata della gestione dati come mostrato nella Figura 3-16. Figura 3-16 Gestione dati 3.4.1 Cancellazione Dati 1. Sulla schermata della gestione dati, selezionare “Delete all” (cancella tutto) con i testi navigazione e premere “OK”, successivamente selezionare i dati salvati in “Device”...
- Page 16 ITALIANO 3.4.2 Caricamento dati Sulla schermata gestione dati, selezionare “Upload data” (caricamento dati) per accedere alla schermata caricamento dati come mostrato nella Figura 3-20. Figura 3-20 Caricamento dati Su questa schermata si possono trasmettere dati al PC per la gestione dati, revisione e interpretazione tramite il cavo dati Prince 180B.
- Page 17 ITALIANO Figura 3-23A Figura 3-23B 3.5.1 Regolazione Ora/Data 1. Sulla schermata di regolazione impostazioni, selezionare “Time/date” (Ora/data) con i tasti di navigazione poi premere “OK” per accedere allo schermo di regolazione dell’ora e della data (formato data: gg/mm/aaaa), come mostrato nella Figura 3-24. 2.
- Page 18 ITALIANO 2. Regolare il contrasto con i tasti di navigazione; 1~7 livelli regolazione, il valore predefinito è livello “4”. 3. Premere “OK” per salvare le modiche e tornare al menu del livello precedente. Figura 3-26 regolazione contrasto 3.5.4 Regolazione luminosità 1.
- Page 19 ITALIANO 3.5.6 Regolazione modalità misurazione 1. Sulla schermata di regolazione impostazioni, selezionare “Measure mode” (modalità misurazione) per accedere alla schermata regolazione misurazione come mostrato nella Figura 3-29. 2. Selezionare modalità “Normal” (normale) o “Enhanced” (potenziata) con i tasti di navigazione. La regolazione predefinita è modalità “Normal”. Modalità...
- Page 20 ITALIANO 3.5.8 Informazioni versione Sulla schermata impostazioni sistema, selezionare “Version” per accedere al menu informazioni versione come mostrato nella Figura 3-31. Il numero della versione è “V09-09-21”. Figure 3-31 Informazioni versione 3.6 Aiuto Sulla schermata del menu principale, selezionare “Help”, poi premere “OK” per accedere alla schermata informazioni di aiuto.
- Page 21 ITALIANO protezione contro l’ingresso di liquidi. Compatibilità elettromagnetica: Gruppo I, Classe B 4.4 Schermo Tipo LCD: dot-matrix monocromatico LCD Area schermo: 57.6mm × 40mm Luce display: LED luce display. 4.5 Memoria dati Card SD per ampliare la memoria.(Optional) I dati memorizzati possono essere caricati su un computer tramite cavo dati fornito dal produttore. 4.6 Dimensioni totali e peso Dimensioni: (L) 125×...
- Page 22 ITALIANO 7 Soluzione problemi Problema: L’apparecchio non si accende. Causa possibile Soluzione 1. Le batterie sono esaurite o quasi esaurite. 1. Sostituire le batterie 2. Le batterie non sono inserite 2. Reinstallare le batterie. correttamente. 3. Contattare l’assistenza. 3. L’apparecchio è guasto. Problema: L’apparecchio non riesce a misurare il battito cardiaco Causa possibile Soluzione...
- Page 23 ITALIANO Card SD Errore Causa Soluzione Card SD non formattata La Card SD non è formattata Formattare la Card SD nel nel formato di sistema FAT formato file FAT nel PC La Card SD è protetta da La Card SD è protetta da Rimuovere la protezione da scrittura scrittura...
- Page 24 Questo prodotto risponde a standard qualitativi elevati sia nel materiale che nella fabbricazione. La garanzia è valida per il tempo di 12 mesi dalla data di fornitura GIMA. Durante il periodo di validità della garanzia si provvederà alla riparazione e/o sostituzione gratuita di tutte le parti difettose per cause di fabbricazione ben accertate, con esclusione delle spese di mano d’opera o eventuali trasferte, trasporti e imballaggi.
- Page 25 ITALIANO Appendice Conoscenza generale di ECG Normale ritmo sinusale: In condizioni sinusali, il nodo SA regola il ritmo cardiaco normalizzando il battito. Il battito cardiaco varia da 60 a 100 al minuto e il ritmo è regolare. L’onda P è normale e ognuna è seguita da un’onda QRS. Intervallo P-R: 0.12~0.20s; onda QRS: 0.06~0.10s;...
- Page 26 ITALIANO Consiglio: In presenza di patologia, consultare un medico. Figure 3 Bradicardia 3) Battito prematuro: Con un battito normale appare un’onda QRS prematuramente e viene seguita da una pausa. L’indicazione risultante “Suspected occasional short beat interval = Sospetto intervallo breve battito occasionale” nell’apparecchio può suggerire battito prematuro. Cosa è...
- Page 27 ITALIANO 4) Bigeminia: E’ un tipo di PVC (contrazione ventricolare prematura) in cui un battito normale è seguito da uno prematuro. Indicazione: PVC si verifica di frequente. Consiglio: Consultare un medico. Figura 5 Bigeminia 5) Trigeminia: E’ un tipo di PVC in cui due battiti normali sono seguiti da un battito prematuro. Indicazione: PVC si verifica di frequente.
- Page 28 ITALIANO Consiglio: La presenza di ciclo corto deve essere confermata da uno specialista, quindi memorizzate l’immagine e mostratela al medico come riferimento al momento della visita. Figura 7 Tachicardia...
- Page 29 ENGLISH WARNING 1. Check the device to make sure that there is no visible damage that may affect user’s safety and measurement performance. Stop using the unit, when there is obvious damage. 2. Do NOT make diagnosis oneself by the measurement and measurement results, always consult the doctor if abnormal information is presented frequently.
- Page 30 ENGLISH 1 Overview 1.1 Appearance Figure 1...
- Page 31 ENGLISH Power: Long time press (about 2 seconds) makes the device power on or off; short time press turns on/off the backlight. 2. Metal Electrode I, II Measurement: shortcut button for measuring, press this button to start measuring. 4. OK: confirm selection or modification. 5.
- Page 32 ENGLISH The unit is not the monitor used in clinical institution or hospital, but is used for spot-check purpose ONLY. It can not be used to substitute the normal ECG examination or real time monitoring. The measurement results are a useful reference for doctor, but do not make direct diagnostic or analytical decision based on the information provided by this unit.
- Page 33 ENGLISH After boot-strap, the unit enters into menu screen, as shown in Figure 3-2. Note: During initialization, press “ Return” button to enter into main menu screen, as shown in Figure 3-2. If press “ Measurement”, it will enter into measuring screen, as shown in Figure 3-4.
- Page 34 ENGLISH 3.2 ECG Measurement 3.2.1 ECG Measuring Method Chest Measurement In order to obtain ideal ECG waveform, chest measurement is suggested firstly. Hold the device with the right hand. Make sure that the palm and fingers touch the metal electrode I and II reliably. Place the electrode III on bare skin about 5cm away below the left nipple.
- Page 35 ENGLISH Lead Wire Measurement For the sake of high quality ECG, lead wire measurement can be used. Connect the lead and the device effectively by lead wire socket. Place the electrodes and connect the lead wires as the figure below to obtain the Lead II ECG signal;...
- Page 36 ENGLISH 3.2.2 Measuring Procedure 1. Press “ Measure” to enter into ECG measuring screen, as shown in Figure 3-4. The first 6 seconds is preparing phase, during this period the unit will judge whether the placed position is befitting. Please adjust your holding position if the detected waveform is not smooth.
- Page 37 ENGLISH Figure 3-5 Measurement Result Screen Figure 3-6 Data Saving “ Return”: return to main menu screen directly and the current measurement result and measuring value won’t be saved. “ Save”: save the current measurement result and measuring value. The current measurement data will be saved in this device automatically without any operation in 6 seconds, as shown in Figure 3-6.
- Page 38 ENGLISH 3.3 Wave Review 3.3.1 Operation Description 1. Select “Review” on main menu screen, then press OK key, the display screen is as shown in Figure 3-9. Device: review the records saved in device. SD Card: review the records saved in SD Card, if the SD Card has not been inserted into the device, the SD Card icon is gray (unselected marker).
- Page 39 ENGLISH 1. “16: 14: 32”: ECG waveform measuring time.. 2. “X1”: ECG waveform amplitude scale. “X1/2”: half size of the nominal scale; “X1”: nominal scale; “X2”: twice the size of the nominal scale; “X3”: 3. “HR=66”: heart rate value is 66bpm. 4.
- Page 40 ENGLISH 3.3.2 Measurement Result Description When device detects lead off or suspected arrhythmia ECG waveform, “Poor signal, measure again (Figure 3-14)”, “Suspected a little slow beat (Figure 3-15)” etc. 17 types ECG measurement results can be obtained. Refer to Table 3-1 for details. Lead Off little slow beat Figure 3-14...
- Page 41 ENGLISH N. ECG Measurement Result Descriptions Waveform Suspected occasional short beat interval Suspected irregular beat interval Suspected fast beat with short beat 10 Suspected slow beat with short beat interval 11 Suspected slow beat with irregular beat interval 12 Waveform baseline wander 13 Suspected fast beat with baseline wander 14 Suspected slow beat with baseline wander 15 Suspected occasional short beat interval with...
- Page 42 ENGLISH 3.4 Data Management Select “Data Management” on main menu screen, then press “OK” button to enter into data management screen, as shown in Figure 3-16. Figure 3-16 Data Management Screen 3.4.1 Data Deletion 1. On data management screen, select “Delete all” with Navigation Key, then press “OK” button, next choose the data saved in “Device”...
- Page 43 ENGLISH 3.4.2 Upload Data On data management screen, select “Upload data” to enter into upload data screen, as shown in figure 3-20. Figure 3-20 Upload Data Screen On this screen, you can transmit data to PC for data management, review and interpretation through PC-80B data cable (optional).
- Page 44 ENGLISH Figure 3-23A Figure 3-23B 3.5.1 Time/Date Setting 1.On system setting screen, select “Time/date” with Navigation Key, then press ” OK” button to enter into time and date setting screen (date format dd/mm/yyyy), as shown in Figure 3-24. 2. Use Navigation Key to adjust the value, and then press “OK” button to shift black cursor and adjust another value.
- Page 45 ENGLISH 3. Press “OK” button to save setting and return to the upper level menu screen. Figure 3-26 Contrast Setting 3.5.4 Brightness Setting 1. On system setting screen, select “Brightness” to enter into brightness setting screen, as shown in Figure 3-27. 2.
- Page 46 ENGLISH 3.5.6 Measure Mode Setting 1. On system setting screen, select “Measure mode” to enter into measure mode setting screen, as shown in Figure 3-29. 2. Choose “Normal” mode or “Enhanced” mode with Navigation Key. The default setting is “Normal” mode. Normal mode: can filter the interference signal in ECG waveform.
- Page 47 ENGLISH 3.5.8 Version Info On system setting screen, select “Version” to enter into version information screen, as shown in Figure 3-31. “V09-09-21” is version number. Figure 3-31 Version Information 3.6 Help On main menu screen, select “Help”, then press “OK” button to enter into help info screen. It provides with different kinds of illustrations for ECG measuring methods.
- Page 48 ENGLISH The degree of protection against harmful ingress of liquid: Ordinary equipment without protection against ingress of liquid. Electro-magnetic Compatibility: Group I, Class B 4.4 Display LCD type: dot-matrix monochrome LCD Display area: 57.6mm × 40mm Backlight: LED backlight. 4.5 Data Memory 24 records can be saved in the built-in memory;...
-
Page 49: Troubleshooting
ENGLISH attention to the use of maintenance. Please use the SD card with the memory not more than 1GB, or it may not compatible with the device. The following brand and capacity of the SD card are tested to work normally with this device: SanDisk (=1GB), Kingston (=1GB) 7 Troubleshooting Trouble: The device can not turn on. - Page 50 ENGLISH 8 Error Prompting and Elimination Flash in device Error Reason Solution Memory error Flash in this device writing Try again, if problem still exits operation error please change flash. Memory full The memory of flash is full Backup data to SD card then clear the memory in flash or recover data directly Card SD...
- Page 51 The warranty is valid for 12 months from the date of supply of GIMA. During the period of validity of the warranty, GIMA will repair and/or replace free of charge all the defected parts due to production reasons. Labor costs and personnel traveling expenses and packaging not included.
- Page 52 ENGLISH Appendix General Knowledge of ECG Normal sinus rhythm: In sinus conditions, S heart rate is in the range of 60 to 100 times per minute and the rhythm is regular. P wave is normal and each one is followed by a QRS wave.
- Page 53 ENGLISH infectious disease or after use some medicines such as digitalis. Suggestion: If it belongs to the pathology condition, please see the doctor. Figure 3 Bradycardia Waveform 3) Premature beat: In a normal beat a QRS waveform appears prematurely and is followed by a comeback pause.
- Page 54 ENGLISH 4) Bigeminy: It is a type of PVC in which a normal beat is coupled with a premature beat. Indication: PVC occurs frequently. Suggestion: Please see the doctor. Figure 5 Bigeminy 5) Trigeminy: It is a type of PVC in which two normal beats are coupled with a premature beat.
- Page 55 ENGLISH Suggestion:The character of short run needs professional to confirm, so please save the temporal figure in time. And you can provide it to doctor as a reference. Figure 7 Tachycardia...
Need help?
Do you have a question about the Cardio-B and is the answer not in the manual?
Questions and answers