Table of Contents
Advertisement
Advertisement
Table of Contents

Related Manuals for Genvex ECO 375


Summary of Contents for Genvex ECO 375
- Page 1 INSTALLATION MANUAL ECO 375 Mechanical ventilation with passive heat recovery...
-
Page 2: Table Of Contents
TABLE OF CONTENTS Safety information ................................3 Functional description ................................ 4 Installation ..................................... 5 Wall mounting (vertical) ..............................5 Dimensional sketch ..............................6 Duct connection ................................. 7 Condensate drain ..............................7 Duct system ................................8 Insulation of ducts in cold attics ......................... 8 Insulation of ducts in warm rooms ........................ -
Page 3: Safety Information
Subject to design changes. Labelling The CE mark represents Genvex’s assurance that the product complies with all regulations laid down for the product in accordance with relevant EU directives. The CE mark is mandatory for most products sold in the EU,... -
Page 4: Functional Description
(e.g. clogged floor drain). The ECO 375 is designed for indoor installation, but – if specific country requirements allow – it can also be used outside the building envelope in areas protected against wind and weather. -
Page 5: Installation
Genvex unit. Important: The ECO 375 ventilation unit can only be mounted vertically. The ECO 375 comes with a universal wall mounting kit. KVM-Genvex A/S always recommends careful planning of the installation space for your Genvex product in relation to the location of living spaces. -
Page 6: Dimensional Sketch
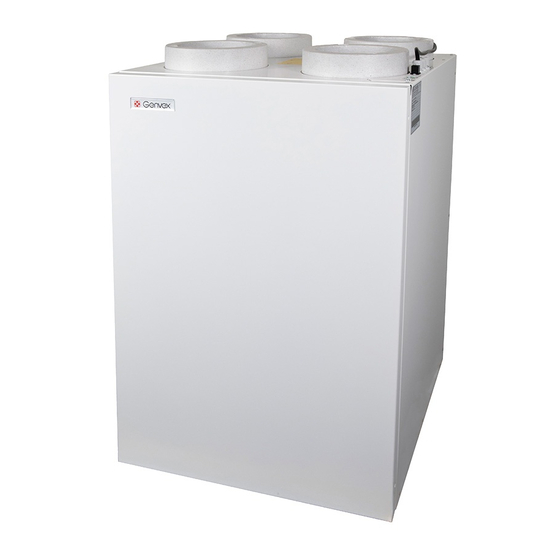
600 mm in front of the unit and 300 mm below the unit (to access the condensate drain and the water trap). The ECO 375 is available in a vertical version (as shown below). Weight: 40 kg... -
Page 7: Duct Connection
Duct connection At all duct connections, a yellow sticker is affixed indicating which ventilation ducts are to be connected to the various connectors. Supply air is connected Duct system from unit to supply air in living room. Exhaust air is connected Duct system from damp rooms to the unit. -
Page 8: Duct System
Recommended minimum vertical distance between air intake and exhaust: 1 metre. To connect ordinary galvanised steel ducts to the ECO 375 ventilation unit, you must first install 4 nipple connectors in the unit’s Ø160 mm openings (double sealing lips). The unit is now ready for direct connection of ductwork to the nipple connector. -
Page 9: Insulation Of Ducts In Warm Rooms
Insulation of ducts in heated rooms At outdoor temperatures below 0°C, and if software defrosting cannot be used, it is recommended installing an Genvex recommends the following: electric preheater to prevent ice accumulation in the countercurrent heat exchanger. Supply air and exhaust air ducts... -
Page 10: Electrical Installation
Before putting the system into operation 1. Check that the Genvex unit is correctly mounted and that all the ducts are properly insulated. 2. Check that the door can be opened so that it is possible to service and maintain the unit. -
Page 11: Optimal Initial Calibration Of The System
Optima Touch have been performed. Then start the unit: display or in the Genvex app, or be indicated with a yellow flashing light in Optima Basic. This means that the filters Set the initial basic ventilation value, which is speed must be replaced/cleaned. - Page 12 Condensate drain When replacing the filter in August/September before the outdoor temperature drops to 5°C, check the condensate drain for dirt blockages and check for water in the water trap. Pour 1 litre of water into the condensate tray and check that it can drain away without any problems.
- Page 13 Countercurrent heat exchanger Inspect the countercurrent heat exchanger. If this is dirty, it should be removed and washed in warm soapy water and then rinsed, e.g. in the bathroom using the shower head. When removing the heat exchanger, be careful not to touch the lamellae, as they are very fragile.
-
Page 14: Recommended Maintenance Intervals
Recommended maintenance intervals Component Action Interval Filter Replaced at regular intervals so that full efficien- 3–6 months cy of the unit is achieved. Fans Fans are cleaned with a soft brush to ensure 12 months operational reliability and efficiency. Countercurrent heat exchanger Clean with water 12 months Gaskets in general... -
Page 15: Spare Parts
SPARE PARTS 069222 069223 069224 069970 069222 069210 069875 069211 069252 069282 069282 069911 060537 Item no. Description Item no. Description 069282 TS fan housing 069223 M5 filter 069252 Front cover RAL 9016 069224 F7 filter 069231 Top plate for el. RAL 9016 060537 Bypass motor 069210... -
Page 16: Troubleshooting
• After the warranty period (2 years ->), the installer from whom the unit was purchased or the Genvex Customer Centre by calling 7353 2700. Please have the data from the type plate ready (silver plate... -
Page 17: Electrical Diagram - Opt270
ELECTRICAL DIAGRAM – OPT270 LAN OK ERROR MODBUS Master MODBUS Display MODBUS... -
Page 18: Declaration Of Conformity
DECLARATION OF CONFORMITY The declaration of conformity can be downloaded from www.genvex.com. -
Page 19: Installation Instructions
DE-COMMISIONING INSTRUCTIONS Remove filters Remove countercurrent heat exchanger (1) and fans (2) Remove control board Remove bypass actuator Remove built-in electric preheating surface (optional) - Page 20 – in fact you can recover up to 95% of the heat energy with a Genvex system. Please visit www.genvex.com to see a list of our distributors KVM-Genvex A/S • Sverigesvej 6 • DK-6100 Haderslev • Tel.: +45 73 53 27 00 • salgogsupport@genvex.dk • www.genvex.com...
Need help?
Do you have a question about the ECO 375 and is the answer not in the manual?
Questions and answers