
Related Manuals for Genvex ECO 300


Summary of Contents for Genvex ECO 300
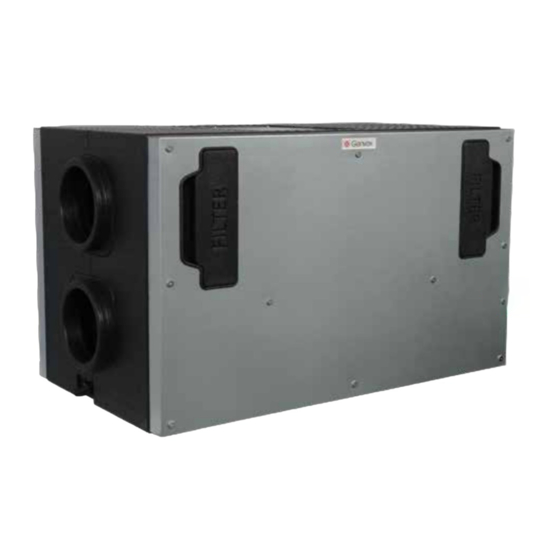
- Page 1 INSTALLATION INSTRUCTIONS ECO 300/ECO 300 XL Mechanical ventilation with passive heat recovery THE AIR WE BREATHE...
-
Page 2: Table Of Contents
TABLE OF CONTENTS Safety information ..................................3 Functional description ................................3 Installation ....................................4 Dimensional sketch ................................5 Duct connection ................................7 Duct system ...................................7 Condensation drain ..............................8 Insulation of ducts in cold attics ..........................9 Insulation of ducts in warm rooms ........................10 Post-heating of the supply air ..........................10 Preheating of outdoor air ............................10 Electrical installation...............................11 Control and calibration of the system .......................11... -
Page 3: Safety Information
ECO 300/ECO 300 XL can be configured as either right- or left-facing depending on the installation conditions. An integrated preheater can be selected for the system to ensure that balanced air volumes can be maintained –... -
Page 4: Installation
INSTALLATION IMPORTANT: KVM-Genvex A/S always recommends careful planning of the installation space for your Genvex product in relation to Follow these instructions when installing the ECO 300/ECO the location of living spaces. As this is a technical product 300 XL:... -
Page 5: Dimensional Sketch
Dimensional sketch in mm. The ECO 300/ECO 300 XL is supplied as either right- or left-facing, as shown in the schematics below. If you want Outdoor air Exhaust air condensate drain at the opposite end, simply remove the Extract air... - Page 6 Left-facing 1058 Ø Ø...
-
Page 7: Duct Connection
Duct connection A label on the front cover indicates which ventilation ducts must be connected to the various connecting pipes. Please note that the designations on the label are not valid if the system is reconfigured from e.g. right to left after delivery. -
Page 8: Condensation Drain
When hanging on a wooden wall, a vibration damper is recommended to avoid vibration transmission. As an alternative to the looped drain trap, a Genvex universal drain trap with hose connection can be used, product no. 063289 (see the photo below). -
Page 9: Insulation Of Ducts In Cold Attics
Insulation of ducts in cold attics To utilise the full heat recovery capacity of the units, the ducts must be properly insulated. Genvex recommends the following: Supply air and extract air ducts To minimise heat loss from the duct system in cold attics, supply and extract air ducts should be insulated with a minimum of 100 mm insulation. -
Page 10: Insulation Of Ducts In Warm Rooms
Insulation of ducts in heated rooms Genvex recommends the following: Supply air and extract air ducts In a warm attic, the supply air and extract air ducts must have 50 mm of insulation finished with aluminium foil. Supply air and extract air ducts routed through heated rooms in the home do not need to be insulated unless cooling, a bypass or a geothermal heat exchanger are used. -
Page 11: Electrical Installation
If the system needs to be used before it is adjusted, then the following can be done before commissioning the system: 1. Check that the ECO 300/ECO 300 XL has been mounted correctly and that all ducts are properly insulated. -
Page 12: Optimal Initial Calibration Of The System
When the filter timer reaches the set value for a filter change, this will appear in the text of the Optima Touch display or in the Genvex app or be indicated with a yellow flashing light in Optima Basic. This means that the filters must be replaced/cleaned. - Page 13 Service If you are unable to maintain your system, you can sign a service agreement with the Genvex service department. If the system is faulty, please contact the Genvex service department.
-
Page 14: Access To Internal Parts
Access to internal parts 4. Dismantle the fan housing by pulling on it. 1. Remove the screws from the front plate to access internal parts. 2. Disassemble the bracket with the sensor mounted in the 5. Dismantle the bypass by releasing the plug on the side of exchanger. -
Page 15: Recommended Maintenance Intervals
7. Remove the six screws on the cover at the top of the system to gain access to the printed circuit board. Recommended maintenance intervals Component Maintenance Interval Filter Replaced at set intervals so the unit is fully 3–6 months efficient. -
Page 16: Spare Parts
SPARE PARTS Pos. Item no. Description 069875 OPTIMA 270 PCB 069876 I/O PCB 070056 EC 90 Watt fan 070055 EC 170 Watt fan (XL) 070130 Bypass motor 072014 Counter flow exchanger 073001 Filter – F7 / ePM1 55% 073006 Filter – G4 / Coarse 65% 073034 Assembled front cover 073041... -
Page 17: Troubleshooting
• During the warranty period (0-2 years), the installer from whom the unit was purchased. • After the warranty period (2+ years), the installer from whom the unit was purchased or call the Genvex Cus- tomer Centre on +45 7353 2700. Please have the information from nameplate ready. -
Page 18: Electrical Diagram - Optima 270
ELDIAGRAM – OPTIMA 270 LAN OK ERROR MODBUS Master MODBUS Display MODBUS... -
Page 19: Declaration Of Conformity
DECLARATION OF CONFORMITY The declaration of conformity can be found on our website: www.genvex.com... - Page 20 Please visit www.genvex.com to see a list of our distributors KVM-Genvex A/S • Sverigesvej 6 • DK-6100 Haderslev • Tel.: +45 73 53 27 00 • salgogsupport@genvex.dk • www.genvex.com...
Need help?
Do you have a question about the ECO 300 and is the answer not in the manual?
Questions and answers