Table of Contents
Advertisement
Quick Links
Advertisement
Table of Contents

Subscribe to Our Youtube Channel
Related Manuals for Genvex OPTIMA 260


Summary of Contents for Genvex OPTIMA 260
- Page 1 OPERATING INSTRUCTIONS OPTIMA 260 – ECO 190, ECO 375...
-
Page 2: Table Of Contents
TABLE OF CONTENTS 1. Installation of Optima 100 Design ..........................3 2. Installation of Optima 100 Opus ...........................4 3. Operation ....................................5 4. Data Logger ...................................5 5. Genlog Set Points ................................9 6. Function ....................................16 7. Maintenance ..................................17 8. Troubleshooting ................................18 9. Table of Factory Settings ..............................19... -
Page 3: Installation Of Optima 100 Design
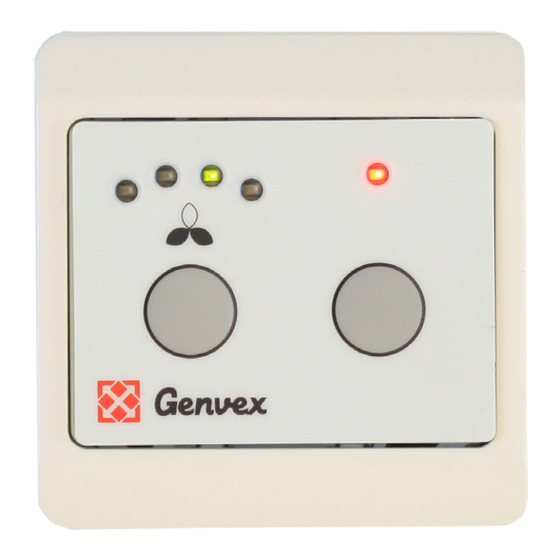
1. INSTALLATION OF OPTIMA 100 DESIGN 1.1 Installation of the Control Panel Fit a 8 x 0.25 mm low-current cable between the unit and the control panel. The maximum cable length is 50 m. The control panel is designed to be mounted onto The voltage drop for cable lengths over 50 m is too high a level wall. -
Page 4: Installation Of Optima 100 Opus
2. INSTALLATION OF OPTIMA 100 OPUS 2.1 Installation of the Control Panel The control panel is designed for being mounted to an Opus type power socket. 2.2 Installation Find the installation place for the control panel, connect the wires and click the control panel into place. Fit a 8 x 0.25 mm low-current cable between the ventilation unit print circuit board and the control panel. -
Page 5: Operation
Note on method 2 Optima 100 Design is operated with the K3 and K5 keys. To use method 2 to initialise a Genvex unit with an Optima 100 Opus is operated with the K3 and K5 keys. Optima 260 control system, we recommend that you remove the SD card of the main circuit board again after The K3 key is used to change fan speed. - Page 6 The data logger software is designed for configuring and side of the logging area is the scale for percentages, e.g. monitoring Genvex devices. The data logger can be for fan speeds. The x-axis represents the time line. connected to all Genvex Optima control systems.
- Page 7 Data from Control System Zoom – Makes the picture larger or smaller. Set points in control system – Opens the following box. Here it is possible to retrieve all set points from the microchip or control panel, change them and then export them back to the microchip or control panel.
- Page 8 Connection to PC – Optima 260 In order for the Optima 260 to be able to communicate directly with the Genlog software, use data logger equipment that can be connected directly to the Optima Clock in control system –...
-
Page 9: Genlog Set Points
5. GENLOG SET POINTS Month Weekday Calendar Use this function to configure the setting for each day of Monday January the week. Each day can be configured to run with different Tuesday February fan speeds, as required. You can copy the configuration Wednesday March from one day to another. -
Page 10: Service Menu
The fan speed is adjusted until the same air flow is achieved disable the filter timer (Be careful when using this setting – as the supply air on level 2. Genvex disclaims any responsibility for faults in the ventilation unit caused by a clogged filter). Setting option: between 0 and 100%. - Page 11 19 – Method of regulation 22 – Regulation water There are 2 options: If a water reheater with a motor-operated valve is installed 0. Cannot be used in the system, it may be necessary to adjust the regulation 1. Supply air regulation (T1 sensor) time.
- Page 12 27 – Help function 30 – Modbus Mode This function can be used for the following: See separate description for MODBUS. Setting option: 0-2. Set point Function 0 = Modbus OFF The relay is off. 1 = 9600 Baud The relay is on when the system is running. 2 = 19200 Baud This can, e.g.
- Page 13 35 – Humidity regulating frequency Setting of desired frequency for how often the fan speed may be changed. The function is defined as 1% per unit of time. When humidity regulation is activated, the current humidity is continuously measured via the integrated humidity sensor in the ventilation unit, which is placed in the extract air duct.
- Page 14 30 sec. This is where you choose which external display is selected Note: Please refer to your country-specific regulations on together with the Optima 260 control system. limitations when adjusting this function. 0 = No display 1 = OPT100 Design/OPT100 Opus...
- Page 15 Schedule for week program Monday Tuesday Wednesday Hours Minutes Speed Red. T2 Hours Minutes Speed Red. T2 Hours Minutes Speed Red. T2 Thursday Friday Saturday Hours Minutes Speed Red. T2 Hours Minutes Speed Red. T2 Hours Minutes Speed Red. T2 Sunday Hours Minutes...
-
Page 16: Function
6. FUNCTION 6.1 Regulation of Optima 260 Regulation of room temperature There are 2 methods of regulation – see Service Menu item 19. If supply air regulation has been selected, the controller will blow in air with the temperature set, provided that a reheater is fitted to the system. -
Page 17: Maintenance
7. MAINTENANCE Fans Follow the following instructions to achieve optimal performance: Inspect the two fan wheels for dirt every year. If they are dirty, they can be washed with a brush, bottle cleaner, etc. Before you open the unit, turn off the power/ Supply air and extract air valves pull out the plug and wait until the fans have Clean the valves by wiping them with a dry cloth. -
Page 18: Troubleshooting
8. TROUBLESHOOTING 8.1 Safety thermostat in electrical heater Cold supply air: Possible error: (optional equipment) • Clogged heat exchanger If an electrical heater suffers from a fault, the safety • Faulty extract air fan thermostat will disconnect. The heater is equipped with a •... -
Page 19: Table Of Factory Settings
8. TABLE OF FACTORY SETTINGS Item Headline Factory setting Configuration area Date Date Date Date (5.5) 01 Temperature 21°C 10 - 30°C 02 Preheating ON/OFF 03 Reheating ON/OFF 04 Timer levels 3 and 4 ON/OFF 05 Change filter 3 months 1 - 12 months 06 Humidity control ON/OFF... - Page 20 – a Genvex system actually allows you to recover up to 95% of the heat energy. A list of our dealers is available at www.genvex.dk KVM-Genvex A/S • Sverigesvej 6 • DK-6100 Haderslev • Tel.: +45 73 53 27 00 • salg@genvex.dk • genvex.dk...
Need help?
Do you have a question about the OPTIMA 260 and is the answer not in the manual?
Questions and answers