
Related Manuals for Genvex ECO 190 XL


Summary of Contents for Genvex ECO 190 XL
- Page 1 INSTALLATION MANUAL ECO 190 XL Mechanical ventilation with passive heat recovery...
-
Page 2: Table Of Contents
Control and adjustment of the system .........................9 Optimal initial adjustment of the system ......................10 System maintenance..............................10 Trouble shooting ..................................11 Optional equipmant for the ECO 190 XL ventilation unit ..................12 Spare parts ....................................13 Electrical diagram – OPT270 ............................14 Declaration of conformity ..............................15... -
Page 3: Safety Information
Subject to change. Labelling The CE label represents Genvex’s assurance that the pro- duct complies with all regulations imposed on the product in accordance with relevant EU directives. The CE label is mandatory for most products sold in the EU, irrespective of... -
Page 4: Installation
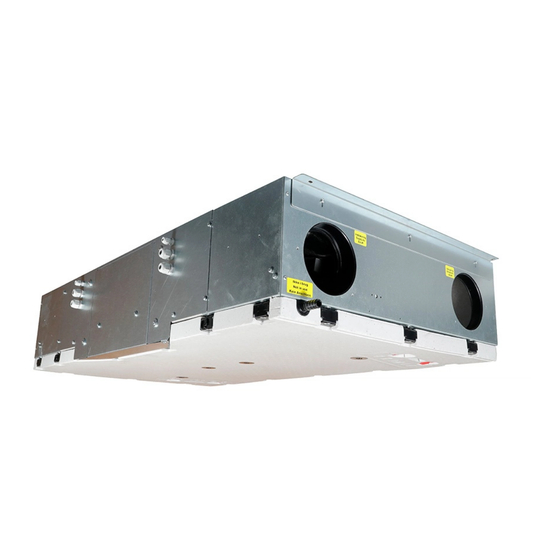
2. The ECO 190 XL is intended to be mounted flat on a level, vibration-free surface. The default configuration is “right”, which means that the supply and extract air from the living... - Page 5 ECO 190 XL Dimensional sketch (in mm) 1202 DETAIL D SCALE 1 : 2 Friskluft Afkast Udsugningluft Indblæsning Modstrømsveks Indblæsningsve Udsugningsvent Friskluftfilter Udsugningsfilter Eltilslutning Kondensafløb 1. Fresh air Bypass Bypassklap 2. Discharge Forvarmer 3. Extract air IO Print 4. Supply air NJ45 Adapter 5.
-
Page 6: Duct Connection
1 metre. In order to connect regular galvanised steel ducts to the ECO 190 XL ventilation unit, you must first install 4 nipple connectors in the unit’s Ø125 mm openings (double sealing lips). The unit is now ready for direct connection of duct- work to the nipple connector. -
Page 7: Condensate Drain
In order to minimise heat loss from the duct system in cold The water trap must be airtight, and the Genvex bottle attics, supply and extract ducts must be provided with at trap with 2 x Ø15 mm hose connections can be used least 100 mm of insulation. -
Page 8: Insulation Of Ducts In Heated Rooms
Insulation of ducts in heated rooms Water post-heating surface To protect the water post-heating surface against frost Genvex recommends the following: burst, a water frost sensor must be installed on the water post-heating surface and the water post-heating surface Supply and extract ducts must be insulated. -
Page 9: Electrical Installation
Before putting the system into operation 1. Check that the Genvex unit is correctly installed and that all the ducts are properly insulated. 2. Check that the base plate can be opened so that it is possible to service and maintain the unit. -
Page 10: Optimal Initial Adjustment Of The System
Optimal initial adjustment of the system System maintenance Genvex recommends that the ventilation unit should be REMEMBER TO SWITCH OFF THE POWER BEFORE adjusted by an authorised Genvex dealer before commissi- OPENING THE UNIT. oning. Filters Before starting the initial adjustment, make sure that the... -
Page 11: Troubleshooting
PTC electric heating surfaces. - After the warranty period (2 years ->) the installer from whom the unit was purchased or Genvex’s customer centre on tel. +45 7353 2700. System not running System stopped Please have the data from the type plate ready (silver plate Fault on the unit). -
Page 12: Optional Equipmant For The Eco 190 Xl Ventilation Unit
Condensate pump – the ECO 190 XL can be supplied with a factory-fitted condensate pump that makes it possible to divert condensate even in difficult conditions (Note: only... -
Page 13: Spare Parts
011300 SPARE PARTS No. Item no. Description No. Item no. Description 069875 Optima 270 print 069221 Packing list 069820 XL Fan, incl. cabinet 069382 Base plate, assembled 069344 Exchanger GS18 x 460 alu 060536 Belimo motor CM230-FR 069345 Exchanger GS18 x 460 plastic 069761 Bypass flap, large 069370... -
Page 14: Electrical Diagram - Opt270
ELECTRICAL DIAGRAM – OPT270 LAN OK ERROR MODBUS Master MODBUS Display MODBUS... -
Page 15: Declaration Of Conformity
DECLARATION OF CONFORMITY The declaration of conformity can be downloaded from www.genvex.com. DISASSEMBLY INSTRUCTIONS Remove fan Remove heat exchanger Remove condensation level switch Remove bypass actuator... - Page 16 95% of the heat energy with a Genvex system. Please visit www.genvex.com to see a list of our distributors KVM-Genvex A/S • Sverigesvej 6 • DK-6100 Haderslev • Tel.: +45 73 53 27 00 • salgogsupport@genvex.dk • www.genvex.com...
Need help?
Do you have a question about the ECO 190 XL and is the answer not in the manual?
Questions and answers